There are ways to free up space to fix BIOS update failed not enough free disk space error on HP/Dell/Lenovo. You can follow it to solve the problem.
The error message “BIOS update failed – not enough free disk space” often appears on HP, Lenovo and Dell computers during a BIOS update. On HP devices, you might see a message saying, “There is not enough free disk space to complete the System BIOS and Device firmware update operation.” On Dell devices, the warning might say, “ESP disk space not enough.”
This issue usually happens because there isn’t enough free space on system partitions like EFI, UEFI, or ESP, which are needed for BIOS updates. Other possible causes include a damaged hard drive, incorrect update method, or software conflicts.
To fix this, you need to free up space or increase the size of the EFI/UEFI/ESP partitions. The easiest solution is to extend the partition. However, using Windows Disk Management, you may find that the “Extend Volume” option is greyed out. In that case, it’s better to use a reliable partition tool like AOMEI Partition Assistant, which allows you to resize these partitions easily.
Tip: Make sure the BIOS update file is stored on your main system drive, not on an external or secondary drive. Also, keep your Windows system updated, as some BIOS updates require the latest system version.
If you need to extend the EFI System Partition (ESP) to complete a UEFI BIOS update, AOMEI Partition Assistant is highly recommended. The 1-Click Adjust Space feature automatically finds unused space on nearby partitions and safely expands the ESP. This makes room for the BIOS update files, which are often stored temporarily on the ESP. Since manually resizing a partition can be risky and complex, this tool helps you do it safely with just a few clicks—no data loss, no boot issues.
AOMEI Partition Assistant offers a user-friendly and safe way to manage your disk space. It can also help with many other tasks, such as resizing, moving, or copying partitions, converting FAT32 to NTFS without data loss, rebuilding MBR, cloning disks, and converting MBR to GPT.
The Best Windows Disk Partition Manager and PC Optimizer
Note: If your PC cannot boot, please create a bootable USB drive (at least 13 GB) with the guide. Restart your computer, press F2 or Delete to enter the BIOS, and set the USB drive as the first boot device. Once the system boots from the USB, kindly follow the on-screen instructions to reach the main interface. Then, select the EFI/UEFI/ESP system partition and click 1-Click Adjust Space to continue.
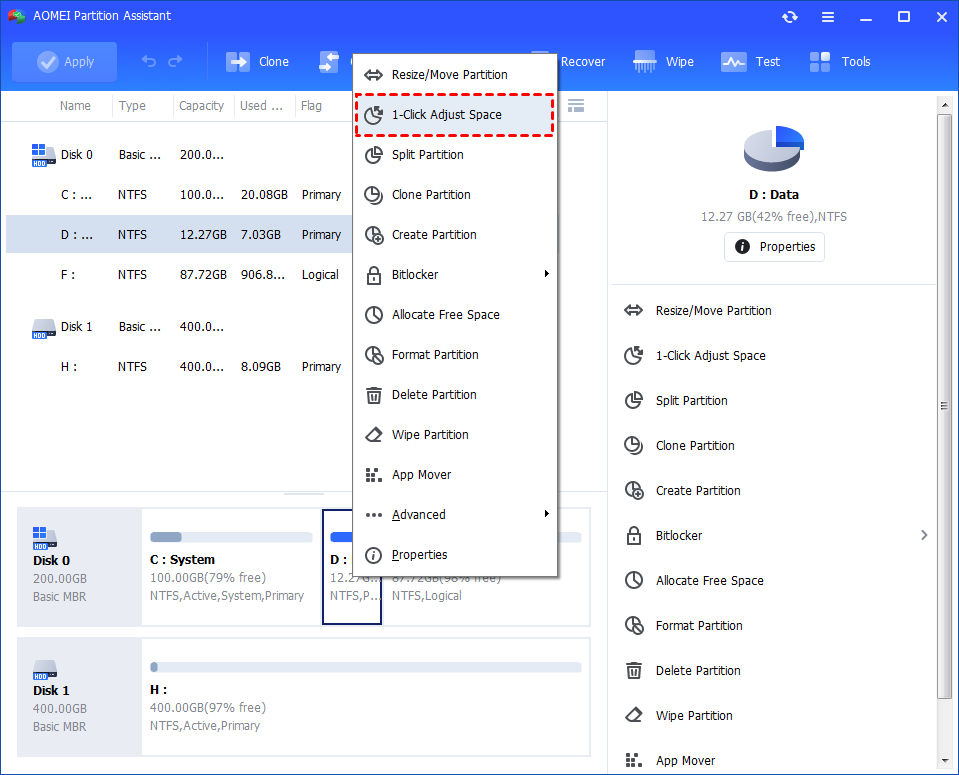
Step 1. Install and launch AOMEI Partition Assistant. Right-click a partition (here is D: partition) you want to adjust space and select "1-Click Adjust Space".
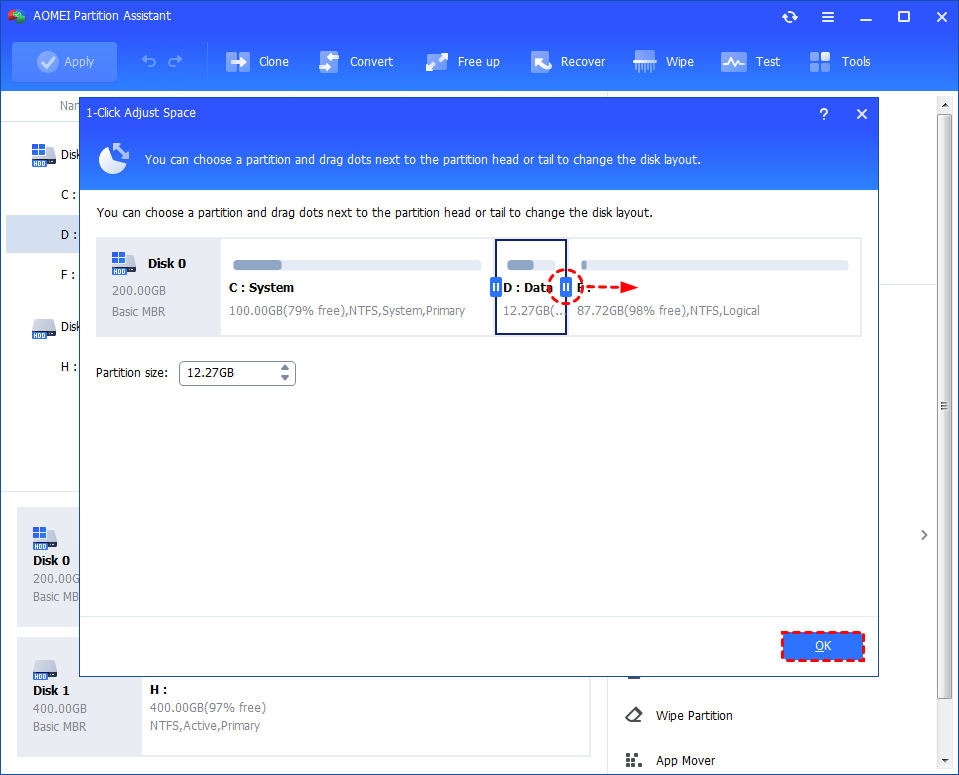
Step 2. If you want to use the space on F: to expand D:, you can simply drag the dot near the partition F: head backward to shrink the partition F: and enlarge the partition D: at the same time. Then click "OK".
Tips: You can simultaneously drag the dot near the partition C: tail forward to shrink the partition C: so the D: will also be enlarged with the space of C: at the same time. In this case, you can adjust all partition space (C:, D:, and F:) on the disk.
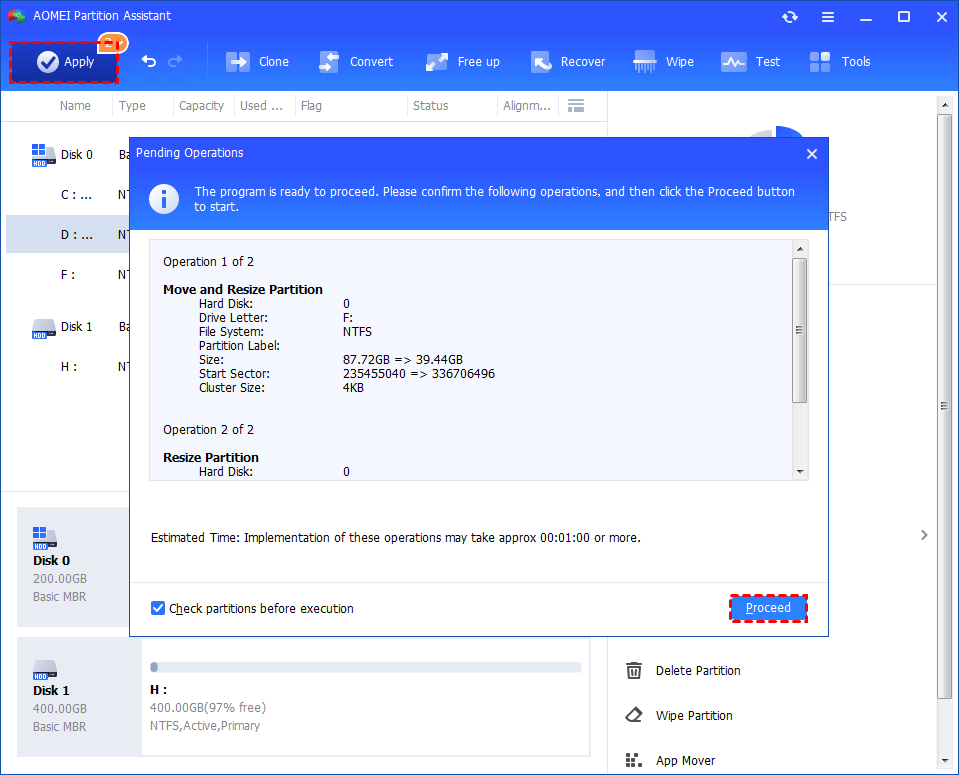
Step 3. You can preview the operation by viewing the "Pending Operations". To commit the "Pending Operations", please click "Apply" and "Proceed".
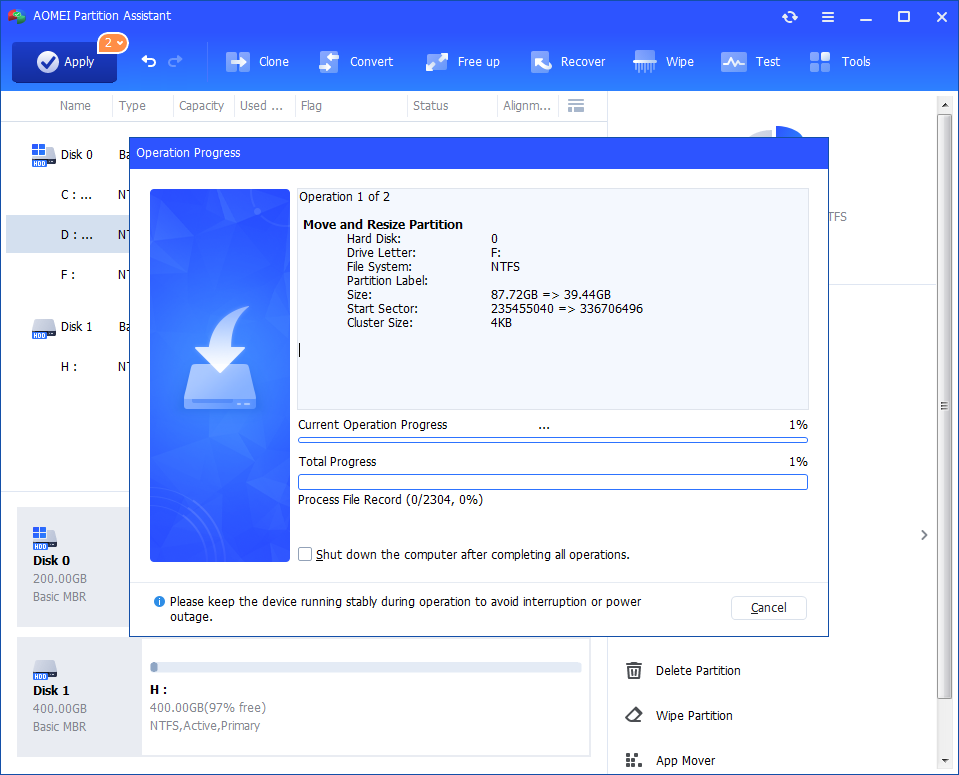
Step 4. The process will start and you can check the progress. It might take time to finish the operation.
Step 5. Wait for the operation to be finished. After it is completed successfully, you will find D: is enlarged and both D: and F: are adjusted.
To free up space and fix the BIOS update failed – not enough free disk space error, you can try some built-in Windows tools. However, these methods are only helpful if your disk already has enough space overall and the issue is minor. That’s because Windows tools typically free up only a few hundred MB — and they target the system drive, not the EFI System Partition (ESP). If the ESP remains full, the BIOS update will still fail. It is still recommended to use a professional tool to fix it.
The Best Windows Disk Partition Manager and PC Optimizer
Command Prompt is a useful and quick way to remove temporary files from a PC. You can follow the steps below.
Step 1. Type "cmd" in the Windows search bar, right-click on Command Prompt, and select "Run as administrator".
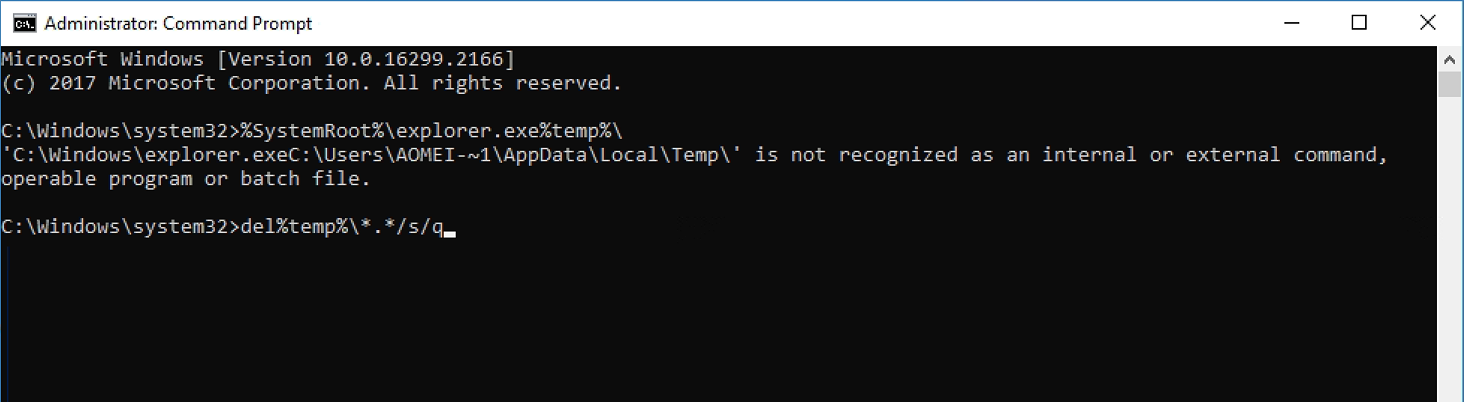
Step 2. Type %SystemRoot%\explorer.exe %temp%\ and hit "Enter" to view temp files on your computer.
Step 3. Type del %temp%\*.*/s/q and press "Enter" to run the command. Then, Command Prompt will delete all temporary files except those currently in use.
Using CMD to delete large files is very effective. If you are not familiar with commands, please be careful about every step.
The Run box allows users to open a program by name (if in the Windows directory) or launch any file by typing the full file path. Thus, you can delete junk files in Windows 10 by typing the file path. Here are the steps.
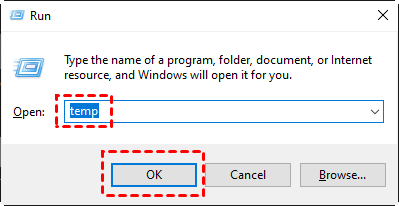
Step 1. Press the Windows key + R together on your keyboard to open the Run box. Then, type "temp" in the blank field and click "OK".
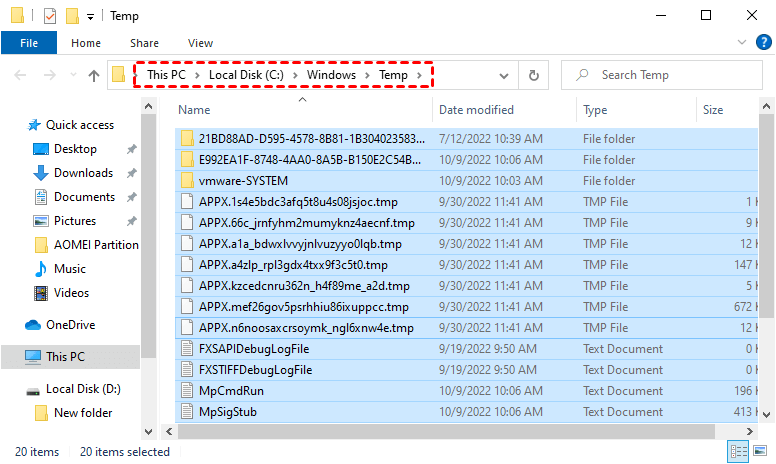
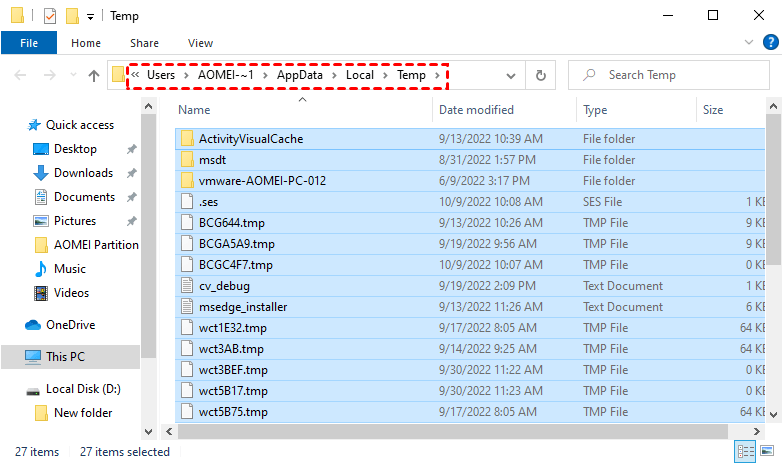
Step 2. It leads you to the temp files location in Windows 10. Press the "Ctrl + A" keys to select the files and hit the "Delete" button.
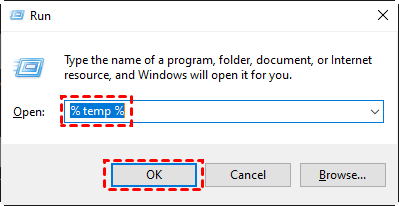
Step 3. Open the Run command once again, type "%temp%" and click "OK".
Step 4. It takes you to the Local Temp files location. Press "Ctrl + A" to select all the files and hit the "Delete" key.
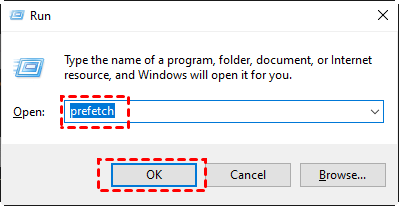
Step 5. Once again, open the Run command, and this time, type "prefetch" and move on.
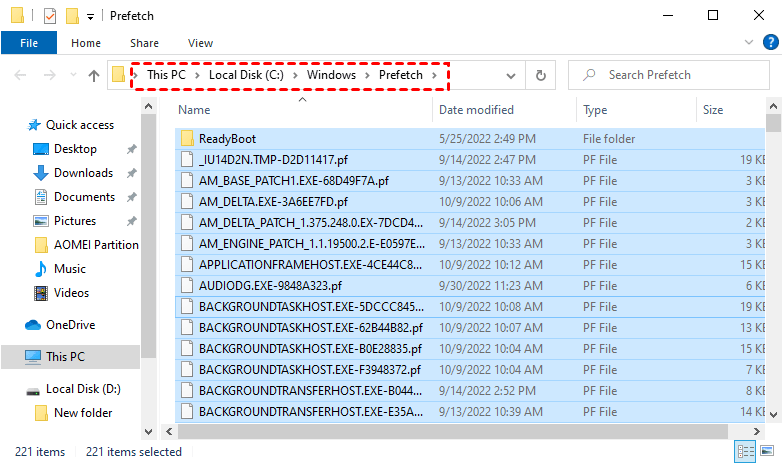
Step 6. It guides you to the Prefetch files' location. Press the "Ctrl + A" keys together and press the "Delete" button.
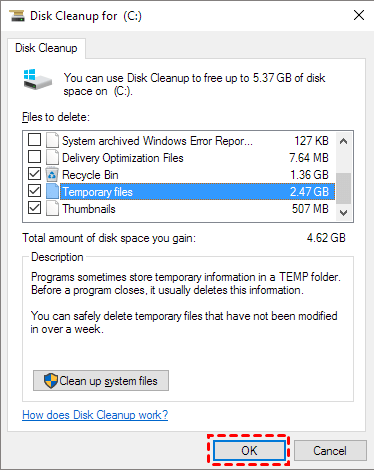
Disk Cleanup is a Windows built-in tool that helps to remove all types of junk files like Temporary files, Thumbnails and etc. You can check how much space these junk files occupy and how much space you can free up in this tool. Follow the below steps to see how to remove junk files Windows 10.
Step 1. Type "disk cleanup" in the search box, and hit "Enter".
Step 2. In the Disk Cleanup, select C drive (or other drives you want to clean) and click "OK".
Step 3. Tick the files you do not need and click "OK" to confirm the operation. And you can click "Clean up system files" to get more free space.
If you find BIOS update failed not enough free disk space error on your PC, the main cause is often a full EFI System Partition (ESP). While built-in Windows tools can free up some space, they’re usually not enough for a BIOS update. A more effective solution is to use a professional tool like AOMEI Partition Assistant. Its 1-Click Adjust Space feature makes it easy to safely expand the ESP and fix the error without data loss. This ensures your BIOS update can proceed smoothly.
The Best Windows Disk Partition Manager and PC Optimizer