If you're trying to reinstall Windows on BitLocker encrypted HDD, you've come to the right place. This guide walks you through the complete process step by step to ensure a smooth and secure reinstallation.
BitLocker is a popular encryption tool in Windows that secures various storage devices using a recovery key or password. Despite its strong protection, users often encounter challenges like being stuck on the BitLocker key loading screen, unable to bypass the recovery key prompt, forgetting their password, or facing difficulties when reinstalling Windows on a BitLocker-encrypted hard drive.
A common issue arises when attempting to clean install Windows 11 on a drive protected by BitLocker. Users may see the error message: “Windows cannot be installed to this hard disk space. BitLocker Drive Encryption is enabled on the selected partition”.This has led many to ask: Is it possible to reinstall Windows on a BitLocker-encrypted drive? This question frequently appears across forums and user communities.
You can reinstall Windows on a BitLocker-encrypted drive, but it’s safer and easier to decrypt or suspend BitLocker first to avoid installation errors or data access problems. Always backup your data and recovery key before proceeding.
How to reinstall Windows on a BitLocker-encrypted partition—with or without the recovery key or password? This section addresses both scenarios. Choose the method that fits your current situation.
If you’ve lost access to the BitLocker recovery key or password, reinstalling Windows 11 or 10 can leave you stuck at the recovery screen. In this case, the only option is to completely wipe the encrypted drive and perform a clean installation of Windows. This method is recommended only if you no longer need the data on the drive or already have a full backup.
There are two effective ways to reinstall Windows 11 on a BitLocker-encrypted hard drive without the recovery key. Choose the one that best suits your needs.
Step 1. Use the Windows Media Creation Tool to create a Windows 11 installation USB. You can find the tool on Microsoft’s official website and follow the instructions to set up the bootable media.
Step 2. Insert the USB into your computer and restart. Enter your BIOS or boot menu and select the USB drive as the primary boot device.
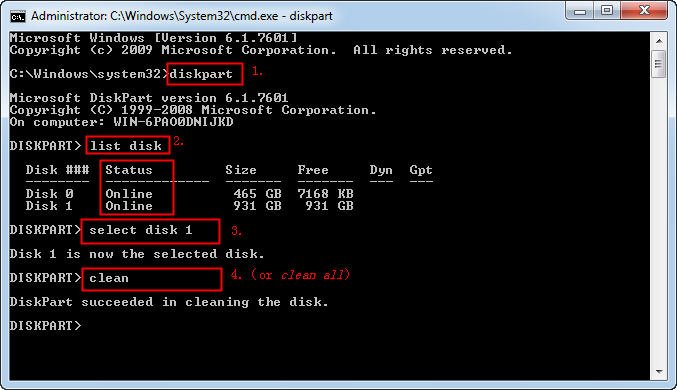
Step 3. When the setup screen appears, press Shift + F10 to open Command Prompt. Then enter the following commands based on your goal:
To clean the entire encrypted drive:
diskpart
list disk
select disk 1 (replace x with the disk number of your encrypted drive)
clean
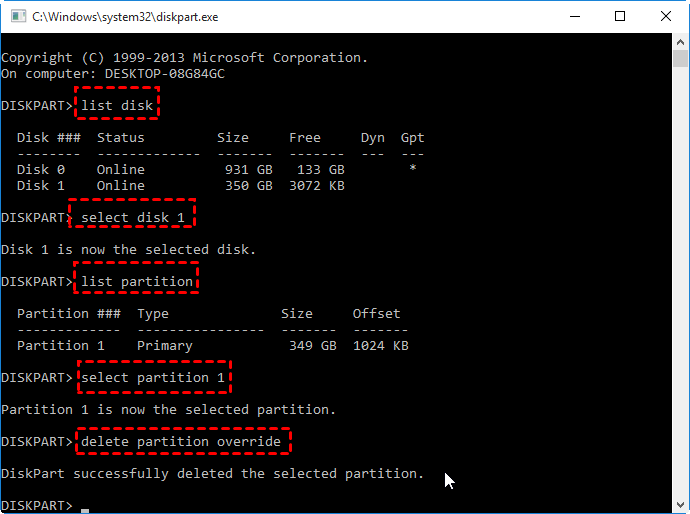
To delete only the encrypted system partition while keeping other partitions:
diskpart
list disk
select disk 1 (replace x with the encrypted drive)
list partition
select partition 1 (replace x with the target system partition)
delete partition override
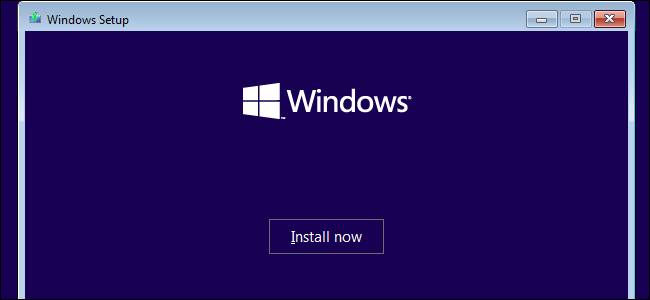
Step 4. After cleaning the drive or partition, type exit to close the Command Prompt and restart your computer. Boot again from the Windows installation USB. Once the Windows Setup screen appears, click Next> Install now> Select I don’t have a product key> Accept the License Terms.
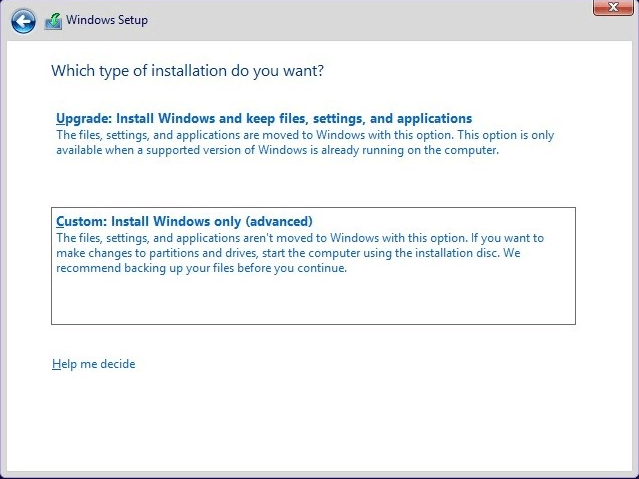
Step 5. Choose Custom: Install Windows only (advanced). Select the partition or unallocated space where you want to install Windows 11 and click Next. Follow the prompts to complete the installation.
An easier alternative is to wipe the encrypted hard drive and migrate a working Windows 10/11 operating system from another computer to your own. This method can save time and effort, especially if your current PC is stuck on the BitLocker recovery screen and won’t boot.
AOMEI Partition Assistant makes this process straightforward. Even on a non-bootable system, this powerful disk management tool can help you:
➢ Clone an entire hard drive
➢ Migrate the OS to an SSD or new HDD
➢ Convert between MBR and GPT without data loss
➢ Recover lost files and partitions
➢ Rebuild a damaged MBR for boot repair
With AOMEI, you can seamlessly restore system functionality and avoid the hassle of a clean Windows installation.
Step 1. On a working computer, create a bootable USB media via the Bootable Media feature.
Step 2. Insert the bootable USB into the BitLocker encrypted computer and boot it from the drive. Once booted, you should enter the AOMEI Partition Assistant window.
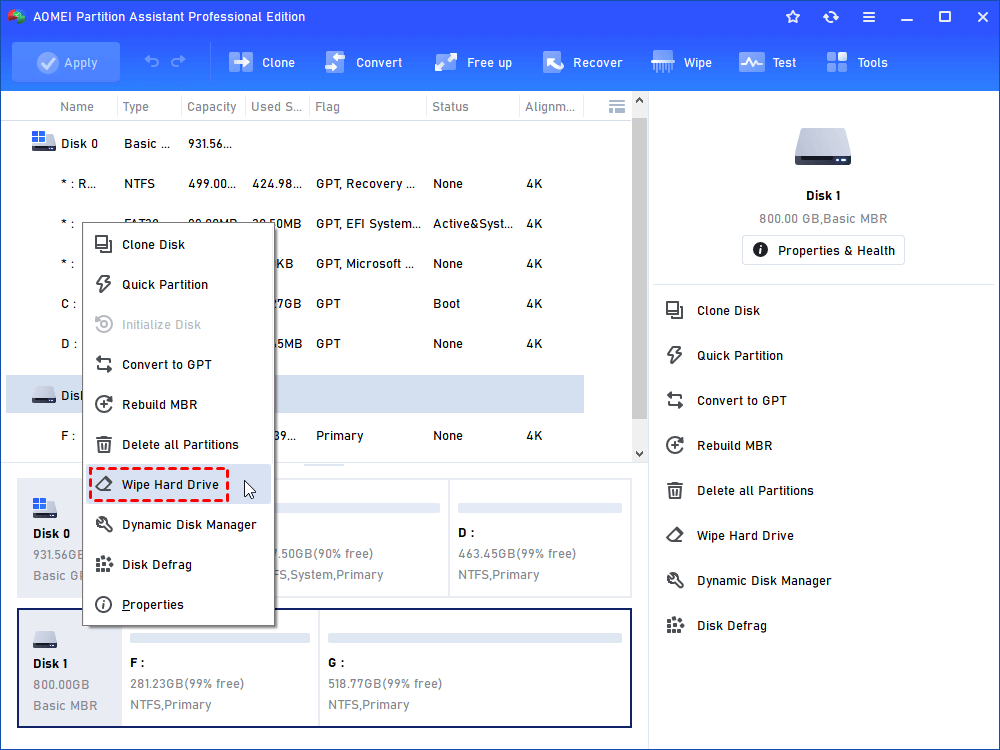
Step 3. Select a hard drive that you want to wipe; right-click on it and choose "Wipe Hard Drive" option.
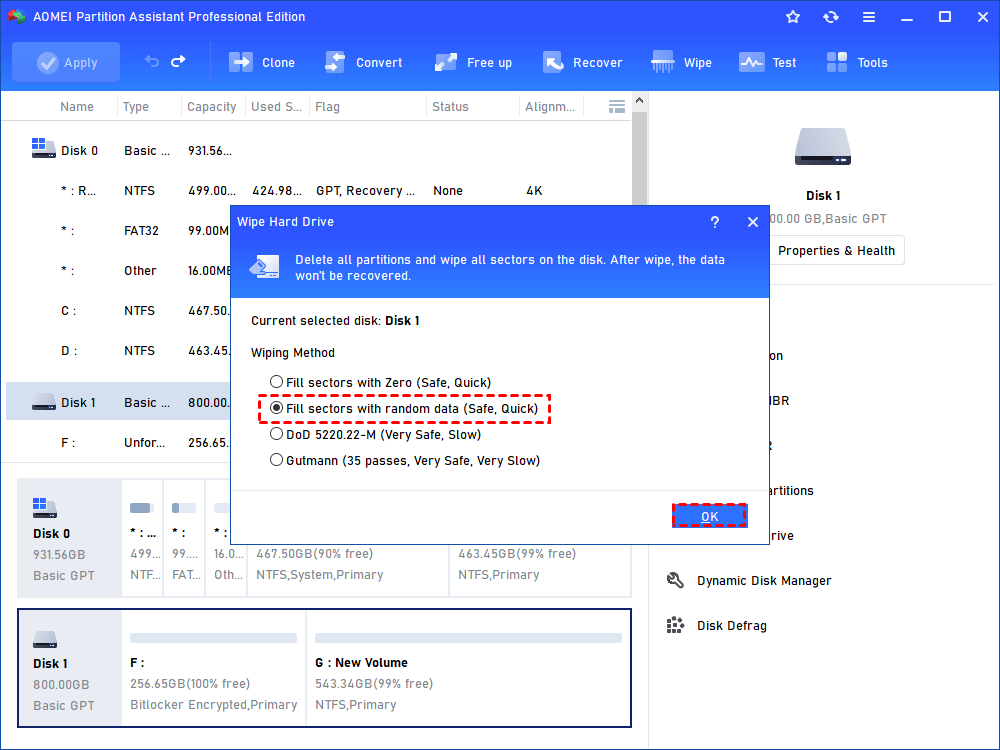
Step 4. Choose a wiping method to wipe the selected hard drive according to your requirements and click "OK". If you want to sell your disk or give it to another user, you’d better choose one of the latter three ways.
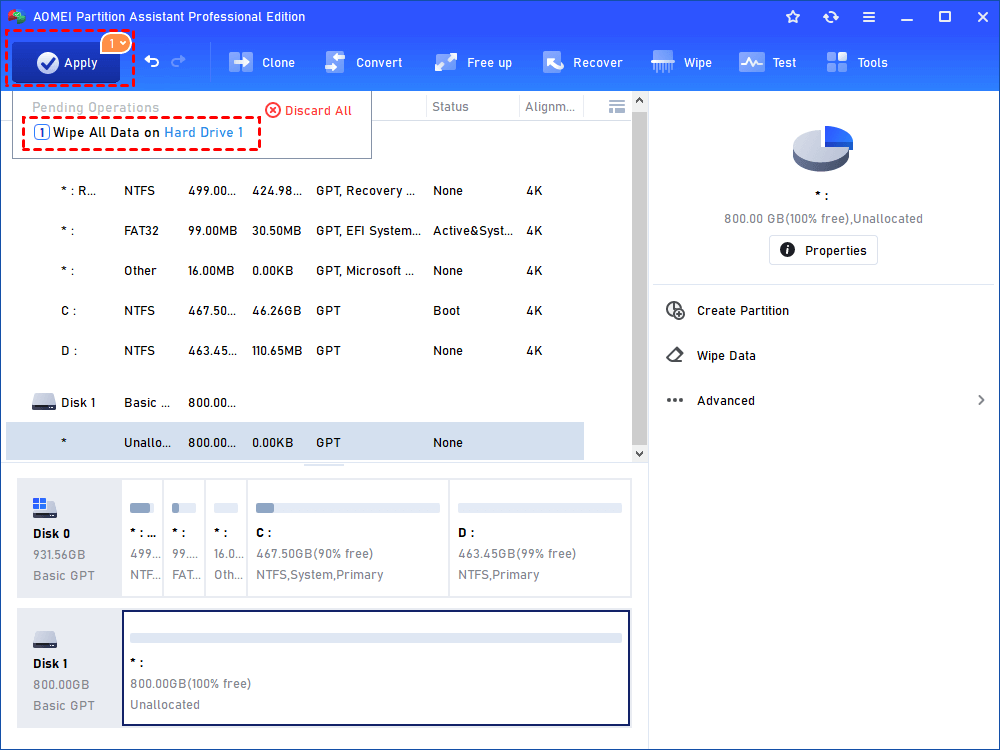
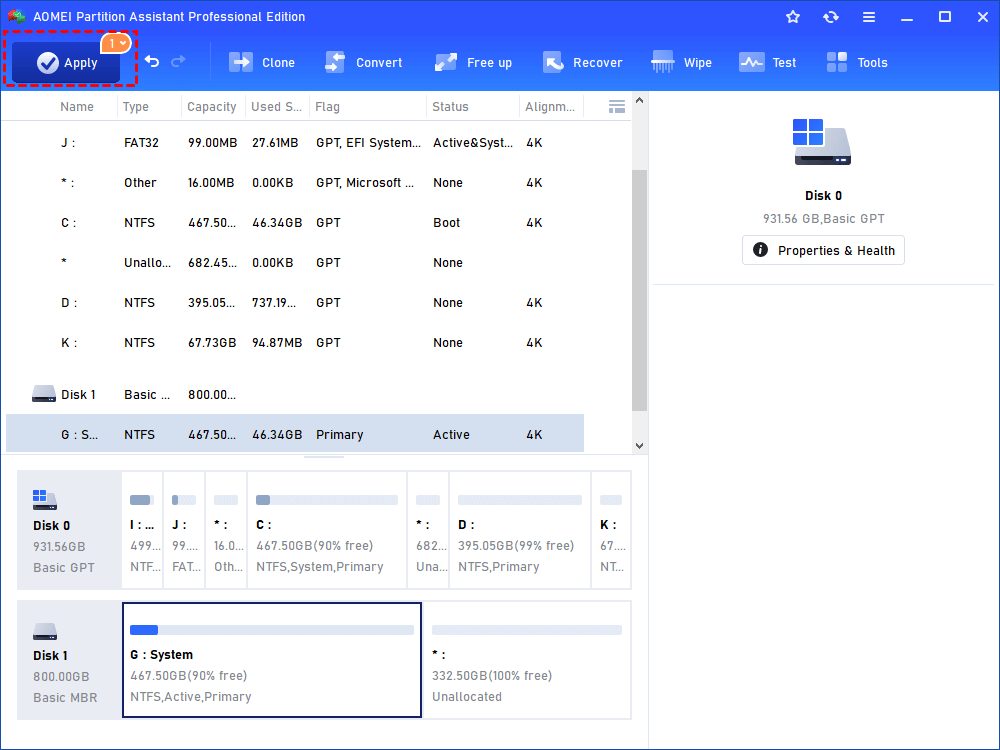
Step 5. Click "Apply" in the toolbar to execute the operation.
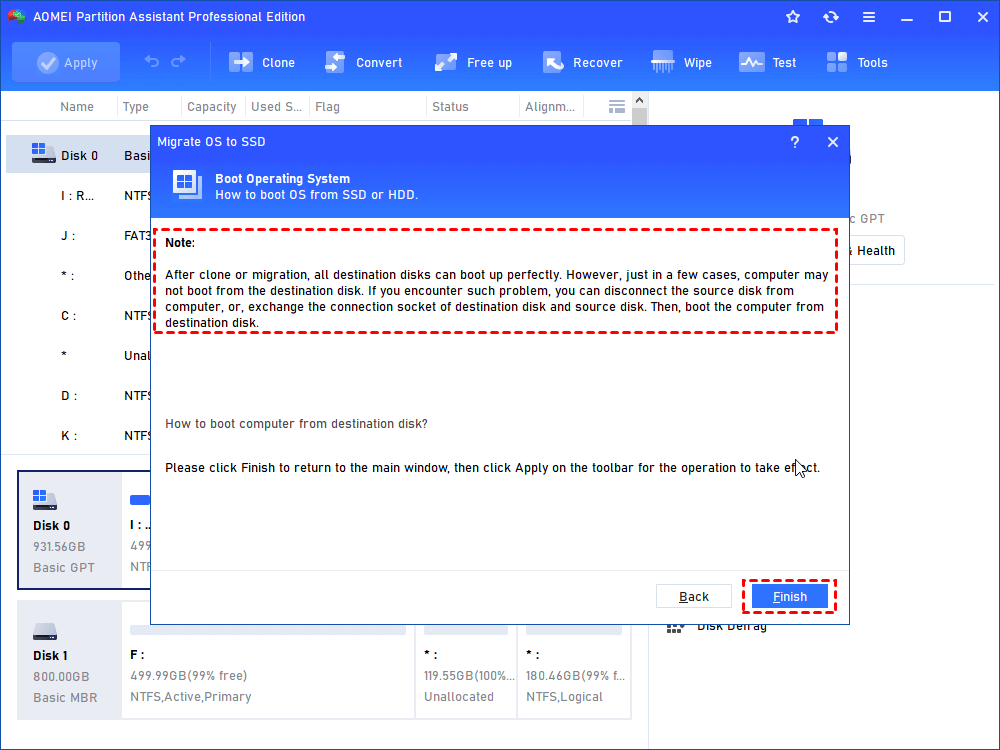
Step 6. Now, you can start migrating Windows OS from a working computer to your computer. To do so, select the Windows-installed hard disk and click Migrate OS under Clone.
Step 7. Choose an unallocated space on the target hard drive and click Next.
Step 8. In this window, you can change the size of the system partition.
Step 9. Attend to Note about how to change boot drive, which might be helpful after migration.
Step 10. In this screen, you can review the result. Click Apply and Proceed after confirmation.
If you have the BitLocker recovery key or password and wish to preserve other partitions on the hard drive during the reinstallation of Windows, it’s strongly advised to decrypt the drive first. Once the clean installation is complete, you can re-enable BitLocker. This approach minimizes the risk of data loss and ensures a smooth setup. The process is divided into three parts:
Start by unlocking and decrypting the BitLocker-protected partition:
Step 1. Press Win + R to open the Run dialog. Type cmd, then press Ctrl + Shift + Enter to open Command Prompt with administrator privileges. Click Yes if prompted.
Step 2. In Command Prompt, enter the following command and press Enter. Replace C: with your encrypted drive letter and insert your recovery password:
manage-bde -unlock C: -rp
Step 3. Next, disable BitLocker protection on the drive by entering:t
manage-bde -protectors -disable C:
This will turn off encryption, allowing you to reinstall Windows without interference.
Before proceeding, back up important files from the system partition. Reinstalling Windows will erase the operating system partition, but other partitions will remain intact. Tools like AOMEI Partition Assistant can help recover files or partitions if needed.
After backing up your data, follow a standard clean installation process, using a bootable USB or installation media. You can also refer to the previous steps shown in Case 1 if needed.
Once Windows is reinstalled, you can turn BitLocker encryption back on:
Step 1. Open File Explorer by pressing Win + E. Right-click the drive you wish to encrypt and choose Turn on BitLocker.
Step 2. Select your preferred unlock method (password or smart card), then click Next.
Step 3. Choose how to back up your BitLocker recovery key (e.g., Microsoft account, file, or print), then click Next.
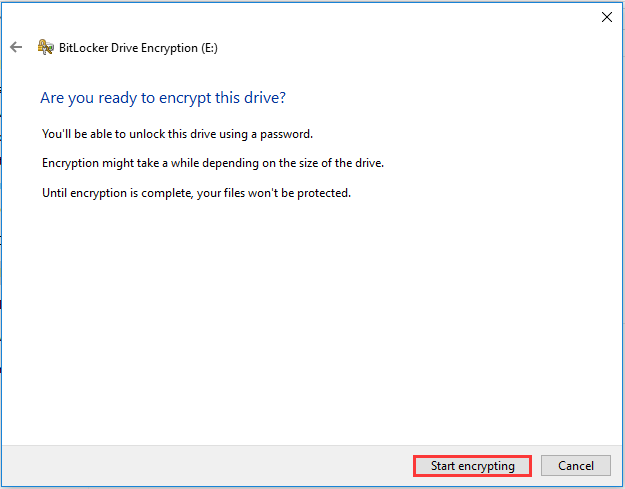
Step 4. Choose how much of the drive to encrypt and select the encryption mode. You can keep the default options unless you have specific preferences.
Step 5. Click Start encrypting to begin the process. Once complete, restart your computer to apply the changes.
Yes, you can reinstall Windows on a BitLocker-encrypted drive—but preparation is key. If you have the recovery key, decrypting or suspending BitLocker first ensures a smooth setup. Without the key, you’ll need to wipe the drive entirely. Tools like AOMEI Partition Assistant simplify the process by enabling OS migration or full disk wipe and reinstall. No matter the route, always back up your data and recovery key beforehand to avoid permanent loss or installation errors.