[Full Guide] BIOS Remove Unused Windows Boot Manager Entries
For various reasons, you may need to remove unsed Windows Boot Manager entries. You can follow the steps outlined in this article to make it easy to delete useless entries of Windows Boot Manager.
By Hedy / Updated on August 2, 2023
What is Windows Boot Manager?
The Windows Boot Manager (BOOTMGR) plays a vital role in initiating the Windows operating system. It serves as a small but crucial piece of software loaded from the volume boot code, which is part of the volume boot record. Its primary function is to enable the booting of Windows 10/8/7 or Windows Vista OS.
To function correctly, BOOTMGR relies on the Boot Configuration Data (BCD) store, a registry-like database that contains essential configuration data. This database has replaced the boot.ini file, previously utilized in older Windows versions like Windows XP.
The BOOTMGR file itself is both read-only and hidden, residing in the root directory of the partition. Moreover, it is marked as "Active" in Disk Management. In many Windows PCs, this partition is designated as "System Reserved" and does not have a drive letter assigned to it.
In cases where there is no "System Reserved" partition, the BOOTMGR can be located on the primary hard drive, typically labeled as the C drive. When booting, the boot manager will execute winload.exe, the system loader responsible for continuing the Windows boot process.
Why need to remove unused Windows Boot Manager entries?
When considering the need to remove UEFI Boot entries Windows 10, there are a few important reasons to take into account:
◤ Clutter reduction: Over time, especially if you've performed multiple Windows installations or upgrades, you may end up with multiple entries for the Windows Boot Manager in your system's boot menu. These unused entries can clutter the boot menu, making it more challenging to select the correct operating system during startup.
◤ Boot time optimization: Having unused entries in the boot menu can slightly increase the time it takes for your system to boot up. When the boot manager presents a list of options, it needs to check the validity of each entry, even if it's not in use. Removing unused entries streamlines the boot process, leading to faster startup times.
◤ Avoiding potential conflicts: In some cases, having multiple entries for the Windows Boot Manager could lead to confusion and potential conflicts. For instance, if you inadvertently select an old or unused entry, it might cause errors or prevent your system from booting properly.
◤ Disk space management: While the space occupied by unused boot entries is relatively small, it's still an unnecessary allocation of disk space. Cleaning up the boot menu ensures that only relevant and active entries remain, optimizing disk usage.
Stepwise guide on BIOS remove unused Windows Boot Manager entries
Removing the Windows Boot Manager from the BIOS can result in the inability to boot into Windows, unless an alternative boot manager is in place or if only one operating system is installed.
For users seeking a reliable solution, AOMEI Partition Assistant Professional is a highly recommended disk partition management software, fully compatible with Windows 11, 10, 8, and 7. Among its valuable features is the "UEFI BIOS boot options manager", which simplifies the management of boot options.
This feature empowers users to effortlessly modify boot orders, delete, backup, restore, and refresh EFI/UEFI BIOS boot options without the need to manually access the BIOS or deal with intricate boot item adjustments. Such streamlined functionality significantly saves time and eases boot option management.
Note: The feature works exclusively for GPT disks. If your disk operates on an MBR disk format, you should convert it to GPT beforehand.
To proceed with how to remove UEFI Boot entries from BIOS using AOMEI Partition Assistant Professional, follow these steps:
Step 1. Install and launch AOMEI Partition Assistant. Click on the "Tools" main tab and select "UEFI BIOS Boot Options Manager".

Step 2. Boot from the alternative startup item, then locate "Windows Boot Manager" and click on the "Remove" button located on the right.
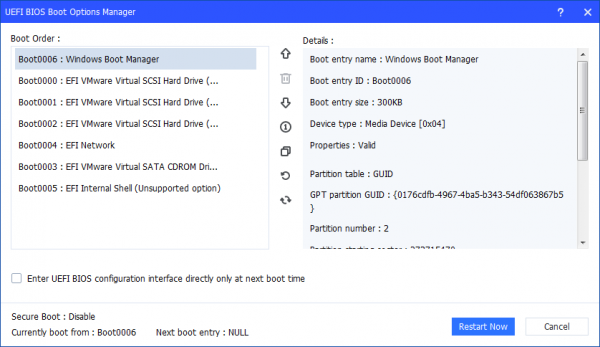
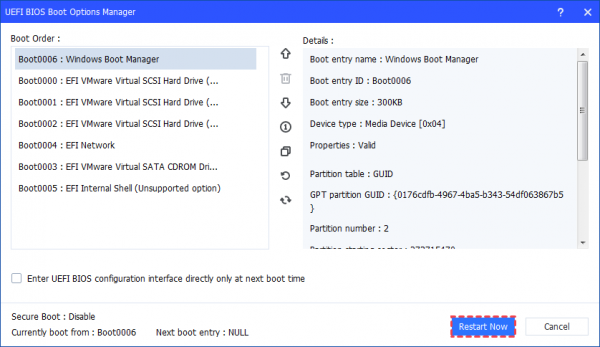
Step 3. Upon successful deletion of the Windows Boot Manager, you will have the option to either click "Restart Now" for an immediate computer restart if required or click "Cancel" to close the Manager window.
Conclusion
BIOS remove unused Windows Boot Manager entries of a Windows 10 system using AOMEI Partition Assistant Professional is a straightforward and effortless procedure. The steps outlined in this article make it easy to eliminate the unnecessary of a useless Windows Boot Manager, which can significantly enhance boot-related problems.
Additionally, AOMEI software offers specialized editions such as the Server edition, tailored specifically for Windows Server systems, and various other advanced editions catering to diverse specific requirements.

