Easy Guide of BitLocker Windows 11/10
BitLocker Windows 11 is a powerful tool to help users to protect privacy from leaking. In this post, you can learn how to use BitLocker and how to disable it when you need.
By Lucas / Updated on February 1, 2024
Understanding BitLocker encryption
BitLocker is a native Windows feature that provides increased disk security, addressing the concerns of data theft or disclosure from lost, stolen, or improperly retired devices. Data on a lost or stolen device is vulnerable to unauthorized access, either by running a software attack tool against it or by transferring hard drive to another device.
It reduces unlawful data access by strengthening file and system safeguards, leaving data inaccessible when BitLocker-protected devices are retired or recycled.
BitLocker has been available to users since Windows Vista. BitLocker in Windows 11 offers an extra degree of protection by encrypting your device and data to prevent them from unwanted access. Encryption scrambles the data on the disk, making it illegible to anybody who does not have the necessary decryption key.
So, if you can employ BitLocker encryption, you can prevent important privacy leaks. Next, this article will lead you through the stages of using BitLocker device encryption on your PC.
How to use BitLocker Windows 11/10
In this part, we’ll show you how to turn on and off BitLocker on Windows 11 and Windows 10. And how to disable BitLocker encryption in Windows 11/10
Part 1. Turn on/off BitLocker encryption on Windows 11/10
First, let’s check out how to turn on and turn off BitLocker on Windows 11/10.
▍Turn on BitLocker
Sign in to your Windows device with an administrator account, you may have to sign out and back in to switch accounts.
Step 1. In the search box on the taskbar, type Manage BitLocker and then select it from the list of results. Or, select Start > Settings > Privacy & security > Device encryption > BitLocker drive encryption.
Step 2. Select Turn on BitLocker. You can choose the target drive to turn on BitLocker. Then follow the instructions.

During the process, you can choose how to back up your key. We suggest you save your key in a way you’re sure it’s reliable.
▍Turn off BitLocker
After you turn on BitLocker, you must provide a password to access the encrypted drive's contents. As a result, after the problem has been resolved, you may choose to disable BitLocker. And turning off BitLocker for a BitLocker-encrypted disk will entirely decrypt the drive.
1. It is required to unlock the BitLocker encrypted drive before being able to turn off BitLocker for the drive.
2. You must be signed in as an administrator to turn off BitLocker for an operating system drive. But you can unlock your removable data drive without login as admin.
Step 1. Open This PC in File Explorer.
Step 2. Right-click or press and hold on the drive you want to decrypt, and click/tap on Show More options. Click/tap on Turn off BitLocker.
Or you can open the Control Panel, and click/tap on the BitLocker Drive Encryption icon and click/tap on Turn off BitLocker for the encrypted drive you want to decrypt.
Step 3. Click/tap on Turn off BitLocker to confirm.
Step 4. The drive will now start decrypting. This may take a while.
Step 5. Click/tap on Close when decryption is complete.
On Windows 10, after you click “BitLocker Drive Encryption”, please select “Manage BitLocker”. Then, you can follow the same steps to encrypt your drive.
Part 2. Disable BitLocker encryption service on Windows 11/10
If you want to completely disable BitLocker encryption service on Windows 11 or Windows 10, you can follow the steps from Windows Service.
Step 1. Open Windows Run by pressing the shortcut “Windows key + R” and type msc. Then hit OK.
Step 2. Scroll down and double-click on BitLocker Drive Encryption Service.
Step 3. Set the startup type to Disabled. Click on Apply.
Step 4. Restart your computer.
After you disable BitLocker, if you need it next time, you’ll need to enable it in Windows Service and then, go to Control Panel to choose the drive to turn it on.
How can I use BitLocker encryption on Windows 11/10 Home PC?
Although Windows BitLocker encryption is a great tool to protect your privacy, BitLocker security features are only available on Windows 11 Pro, Enterprise, and Education editions. If you’re a Windows 11/10 Home user, sorry, you could only use a limited “BitLocker encryption” called "device encryption".
It functions like the full version but lacks numerous complex management options and features, such as "BitLocker To Go." Furthermore, while utilizing device encryption, all drives will automatically encrypt, although the full version of BitLocker allows you to select the storage using encryption.
So, if you are a Windows 11/10 Home user but need BitLocker encryption for your drives or portable devices, you can turn to AOMEI Partition Assistant Professional to use the BitLocker from this powerful tool.
It supports Windows 11/10 Home users to encrypt drives without limitation and also offers key management to prevent key loss.
The Best Windows Disk Partition Manager and PC Optimizer
Step 1. Install and launch AOMEI Partition Assistant. Click the "Tools" main tab and select "BitLocker".
Or, right-click the partition you want to encrypt and click the "BitLocker"->"Turn on BitLocker" option in the Context Menu.
Step 2. All drives on the system will be displayed, including operating system drives, fixed data drives, and removable drives. Please find the partition you would like to encrypt BitLocker and click the "Turn on BitLocker" option. (Here, we take the drive D: as an example.)
Currently, it only supports encrypting NTFS partitions. Other partition file systems, for example, FAT or FAT32 cannot be encrypted.
Step 3. Please set and confirm a password to encrypt the drive and click "Next".
★ Encrypt used disk space only (faster and best for new PCs and Drives)
Encrypting the entire drive ensures that all data is protected. Even data that has been deleted but may still contain detectable information is also protected.
1. If you are setting up BitLocker on a new PC or a new drive, you only need to encrypt the part of the drive that is currently being used. And, BitLocker will automatically encrypt the newly-added data.
2. If you are enabling BitLocker on a PC or drive that is already in use, you may consider encrypting the entire drive.
★ Disk encryption compatible mode (suitable for removable data drives)
Windows 10 (version 1511) introduces a new disk encryption mode (XTS-AES). This mode provides heavy integrity support but is not compatible with earlier versions of Windows.
1. If this is a removable drive to be used on an earlier version of Windows, you should select Compatible mode.
2. If this is a fixed drive, or if this drive will only be used on devices running at least Windows 10 (version 1511) or later, select the new encryption mode.
★ 256-bit encryption
Unchecked by default. After checking, depending on whether to select the compatible mode encryption, use AES_256_DIFFUSER, AES_256_NO_DIFFUSER or AES_XTS_256 mode for encryption.
Step 4. Select a way to back up your recovery key. You can either select "Save to a file" or "Print the recovery key".
If you select "Save to a file", please choose a location on your PC to save the recovery key.
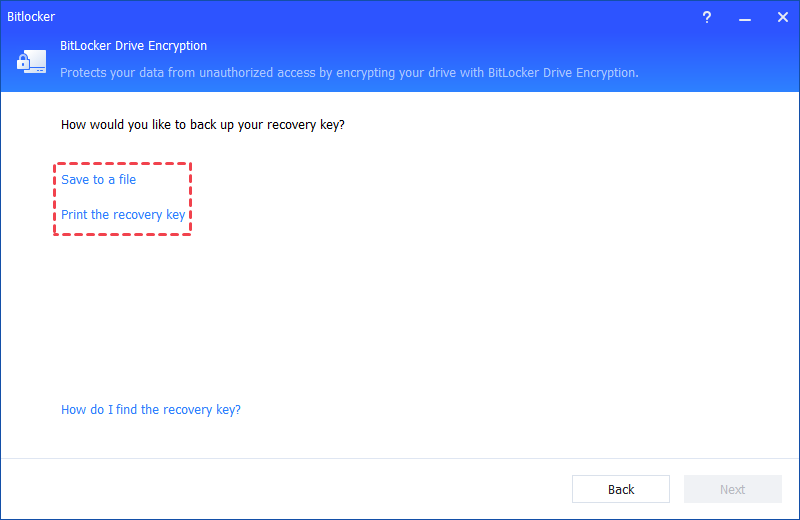
Please do not save the recovery key in the encrypted drive path. For example, it is unable to encrypt D: and save the recovery key on the same D: drive.
It will generate a TXT file with the name: Bitlocker Recovery Key + 45-bit Key. The recovery file will be saved in the TXT file. You can open the file to view the recovery key. Please keep the file. Then, please click the "Next" button to start the encryption process.
If you would like to encrypt your current system drive, you will be asked to restart your PC into Windows PE mode to execute the operation because it is the current system drive. The program will first create Windows PE and then boot the PC into Windows PE mode to encrypt the drive. After the encryption is finished, you can restart your PC.
AOMEI Partition Assistant will automatically detect whether your system has installed Windows AIK/ADK or not. If yes, it will start the Windows PE creation and then enter into WinPE to encrypt the drive. If not, please download and install Windows AIK/ADK first.
Step 5. The encryption process might take time to encrypt the drive. Before the process is finished, please do not terminate the program, remove the drive, or turn off the power.
Once the encryption process is finished, please click "Completed". Finally, the drive is BitLocker encrypted.
Conclusion
In the ever-evolving landscape of digital security, BitLocker remains a stalwart defender of your data on Windows 11 and Windows 10. In this post, you’ve learned how to turn on/off and disable BitLocker in Windows 11/10. While Windows Home users may face limitations, AOMEI Partition Assistant Professional emerges as an excellent choice, extending the protective embrace of BitLocker to all. Empower your Windows Home device with AOMEI, and experience a new era of security and peace of mind.
Besides BitLocker encryption, this versatile tool can also help you upgrade disk without data loss via clone, move installed apps, convert disk to MBR/GPT and many other handy functions to help you manage your Windows.

