Easily Solved: Can’t Delete System Partition of Windows 10, 8, 7
Are you unable to delete system partition within Windows Disk Management? Refer to this paper and you can learn how to delete C drive of Windows 7, 8 or 10.
By AOMEI / Updated on September 5, 2023
Delete Volume greyed out in Disk Management
“My computer is running Windows 7. I intend to delete my system partition in Disk Management. But when I right-click it, I find that the Delete Volume option greyed out. Is there anyone who knows what happens? How can I remove the system partition successfully?”

Why can’t delete system C drive?
System partition contains the operating system boot files including boot.ini, Ntldr, Bootmgr and BCD, which can be used to boot Windows. When the OS is running, you are certainly unable to the partition holding the OS within Windows. Thus, the option of Delete Volume in Disk Management becomes invalid. In such a case, you need to delete system C drive outside Windows.
Two effective ways to delete system partition
Here offers you two methods to remove system drive of Windows 10, Windows 8 or Windows 7. Read it and learn detailed steps.
Warning: After you delete the system partition of Windows, you won’t be able to boot the Windows.
✔ Delete C drive from Windows installation CD/DVD
✔ Delete C drive without CD/DVD
✔ Delete C drive from Windows installation CD/DVD
If you have a Windows installation disc, do as following steps (Here take Windows 7 installation disc as an example):
1. Insert the Windows installation CD/DVD to your computer and enter BIOS to boot from it.
2. When Windows is loading files… and the Starting Windows screens end, choose Language to install, Time and currency format and Keyboard or input method in the pop-up window. Then, click Next.
3. Click Install now button and wait for the Setup is starting screen over.
4. Read license terms and check I accept the license terms and click Next.
5. Click Custom (advanced) button and you’ll go to Where do you want to install Windows? window.
6. Click Drive options (advanced) and you’ll see sever options including Delete and Format. Then, choose system partition and click Delete and OK.
✔ Delete C drive without CD/DVD
It is not bad to delete Windows system drive with Windows installation CD/DVD. But if you have no such CD/DVD, a third-party powerful and reliable partition tool – AOMEI Partition Assistant Standard can help you to complete this task. It supports Windows 10/8.1/8/7, XP and Vista and is very easy to use. Now, free download it and take a look at how to delete system C drive using AOMEI Partition Assistant Standard.
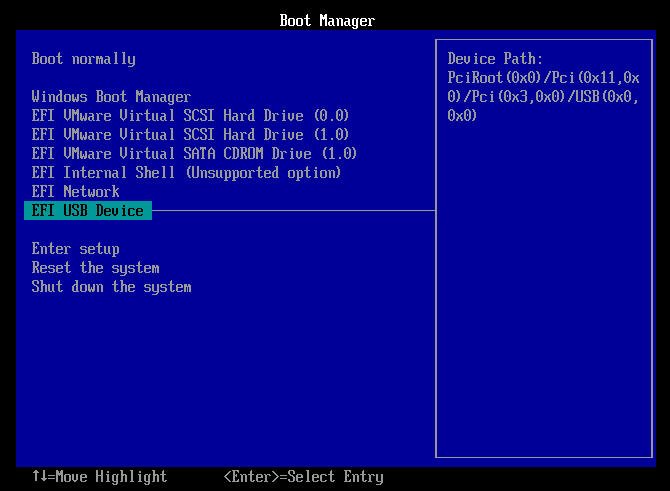
Step 1. Insert a USB drive to your computer and launch AOMEI Partition Assistant Standard. Click "Tools" > “Make Bootable Media” and do the following prompts to create a Windows bootable USB drive. and reboot the computer and boot from the created bootable USB drive.
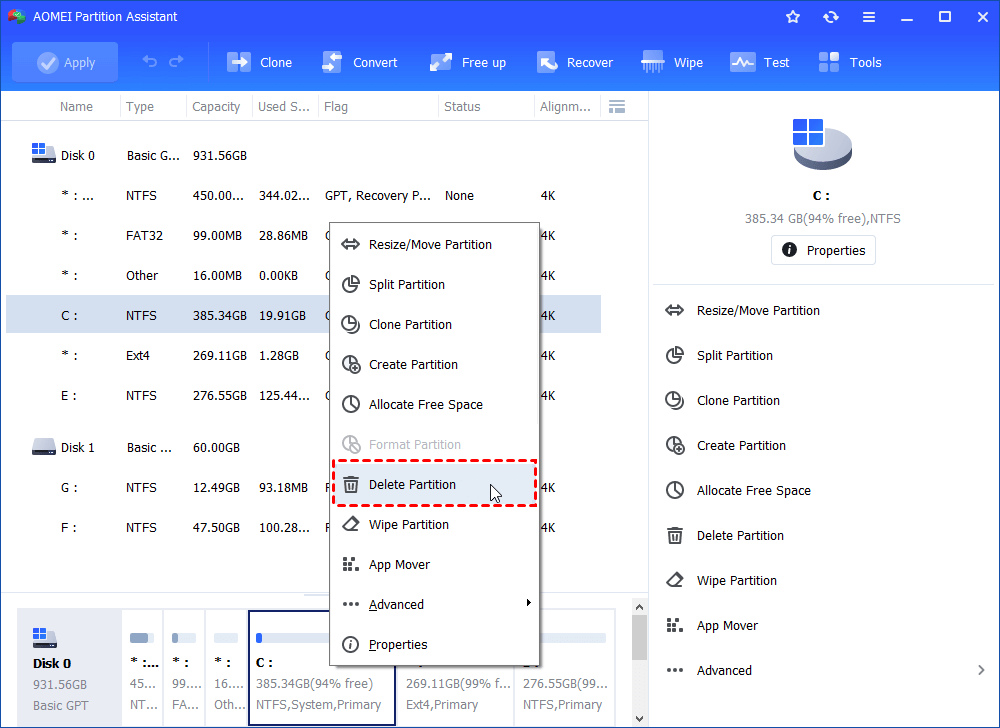
Step 2. After a while, you will be in the main console of AOMEI Partition Assistant. Right-click the system partition C and choose Delete Partition.
Step 3. In the small pop-up window, choose Delete partition quickly (delete partition without wiping data). Then, click on OK.
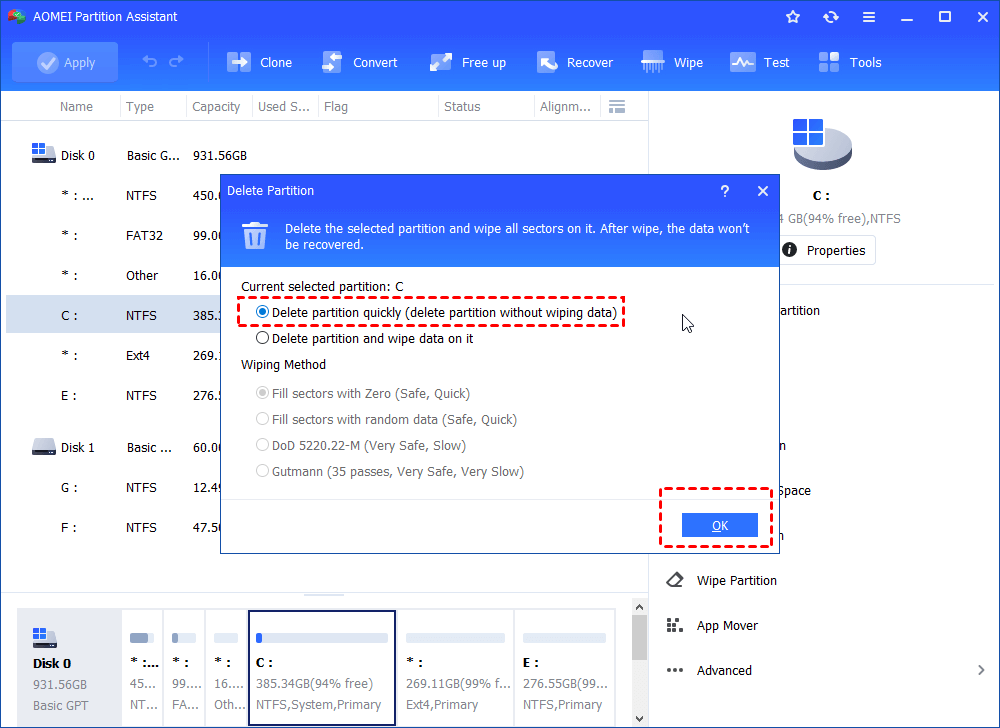
PS.: If you want to wipe C drive, choose Delete partition and wipe data on it and this program will delete the partition and fill sectors with Zero.
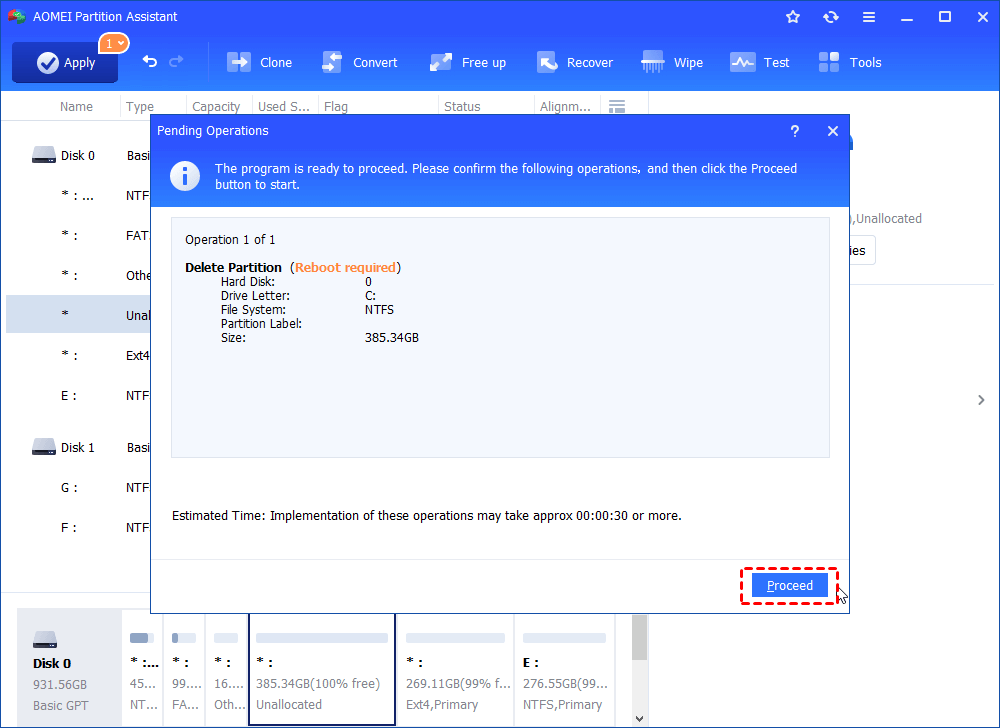
Step 5. Go back to the main console, click Apply to commit operation.
Wrap things up
Two methods on how to delete system partition of Windows have been presented at length and you can pick up one as you like. In fact, AOMEI Partition Assistant Standard is far more than a tool to help you to create bootable media to delete C drive. It enjoys various useful features like resizing partition, cloning partition and merge partitions, etc. Besides, you can upgrade it to AOMEI Partition Assistant Professional to enjoy more advanced functions such as converting system disk to GPT without data loss, cloning system hard drive to SSD without reinstallation and so on.

