How to Format Kingston SSD in Win 10
If you wish to format a Kingston SSD in Win 10 computer but are unsure how to do it safely, this guide will show you how to format an SSD on a Windows PC.
By Lucas / Updated on August 22, 2023
SSDs have grown in popularity among computer users due to their high and consistent performance. Formatting a disk is the process of initializing a disk or disk partition. Some customers want to format an SSD to optimize disk speed or to delete superfluous data, but they don't know how. So, in this tutorial, we'll go over some disk formatting basics and demonstrate how to format a disk.
When should I format Kingston SSD in Win 10?
If you've recently acquired a new Kingston SSD, it's likely that you'll need to format the drive to make it compatible with your operating system. During the operating system installation process, you will encounter an option allowing you to designate your newly acquired drive and initiate the formatting procedure.
On the other hand, if your intention is to repurpose an existing SSD, it's essential to remember to format the drive before proceeding with the operating system reinstallation. It's important to note that this formatting action involves the removal of data stored on the drive's partitions, making it imperative to back up your drive's contents prior to proceeding with the formatting process.
In cases where you're contemplating selling or donating your SSD, it's highly advisable to contemplate securely erasing the drive. This can be accomplished using Kingston's SSD Manager application or third-party utilities that offer support for secure erase or NVMe format.
Always keep in mind that this action will result in the permanent deletion of all data residing on the drive, ensuring that your sensitive information remains safeguarded.
Which file system should I choose?
Selecting an appropriate file format that aligns with your operating system is a crucial consideration. The file systems most commonly employed include:
1. FAT32: This is a widely chosen option owing to its compatibility across Mac®, Windows®, and Linux® operating systems, as well as gaming consoles and various USB-enabled devices. However, it's worth noting that FAT32 lacks security features and imposes a maximum file size of 4GB. (More details about the limits of FAT32)
2. exFAT: A prevalent choice that overcomes the 4GB file size constraint and functions well with a majority of Windows and Mac OS versions. Yet, it's important to acknowledge that older operating systems might necessitate updates to ensure seamless reading and writing capabilities with exFAT file systems.
3. NTFS: This format is automatically adopted during the installation of Microsoft Windows. It offers a substantially larger maximum file size, but macOS® X can only read NTFS files in a read-only mode (unless supplemented with a third-party NTFS read/write utility).
4. APFS: Specifically tailored for Mac users, APFS is the intrinsic solution introduced with macOS 10.13. However, it's imperative to confine the use of this option solely to macOS environments, as Windows systems require third-party utilities to recognize this particular file system.
5. Ext4 (fourth extended file system): Serving as Linux's default journaling file system, Ext4 acts as the natural successor to ext3 and is widely utilized in Linux setups.
Before formatting SSD
There are some points you need to before you start.
Prioritize an initial step: safeguard your data by backing it up! Be it stored on an external drive or within the realm of cloud storage, ensure that any critical data is securely backed up prior to proceeding with the drive formatting. The process of reformatting the drive is a point of no return, rendering data recovery near-impossible thereafter.
Additionally, confirm the activation of the TRIM function on an operating system that supports it, as this is vital for preserving the optimal performance levels of your SSD. And for a comprehensive removal of all existing content on the drive, consider opting for a secure erase or NVMe format procedure for the device.
How to format Kingston SSD in Windows 10/11
Now, we’ll show how to format SSD via different tools.
Way 1. Format Kingston SSD via Disk Management
Step 1. Click on Start or the Windows button, select Control Panel, then System and Security.
Step 2. Select Administrative Tools, then Computer Management and Disk Management.
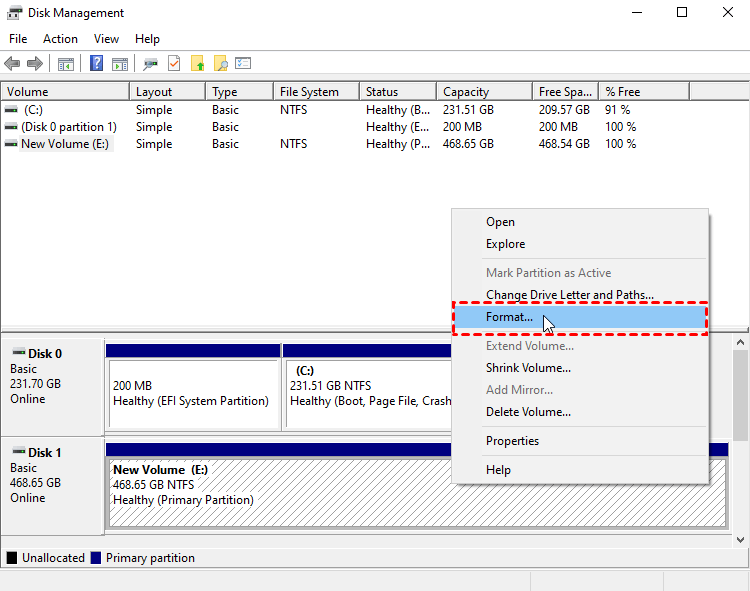
Step 3. Choose the disk you’d like to format, right-click and select Format.
Step 4. Select the File System (usually NTFS) in the dialog that appears and enter the Allocation Unit Size (usually 4096) and check Perform a quick format.
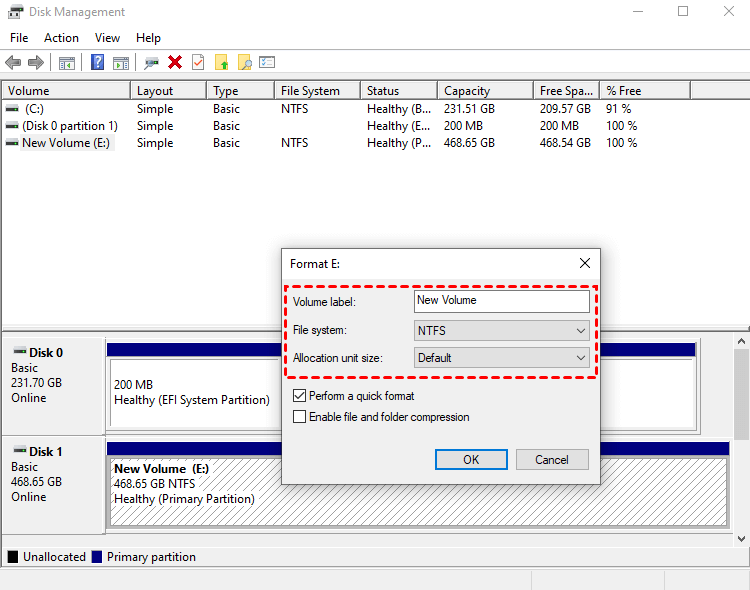
Step 5. Click OK.
Way 2. Format SSD from BIOS
The term "format" is frequently used to refer to both formatting and erasing, however, only a safe erase process can completely wipe the data. Some motherboard manufacturers include a secure wipe technique from within the BIOS of the motherboard. You should check the documentation for your motherboard to determine whether it has secure erase capabilities. Alternatively, you may safely delete an SSD from within Windows using available tools.
To safely remove an SSD from the system BIOS, you must first power down your computer. After the shutdown, proceed as follows:
Step 1. Enter the BIOS of the machine. This may be accomplished by continually hitting the BIOS key. This key varies by manufacturer, however, some of the most frequent BIOS keys are deleted, F1, F2, F10, and F12.
When the system boots, the proper key will generally be mentioned in the lower quarter of the screen, in either the left, center or right quadrant.
Step 2. Select the Security tab.
Step 3. Choose Hard Drive Utilities. This may also be labeled as Hard Drive Tools on some systems.
Step 4. Choose Secure Erase.
Step 5. Select the drive you wish to empty.
Step 6. Wait for the popup before clicking Continue.
Way 3. Employ third-party partition assistant to format and erase SSD
Another option is using all-in-one disk management software to securely format or erase your SSD. This type of tool can format disks or drives even when they have some errors like RAW drive, unavailable “Format” selection in Disk Management, unrecognized SSD, etc.
Here we recommend you AOMEI Partition Assistant Standard, a disk and a drive manager for Windows PC. This tool carries “Format Partition” and “SSD Secure Erase” functions to help users clean and improve SSD.
▶ 1. Format SSD in Windows 10 via this handy tool
The format function of this tool supports NTFS, FAT32, Ext2/3/4, and exFAT file systems. And all drives of common brands are available, with no brand limitations. You can conveniently format your HDD, SSD, SD card, USB… What's more, this tool also can format a drive that is larger than 32GB into FAT32.
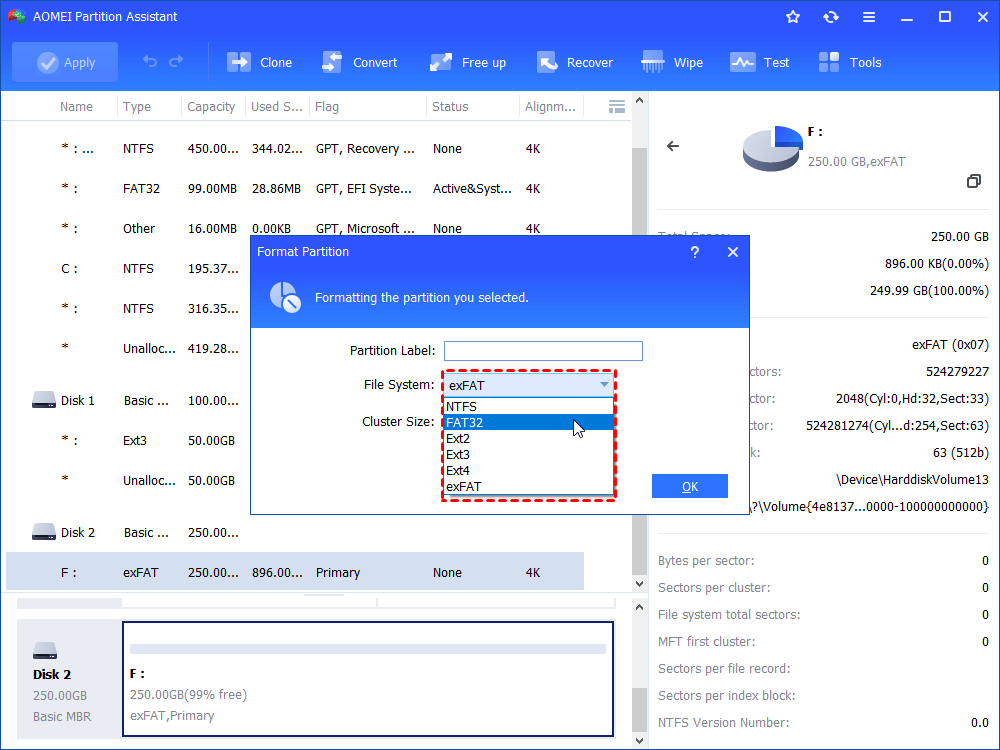
Step 1. Download this freeware, install and run it. In the main interface, right-click the partition on SSD and select “Format Partition”.
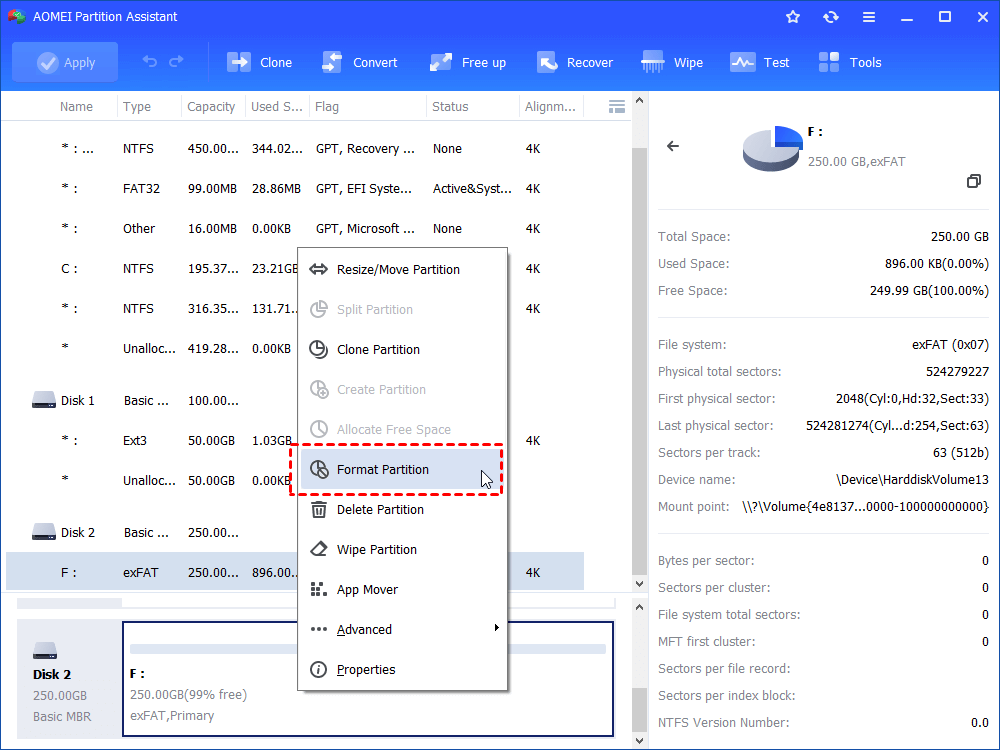
Step 2. In this small window, specify the file system of the SSD partition based on your own demand and click “OK”.
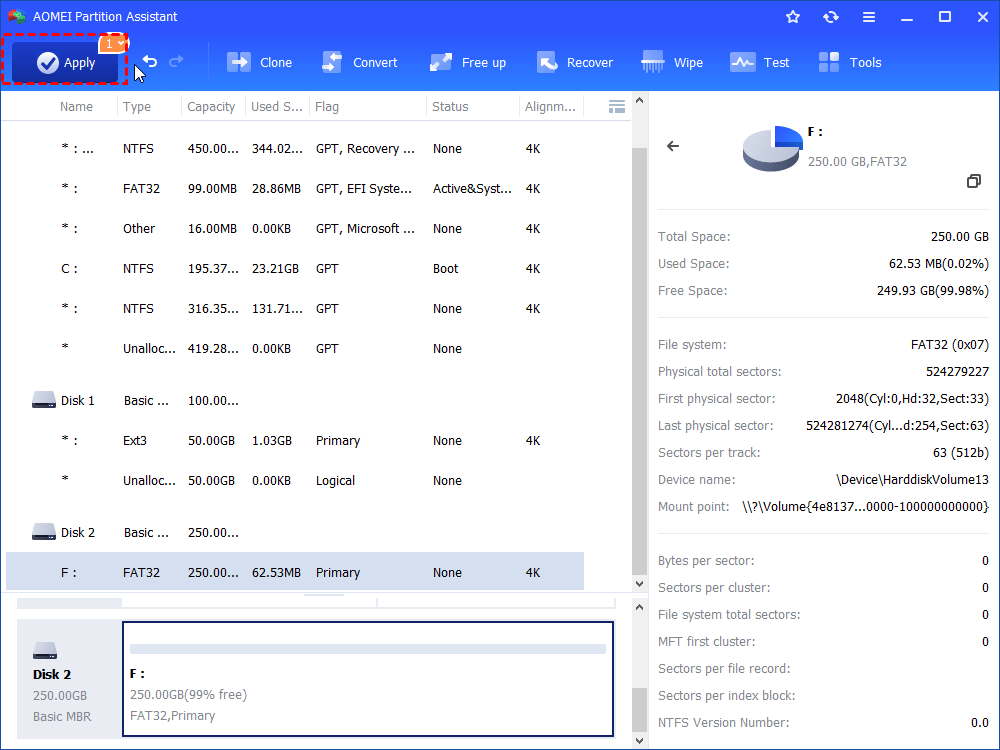
Step 3. Preview the operation. Then, click “Apply” and “Proceed” to perform it.
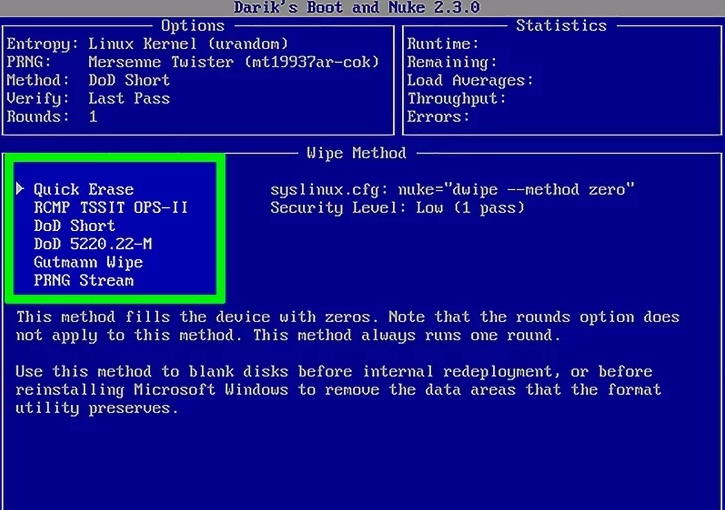
▶ 2. Erase SSD securely via disk eraser
Because the way data is written on SSD differs greatly from that on HDD, the "zero fillings" approach cannot be used for low-level formatting. Secure Erase is a low-level SSD format procedure that assures all data saved on the SSD storage device is cleaned out in order to restore SSD performance.
Note: To employ disk eraser function, you need to upgrade to the Professional Edition and install it on a Windows 7 PC.
Step 1. Install and run AOMEI Partition Assistant Professional. In the interface of AOMEI Partition Assistant, click "Wipe" > "SSD Secure Erase".
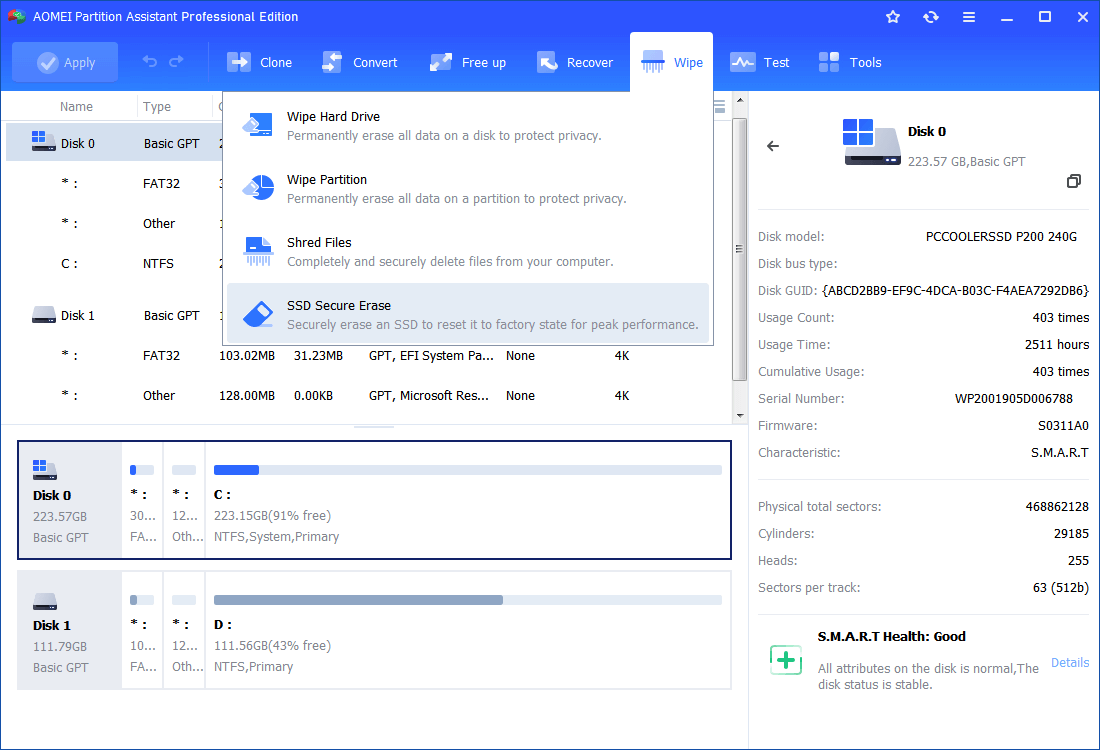
Step 2. Select the SSD that you want to securely erase and click.

Step 3. Double-check the SSD identification information in case of erasing the wrong SSD because the data is unrecoverable after the Erase. Now, you will see the SSD is in a frozen state. To continue, you need to perform a hot swap.
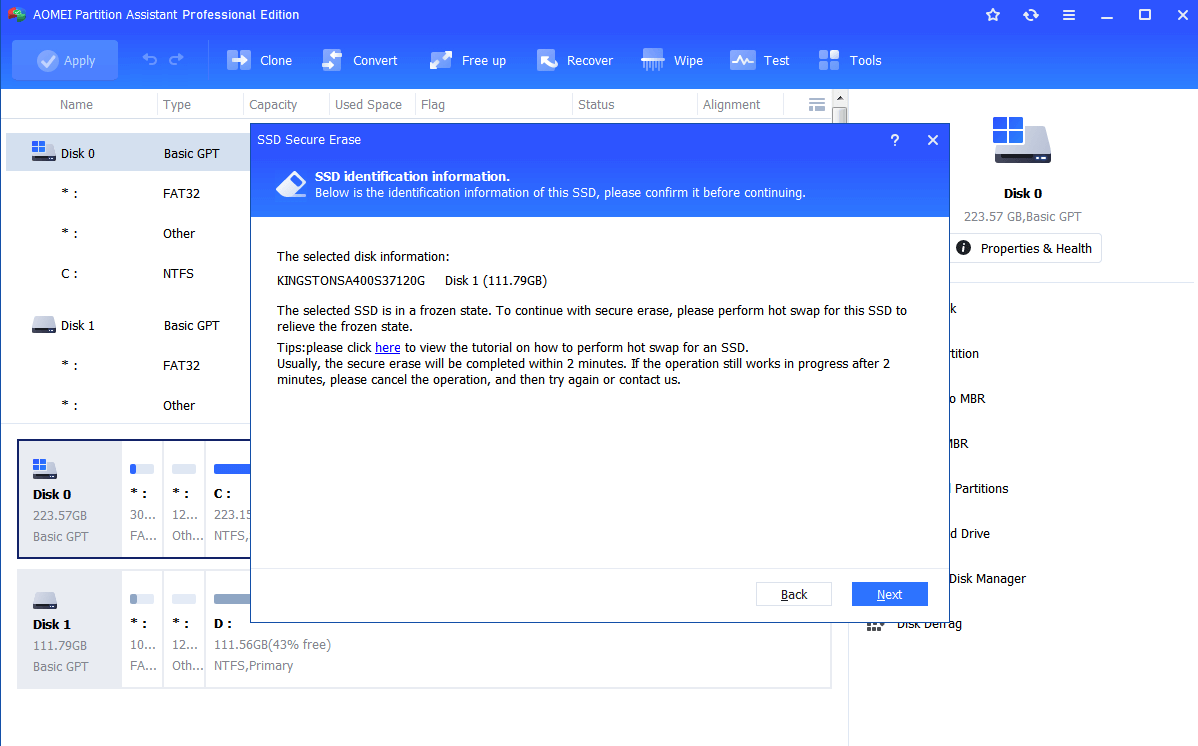
Sometimes, Secure Erase SSD requires hot-swapping the drive to unlock it from the frozen state.
To perform Hot Swap
● Open the computer case, rear cover, or drive shell and find out the SSD you’ll erase.
● Unplug the power cable and then disconnect the SATA data cable from SSD.
● After a few seconds, reconnect the SATA cable to the SATA port and then plug the power cable back to complete the hot-swap.
Step 4. Click "Next" to start the SSD Secure Erase.
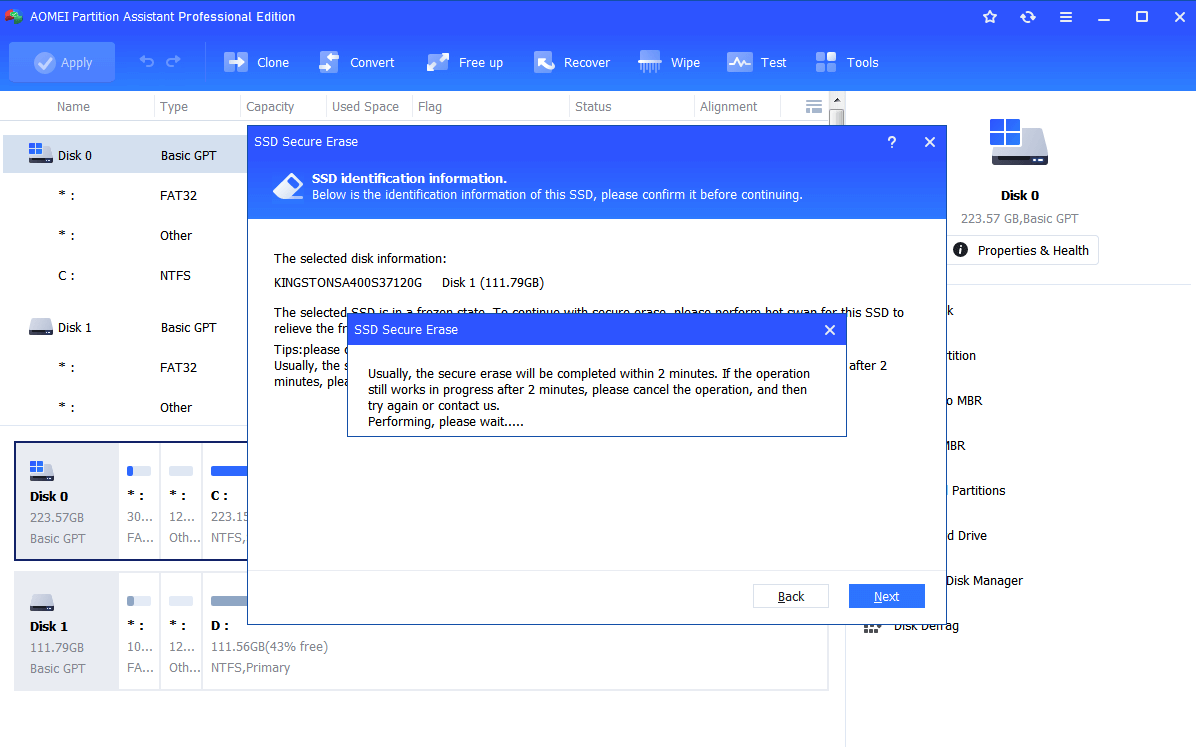
After the secure erase process is complete, you will see the SSD shown as a block of unallocated space. Besides, it also allows erasing C drive if you need.
To sum up
On this page, we've shown how to format Kingston SSD in Win 10. In fact, not only Kingston drives, these ways are available for all brands. AOMEI Partition Assistant can handle most cases that require users to format a drive. Additionally, this tool can also clone disk, move installed apps, and convert a disk between MBR and GPT... And it has the Server Edition for Windows Server users and other advanced editions for enterprise users.

