How to Format SD Card in Windows 10, 8, 7?
This post will analyze when you will need to format an SD card, and what format is suitable. Then guide you how to format SD or micro SD card in Windows 10, 8, 7 for cameras, GoPro, phone, and other devices.
By AOMEI / Updated on May 12, 2023
Why need to format SD card?
SD is one of the most common storage device for mobile devices, like cameras, smart phones, Nintendo Switch. Usually there are 2 circumstances making you want to format SD card:
● Repair SD card error: Sometimes, an SD card may encounter file system error making it inaccessible. And Formatting process will delete data on it and rebuild its file system, so one possible method for such issue is to reformat it to repair its file sytem information.
● Incompatibility with your device: Some devices will work with some particular file sytem. For example, Windows hard drives use NTFS and FAT32 file sytem, while PS3 or PS4 can't read NTFS drive. When your device can't read your SD card, you might need to format it to proper file sytem.
What file system is best for SD card?
Generally, you can check the instruction book to see what is the best file system for your device. If you don’t find the right answer, FAT32 or exFAT may be your choice. These 2 file systems are compatible with most mainstream Andriod phones, cameras, game consoles (like PlayStation, Xbox). Here are some features and differences between the 2 file sytems that may help you to choose the proper file system for you SD card.
● FAT32: FAT32 is a lightweight file system for SD and SDHC cards. It comes with great compatibility. But it is old, and FAT32 file system can’t recognize a file that is larger than 4GB. It seems to be out-of-date in today's requirements.
● exFAT: It is like an alternative option when you need to store 4GB+ files on your device. It practically does not have size limit. And most SDXC memory cards adapt this file sytem.
Now, you have known what is file system you need. Next, on this post, we will guide you on how to format SD card in Windows 10, 8, 7.
How to format SD card to FAT32, exFAT in Windows 10, 8, 7?
✍Note: Before get started, if you have important data on the SD card, you would better to clone the SD card to your PC or other place to back up your data. Because formatting process will delete all information on it.
Method 1. Format SD card via DiskPart.exe
Windows provides command-line utility allowing you to format SD card in Windows. If you are good at entering commands, this tool can help you.
Step 1. Press “Win + R” to open Run dialogue.
Step 2. Type “cmd” to open Command Prompt.
Step 3. Once the Command Prompt is launched, type “diskpart” on the window, and press Enter.
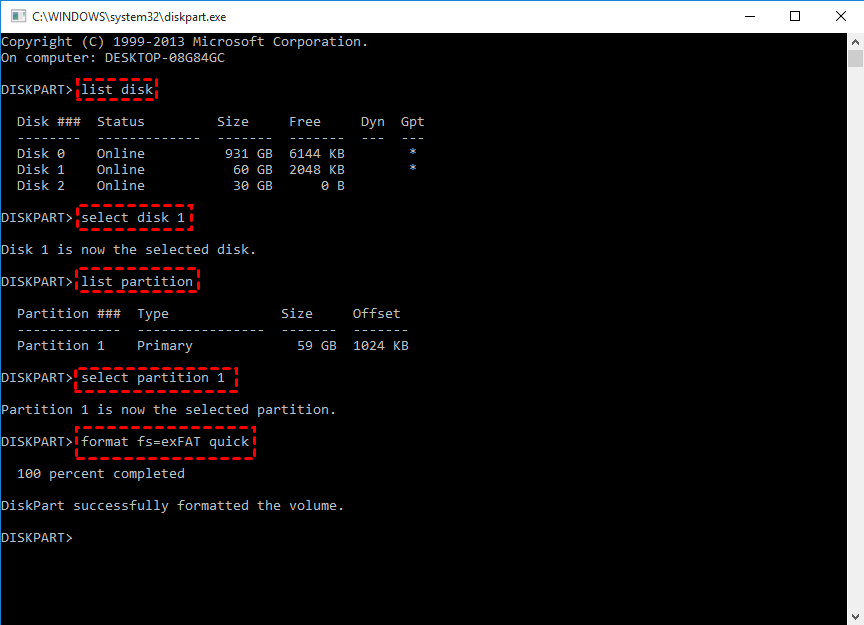
Step 4. When the diskpart.exe is opened, type the following commands:
● list disk
● select disk 1
● list partition
● select partition 1
● format fs=exFAT quick (exFAT can be replaced with FAT32, or other file systems)
Method 2. Easier to format SD card with user-friendly tool
Diskpart.exe is an effective tool, but it is difficult to remember the commands for most users. And this tool doesn't supprot previewing or undoing an operation. Once you mistype a command, it may cause an expected problem.
Fortunately, there is a user-friendly and powerful formatting tool – AOMEI Partition Assistant Standard which allows you to format an SD card to exFAT, FAT32, NTFS, and Ext2, Ext3, Ext4 on an intuitive interface. Only a few steps can you format your SD card, or micro SD card easily. Now, download this tool and follow the tutorial to see how to use it.
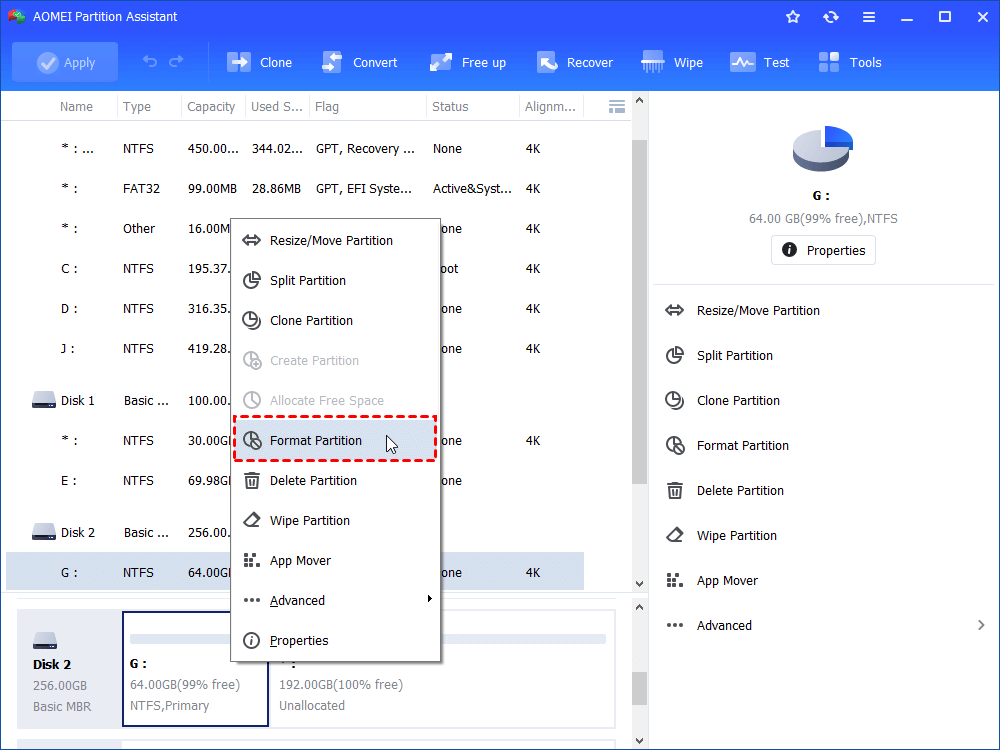
Step 1. Launch AOMEI Partition Assistant, right-click on the SD card partition on the main interface. And choose “Format Partition”.
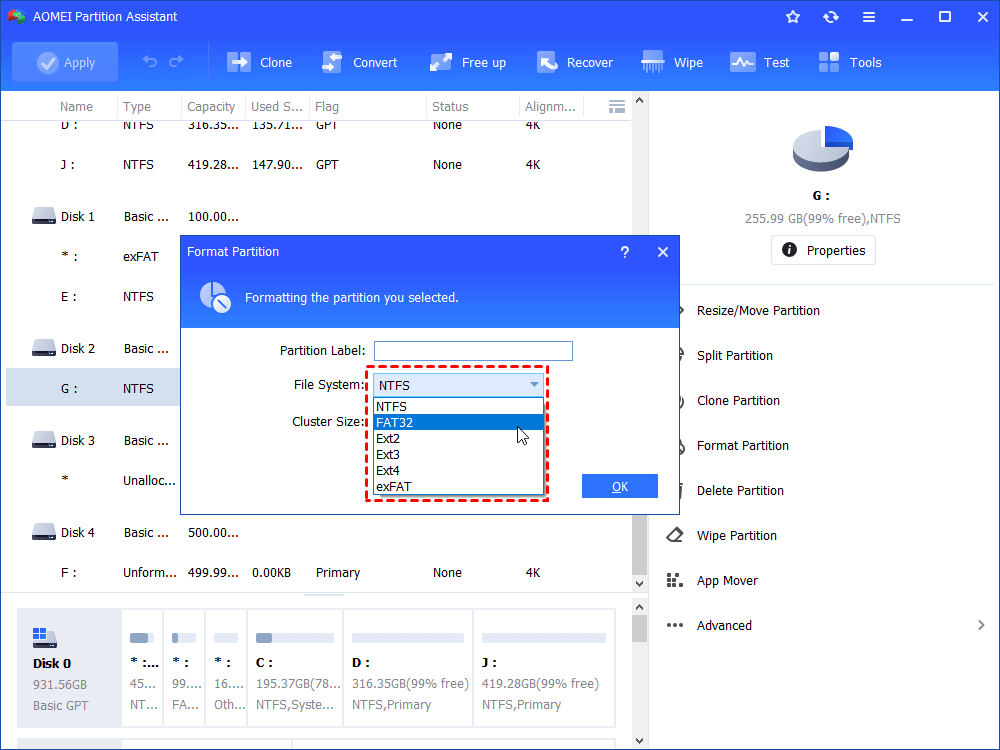
Step 2. Choose the file system you need, like “FAT32”, “exFAT”, and click “OK”.
Step 3. Click “Apply” on the top of the main interface to commit the change.
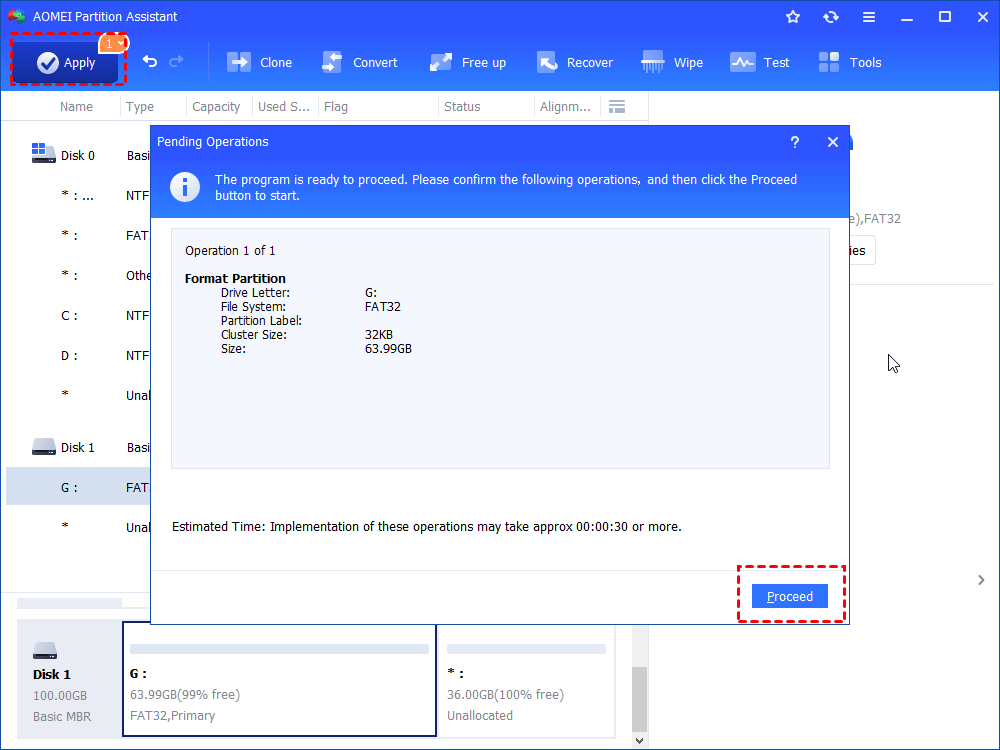
Then wait for a while, your SD card will be formatted. And plug it into your camera, phone, Nintendo Switch, or other digital devices.
Additional content: Format SD card on camera, GoPro
When you have an SD card, usually your digital device support formatting storage device to proper file system that can be launch in “Menu” option if the function is working. Here, we offer a brief tutorial of format SD card on Cannon camera, and GoPro.
● Format on Cannon camera
Step 1. Turn on your Camera, and press “Menu” button.
Step 2. Go to the “Camera Setting 1” tab.
Step 3. Choose “Format” option.
Step 4. Select “OK” to confirm the operation.
● Format SD card on GoPro
Step 1. Turn on your GoPro, and choose “Menu” on the screen.
Step 2. Choose “Preference”.
Step 3. Choose “Reset” on the Preference dialogue.
Step 4. Choose “Format SD card”, and choose “Format” when it prompts you to confirm the operation.
Conclusion
That all about how to format SD card in Windows 10, 8, 7. So in a word, DiskPart and AOMEI Partition Assistant are both effective tool to perform this operation in Windows. Besides, they are also applied to formating a USB drive, hard drive, TF card, and SSD.
But by contrast, AOMEI Partition Assistant is the better option for most people, epecially for people who can't handle command-line interface. In addition, this tool can also help you to create, delete, merge partition, and wipe a SD card. If you upgrade to Professional edition. It gives you more advanced features, such as change SD card serial number, manage dynamic disk, SSD secure erase, and so on.

