3 Ways to Fix Secure Boot Enabled But Not Active in Windows 11/10
In this article, you can find the most effective ways to fix “Secure Boot is enabled but not activated” issue in Windows 11/10. Plus, secure and free data protection solutions are available to keep your valuable information safe.
By Hedy / Updated on March 14, 2025
With the advent of Windows 8, Microsoft introduced the Secure Boot feature to enhance user security. Its main role is to protect the computer's operating system and ensure a smooth startup of the device by blocking any unauthorized applications.
Simply put, this feature creates an additional barrier of protection, enhancing the overall security of the user. However, many users have reported encountering the “Secure Boot is enabled but not activated” message on their devices, an issue that tends to escalate during Windows installation.
If you find yourself struggling with this Secure Boot issue, please read the full text of this blog carefully. Here, we shed light on effective strategies to overcome this obstacle and operate the system seamlessly.
Why is Windows 11 secure boot enabled but not active?
Before delving into potential solutions to computer-related problems, it is crucial to understand the root cause behind such glitches. Why is my secure boot enabled but not active? Being familiar with these factors ensures that you take a more informed approach to troubleshooting, thereby promoting a smoother resolution process. Here, we outline some common reasons behind the “Secure Boot is enabled but not active” error.
A common culprit is the "Secure Boot Disabled" status in the UEFI firmware settings. Although it appears enabled in the Windows interface, if this option is disabled in the firmware settings, the feature remains inactive, resulting in the above error.
Another common trigger is the activation of the Compatibility Support Module (CSM) in the system. Enabling this option in UEFI settings may cause reporting errors. The remedy involves adjusting these settings, a process detailed later in this blog.
Finally, an outdated BIOS can cause issues like "Secure Boot is enabled but not activated". Whether you are using a Dell or Asus device, these issues may persist if your BIOS is not up to date.
How to fix Secure Boot is enabled but not active
Fixing the “Windows 11 Secure Boot is enabled but not activated” issue is a simple process. This issue can be resolved easily and quickly by carefully following each step outlined below. Activation of Secure Boot can be broken down into three distinct parts.
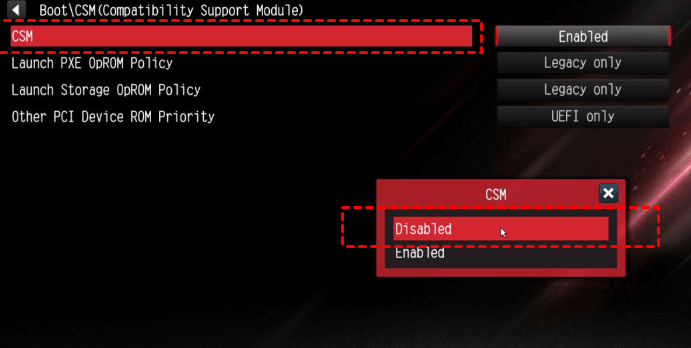
Method 1. Booting without CSM
Before changing Secure Boot settings, ensure a successful boot with CSM disabled.
Step 1. Disable CSM using a specific key to enter the BIOS; usually DEL, F2, F10, or F12.
Step 2. Navigate to the Boot or Security tab, find the Secure Boot menu, and then find the CSM option.
Step 3. Disable booting CSM, select Save changes and reset, and your computer will now boot without CSM.
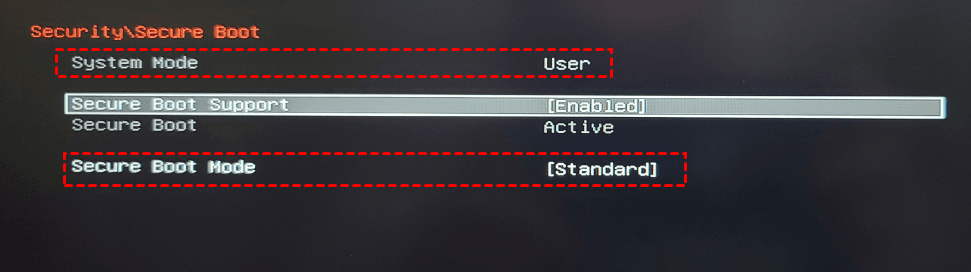
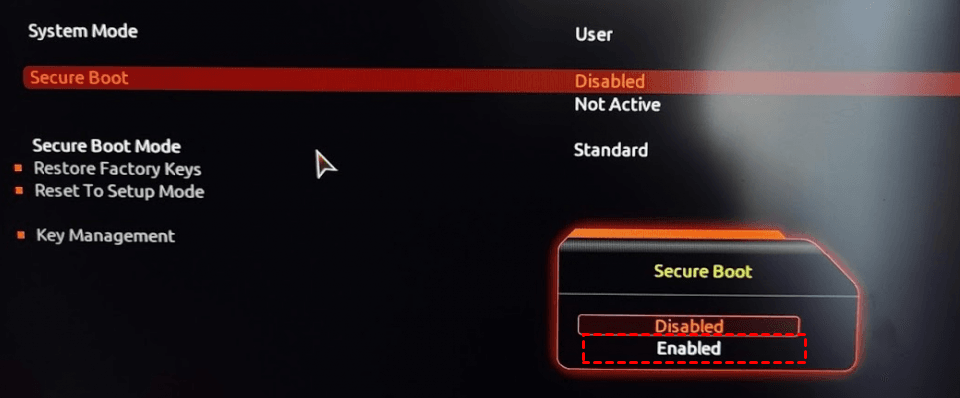
Method 2. Changing Platforms
If you find yourself in setup mode because the platform key in the BIOS was deleted, enabling Secure Boot allows your operating system to create a new platform key.
Step 1. In BIOS setup, if Mode is set to User, enable Secure Boot. If Settings is displayed, disable Secure Boot if it is currently enabled.
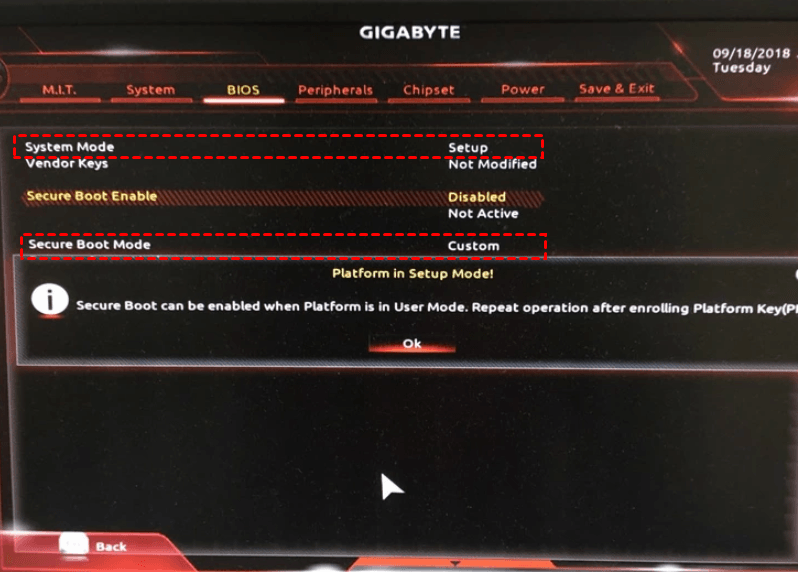
Step 2. If "Safe Boot Mode" is set to "Standard", switch to "Custom". Then change "Custom" to "Standard" and accept "Factory Default".
Method 3. Properly enable Secure Boot
Step 1. Open the Start menu, navigate to Settings, and click Update & Security > Recovery > Advanced Startup > Restart Now.
Step 2. On the blue screen with the advanced menu, click Troubleshooting > Advanced Options > UEFI Firmware Settings.
Step 3. Find the Secure Boot setting in the Security, Startup, or Authentication tab, enable it, and be sure to save the changes before restarting.
Step 4. Verify that the issue with Secure Boot not activating in Windows 11 is resolved.
Step 5. Follow these steps carefully and you should find that the problem is successfully resolved.
Bonus tip: How to backup Computer to avoid data loss
Since the results of the above repair are unpredictable, especially when dealing with critical files on your computer, it is highly recommended to back up these files and store them in a safe location. To keep your system and data safe, consider using the best-in-class free backup software AOMEI Partition Assistant Professional.
In terms of functions, AOMEI Partition Assistant has a comprehensive and user-friendly interface, which can even satisfy users who are not familiar with computers. This software can easily clone system, disk, partition, files, and folders on Windows 11/10/8.1/8/7 to alternate internal disk, external hard drive, USB drive, etc. as a reliable tool for backup. To explore its features, you can download the demo version and follow the graphical tutorial below.
For Windows Server users, there are options to customize AOMEI Partition Assistant Server as per your needs.
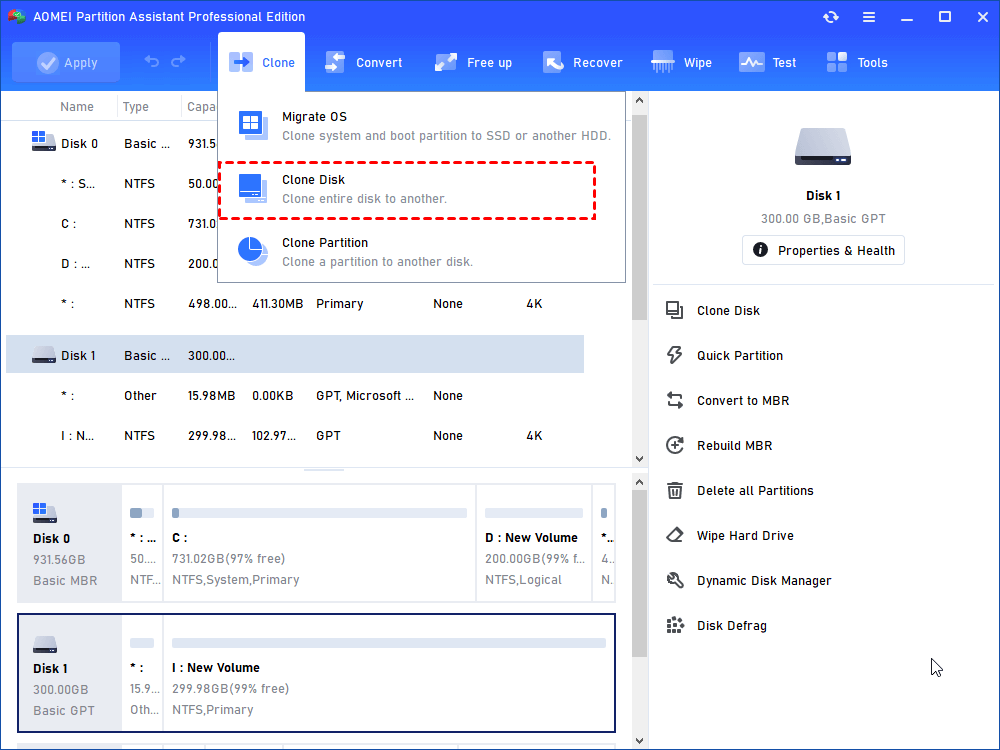
Step 1. Install and open AOMEI Partition Assistant Professional. Go to the "Clone" option and "Clone Disk".
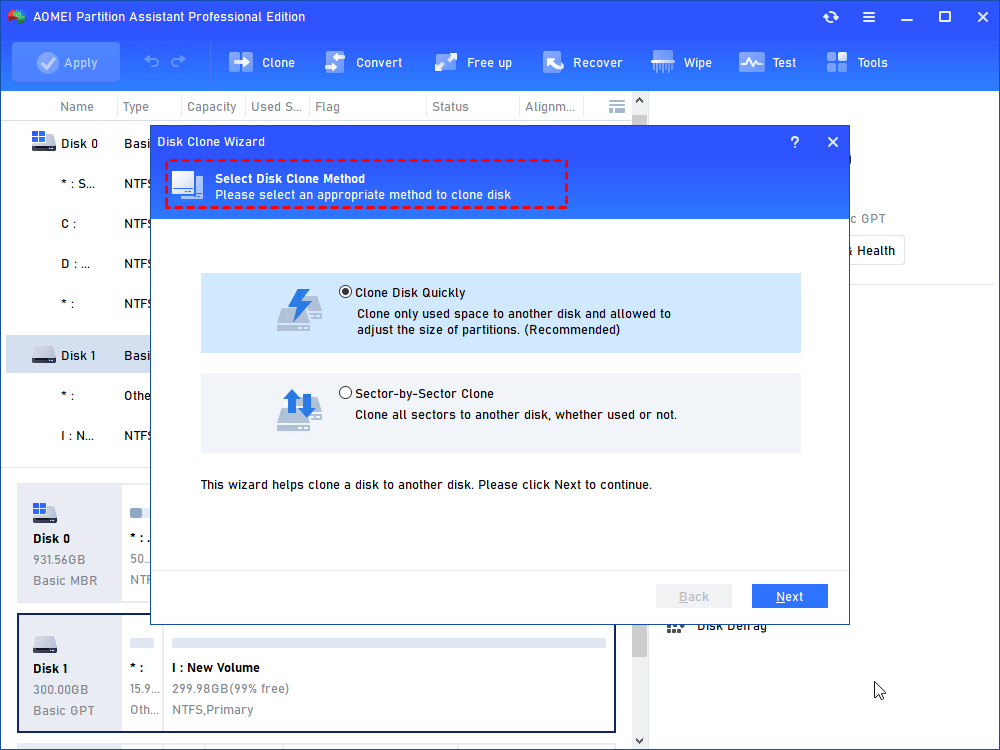
Step 2. Select a disk clone method as you like. Here we recommend you to choose "Clone Disk Quickly” for the first time.
"Clone Disk Quickly": It will clone only used space to another disk and allow to adjust the size of partitions.
"Sector-by-Sector Clone": It will clone all sectors to another disk, whether used or not.
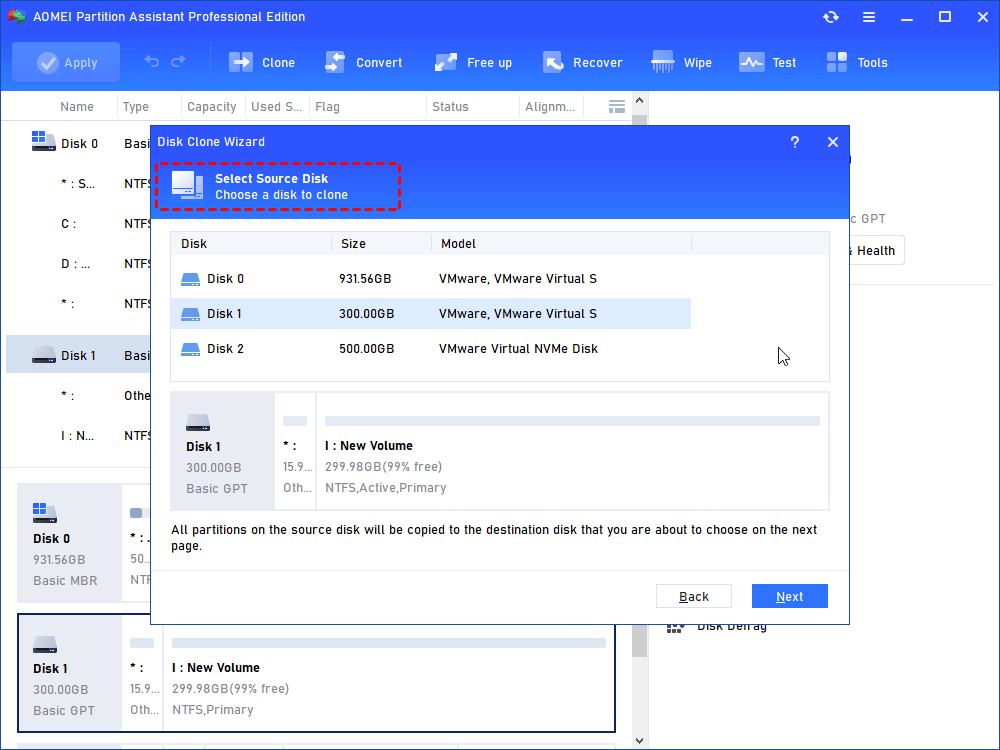
Step 3. Select the disk you want to clone as the source disk and then click "Next".
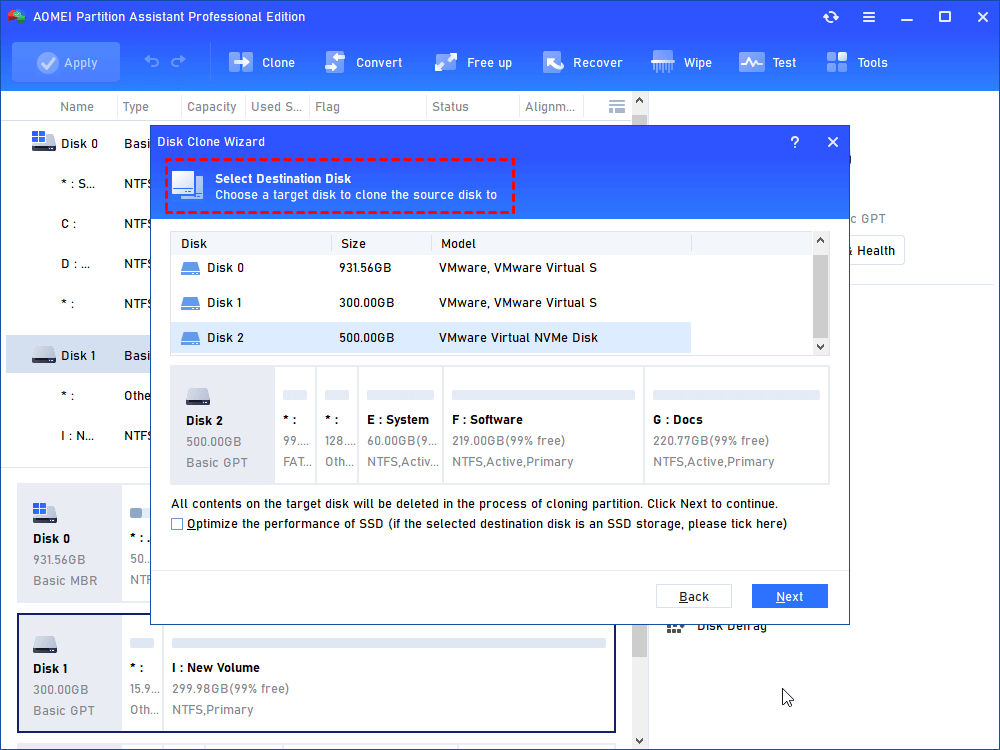
Step 4. Then select another drive as the destination disk and click "Next". Tick "Optimize the performance of SSD" to make partition 4K alignment if you choose SSD as your target disk.
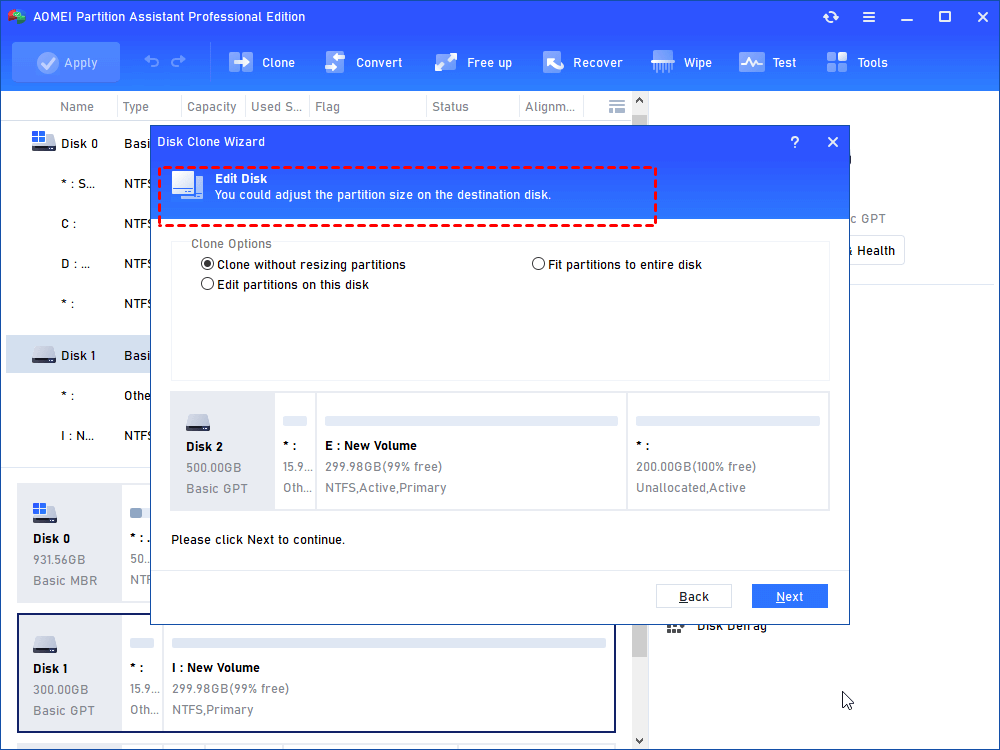
Step 5. In this window, you can adjust the size of the partitions on the new drive. Select the one you like and click "Next".
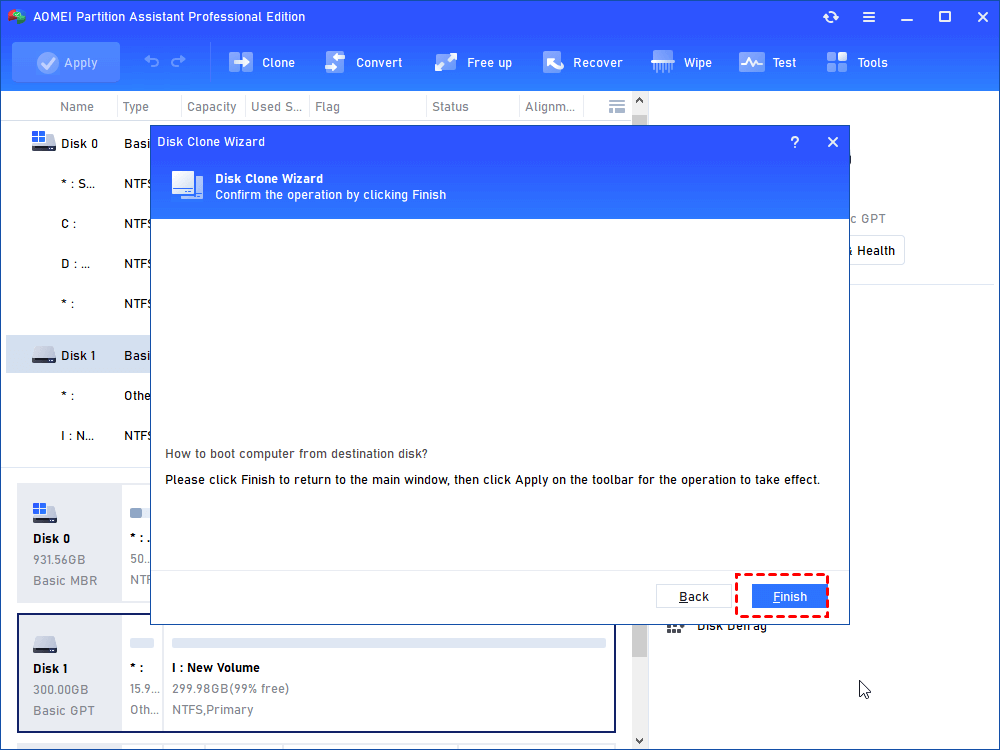
Step 6. Then, you will back to the main console, click "Finish" and then click "Apply" to commit the operation.
FAQs
How to fix Secure Boot enabled in BIOS but not Windows 11?
If Secure Boot is enabled in your BIOS but not recognized in Windows 11, you can resolve this by accessing your BIOS settings:
1. Restart your computer and enter the BIOS using the designated key (refer to your system’s manual for the correct key).
2. Locate and disable the Fast Boot option.
3. Restore your system's Factory Defaults to reset settings to their original manufacturer state.
Why is Secure Boot not showing in BIOS?
If the Secure Boot option is missing from your BIOS, your system may have outdated UEFI firmware that lacks Secure Boot support. Alternatively, the option could be disabled in your UEFI firmware settings. Updating your firmware or enabling Secure Boot in UEFI settings may resolve this issue.
How do I enable Secure Boot without BIOS?
To enable Secure Boot directly from Windows:
1. Press Ctrl + R to open the Run dialog box.
2. Type msinfo32 and press Enter.
3. If Secure Boot is listed as "Off," you’ll need to enable it through your BIOS settings.
Conclusion
In the previous guide, we provided a comprehensive set of instructions to resolve the “Secure Boot is enabled but not activated” issue. We encourage you to systematically try each method listed to determine an effective solution to your problem. However, for an added layer of data security, we highly recommend using AOMEI Partition Assistant Professional.
This tool enables you to clone and recover every file and store it safely outside the system. By doing this, you can safely initiate the processes outlined in the above list without worrying about data loss.

