Size of Available Shrink Space in MB 0 - How to Fix
The effortless way to fix the size of available shrink space in MB 0 when use Windows 7/8/10 Disk Management to shrink volume.
By AOMEI / Updated on October 28, 2024
The Symptom
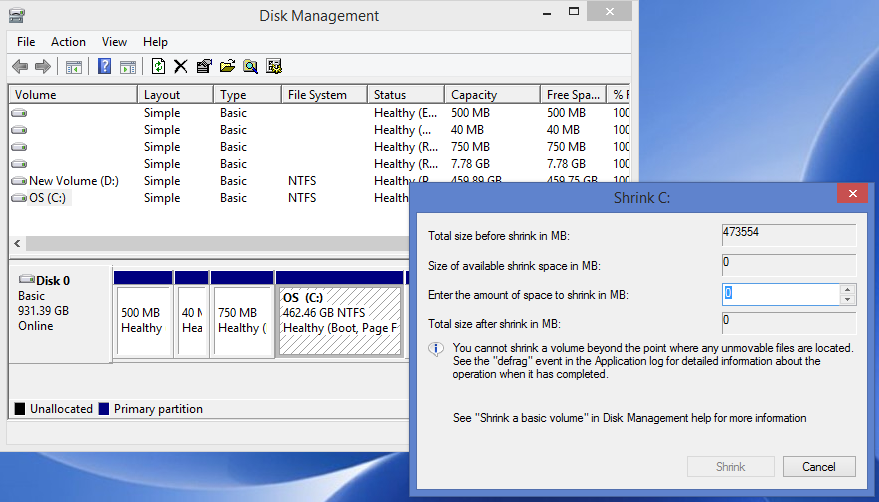
When using Disk Management to shrink a volume or partition, you may find out that the size of available shrink space in mb 0, even through the partition to be shrunk has much unused space. the problem is often met when people trying to resize the system partition, which is also known as the C: drive.
The Cause
According to the warning note in Disk Management shrink volume window that “you cannot shrink a volume beyond the point where any unmovable files are located.’below the Total size after shrink in MB box, there must be some unmovable files (page files or system files) at the very end of the partition that you were trying to shrink.
The Solution
To fix this problem, you can remove or disable the unmovable files to increase available shrink space, but the question is that it is hard to find out which exactly is the file that is stopping you from shrinking volume. Therefore, you need to disable as many system files as you can to see if it works. You can first disable System Protection, Hibernation mode, kernel memory dump, and page files as least temporarily. Then run Disk Defragement, Disk Cleanup. These move shall increase the available shrink space in Disk Management.
Actually, there is a simpler and safer way to shrink a volume without worrying about no available shrink space by using third party software AOMEI Partition Assistant, which does not have the problem with shrink volume with unmovable files. AOMEI Partition Assistant is a partition manager software for Windows 11/10/8/7 that can help you shrink a volume or partition, no matter where the unmovable files locate.
To shrink partition with AOMEI Partition Assistant:
1. Download and run this partition software
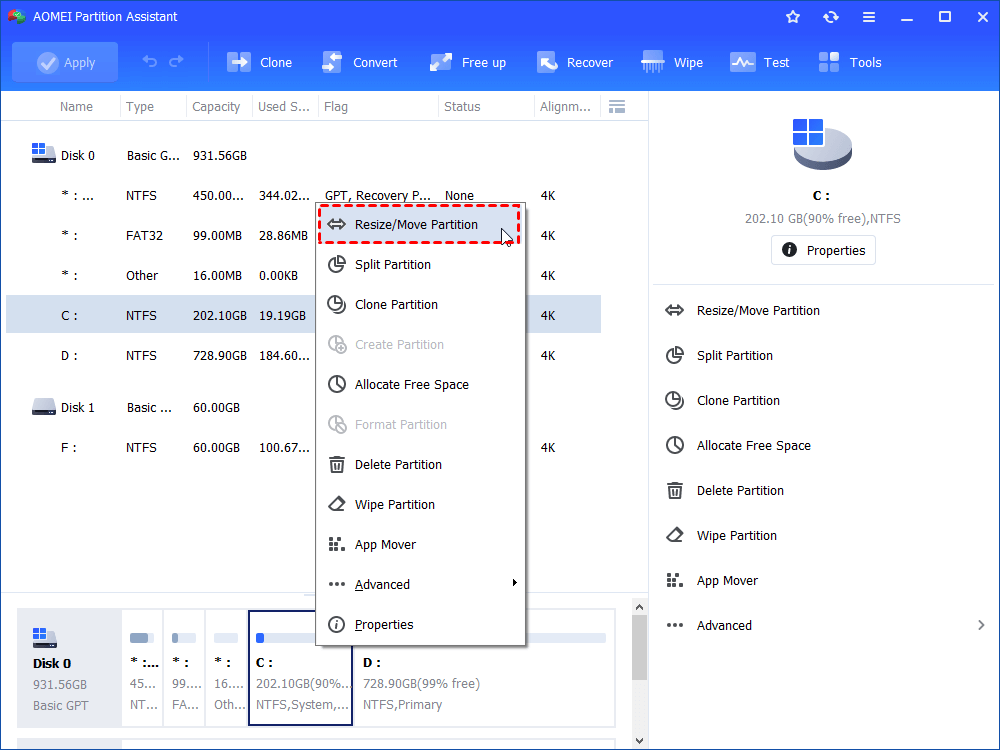
2. Right-click on the partition which needs shrinking and select “Resize/Move Partition” in the drop-down menu.
3. It will bring you the Move and Resize Partition screen. What’s amazing about this software is that you can shrink the partition from both sizes by dragging the slider. You can also enter the amount of space to shrink the volume.

4. Preview the partition layout after the shrink. If it contents you, click Apply to apply the operation.
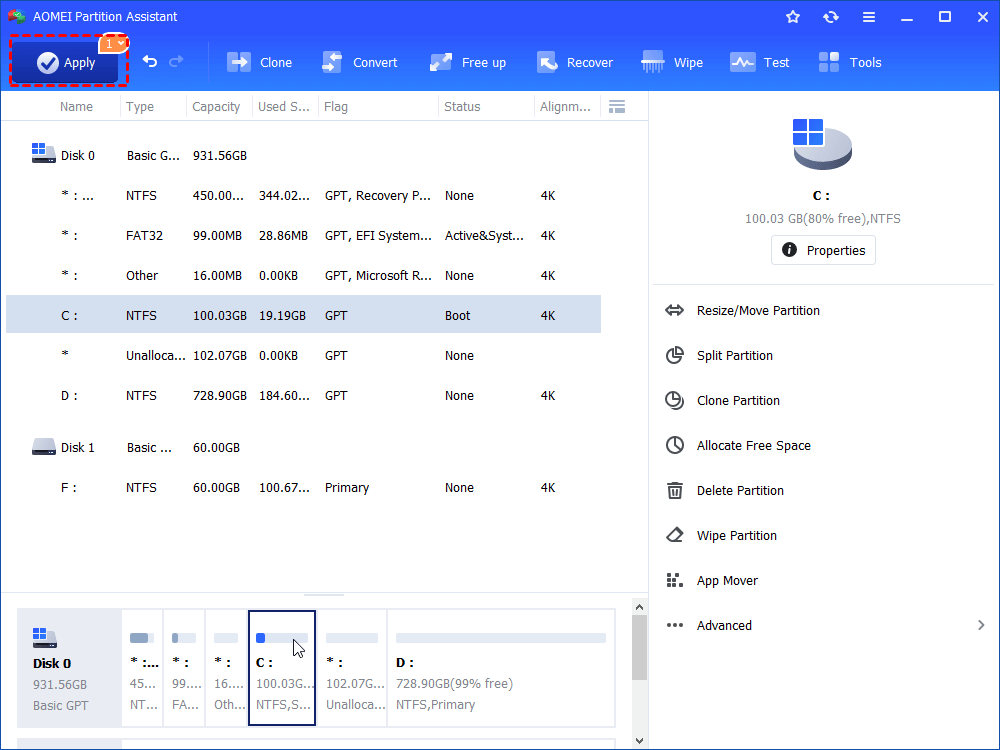
In a short while it will complete the shrink process, leaving unallocated space on the disk. With the unallocated space, you can create a new partition, extend the adjacent partition, or add the unallocated space to a nonadjacent partition by using Merge Partitions function, which is available on paid edition like AOMEI Partition Assistant Server edition. Besides, AOMEI Partition Assistant is also capable of many other useful things, such as Migrate OS to SSD, convert MBR to GPT for Windows 11 upgrade without data loss, and create bootable media. In conclusion, the problem of the size of available shrink space in MB 0 will never concern you after trying AOMEI Partition Assistant.

