How to: Format Write-protected Transcend Pen Drive
A lot of users fail to format write-protected Transcend pen drive and don’t know how to deal with it. So this article will provide an easy solution for you.
By AOMEI / Updated on May 12, 2023
About write protection
When you’re told that a disk is write-protected, you can not add new data to its memory any longer. Write protection enables a drive/SD card to keep its contents from being changed. Many people say they failed to format Transcend write protected USB pen drive. Well, not only Transcend, you may meet the same problem when formatting other brands’ pen drives.

If a pen drive is write protected, you will not be able to copy any files. And if you try to format it, there will be a write protected error which often occurs due to multiple times of formatting and the bad sectors while copying any error occurred files. Part of people just threw their pen drives without knowing how to do a Transcend USB write protection removal. Don’t be in a hurry. Now you can find solutions to realize Transcend format write protected pen drive here.
Ways to remove write protection
To get rid of the write protection, methods are available as follows. While formatting will delete all data, you should make a backup if you need.
-
Via command prompt
Step 1: Since some USB drives have a physical switch that allows you to lock or unlock write protection, make sure that switch has been slid to unlock position. If the switch is off but you still get the error message or there’s no physical switch on your USB drive, skip to the next step.
Step 2: Press Windows key+R on your keyboard. Type diskpart in the pop-up window and press Enter.
Step 3: Type list disk → Enter. All disks connected to the computer will be displayed.
Step 4: You need to identify which one is USB drive then inputselect disk # (# refers to the number of disk) → Enter.
Step 5: attributes disk clear readonly → Enter.
After that, close Diskpart command prompt and re-plug USB. Check whether you’ve formatted Transcend write protected pen drive successfully. If not, you may employ another method below.
-
Edit registry in Windows
Step 1: Again, press Windows key+R. Type regeditthis time, Enter.
Step 2: Navigate to this path from the panel on the left:
HKEY_LOCAL_MACHINE\SYSTEM\CurrentControlSet\Control\StorageDevicePolicies
On the right, double click WriteProtect. Modify value data from 1 to 0 to disable write protection.
Tips: If you can’t find “StorageDevicePolicies”, right clickControl folder → New → Key. Name it with StorageDevicePolicies and open it.
Right click on the white space. Choose New → DWORD (32-bit) value. Name it with WriteProtect.
Then, you can do as before to change value data and check pen drive afterwards. If this still not works, you’re recommended to hire a powerful third-party tool calledAOMEI Partition Assistant.
-
Use AOMEI Partition Assistant
AOMEI Partition Assistant is a professional software that helps you get a better management of your disk/partition. Compared with the first two methods, you’ll find it’s more conveniently to format transcend write protected pen drive with this tool. By the way, it supports both 32 bit and 64 bit of Windows 7/8/8.1/10.
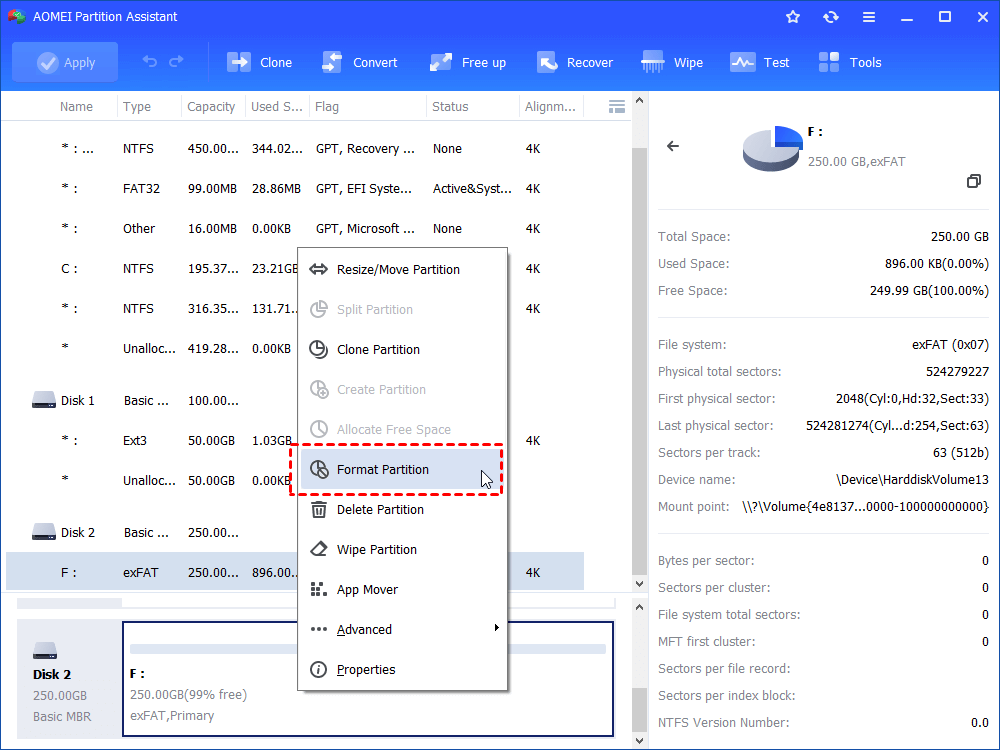
Step 1: Launch AOMEI Partition Assistant. Right click the write protected pen drive and select Format Partition.
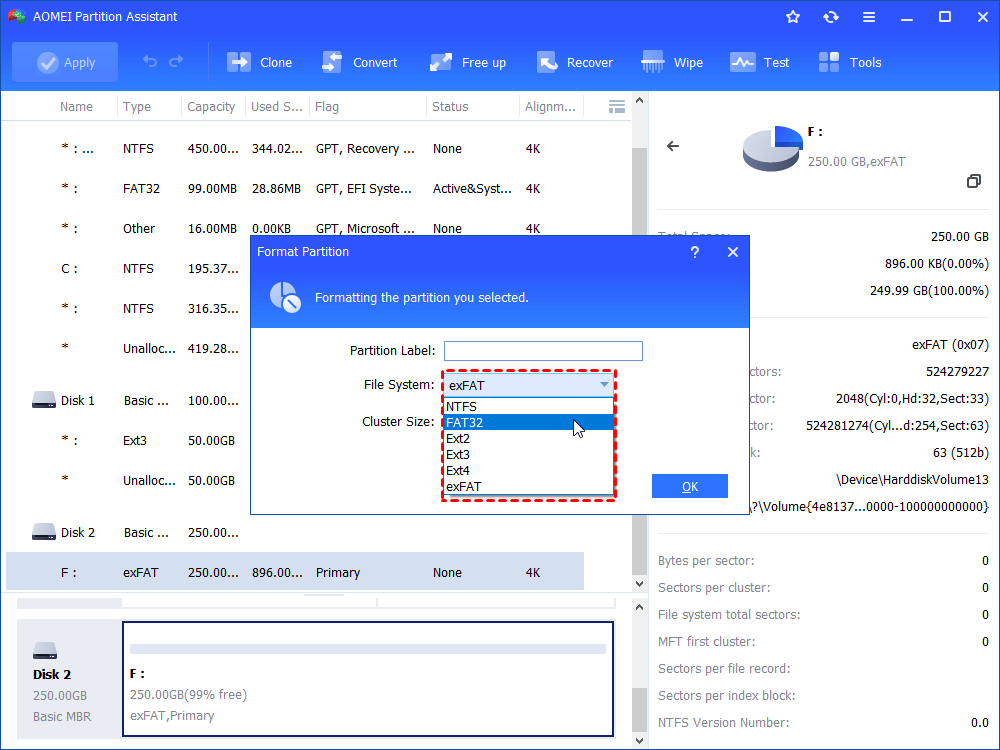
Step 2: In the pop-up window, you’re able to set partition label, file system as well as cluster size.
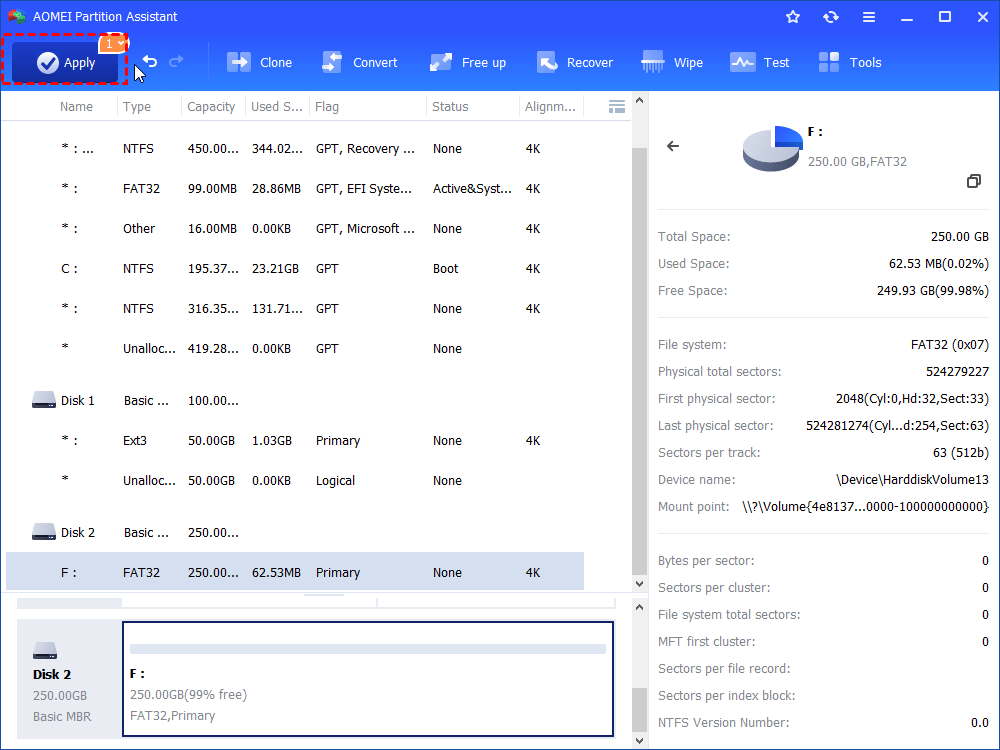
Step 3: Pending operations will be listed on the main interface before execution. You may redo at any time before clicking Apply.
Apart from write protection formatting, you can also extend partition from unallocated space, transfer OS to new hard drive, etc via AOMEI Partition Assistant.

