How to Turn off BitLocker Encryption in Windows 11/10
Sometimes, you may need to turn off BitLocker device encryption on your Windows 11/10 computer. On this page, you will get stepwise guide on how to turn off Windows BitLocker temporarily and permanently in different ways.
By Hedy / Updated on March 8, 2024
Can I turn off BitLocker?
Yes, you can turn off BitLocker on your Windows computer if it's currently enabled. BitLocker is a disk encryption program included with some Windows operating systems (Windows 11/10 Pro, Enterprise, and Education editions) to help protect data by encrypting the entire disk volume.
When you turn off BitLocker, the data on the encrypted drive is decrypted, and the drive becomes accessible without requiring a password or encryption key.
Here are some considerations before turning off BitLocker:
◆ Encryption key: If you use a password or a USB key as the encryption key, you will need it to turn off BitLocker. Ensure that you have the necessary credentials before proceeding.
◆ Data backup: Before turning off BitLocker, it's a good practice to have a backup of your important data. This adds an extra layer of protection in case anything goes wrong during the process.
◆ System Integrity: If BitLocker is used to protect the system drive (where the operating system is installed), turning it off might expose your system to potential security threats. Make sure you have alternative security measures in place.
BitLocker suspend protect vs. turn off: Which one to choose?
Windows offers two ways to help you turn off BitLocker for a specific hard drive: Suspend protection and Turn off BitLocker. As its name implies, Suspend protection allows BitLocker to temporarily stop encrypting and decrypting data on the drive, so it should be used cautiously and for specific purposes.
Turning off BitLocker means you are essentially disabling the disk encryption on a particular drive or volume, so the data will be decrypted forever. If you're making significant changes to the system configuration, such as modifying partitions or disk-related settings, turning off BitLocker may be necessary to avoid potential issues.
In this post, we’ll show you how to turn off BitLocker temporarily or permanently. Which one to choose depends on your needs.
How to turn Bitlocker off temporarily on Windows 11/10?
As mentioned before, to decrypt the hard drive for some time, you can use the BitLocker Suspend protection feature. Here concludes three ways to make it.
Way 1. Suspend BitLocker via Control Panel
The first and most common way is to get into Control Panel to enable Suspend protection. It comes with GUI operations and detailed steps are as follows:
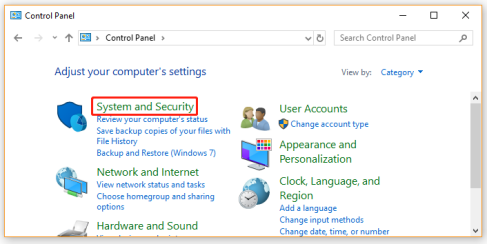
Step 1. Press "Win + X" and select "Control Panel".
Step 2. Change the View by type to Category and go to "System and Security" and then click on "BitLocker Drive Encryption".
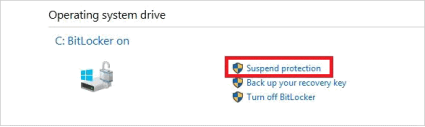
Step 3. In the BitLocker Drive Encryption window, find the drive you want to suspend. Click on "Suspend Protection" next to the drive you want to suspend.
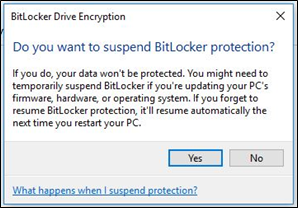
Step 4. A confirmation dialog will appear. Click "Yes" to suspend BitLocker. The BitLocker status for the drive should now show as "Protection suspended".
Way 2. Suspend BitLocker from Command Prompt
Also, you can run the manage-bde commands in Command Prompt to suspend the encryption protection on the hard drive. Follow the steps given below to see how to turn off BitLocker temporarily.
Note: Always exercise caution when using command-line tools, especially with administrative privileges, and make sure you have a backup of your important data before making changes to BitLocker settings.
Step 1. Right-click on the Start button and select "Command Prompt (Admin)".
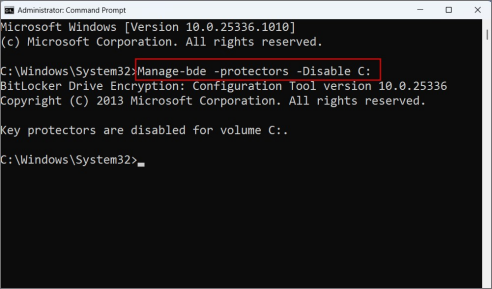
Step 2. To suspend BitLocker, use the following command:
manage-bde -protectors -disable X:
Replace X with the letter of the drive you want to suspend (e.g., C:).
Step 3. You can check the status using the following command:
manage-bde -status
Verify that the protection status for the drive shows as "Protection is disabled".
Way 3. Suspend BitLocker using Powershell
In addition, you can use the suspend BitLocker command line in Powershell. Here’s how to perform Suspend protection using Powershell command.
Step 1. Right-click the Start menu select Windows PowerShell (Admin) and click on Yes to run the program.
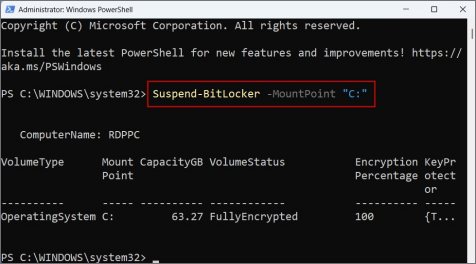
Step 2. Use the following PowerShell command to suspend BitLocker for the target drive.
Suspend-BitLocker -MountPoint "X:"
If you want to suspend the C drive, type: Suspend-BitLocker -MountPoint "C:"
Step 3. To check the status, you can use: Get-BitLockerVolume. Ensure that the "ProtectionStatus" is set to "ProtectionSuspended".
How to permanently turn off BitLocker on Windows 11/10?
If you don’t need to encrypt a drive anymore, you can remove BitLocker from it permanently. There are also three ways to accomplish this.
Way 1. Turn off BitLocker encryption via Control Panel
Same as suspending BitLocker, you can operate from the Control Panel, here are the steps:
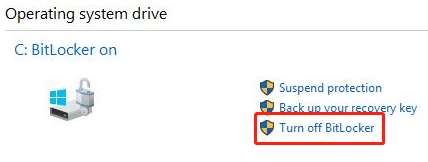
Step 1. Open Control Panel and go to "System and Security" > "BitLocker Drive Encryption".
Step 2. Click Turn off BitLocker on the drive that you want to decrypt.
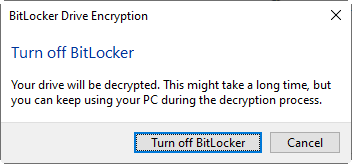
Step 3. Confirm whether you want to decrypt your drive, then click “Yes” to start the process, and your drive will not be protected anymore.
Way 2. Turn off BitLocker from Command Prompt
To turn off BitLocker using the command line, you can also use the "manage-bde" command in Command Prompt. But there is a little difference from suspending commands. Here's a step-by-step guide on how to turn off BitLocker using the command line:
Step 1. Run command prompt as an administrator.
Step 2. If your is locked, you need to type the following command to unlock it:
manage-bde -unlock F: -RecoveryPassword YOUR-BITLOCKER-RECOVERY-KEY .
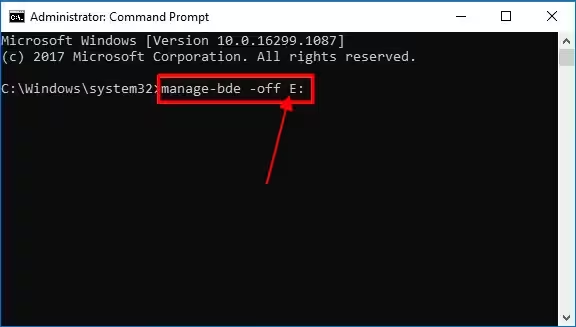
Step 3. Then, use the following command to turn off BitLocker for a specific drive:
manage-bde -off X:
Replace X with the letter of the drive you want to decrypt (e.g., E:).
Here's an example: manage-bde -off E:
Step 4. The command will initiate the decryption process. Please note that this process may take some time, especially if you have a large drive or a significant amount of data. Wait for it to complete.
Way 3. Turn off BitLocker using Powershell
If you prefer using PowerShell, you can use the Disable-BitLocker cmdlet. Let’s see the steps:
Step 1. Right-click on the Start button and select "Windows PowerShell (Admin)".
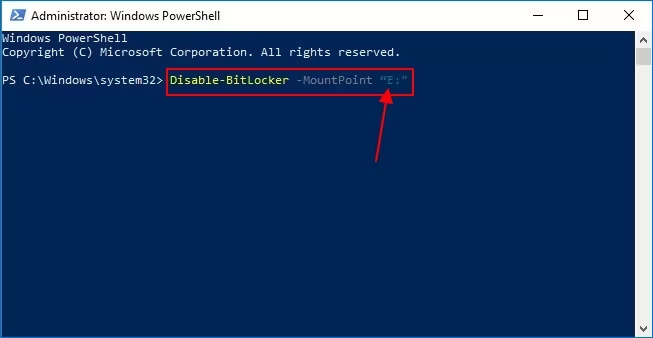
Step 2. Use the following PowerShell command:
Disable-BitLocker -MountPoint "X:"
Replace X with the letter of the drive you want to decrypt (e.g., E).
Step 3. Allow some time for the decryption process to finish. After completing these steps, BitLocker protection will be turned off, and the drive will be decrypted.
Turn off BitLocker option not available - What should do?
As you can see, no matter whether you want to temporarily or permanently decrypt your drive data, there are several different methods for you to choose from. However, some users are always complaining that they can’t find the Turn off BitLocker option on the panel or meet BitLocker decryption stuck issues. Here is a user case from the Microsoft forum:
“I recently upgraded from Windows 8.1 Enterprise to Windows 10 Home by doing a clean install. By doing this, I thought that the BitLocker would be removed, but I was wrong. When I go into the control panel and Settings, there is no option to turn off BitLocker. Is there a way to do this in CMD or PowerShell?”
Why does the above situation occur? This is because BitLocker doesn‘t support Windows 10 or 11 Home Edition. If you are a Windows Home user who wants to disable BitLocker for your drive, you can only turn to a third-party Windows Home BitLocker software like AOMEI Partition Assistant Professional.
This all-in-one encryption program works on all editions of Windows 11/10/8/7 systems, allowing you to manage your BitLocker drive at ease, including drive encryption/decryption, recovery key backup, password changing, and drive locking/unlocking.
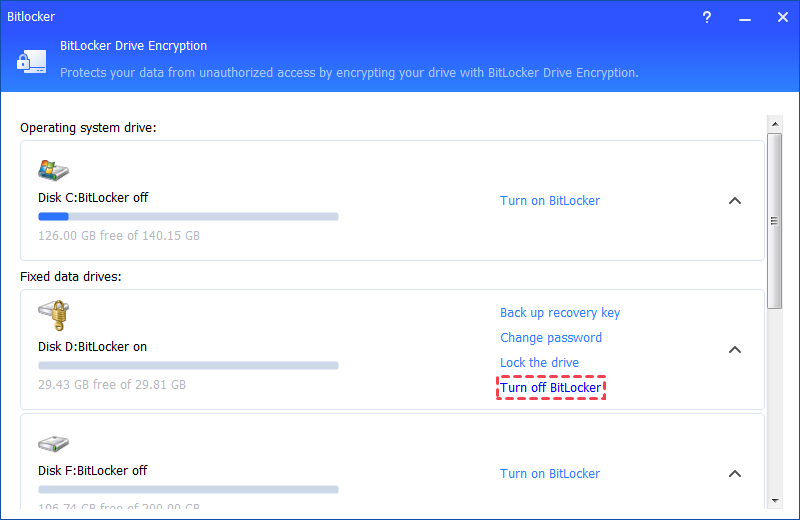
You can follow the below steps to see how to turn off BitLocker Windows 11/10/8/7 easily and quickly:
Step 1. Find the encrypted drive you would like to decrypt and click the option "Turn off BitLocker".
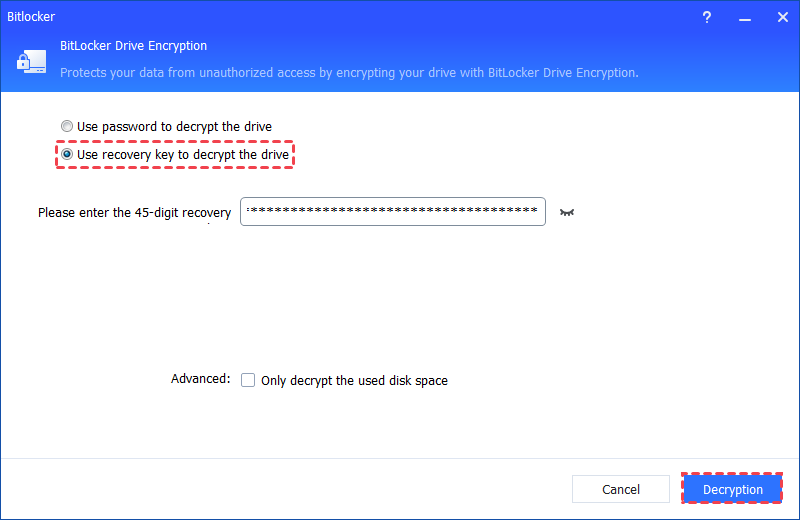
Step 2. There are 2 ways available to decrypt the drive: Use password to decrypt the drive and Use recovery key to decrypt the drive. Please select either way as per your need.
If you select "Use a password to decrypt the drive", please enter the right password and then click the "Decrypt" button.
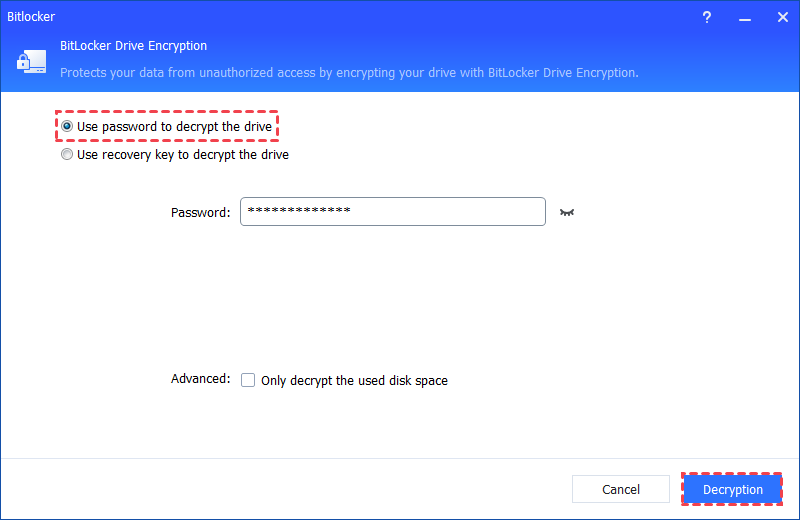
If you select "Use a recovery key to decrypt the drive", please enter the recovery key saved in the TXT file or printed when you encrypted the drive, and then click the "Decrypt" button.
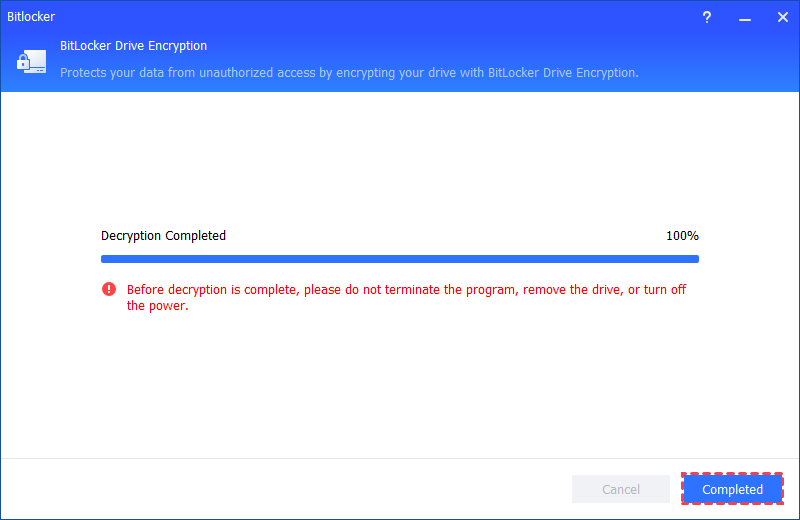
Step 3. Then, the decryption process will start and it might take time to decrypt the drive. Once the decryption process is finished, please click "Completed". Finally, the BitLocker on the drive is decrypted.
Further reading - 1: How to turn on BitLocker after turning it off
After decrypting your drive, all the data will be exposed. If you want to protect your files using encryption again, please follow the below instructions:
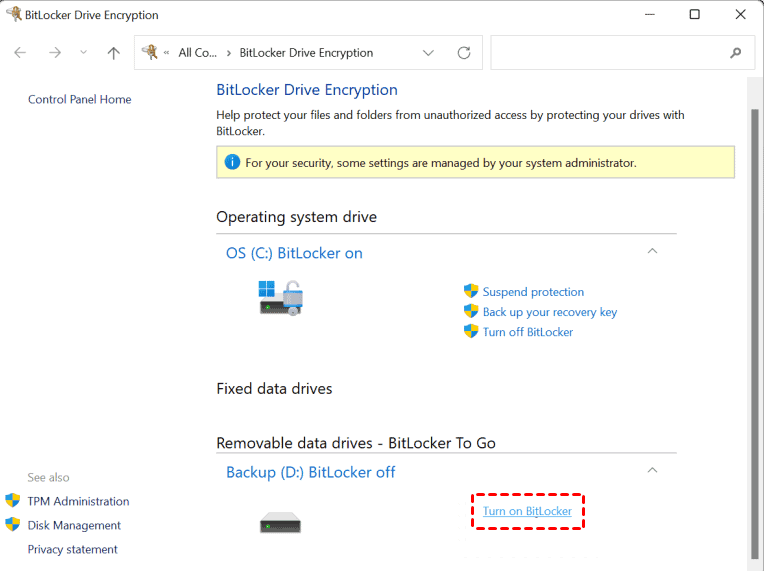
Step 1. Go to "Control Panel" > "System and Security" > "BitLocker Drive Encryption".
Step 2. Click on the drive you want to encrypt, and then click on "Turn on BitLocker".
Step 3. Choose how you want to unlock this drive: password or smart card. Here we select a password option, enter your password twice, and click "Next" to continue.

Step 4. Choose where to save the recovery key, and click "Next".
Save to your Microsoft account.
Save to a file.
Print the recovery key.
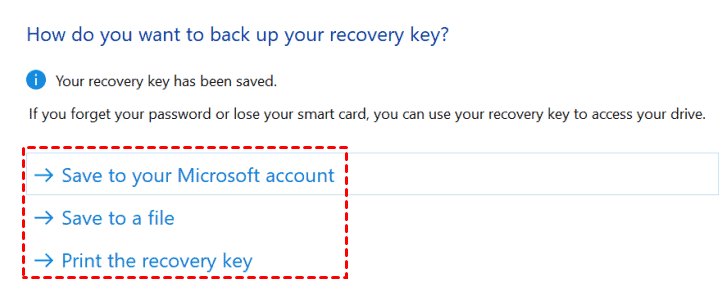
(You can save the recovery key to your OneDrive account and retrieve it later.)
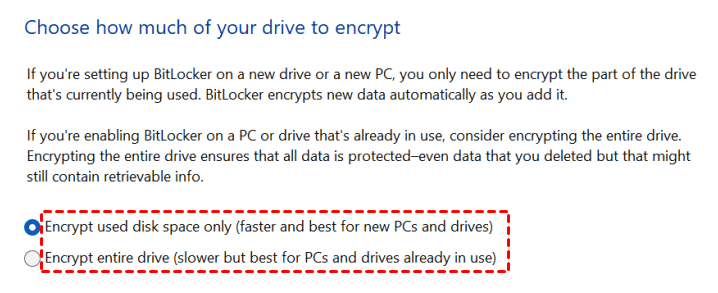
Step 5. Choose how much of your drive space you want to encrypt. There are two options:
Encrypt used disk space only (faster and best for new PCs and drives.)
Encrypt the entire drive (slower but best for PCs and drives already in use.)
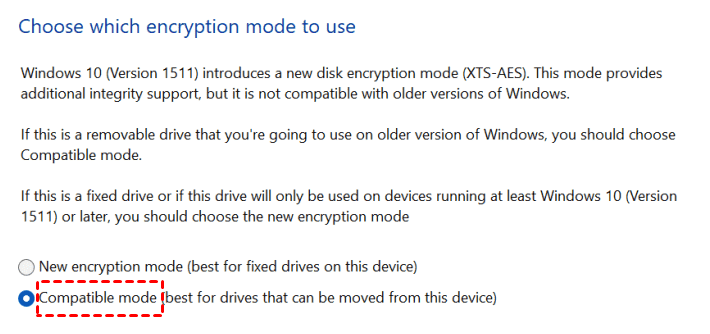
Step 4. Choose a preferred encryption mode: "New encryption mode" or "Compatible mode". Here we select "Compatible mode". Click "Next" to continue.
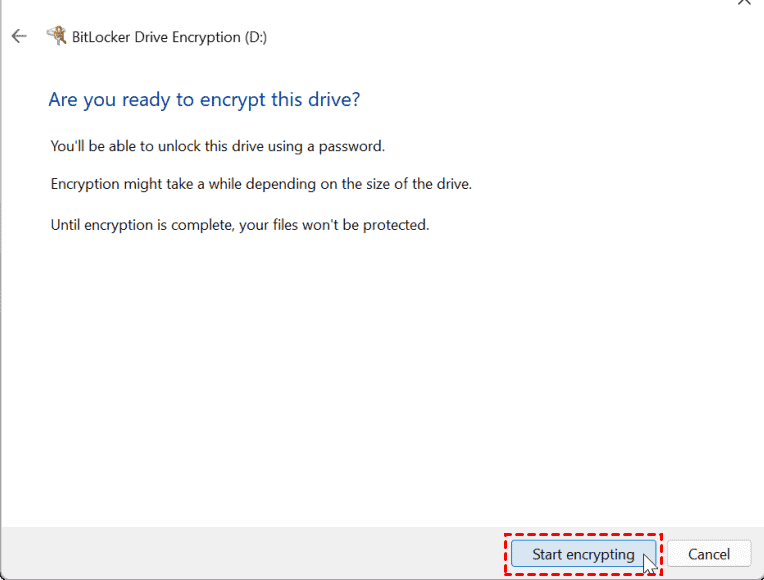
Step 5. Confirm that you are ready to encrypt the device. Click on "Start encrypting" to continue.
Step 6. Once the download is completed, restart your device. Then, BitLocker will be enabled on your drive.
Further reading - 2: How to disable BitLocker service
Apart from using Turn off BitLocker to decrypt the drive, there is also a once and for all solution, which is to disable BitLocker encryption. After disabling, all encrypted data drives on the computer will be mounted with read and write access, so that you don’t need to turn BitLocker off for specific drives one by one.
Here are two ways to make it:
Option 1. Using Local Services
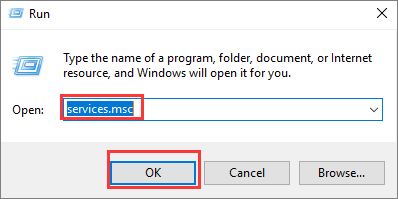
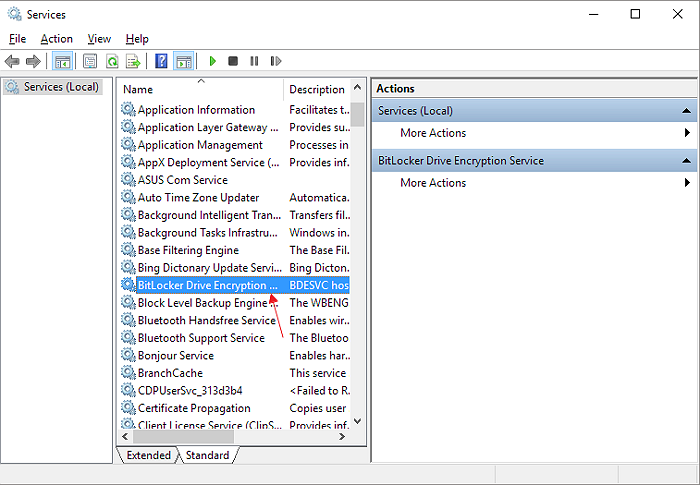
Step 1. Press the Windows + R keys at the same time to open Run dialog. Type services.msc and press "Enter" or click on "OK" to continue.
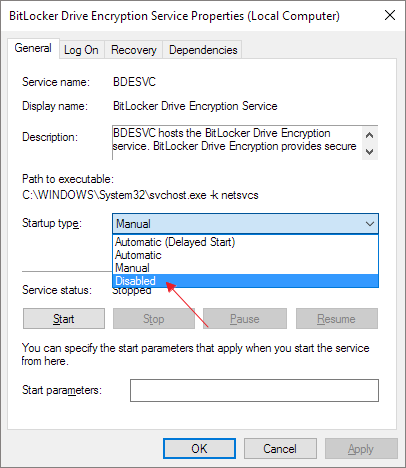
Step 2. When the Services window opens, locate and double-click on "BitLocker Drive Encryption Service".
Step 3. Set the Startup type to Disabled and click on "Apply" and "OK" to save changes.
Option 2. Using Local Group Policy Editor
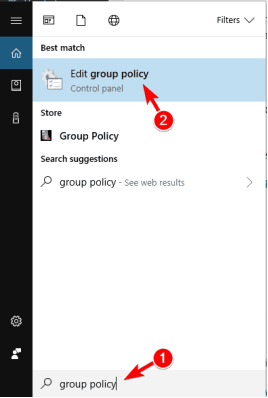
Step 1. Type Group Policy in the Search bar, then select "Edit Group Policy" from the list.
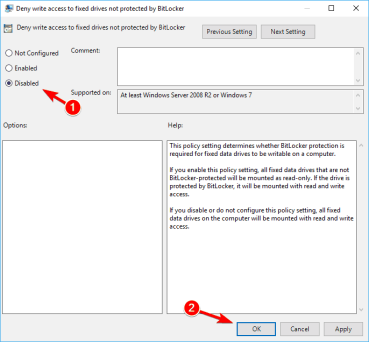
Step 2. From here, navigate using the left-hand side menu to Computer Configuration -> Administrative Templates -> Windows Components – > BitLocker Drive Encryption -> Fixed Data Drives and select the Deny write access to fixed drives not protected by BitLocker option and double click it.
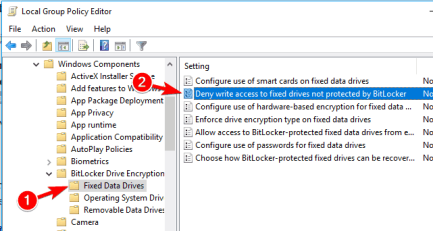
Step 3. Click Not Configured or Disabled, and click on "Apply" and "OK" to save changes.
FAQs
Is it OK to turn off BitLocker?
Yes, it is okay to turn off BitLocker, and there are different reasons why you might want to do so.
Is it safe to turn off BitLocker?
Yes, it is generally safe to turn off BitLocker, but it's important to have it done under appropriate circumstances and with proper considerations.
What happens if I turn off BitLocker?
If you turn off BitLocker, the encrypted data on your drive will be decrypted, and the drive will become accessible without the need for authentication.
How long does it take to turn off BitLocker?
The time it takes to turn off BitLocker can vary depending on a variety of factors, including the size of the drive, the amount of data stored on the drive, the performance of your computer hardware, and the encryption method used. Generally speaking, the process of turning off BitLocker is relatively quick, but for larger drives or systems with large amounts of data, the actual time can range from a few minutes to possibly longer.
Conclusion
That’s all about how to turn off BitLocker Windows 11/10. Whether you want to temporarily or permanently remove the encryption, you can always find the responding ways to get it done.
Besides, for those who have trouble turning off BitLocker or lack BitLocker features, we provide a great alternative named AOMEI Partition Assistant Professional that can decrypt your drive easily and quickly.
What’s more, more advanced features can be enjoyed in AOMEI software such as cloning disks as backup, recovering lost data, converting MBR to GPT without losing data, etc. If you are a Windows Server user, don’t hesitate to try the AOMEI Partition Assistant Server edition.

