How to Audit File or Folder Deletion in Windows Server?
Here is a detailed tutorial about Windows Server audit file delete. After auditing, you can view the information from the Event Viewer to figure out who deleted files in Windows Server. Also, you will learn how to protect your files better.
By Hedy / Updated on December 5, 2024
About Windows Server audit file delete
"On Windows Server 2003, is there a way to see if and when a file was deleted? Our web application let our users load Word documents into Server. However, we found that one Word file is missing, and would like to know if it was deleted or never existed."
File and folder deletion auditing is a vital part of protecting your data. With auditing, you can identify who creates, modifies, or deletes a specific file. If someone deletes files that contain sensitive information or personal data, your privacy will be on the brink of leakage and it could result in some unexpected disruption to your business.
Therefore, it's important to perform Windows audit file deletion. These days, auditing files gets much easier with Global Object Access auditing in Windows Server. Below is a stepwise tutorial about Windows Server audit file delete.
How to audit deleted files in Windows Server?
To make the auditing process clearer, the whole operation is divided into the three following parts:
Part 1. Enable "Audit Object Access"
By default, Audit Object Access is not enabled on Windows Server. You should enable and configure audit settings using Local Group Policy Editor. Here are the steps:
Step 1. Open "Group Policy Management" on the primary domain controller.
Step 2. In Group Policy Management, expand your AD forest, Domains, and your domain.
Step 3. Right-click the "Default Domain Policy GPO", and select "Edit" from the menu.
Step 4. Go to "Computer Configuration" > "Windows Settings" > "Security Settings" > "Local Policies" > "Audit Policy" > "Audit object Access".
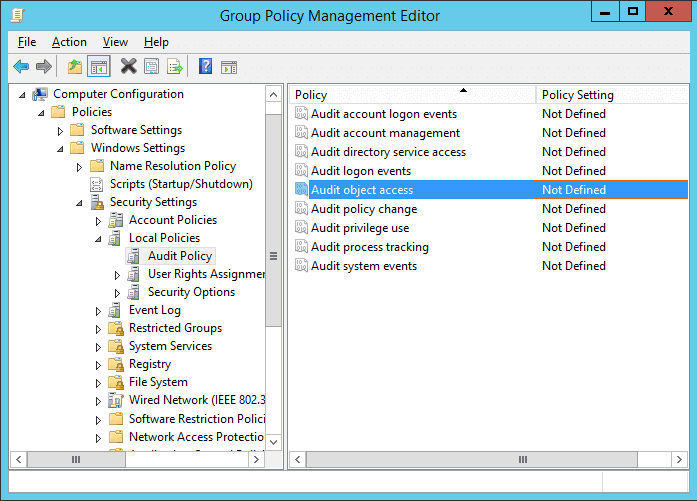
Step 5. Double-click this policy to open "Properties" window, click the "Define these policy settings" checkbox, then click "Success" and "Failure" under "Audit these attempts". Click "Apply" and "OK".

Step 6. Finally, close "Group Policy Management Editor" and "Group Policy Management Console".
Part 2. Set auditing of files and folders
Enabling the Audit Object Access setting is not enough to get the Windows server 2008 r2 audit file delete working. You also need to configure the auditing of each object you want to audit. Perform the following steps to set it.
Step 1. Run File Explorer and select the folder that you want to audit. Right-click it and select "Properties". Go to the "Security" tab.
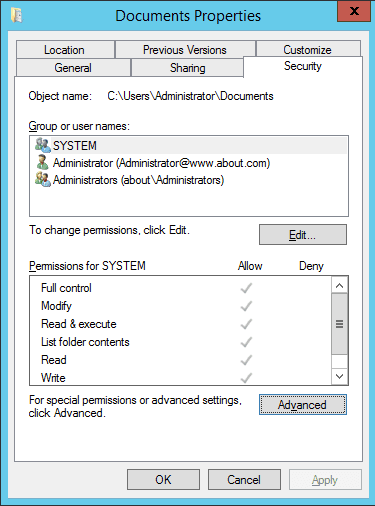
Step 2. Click "Advanced" to access "Advanced Security Settings", and go to the "Auditing" tab. Click "Add" to add a new entry.
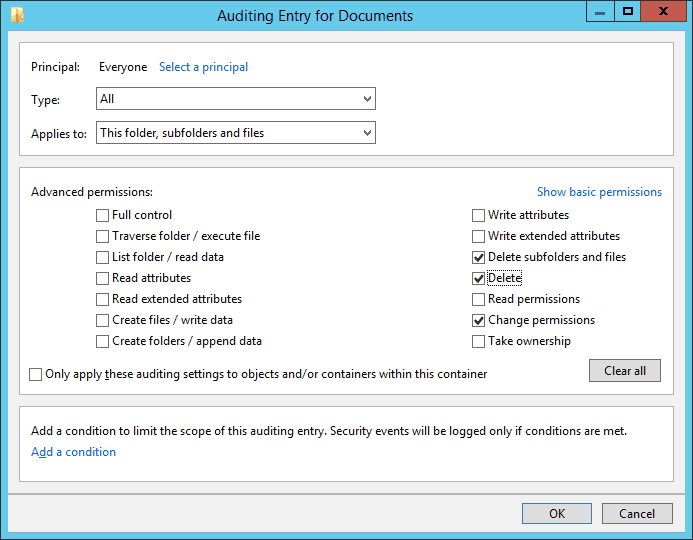
Step 3. You will be brought to the "Auditing Entry" window where you'll make the following selections:
❉ Principal: Everyone
❉ Type: All
❉ Applies to: This folder, subfolders, and files.
Step 4. Then select "Advanced Permissions" to view all the permissions.
Step 5. For tracking file and folder deletion, you will have to select the "Delete" and "Delete subfolders and files" options.
Step 6. Click "Apply" and "OK" to move on.
Part 3. View deleted files and folders in Event Viewer
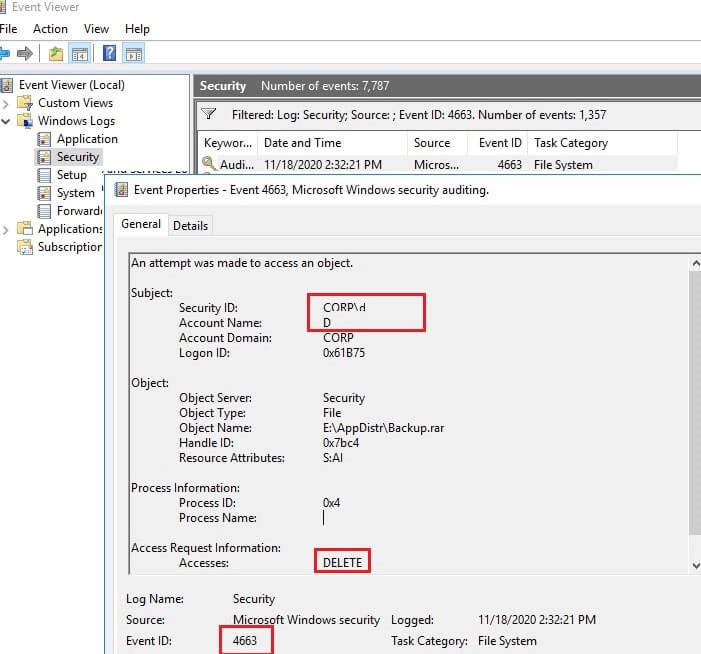
Step 1. Press "Window + R" to open Run box and input "eventvwr.msc" to open Windows Event Viewer and go to "Windows Logs" > "Security". Enable event log filter by the Event ID 4663.
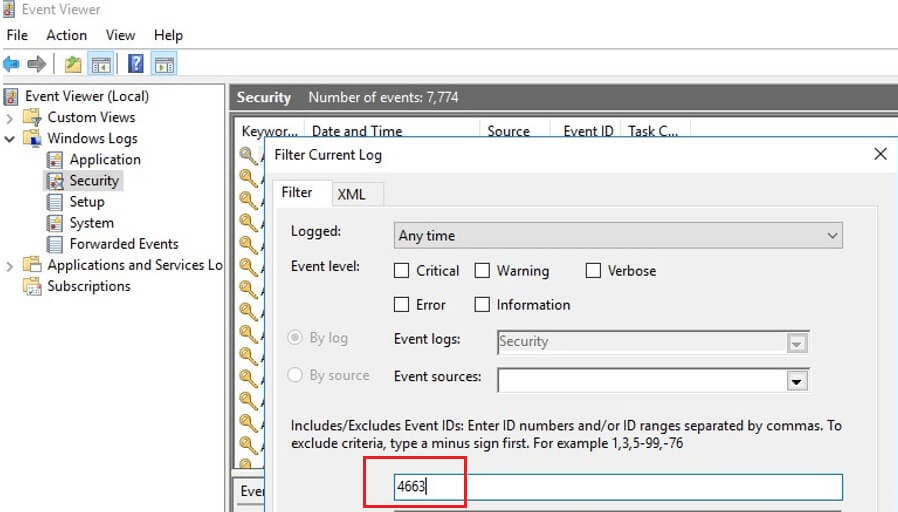
Step 2. As you can see, it contains all detailed information about the auditing files, including the name of the deleted file, the account of the user who deleted the file, and when it happened.
Bonus tip: Make a backup to protect your files
As you can see, it's a little complicated for Windows Server audit file delete. For the sake of preventing your files from being deleted accidentally or deleted by some bad guys, you are suggested to make a duplicate of important files. The easiest way is to clone the drive using a professional disk cloning tool.
AOMEI Partition Assistant Server is such a thing that can meet your needs. It allows you to clone disk to disk on Windows Server 2025/2022/2019/2016/2012 (R2)/2008 (R2) easily and safely. After cloning, you will get a copy of the original disk, which helps you restore the deleted files as before.
You can click the following button to download the Server Demo version to have a try.
Note: If you don't want to copy the entire hard drive, you can clone a single partition or migrate only OS to another drive to keep your data and system safe.
Step 1. Install and launch AOMEI Partition Assistant, click "Clone" in the main interface and select "Clone Disk".

Step 2. Choose the hard disk that you need to clone as the source disk and click "Next".

Step 3. Select the destination disk to store the data on the source disk, and then click "Next".

Step 4. Then, you can check the source and destination disk in the next window or change to “Sector to Sector clone”, and click the "Confirm" button to continue if there is no problem.

Here, you can also click the "Settings" button to adjust the partition size on the destination disk or tick "4k alignment" to improve the reading and writing speed of SSD if the target disk is an SSD drive.

Step 5. At last, click "Apply" and "Proceed" in the main interface to start cloning the hard drive.

Conclusion
If you want to know how to perform Windows Server audit file delete, read this article carefully. Due to the importance of files for a computer, it's suggested to make a full backup of them. However, there are still junk files that are not useful for the system but affect its performance. For these files, you'd better delete them regularly to keep your PC in a good state.

