How to Use Create Volume Wizard?
“Create Volume Wizard” function is contained in Dynamic Disk Manager. With this function you can create simple, spanned, stripped, mirrored and RAID-5 volumes.
Sometimes, there might be remaining unallocated space on dynamic disks. We can make full use of these spaces to create more volumes for better dynamic disk maintenance. Next, we’ll talk about how to use “Create Volume Wizard” to create dynamic volumes.
Note: If you have only one dynamic disk, you can create only simple volumes. To create spanned volumes, there are must be unallocated space on two or more disks, the unallocated space can be different sizes. Stripped volumes are created from equally sized, unallocated areas on two or more physical disks. Implementing a RAID-5 volume requires a minimum of three disks.
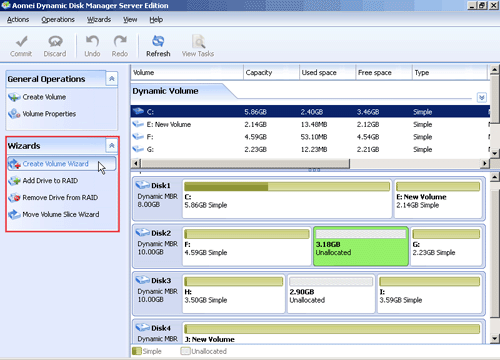
Step 1. Perform AOMEI Partition Assistant Server. Right click the target drive and select the “Dynamic Disk Manager” on the right navigate pane. When the new window shows up, please click “Create Volume Wizard” on the left side.
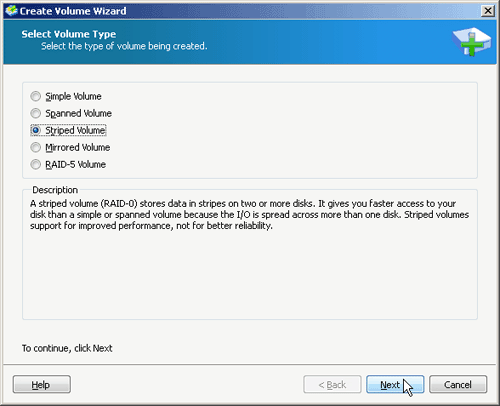
Step 2: In the pop-up window, there are five volume types for you to choose. Here, I’d like to create stripped volume, and then click “Next”.
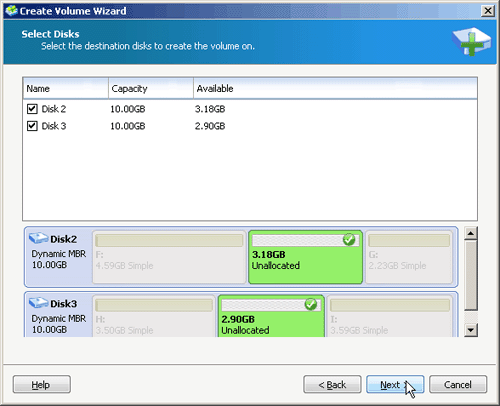
Step 3: Then, select the destination disks to create the volume on and click “Next” to continue.
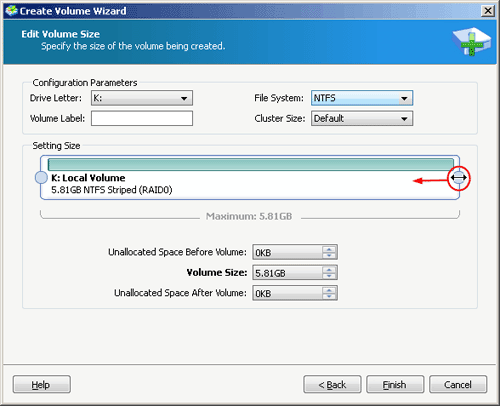
Step 4: In the dialog box that pop-up, you can choose the drive letter, file system, volume label and cluster size of the volume. Besides, you can also specify the size of the volume being created by dragging the slider leftwards.
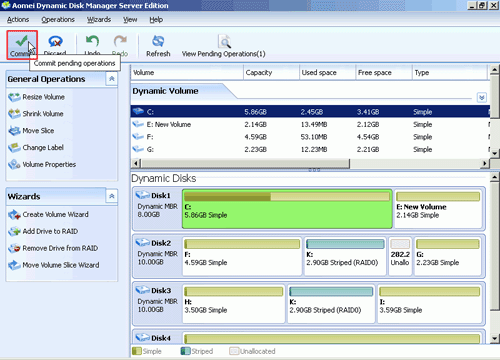
Step 5: Finally, click “Commit” to perform.
After the above instructions, you may have a preliminary understanding of how to use “Create Volume Wizard” to create different dynamic volumes. Why not download Dynamic Disk Manager, and try its excellent features.

