How to Resize Partition via PowerShell Easily and Safely?
With increasing popularity among computer users, PowerShell is used in many cases. This article will show you how to resize partition via PowerShell detailedly.
By AOMEI / Updated on November 7, 2022
Quick Navigation:
When to resize partition via PowerShell?
During the usage of our computer, there is certainly a time when you find that a partition is running out of space while other partitions have much space left. In this case, what you can do is to resize partition via PowerShell or other utilities. By resizing partition, you can shrink large partitions to create unallocated space and extend small ones with the space. As a result, you can make full use of each partition. What’s more, you can increase memory of C drive by resizing partition and improve your computer’s reading and writing speed consequently. Then, how to resize partition via PowerShell? Let’s continue.
How to resize partition via PowerShell in Windows 11/10/8/7?
Now I’ll show you how to use PowerShell to resize partition in Windows 7 in detail. These steps apply to Windows 11, 10 and 8 as well.
To extend partition via PowerShell
1. Click on the “Start” icon and type “power”. Right-click “Windows PowerShell” and select “Run as administrator”.
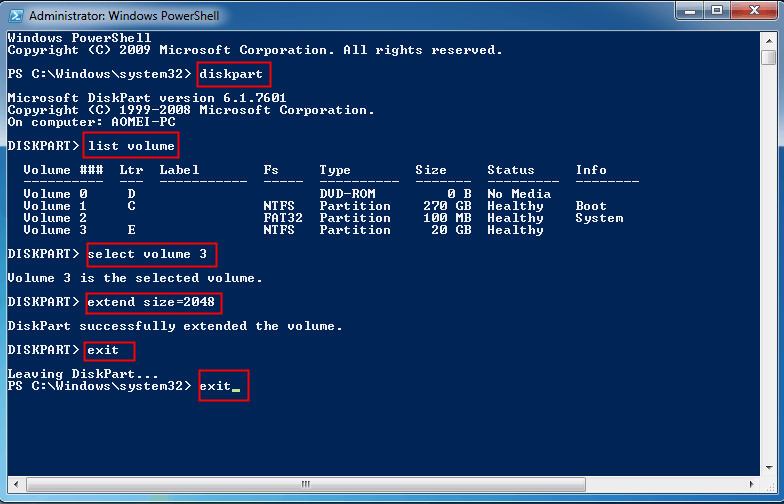
2. Type diskpart and press Enter.
3. Type list volume and press Enter.
4. Type select volume # (ex: Volume 3) to select the partition that you want to extend and press Enter.
5. Type extend size=# (ex: size=2048) to extend the partition by size in megabytes (MB) and press Enter.
6. Double type exit and press Enter to exit Diskpart and PowerShell continuously.
Tips:
-
You may fail to extend the partition if there is no contiguous unallocated space on the disk.
-
If you do not specify a size, the partition will be extended to take up all the contiguous unallocated space.
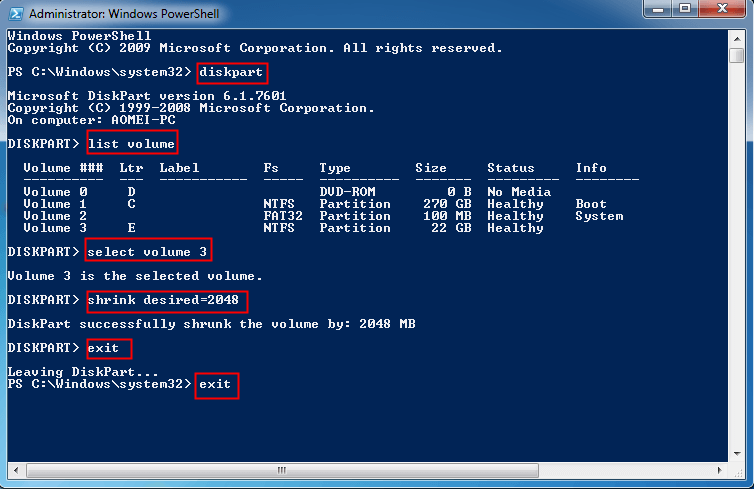
To shrink partition via PowerShell
It’s similar to extending partition via PowerShell. Just change the fifth step mentioned above to this:
Type shrink desired=# (ex: desired=2048) to shrink the partition by size in megabytes (MB) and press Enter.
Tips:
-
You may fail to shrink the partition if there are unmovable files on the disk. You can only shrink the partition to the unmovable file point.
-
If you do not specify a desired size, the command will reclaim the maximum amount of space possible.
Get an alternative to PowerShell for free
You see the limitations of resizing partition via PowerShell—you have to make sure there is contiguous unallocated space right behind the partition to be extended or move the unmovable files to anther disk before you shrink a partition. Here is a wonderful freeware AOMEI Partition Assistant Standard which can be used as an alternative. It can be operated with mouse-clicking and it’s totally free. You can easily resize partition with AOMEI Partition Assistant following the guidance below:
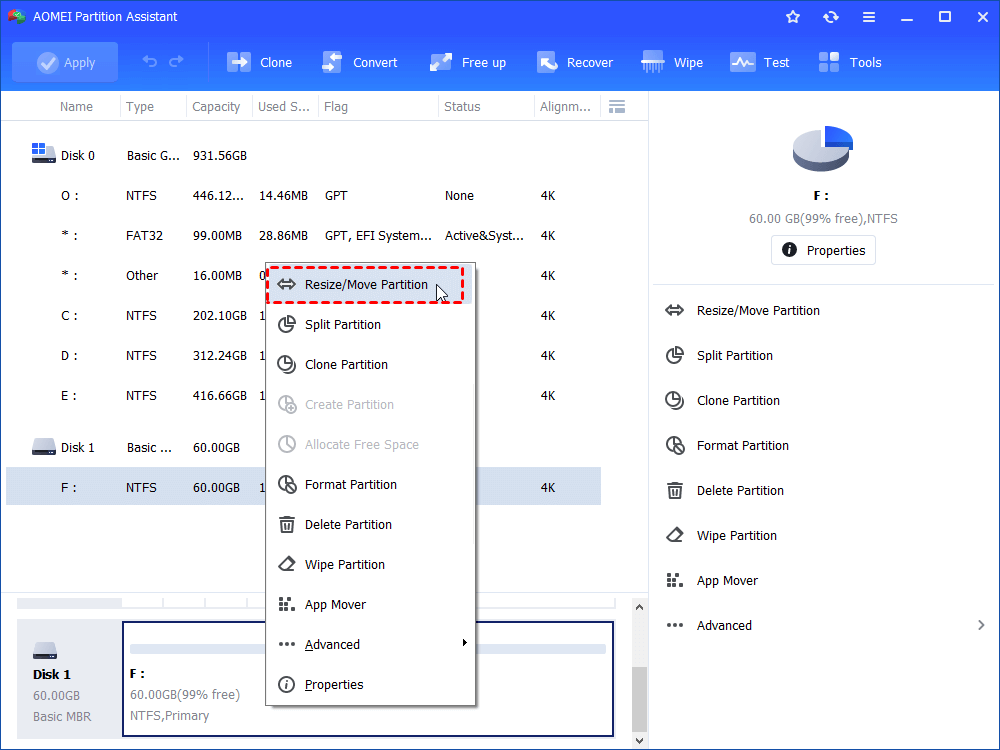
Step 1. Download, install and launch AOMEI Partition Assistant. Right-click the partition you want to resize and select “Resize Partition”.
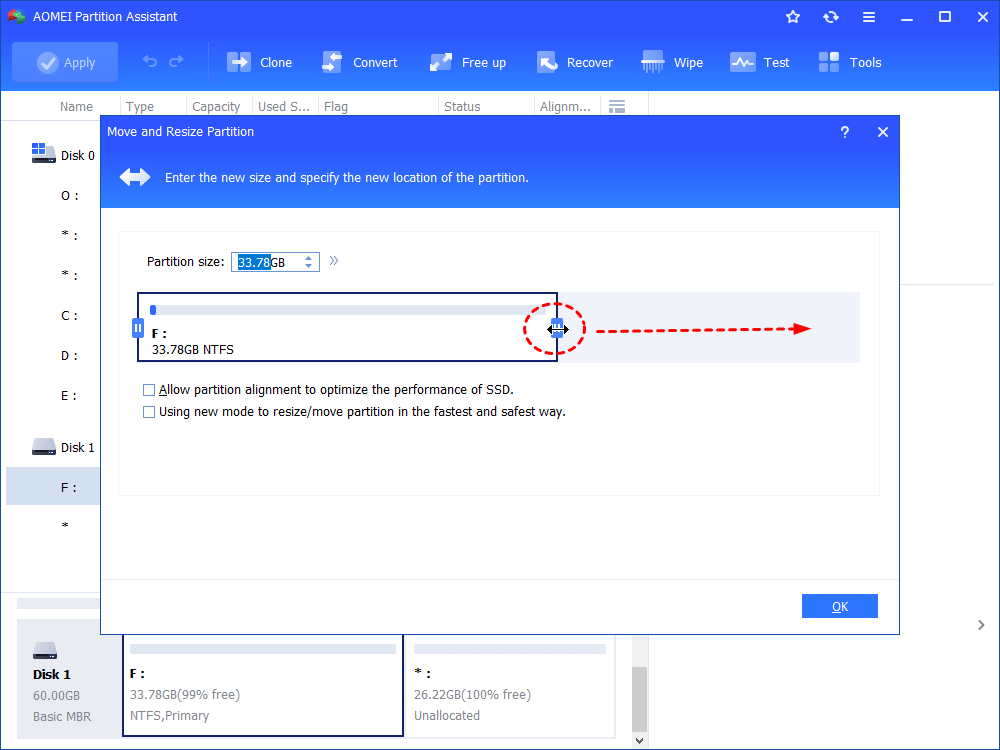
Step 2. In the pop-up window, put the mouse pointer on the border of the partition and drag the border. Making the partition bar longer means to extend the partition whereas making it shorter means to shrink the partition.

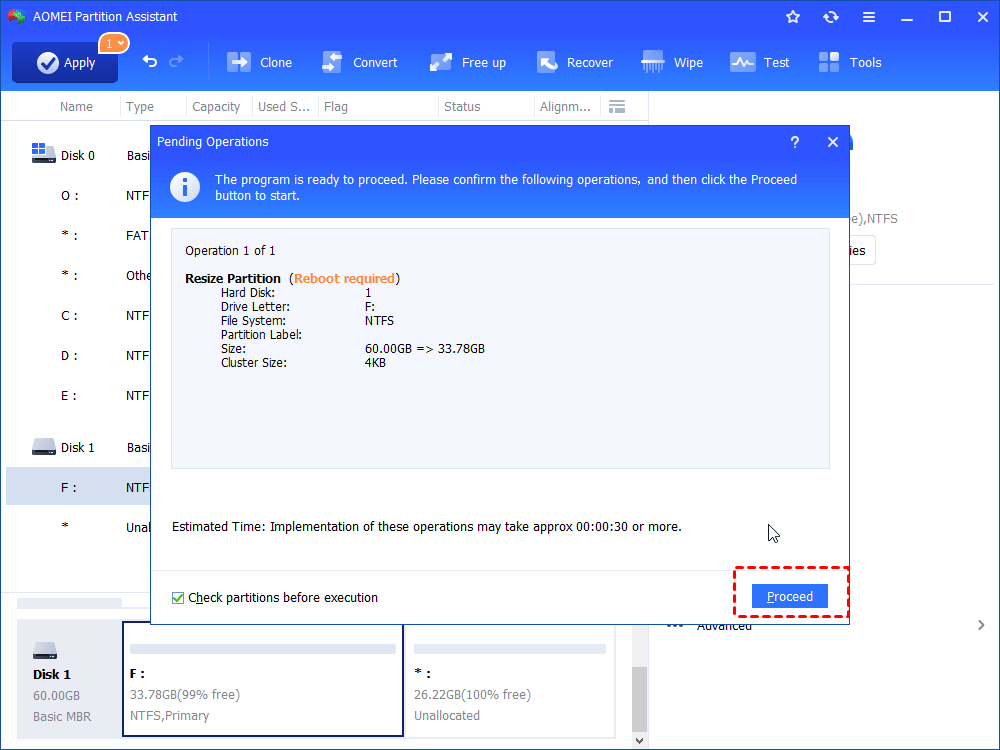
Step 3. Click “Apply” to confirm “Pending Operations”, and then click “Proceed” to execute the operation.
Tips:
-
AOMEI Partition Assistant helps you extend partition(including the BitLocker partition) as long as there is unallocated space on the same disk, whether it’s right behind the partition or not. If there is no unallocated space, you may create unallocated space manually.
-
AOMEI Partition Assistant also helps you shrink partition with unmovable files successfully.
-
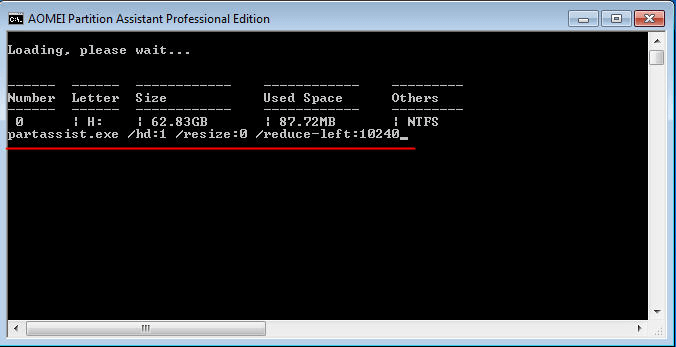
You may upgrade to AOMEI Partition Assistant Professional to enjoy more powerful features like quick partition, converting system disk between MBR and GPT partition styles and so on. You can also use AOMEI Partition Assistant Professional command lines to extend volume or shrink volume:
Conclusion
When you consider resizing partition, PowerShell is a good choice. However, you may get upset when it fails sometimes. At this time, AOMEI Partition Assistant can cheer you up with more advanced features. If you are a server user, please turn to AOMEI Partition Assistant Server.

