How to Clone Windows Server 2012 (R2) to SSD at Ease?
To clone Windows Server 2012 (R2) to SSD without losing data, you can turn to disk cloning software, AOMEI Partition Assistant Server.
By AOMEI / Updated on December 3, 2024
Why clone Windows Server 2012 (R2) to SSD?
Compared with HDD, SSD performers better in many aspects. Employing memory chips to store data, SSD owns faster read and write speed; without moving parts, it decreases the risk of data loss.
Therefore, many Windows Server 2012 (R2) users are willing to upgrade HDD to SSD to enjoy its advantages. Nevertheless, it is a time-consuming and cumbersome task to reinstall Windows Server 2012 (R2) and other applications on a new SSD. At this time, it is a wise choice to duplicate Windows Server 2012 (R2) to SSD.
How to clone Windows Server 2012 (R2) to SSD?
As Windows has no built-in tool to clone Windows Server 2012 (R2) to SSD, it is necessary to employ a reliable third-party disk cloning tool. AOMEI Partition Assistant Server is exactly what you need to achieve your goal.
It is able to clone the entire Windows Server 2012 (R2) hard drive to SSD or clone certain specific partitions to SSD. To retain Windows Server 2012 (R2) on your new SSD without reinstallation, you can choose to clone all partitions or migrate only OS-related partitions to SSD. What’s more, it allows you to make a 4K alignment for SSD to improve its performance during the cloning process.
✔ Clone entire Windows Server 2012 (R2) hard drive to SSD
If you need to reserve the operating system and all other data on disk, you can duplicate the whole disk to SSD on Windows Server 2012 (R2), which can migrate all the content on the hard drive to SSD without losing data.
◤ Prepare proper SSD and connect it to your machine (The capacity of SSD should not be smaller than the used space of source hard drive).
◤ Defrag your hard drive if it is HDD to decrease the time spent on cloning.
◤ Check the error of the partition on the hard drive and fix it if there is an error on the hard drive.
Step 1. Install and launch AOMEI Partition Assistant, click "Clone" in the main interface and select "Clone Disk".

Step 2. Choose the hard disk that you need to clone as the source disk and click "Next".

Step 3. Select the destination disk to store the data on the source disk, and then click "Next".

Step 4. Then, you can check the source and destination disk in the next window or change to “Sector to Sector clone”, and click the "Confirm" button to continue if there is no problem.

Here, you can also click the "Settings" button to adjust the partition size on the destination disk or tick "4k alignment" to improve the reading and writing speed of SSD if the target disk is an SSD drive.

Step 5. At last, click "Apply" and "Proceed" in the main interface to start cloning the hard drive.

✔ Migrate OS to SSD on Windows Server 2012 (R2)
When you need to keep Windows Server 2012 (R2) on SSD and don’t care about other applications on the hard drive, you can migrate only OS-related partitions to SSD rather than the entire hard drive on Windows Server 2012 (R2) via AOMEI Partition Assistant Server. Now, let’s see how it works.
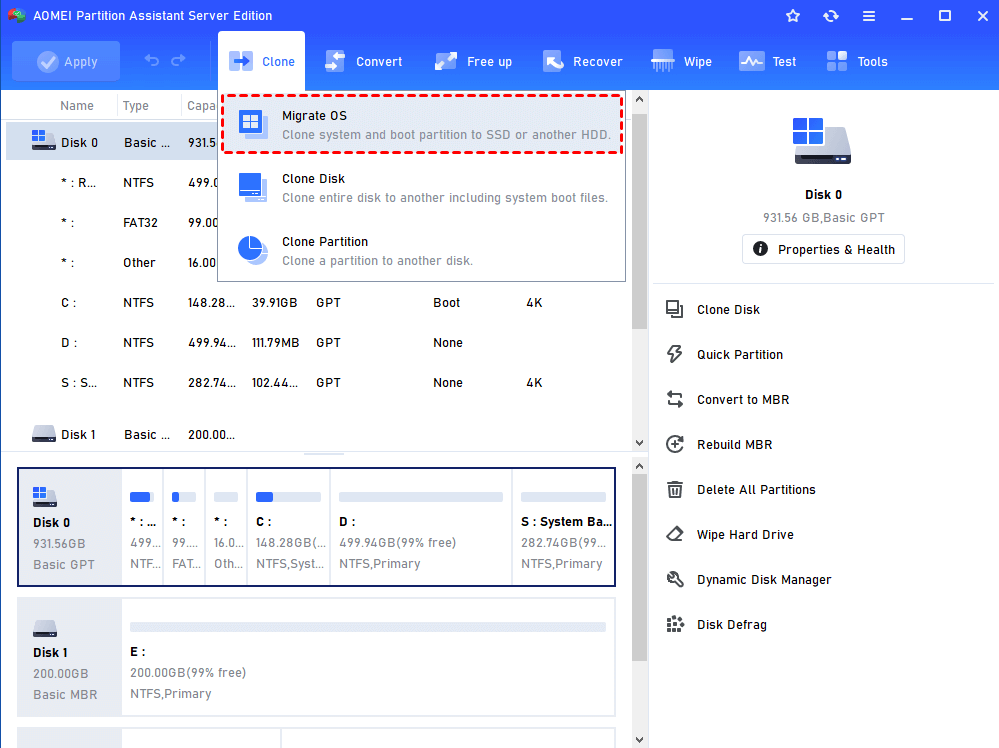
Step 1. Run AOMEI Partition Assistant Server, click “Clone” in the top toolbar, and choose Migrate OS to SSD> Next.
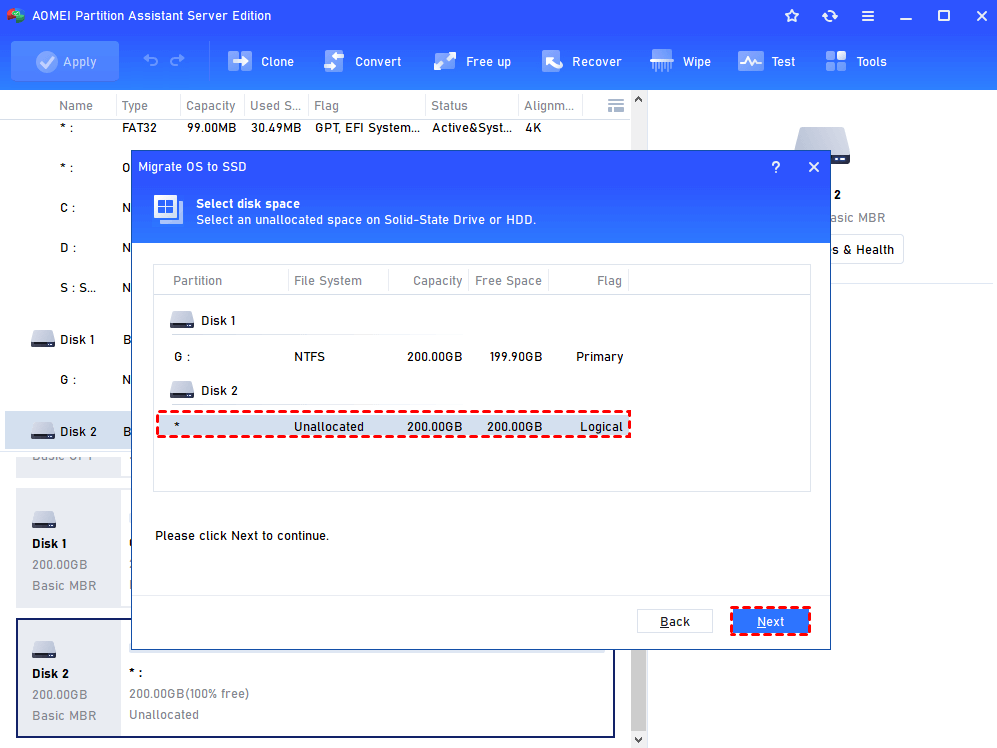
Step 2. Choose an unallocated space on the destination SSD. Then, click the Next button.
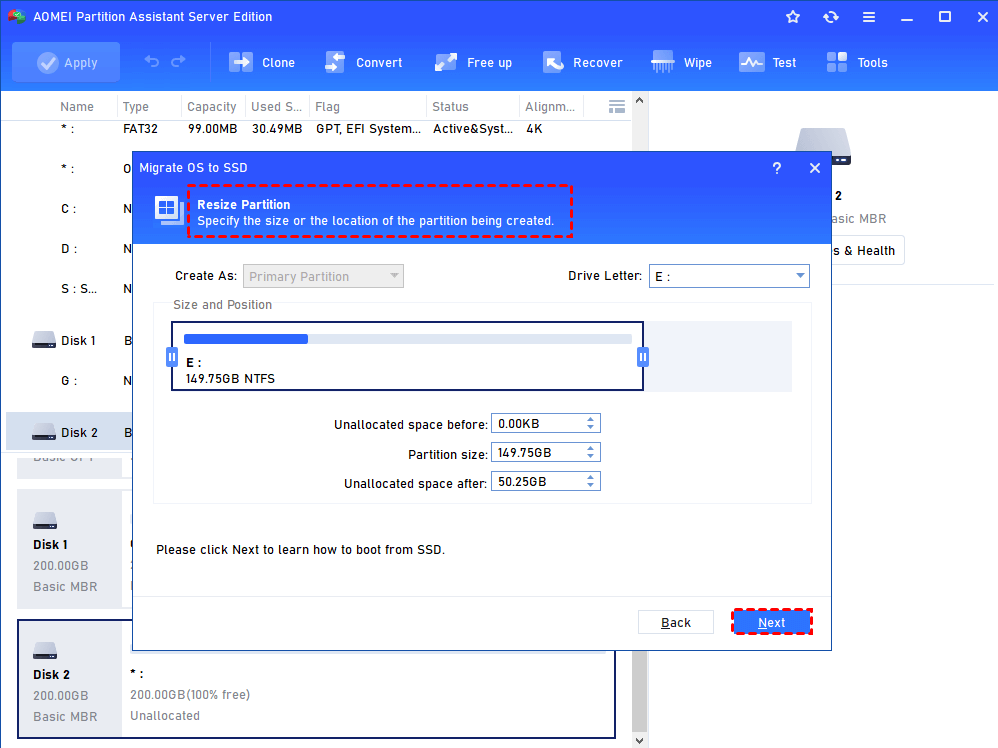
Step 3. Here you can resize partition size through the drag slider and click Next.
Remember the Note about how to boot OS from SSD or HDD and click Finish.
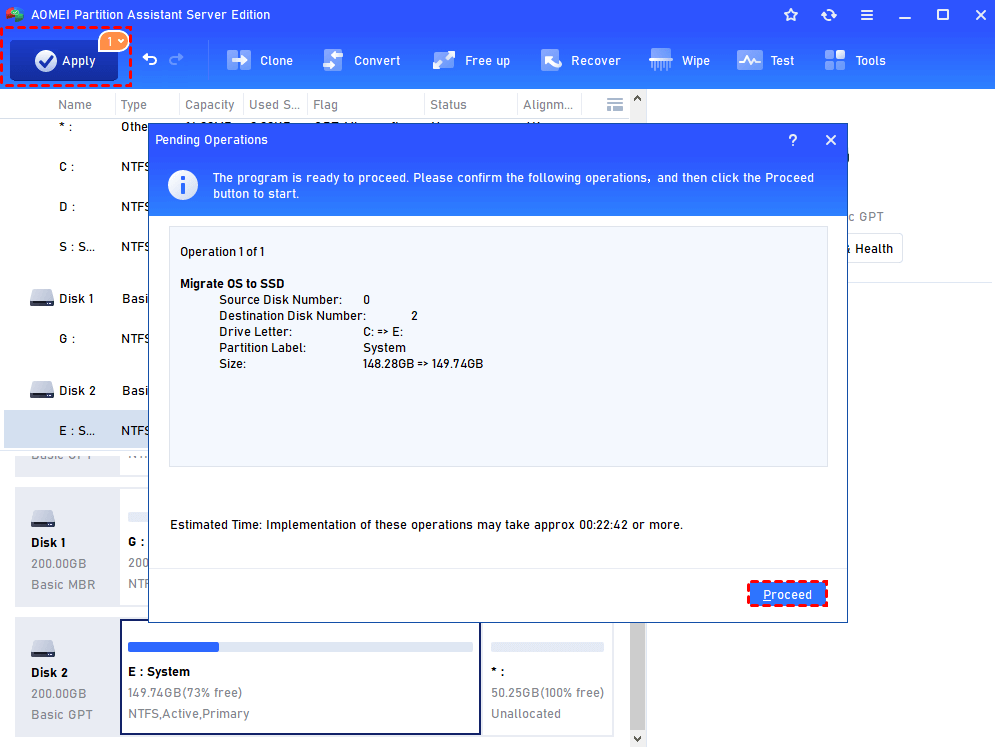
Step 4. Confirm the pending operating and click Apply to implement the task.
- ★Notices:
- A reboot is required as the operations (clone Windows Server 2012 (R2) hard drive to SSD and migrate OS to SSD on Windows Server 2012(R2)) involve system partition and will be performed under PreOS Mode.
- When the system is unable to boot from SSD after cloning or migrating, you can disconnect the source disk or exchange the position of the destination disk and source disk. Then, boot the computer from SSD.
- When you migrate OS from MBR to GPT or GPT to MBR, you need to enter BIOS to change boot mode according to disk mode after implementing migrating.
Conclusion
It is obvious that AOMEI Partition Assistant Server helps you to clone Windows Server 2012 (R2S) to SSD quickly and securely. It manages to keep Windows Server 2012 (R2) to SSD through cloning the whole disk to SSD or migrating OS to SSD. You can apply one way according to your need.
With strong compatibility, AOMEI Partition Assistant also supports Windows Server 2025, 2022, 2019, 2016, 2012 (R2). It is not only cloning software for Windows Server but also a great partition tool that can manage your disk well. It allows you to extend the C drive without data loss, merge partitions, convert partition from NTFS to FAT32 without formatting, and more. All in all, with it, you can manage your disks and partitions easier.

