Free to Create Windows 10 to Go USB (All Win10 Versions Supported)
If you want to create Windows 10 to Go USB on Home/Enterprise/Education editions of Windows 10 but don’t know how to do it, don’t worry. In this tutorial, 2 simple and free ways will be given to show you how to create a bootable Windows 10 USB drive effortlessly.
By Hedy / Updated on May 23, 2025
Can Windows 10 be installed on a USB drive?
"When I work in my company, I use a Windows 10 based PC, and when I’m at home, the PC for personal use is in Windows 7. However, sometimes I need to work at home and Windows 7 makes it rather inconvenient. I learn from the Internet, I can create Windows to Go USB to solve my problem. However, I am only a computer novice and have still have no idea how to perform it even after searching for information on the internet. Can anybody help me?"
It's common to meet the same circumstances as the user above. Let’s take an example: You own a Windows 10-based computer where you work while the computer at your home is in Windows 7. Sometimes, you could work at home but the non-Windows 10 environment makes it literally hard for you to concentrate. In such a case, you may be wondering whether Windows 10 can be installed on a USB drive so that you can take it home and enjoy the Windows 10 system when working from home. Of course you can, this is what we call Windows to Go USB.
Why do we use Windows 10 to Go USB?
The factors responsible for creating a bootable Windows 10 USB drive can be concluded as:
★ It's more portable and handy. In the case described above, you can enjoy your familiar operating system environment via the tiny USB rather than carrying a huge laptop.
★ It's convenient and effective. No matter where you go, you can carry it with you and boot any computer as you like. This can prevent you from using public machines that don't have the applications you are used to.
★ It can protect your system safe. Windows 10 to go USB can be seen as a complete copy of your Windows 10 system. So you can take it as a backup in case of any system crashes or malware infection.
How to create Windows 10 to Go USB?
After seeing the overview of Windows 10 to Go, I believe you can’t wait to do it by yourself. Here, in the following contents, I introduced 2 ways to create Windows 10 to Go USB from ISO.
1. Use Windows inbuilt feature to create Win10 Enterprise/Education to Go
Windows To Go on Windows 10 is a tool by Microsoft that can help generate a bootable Windows 10 USB flash drive with the Enterprise and Education editions of Windows 10. Before we get started, there are 2 things you should be aware of:
a. Windows to Go on Windows 10 is supported only in Windows 10 Enterprise Edition and Education Edition.
b. You need a certified USB drive to use Windows 10 to Go and the drive should be larger than 32GB.
1. Download the Windows 10 ISO file from Microsoft and plug your USB drive to your Windows 10 PC.
2. Search “Windows to Go” in your Control Panel and click on it to proceed.
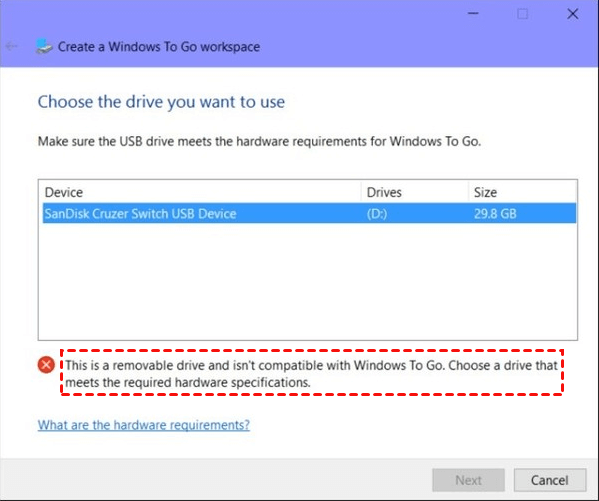
3. Then, in the popup window, all inserted USB drives will appear. Select the USB drive you wish to burn the ISO file to and click on “Next” to continue. (The USB drive should be certified. Otherwise, the “Next” button will be greyed out.)
4. Click on “Add search location” to search the Windows 10 installation ISO file and then, choose the mounted one.

5. Preset a Bitlocker passcode to encrypt your Windows 10 to go workplace.

Now, the burning process starts. Just wait several minutes before it’s completed.
2. Use freeware to create all Win10 editions to Go USB Drive
If you hope to try method 1, your USB must be certified for Windows 10 to Go and your OS edition should be Enterprise or Education. If these 2 requirements are not met, then, you’ll be failed. So, in this case, you’d better find a workaround.
Luckily, AOMEI Partition Assistant Standard can help you out no matter which edition your OS is and which type your USB drive is. As for the capacity size of the drive, 13GB is enough. What's more, Win to Go function is removed in Windows 11, if you want to use your own Windows 11 on other devices, you could create a Windows 11 to Go USB by yourself.
Next, let’s download the freeware first and learn how to create Windows 10 to Go USB with it.
Step 1. Install and launch AOMEI Partition Assistant Standard and plug your USB into your Windows 10-based computer.
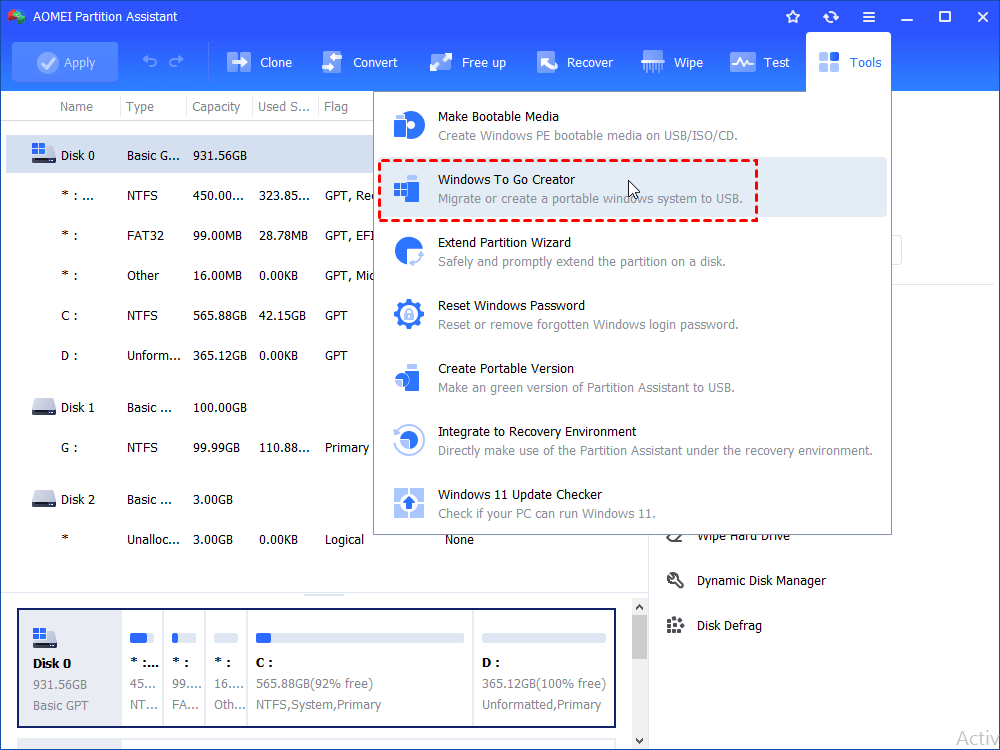
Step 2. Select “Tools” on the main interface and hit “Windows To Go Creator”.
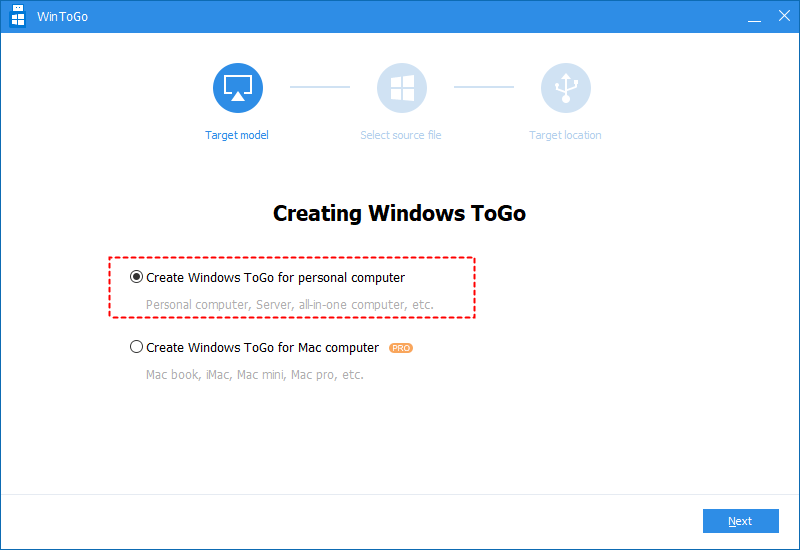
Step 3. In the popup window, select “Create Windows ToGo for personal computer” and hit “Next”.
Step 4. Select “Create Windows ToGo with system disc/ISO” and then, import the ISO file you previously downloaded on your PC. Hit “Next”.
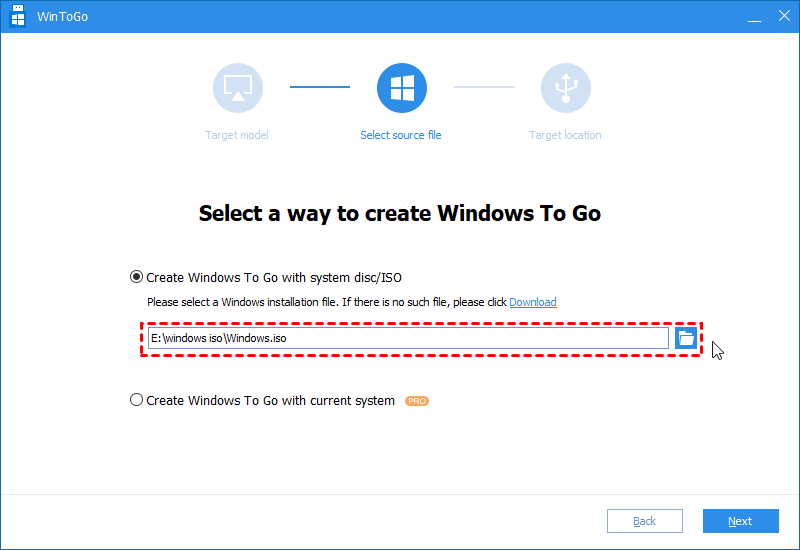
If you want to select “Create Windows to Go with current system”, please upgrade the software to Pro version.
Step 5. Usually, the software will detect all available USB drives on your PC automatically. If not, refresh it. Then, select the desired USB and hit “Proceed”.

Conclusion
How to create Windows 10 to Go USB? In this article, both a Windows’s inbuilt feature, and the most powerful third-party software – AOMEI Partition Assistant Standard - are given to help get it done. As for me, I prefer the latter method for it’s more flexible in the USB drive’s specs and the edition of your OS. Moreover, besides burning the ISO to your USB, it is also able to repair corrupted MBR, migrate OS from MBR to MBR, and fix RAW file system.
If you want to make this software work on 2 Servers per license, please try the Server edition.

