Safely Transfer PC Games from C Drive to D Drive Windows10
Learn how to transfer games or apps from C drive to D drive or another drives in windows 10 without re-downloading and reinstallation.
By Lucas / Updated on June 30, 2026
Can I transfer my PC games from C drive to D drive?
“Even as a game enthusiast, I have too many games on C drive in my Windows 10. Now, the space of the C drive is going to run out and many games are stuck frequently, the game screen is also lagging..., but there is still plenty of free space on the D drive. Can I transfer my PC games from the C drive to D drive? Does that cause any other problems? Thanks!”

What is the problem if there are too many games installed on the C drive in Win10? First of all, most of the C drives are installed with the system. When the capacity is exhausted by games and other software, the read and write performance will decrease.
Under heavy load (game model loading, etc.), normal service will be seriously affected. What causes the write amplification is that the drive capacity is largely occupied by the game, so that the computer slows down. Therefore, some may choose to transfer some games from one C hard drive to another to optimize the gaming PC for low latency and peak performance.
Three options to move games from C drive to D drive
What methods are generally adopted to migrate the game from C drive to D drive? For platforms such as Steam, EA, GOG Galaxy, and We game, you can use platform management to migrate the game, like many players also search how to move a Steam game to another drive with Steam’s inbuilt feature.
Non-platform games or bad platforms (origin, etc.) need to migrate the game body, save, and rewrite the registry, which is more difficult for novices. It’s utterly cruel for most game players to forgo their games by dint of the triviality that the space on the C drive is almost full.
Thus, here we show three alternatives that may help you solve your troubles.
1. Move games from C drive to D drive via Registry
The registry contains information used by programs and Windows itself, which assists the operating system in managing your computer. You can relocate installed apps by changing the registry.
Step 1. Create a new folder named "Program Files (86)" in the C drive or another drive.
Step 2. Copy "Program Files" and "Program Files (x86)" directories to the new folder.
Step 3. Insert “CMD” in the search bar, right-click it, select “Run as administrator”.
Step 4. Insert the following commands and press “Enter”.
• Robocopy" C:\ Program Files" " X:\ Program Files" / mir
• Robocopy" C:\ Program Files(x86)" " X:\ Program Files(x86)" / mir
Tip: “X” is the drive letter of the created file.
Step 5. Press “Win + R”, then type “Regedit.exe”.
Step 6. Find the folder path and change the C to another drive.
For Windows 10: HKEY_LOCAL_MACHINE \ SOFTWARE \ Wow6432Node \ Microsoft \ Windows \ CurrentVersion
For Windows 7/8/8.1: HKEY_LOCAL_MACHINE \ SOFTWARE \ Microsoft \ Windows \ CurrentVersion
Warning: If you misapply the registry, your system may crash.
2. Unload and reload in D drive while keep and move data files
Many players also choose an orthodox approach to transfer their games, although it will take a lot of time.
Step 1. Unload and reload the game, but install on D drive.
Step 2. Find those files on C drive, then cut and paste them into the game folder on D drive.
3. Transfer games from C drive to D drive via a workable app mover
If both ways can’t help you to transfer games from C drive to D drive without run failure, a convenient & professional application mover for Windows 11/10/8.1/8/7 – AOMEI Partition Assistant Professional is a nice choice.
It can move apps not only from C drive to D drive on the same disk but also to another disk without reinstalling. More than that, you can know more manipulations of various problems about your C drive, such as how to extend the C drive in Windows 10 easily and delete unnecessary files from PC, etc. Now, follow these steps for the perfect performance of the game after transferring.
Note: It's available to download the demo version of PA Pro to move installed programs to another drive in Windows 10/11!
Step 1. Install and run the application, then click “Free Up”, and find “App Mover”.

Step 2. In the new window, select the partition with the game you need to transfer.
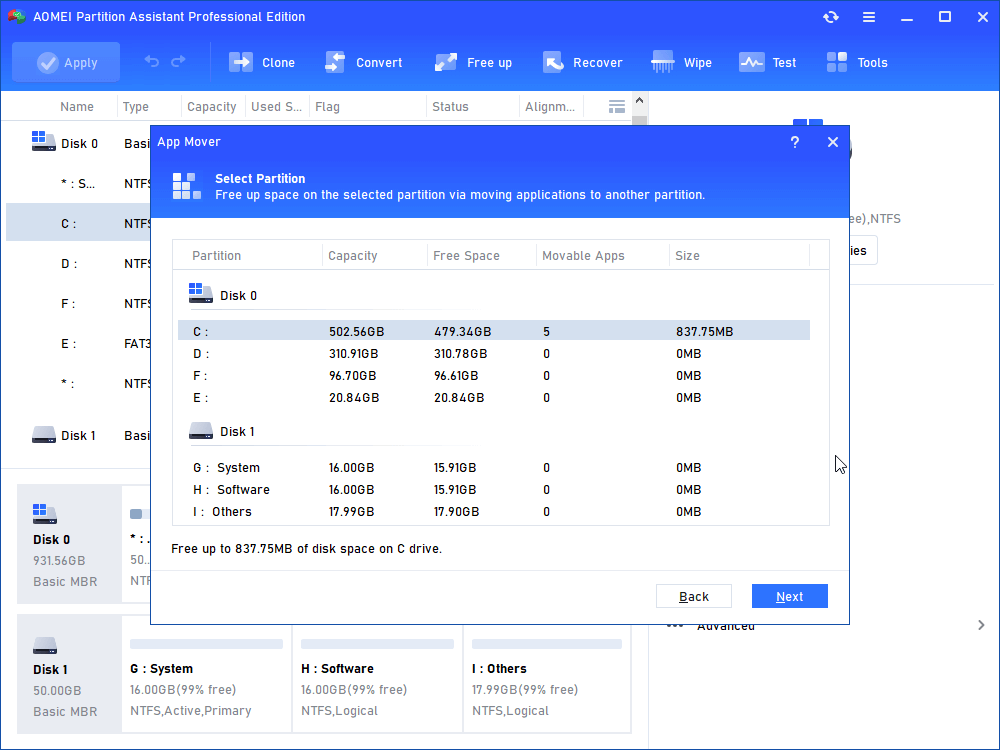
Step 3. In the pop-up, those transferable apps on C drive will be listed. You can choose one or multiple games that you want to transfer.

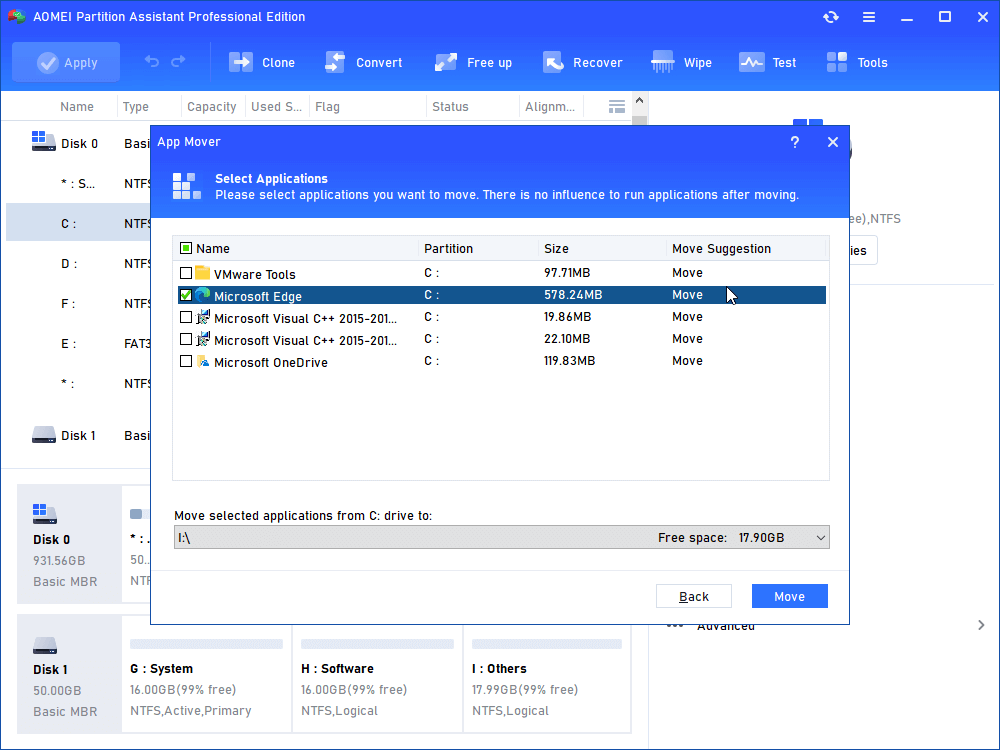
Step 4. While you finish the selection, please choose the destination drive, like D drive. Then choose“Move”, don’t click “Cancel” during this process.
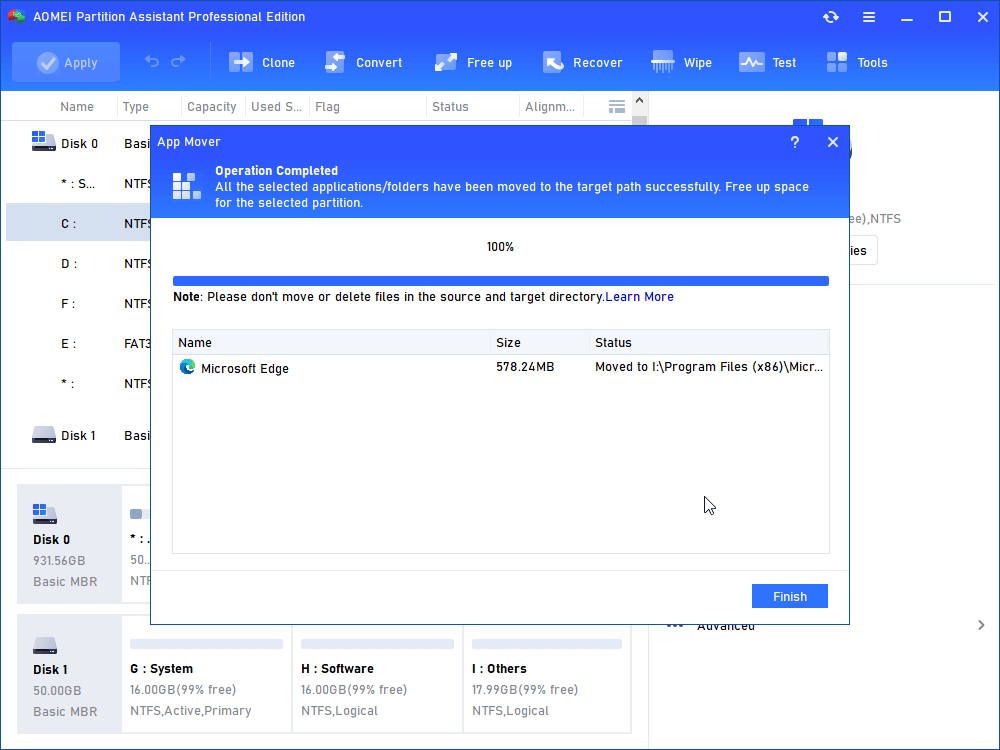
Step 5. Click “Finish”, then try your game to check if it is going well or not.
♦ Please make sure your D drive has enough space for your games. If it doesn’t, you will see a pop-up note: D drive has insufficient space. Can’t move applications. Please release more space or extend your D drive and try again.
♦ Pay attention! You also can choose an external drive or USB flash drive as the target path of your game. But what you should know is that the drive letter may be changed automatically when it is reconnected. In this case, the moved apps are unable to run.
Besides moving the games to another drive, AOMEI Partition Assistant is a reliable friend to guard your data safely with any kind of certainty while you need to transfer some data from one hard drive to another. Check more about AOMEI Partition Assistant to explore more data solutions. There are multiple choices to safely move your game data to your destination hard drive.
Further reading: Other ways to improve game performance
Now, you know how to transfer your games from C drive to D drive in Windows 10, 8, 7, XP, and Vista. In fact, we can do some other things to improve our game performance. Two methods may offer you more possibilities.
Method 1: Turns on ”Game Mode" in windows 10
The Win10 game mode has two functions. One is to prohibit Windows updates during the game playing to prevent system freeze, the other is to allocate more CPU and graphics card GPU resources to suspend irrelevant processes. Simply, it can create a better environment for the game to run!
Step 1. Find “Gaming”, or open the” Control Panel”, search “Game Mode” in the search bar.
Step 2. Turn on the mode if it’s off.
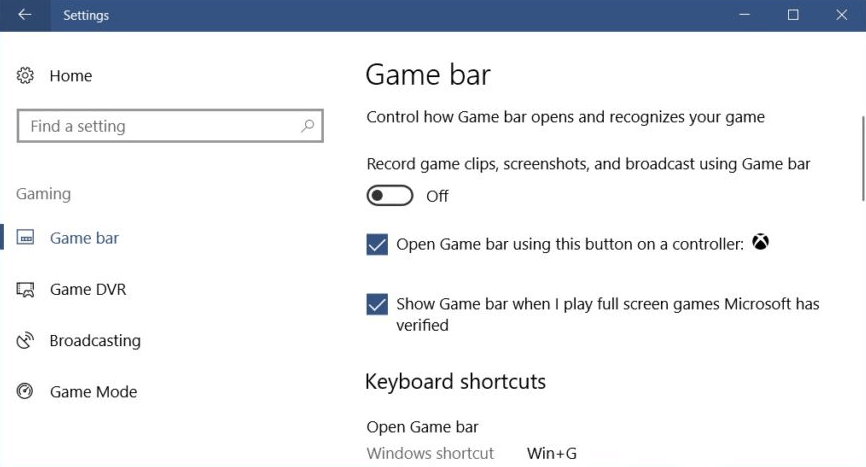
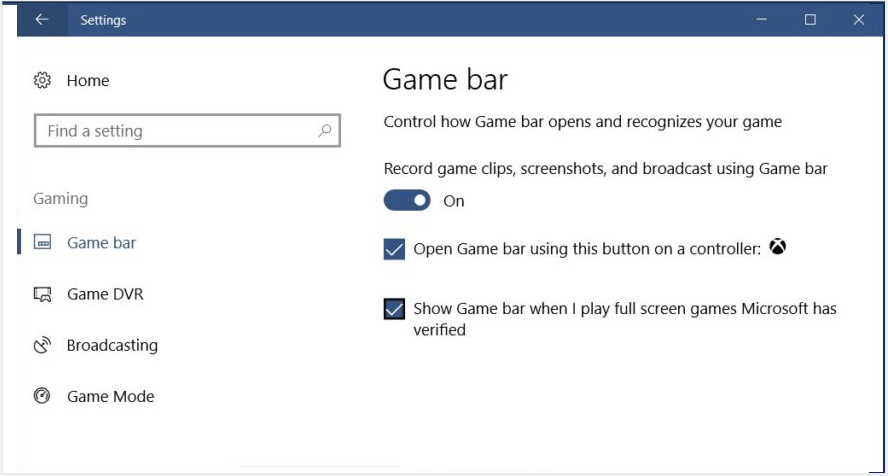
Tip:Game Mode" is turned on by default in Win10, but some systems may be turned off. It is recommended to check it yourself.
Method 2: Turn off irrelevant services
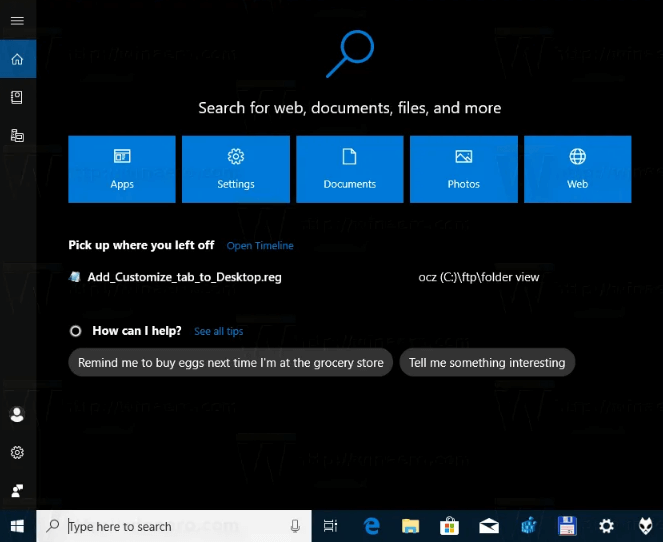
Step 1. Click the Cortana search box and enter “Services.msc” to enter the service editing panel.
Step 2. Find “Connected User Experiences and Telemetry”, “Diagnostic Execution Service”, “Diagnostic Policy Service”, “Diagnostic Service Host”, “Diagnostic System Host” these entries.
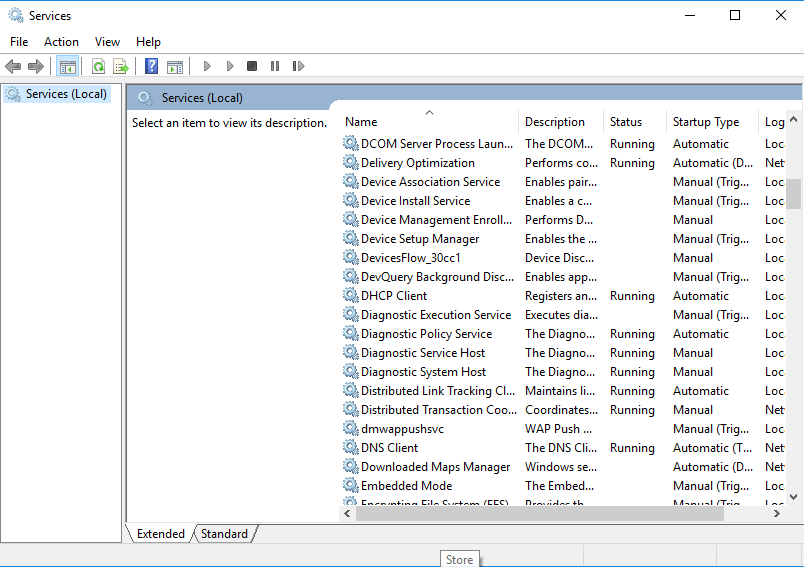
Step 3. Right-click then choose” Properties”, set the Startup type to“Disabled”.
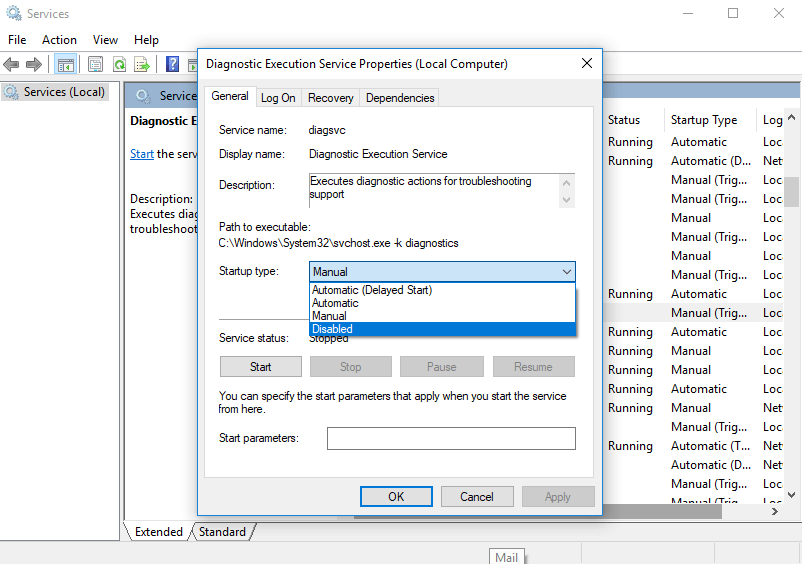
Step 4. Restart the computer after completing the above steps.
This may significantly reduce the system's freezing during the game.

