Best Top 5 Disk Management Tools for Windows 11
Top 5 disk management tools for Windows 11 can help you pick suitable disk management to protect and manage your disks.
By Lucas / Updated on April 18, 2024
Every OS needs users to manage the disk resource and protect disks and partitions to keep the system in high performance. If you wish to upgrade to Windows 11 at this version, you'd better start to adjust your devices.
Since users may need to adjust the capacity of drives, format drives, and move programs…disk management tools emerge to the people’s needs. This article will introduce two disk managements: Windows 11 Disk Management, and better third-party software, and show you how to use them.
Overview of built-in disk management in Windows 11
Disk Management is a built-in program in the Windows system for all Windows users.
As a necessary tool, disk management has also been built in Windows 11 to allow users to manage hard drives and disks. The Disk Management utility's primary function is to create, format, and remove partitions, however, these functions have various limitations and only are available in specific situations. And the program is a bare-bones utility with no means to roll back if you make a mistake. Yet, it is critical to understand how to use it so that it is available when needed.
1. How to open disk management in Windows 11?
There are many ways to open Disk Management in Windows 11. Here we show you the two most easy ways.
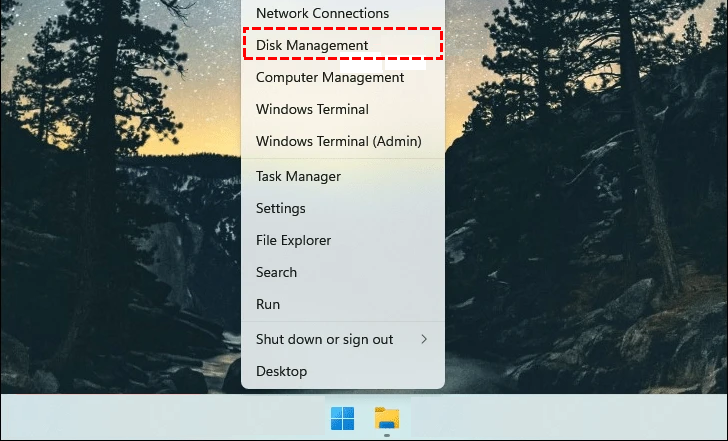
No.1: Use the Quick Access menu
Step 1. Right-click the “Start” button or press “Windows”+ “X” together to open the menu, and choose Disk Management.
No.2: Use the “Run” command
Step 1. Press “Windows” + “R” simultaneously, input "diskmgmt.msc” in the search box, and press “Enter” to run it.

2. How to use Disk Management?
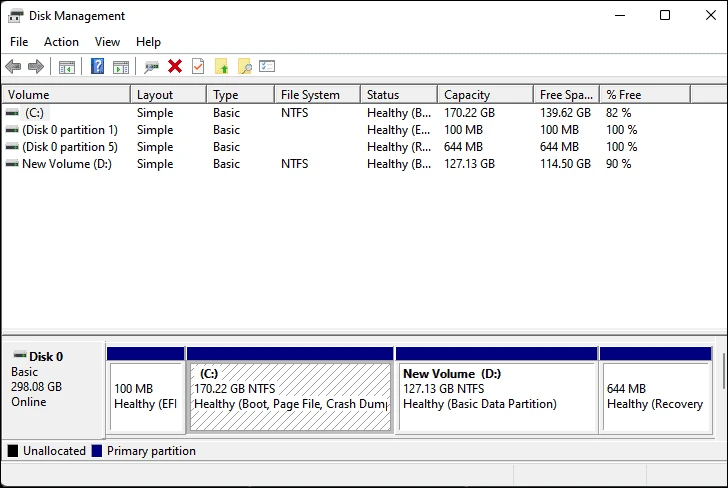
To show how to use Disk Management, we’ll try to extend the C drive by using the free space on the D drive.
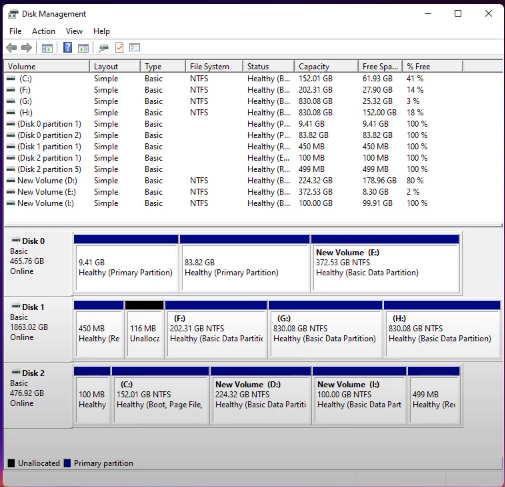
Step 1. Open Disk Management.
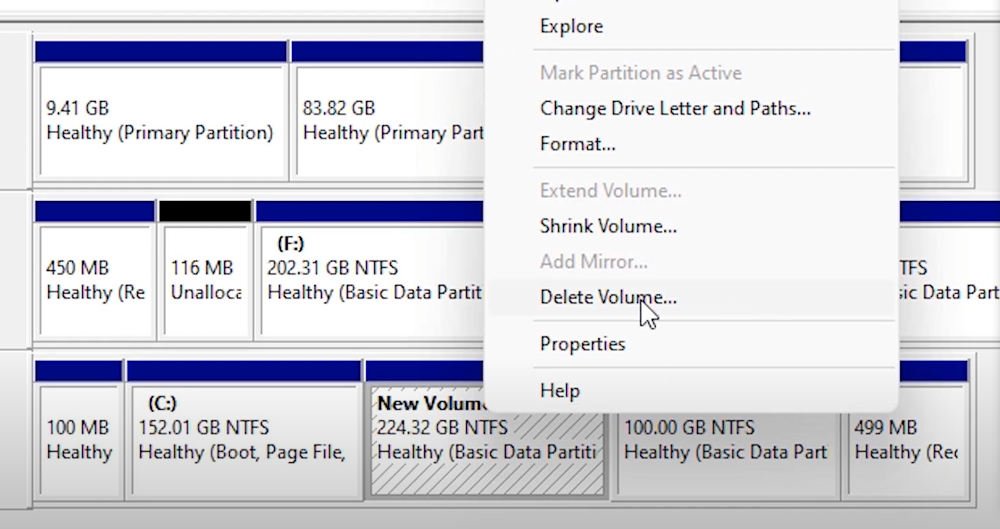
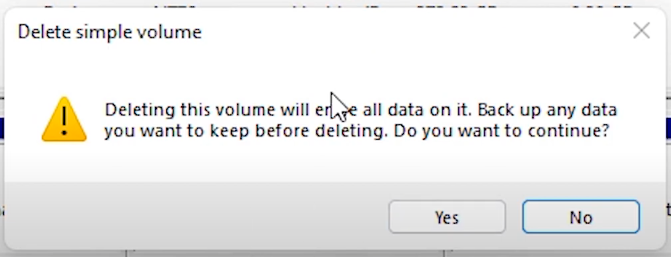
Step 2. Right-click the D drive and select “Delete Volume”. You’ll receive a warning to confirm the operation, click “Yes” to continue.
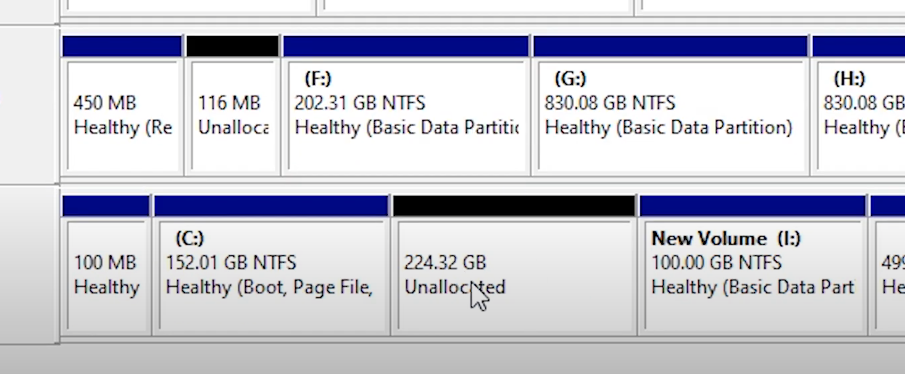
Step 3. Then, the D drive is an unallocated space right behind the C drive.
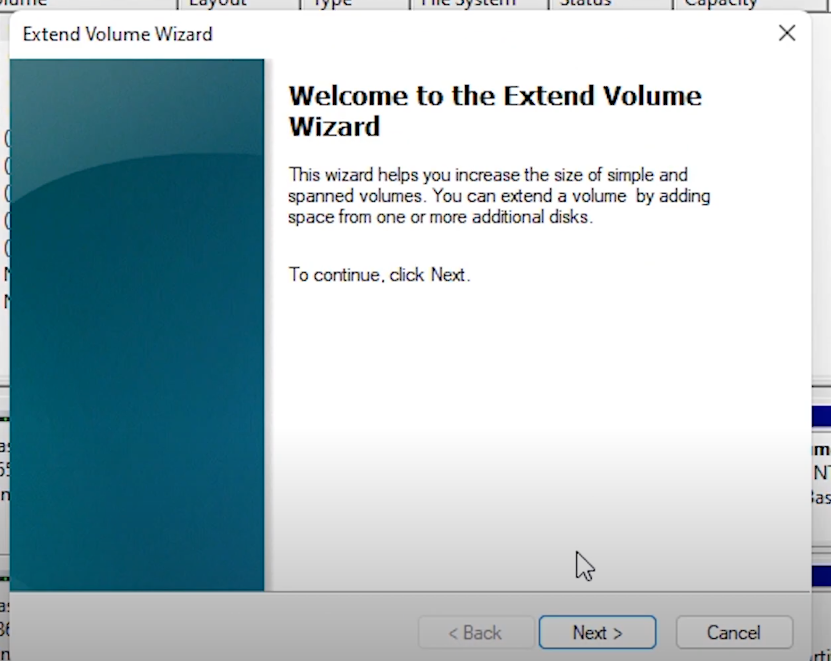
Step 4. Now, right-click C drive, and you can find that “Extend Volume” is available, click it. Then you’ll enter “Extend Volume Wizard”, and click “Next”.
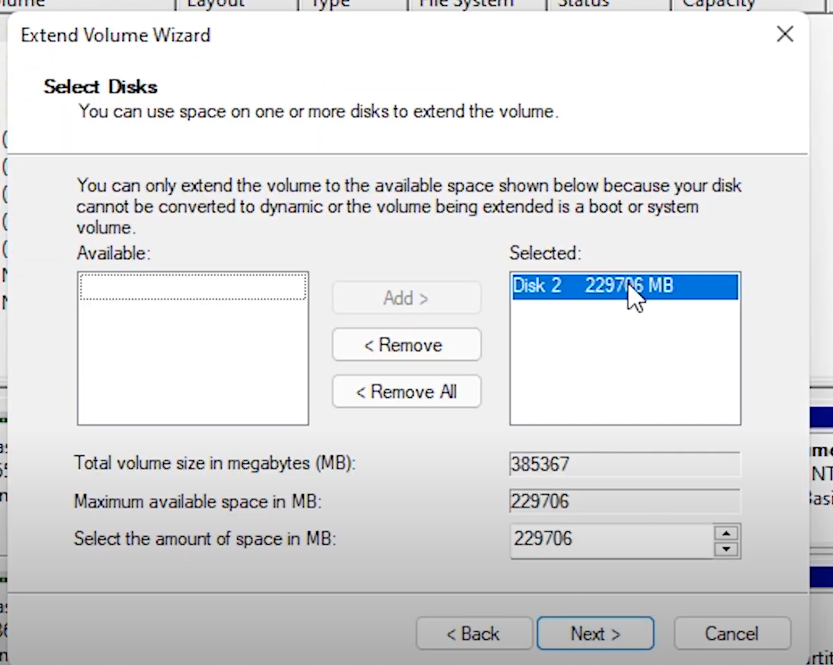
Step 5. Select the correct disk and click “Next”.
Step 6. Click “Finish” to complete the operation.
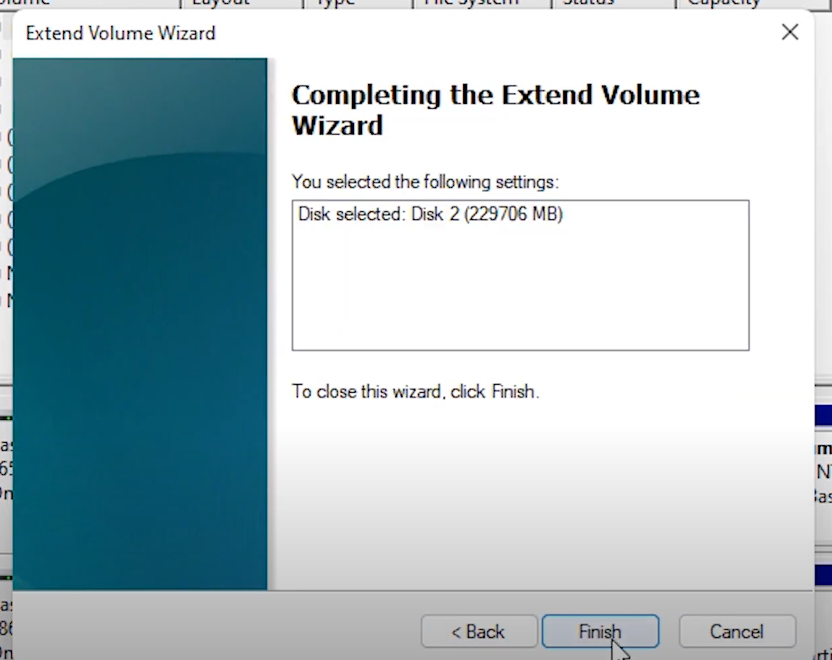
Then, your C drive will have more free space.
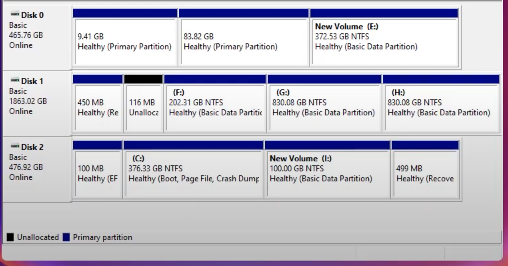
Disk Management allows users to extend volume on any drive but this could be workable only if the target drive has an unallocated volume right behind it. Usually, the D drive is on the right of the C drive, so users can create unallocated space from the D drive by deleting all data on the D drive.
Top 5 disk management tools for Windows 11
In Windows 11 built-in disk management, users can also create a new volume, convert to a GPT disk, convert to a dynamic disk, shrink or format a partition, change drive letter…However, if you’ve used Disk Management in other Windows OS, you will exactly understand how laborious to use it. Many features ask users to delete their data on drives, and lots of ambiguous limits restrict users from flexibly managing their disks and drives.
So, to help users efficiently, safely, and conveniently manage partitions and disks on Windows 11 computers, many third-party disk management tools come out. If you search for disk management tools for Windows 11, numerous products will jump into your sight. How do you know which one suits you? In this case, a top list may give you more information to help you pick a proper tool.
Here, in this part, we'll introduce you 5 third-party Windows 11 disk management tools. Each has its pros and cons, you can select one according to your situation.
Top 1. AOMEI Partition Assistant
AOMEI Partition Assistant is your best choice. This tool is specifically designed for users to flexibly manage their disks/drives at maximum.
Besides basic features of modifying partitions, this tool also offers disk cloning, App moving, disk wiping, data recovery, and password reset, etc. You can even try to fix problems without entering OS.
This software has 5 editions for different types of uses: the Standard Edition (free) and the Professional Edition (Yearly & Lifetime paid) support Windows 11/10/8/7, the Server edition is for Windows Server users. If you’re an enterprise user or a service provider, the Tech edition is devised for you. All users can find what they need.
▶ Key function list:
• Resize/create/delete/format/check & repair/merge/wipe/split partition
• Clone partition/disk
• Convert system/data disk between MBR and GPT without data loss
• Migrate OS to another drive/disk without reinstalling
• Allocate free space from one partition to another without losing data
• Move installed programs without reinstalling
• Convert file system between FAT32 and NTFS
• SSD secure erase wizard
• Wipe system disk
• Data recovery
• PC password reset
…
▶ Pros & Cons of AOMEI Partition Assistant
|
Pros |
Cons |
|
Widely system supporting Easy to use for all users Totally data safe Apply to various storage devices: SSD, HDD, USB, SD Card, PS disks, Xbox disks, etc. Multiple practical functions Friendly user interface Available to NTFS, FAT32, exFAT, Ext2/3/4 file systems Preview changes before executing tasks |
Only for Windows users The free edition has limited functions
|
If you use AOMEI Partition Assistant to extend the C drive, you don’t need to delete any data on your drive, let’s see how to give more free space with this powerful tool.
To release C drive space, you can select "Allocate Free Space" to directly split some free space from one partition to the C drive, or move some large apps from C drive to another via the "App Mover" function.
Step 1. We’d like to allocate free space from the D drive to the C drive. Right-click D drive and select "Allocate Free Space".

Step 2. You will get a small pop-up window. Please type in the size of the free space which you want to share from the D partition and this free space will be directly added to the target drive.

Step 3. You can take a preview of the operation result before confirming the start. Click "Apply" to execute this operation.

After these 3 steps, your C drive will be extended by the free space from the D drive, and you don’t need to delete anything to create an unallocated space right behind the C drive manually. Users can use the free space on any drive to enlarge other drives. If there’s unallocated space on your disk, but it’s not on the right behind the drive you wish to extend, you can choose the “Merge Partition” feature.
Some users may install programs on their C drive, leading it to confront low-capacity warnings. AOMEI Partition Assistant can migrate these installed programs to another drive/disk (including an external disk). It can move all program data files on the disk to ensure the program can boot successfully after the transfer. And if you wish, you can choose "Delete Large Files" to release more free space.
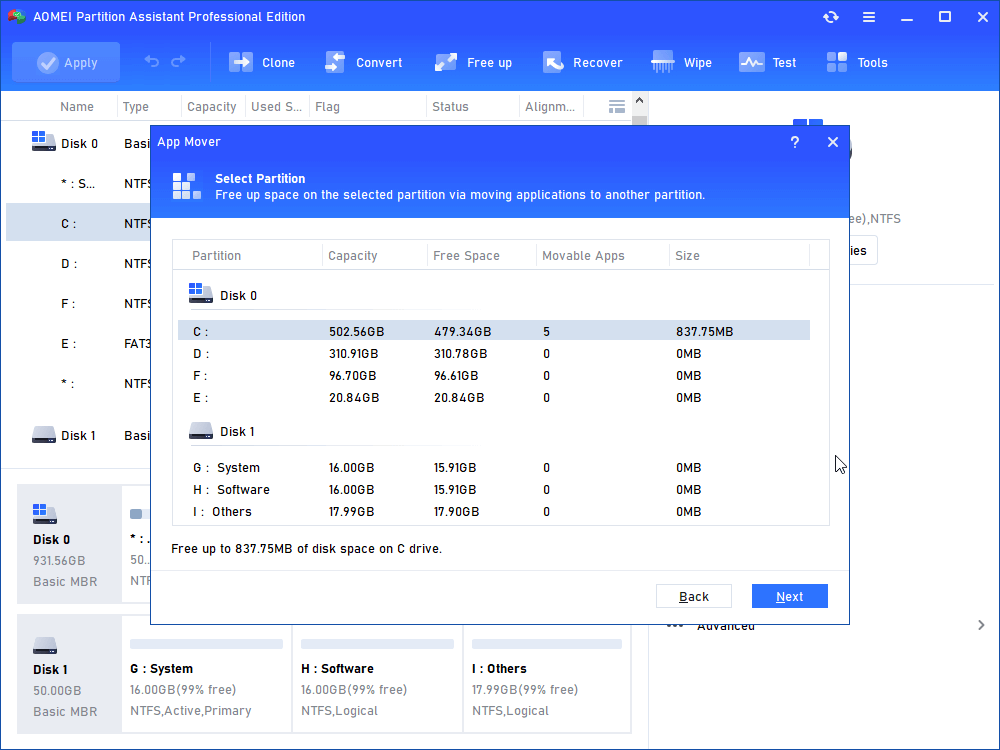
Step 1. Launch Partition Assistant, click “Free up” on the top menu, then select the “App Mover” feature.

Step 2. In the new window, you select "App Mover", then you can see all partitions, the number and size of installed programs on every partition will also be displayed. Select one partition that you want to move applications from and click "Next".
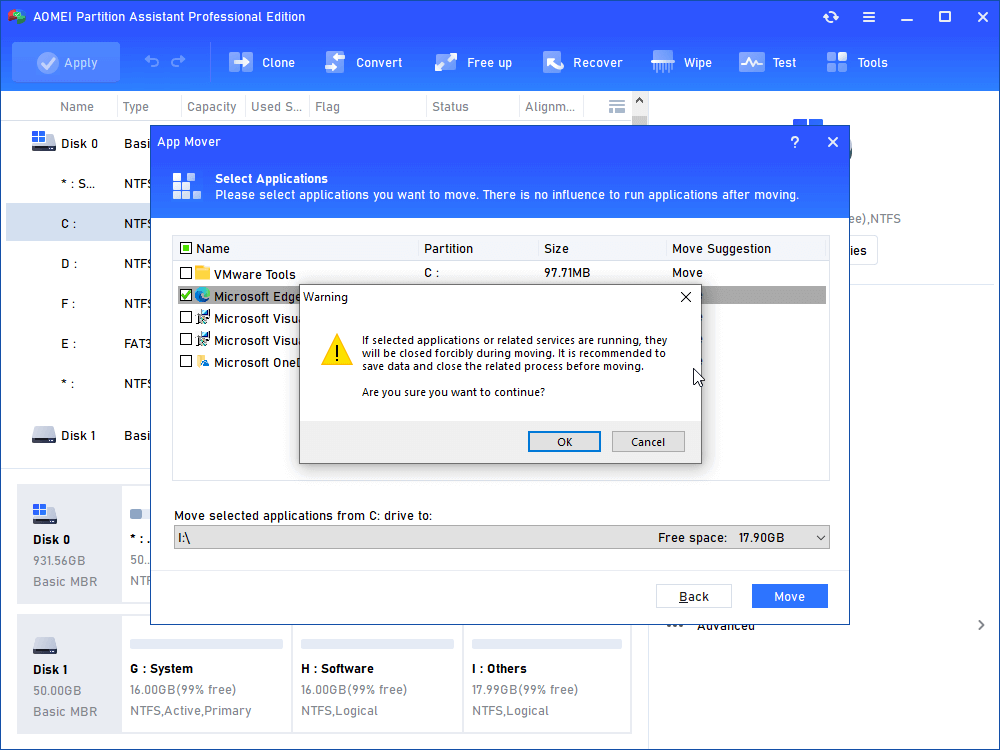
Step 3. Choose the applications you want to move and select the target location, then click "Move".
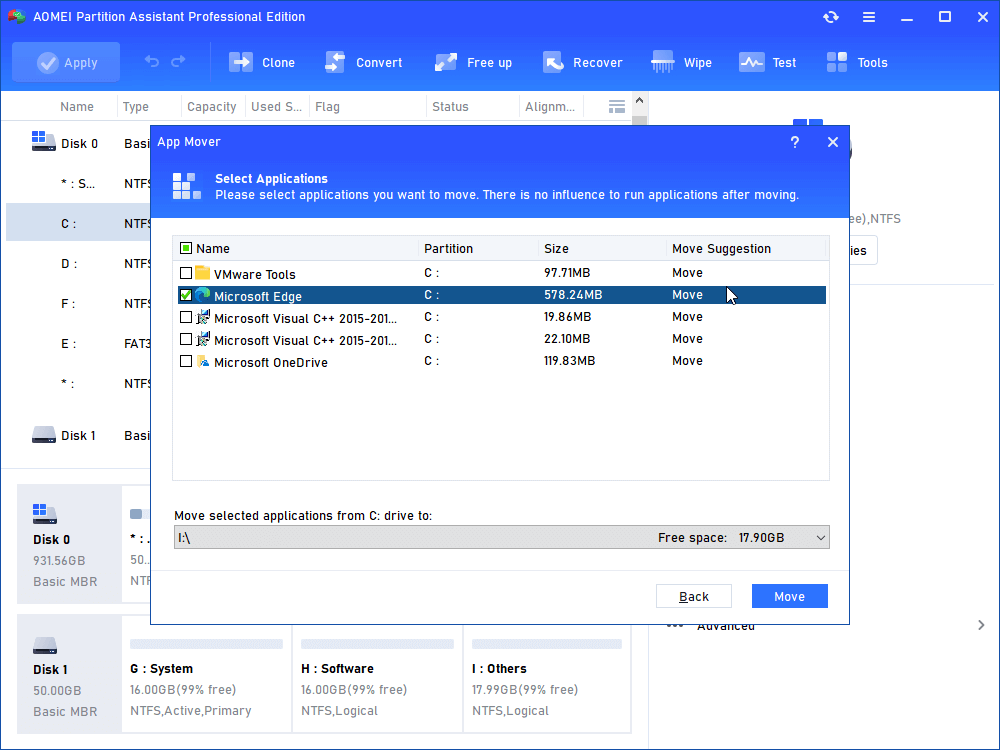
Step 4. In the pop-up window, you can confirm forcibly closing running applications when moving starts. Click "OK" to begin the process.
Top 2. Gparted/GNOME Partition Editor
GParted is an official GNOME partition-editing program that allows you to create, delete, resize, move, verify, and copy disk partitions and file systems. This is important for restructuring disk utilization, providing room for new operating systems, transferring data from hard drives, and mirroring one partition with another disk image. It is also capable of formatting a USB device.
It features a comprehensive user interface, much like any other program, and is easy to use. If you want to modify partition size, you may define the exact size of the free space before and after the partition using a standard text box or a sliding bar to see the size change graphically. This tool supports formatting a partition in any one of several file system formats, some of which include EXT2/3/4, NTFS, FAT16/32, and XFS.
GParted can also clone files by copying and pasting. GParted can only clone one partition at a time, not a full disk. The copied file system should not be mounted. GParted clone partitions at the filesystem level, meaning it can clone various target-size partitions for the same source filesystem as long as the size of the source filesystem does not exceed the size of the target disk.
▶ Key feature list
• Creating, deleting, resizing, moving, and checking partitions
• Copying disk partitions
• Copying data residing
• Set a new UUID for an existing partition
▶ Pros & Cons of Gparted
|
Pros |
Cons |
|
Works regardless of the operating system installed, or even if none is installed. Any update can be implemented almost instantaneously without the need for a reboot. Quite simple to change the size of a division. Several file systems are supported: Ext2, Ext3, Ext4, FAT16, FAT32, HFS, HFS+, JFS, Linux-swap, ReiserFS, Reiser4, UFS, XFS, and NTFS. |
It takes longer to boot up since you must boot into the program. Need to boot software from a bootable device Partitions are easy to overlook since they are concealed within a menu. It takes significantly longer to download than other disk partitioning tools. There is no opportunity to redo. |
To clone partitions with Gparted, after you Download GParted ISO files and burn it to a CD. You need to put the GParted Live CD into your computer CD drive. Boot Windows computer from the CD by changing the boot order. Once you boot to GParted, you’ll get the below screen. It should be set to GParted Live by default.
Step 1. Next, you’ll get a screen asking about what keymap to use. By default, just select “Don’t touch keymap”.
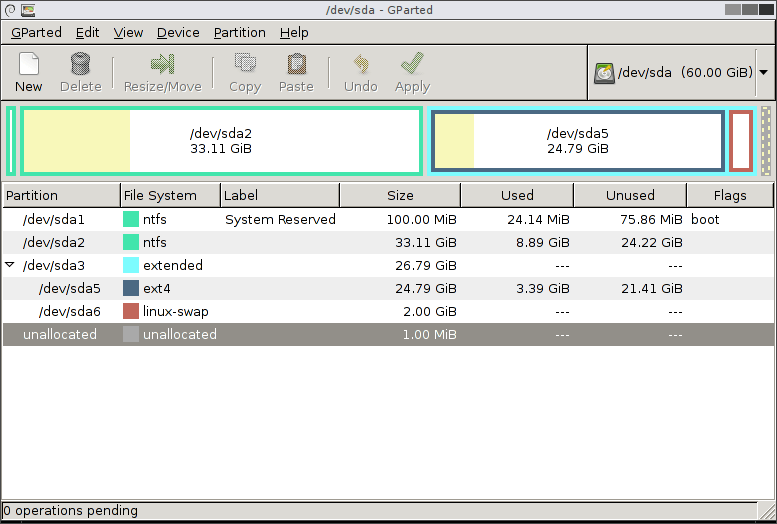
Step 2. Then go for the default language, mode, and other settings and press Enter.
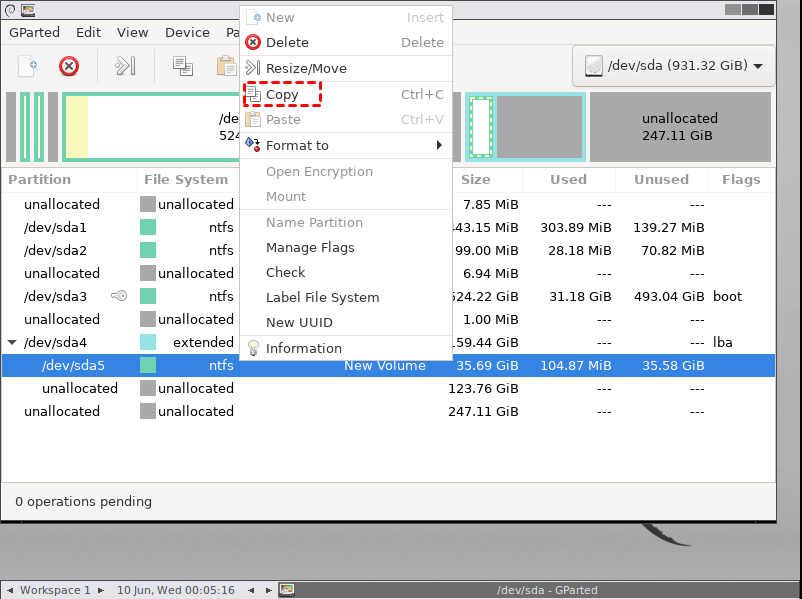
Step 3. Then the GParted window will open. Then right-click the partition you want to copy and select the “Copy” button from the drop-down menu.
Step 4. Now, select a piece of unallocated space on your second disk. Right-click it and choose the “Paste” Button.
Step 5. When you click the Paste button, a new window will open that requires you to define how much of the unallocated space to use. If it is not enough, you can resize the partition to make more room. Once everything is done, click the "Paste" button. Then "Apply" to start cloning the partition to SSD or HDD.
Top 3. Paragon Partition Manager
With Windows 11/10/8/7, you may use Paragon Partition Manager to resize, create, format, and remove partitions. It also supports WinPE bootable disks and disk conversion (convert MBR to GPT or vice versa) and has a plethora of capabilities for both home and commercial customers. The program is available in both free and commercial editions, with the latter providing more sophisticated capabilities such as OS migration and disk backup support.
▶ Key features list
• Create, format, delete/undelete, hide/unhide, active/inactive, split/merge partition
• Assign/remove/change drive letter
• File system conversion: FAT to NTFS, NTFS to FAT, HFS to NTFS, NTFS to HFS
• File system integrity check
• Redistribute free space
• Change cluster size
• Convert to logical/primary
• Disk wipe
...
▶ Pros & Cons of Paragon Partition Manager
|
Pros |
Cons |
|
Several basic functionalities are supported. It guides you through a wizard step by step. Changes are previewed before being committed. Various file systems are supported: FAT, NTFS, HFS Support Windows 7 SP1/8/8.1/10/11 |
It is not feasible to migrate an operating system from one Computer to another Take a bit longer to download |
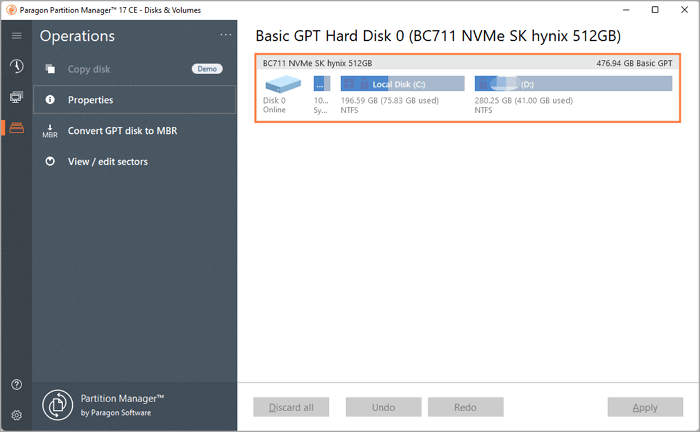
It is simple to delete and format a partition, and it is much simpler to resize it with Partition Manager. When you choose a partition, an adjustment bar will appear on the left and right. If you resize from the left, a new partition will emerge on the left, and if you resize from the right, it will appear on the right. The slider is important because it provides a real-time graphical depiction.
After you do this, it will immediately open another window where you may make further changes by inputting the precise values. A clear visual of before and after will boost confidence even more.
Top 4. Active@ Partition Manager
Active@ Partition Manager can both create new partitions from unallocated space and manage existing partitions, such as resizing and formatting. Easy wizards make it simple to complete some of these tasks. This utility should be able to handle any file system, with support for all of the common ones such as FAT, NTFS, exFAT, ReFS, HFS+, Ext2/Ext3/ Ext4, BtrFS, UFS, XFS, and JFS.
Further functions include imaging a whole drive for backup reasons, switching between MBR and GPT, creating FAT32 partitions up to 1 TB in size, modifying boot records, and rolling back changes by automatically backing up partition layouts. When you resize a partition with Active@ Partition Manager, you may specify the custom size in megabytes or sectors.
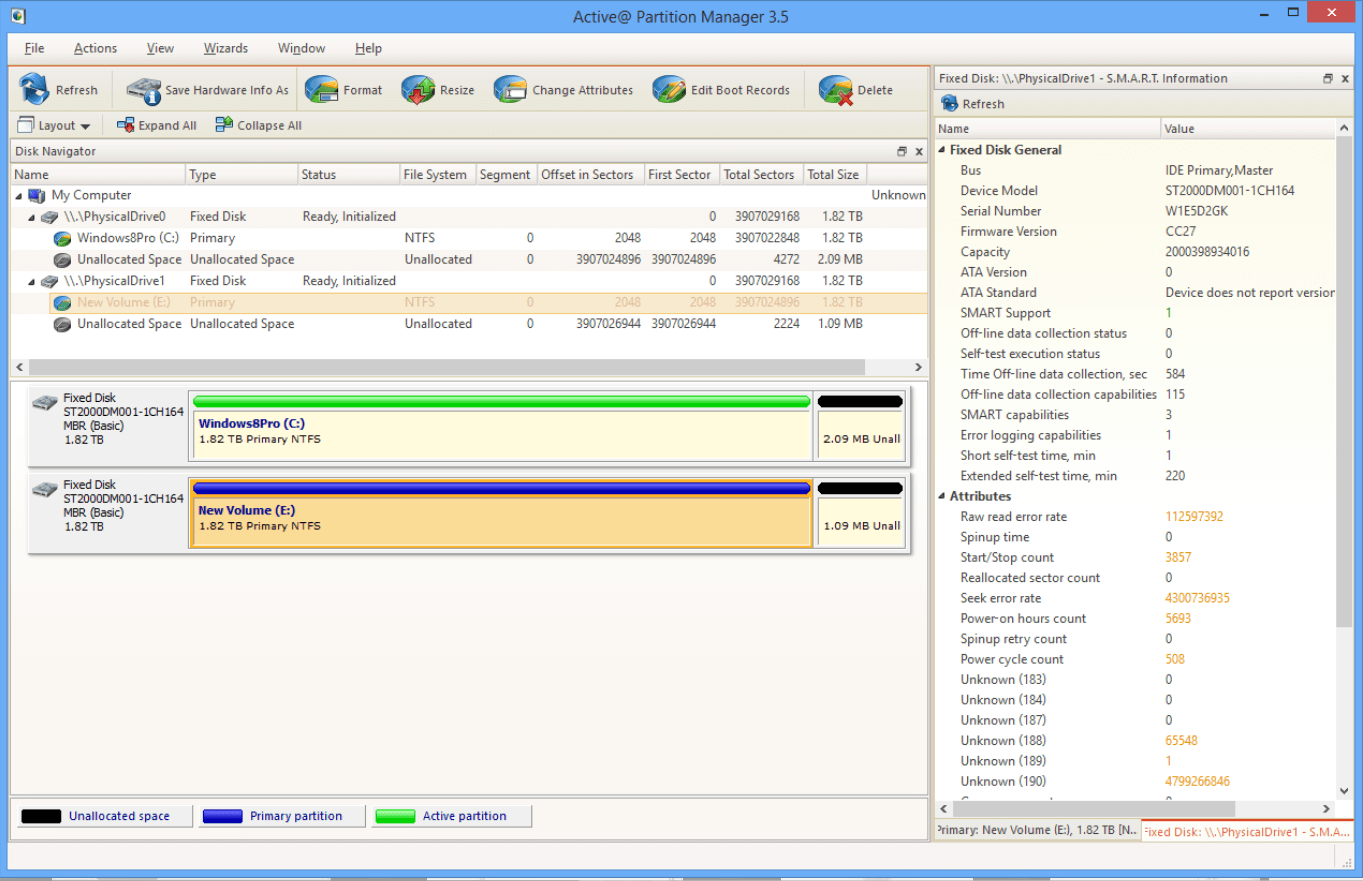
Sadly, it cannot resize locked volumes, therefore you cannot adjust the size of the system disk. This software should function well on Windows 11, 10, 8, 7, Vista, and XP, as well as Windows Server 2012, 2008, and 2003.
▶ Key features list
• Resize partitions
• Create, Format, and Resize a partition or logical drive/volume in FAT, exFAT, NTFS
• Edit and synchronize boot sectors
• Initialize new disk
• MBR to GPT conversion
• Create FAT32 partitions greater than 32GB in size (only up to 1TB)
▶ Pros & Cons of Active@ Partition Manager
|
Pros |
Cons |
|
It is quite simple to use and comprehend. Some of your modifications can be restored from a backup. A wide range of typical disk partitioning jobs is covered. |
Partitions cannot be copied. Expanding the system partition may not be an option for you. Will not shrink locked volumes |
To resize a logical partition in Partition Manager, launch the Resize Volume window by selecting a volume node. And then, from the toolbar, click the Resize button, or use the main menu option Actions > Resize..., or right-click the chosen object and pick the Resize... command from the context menu. You may now utilize the Resize Volume dialog to choose a new partition size.

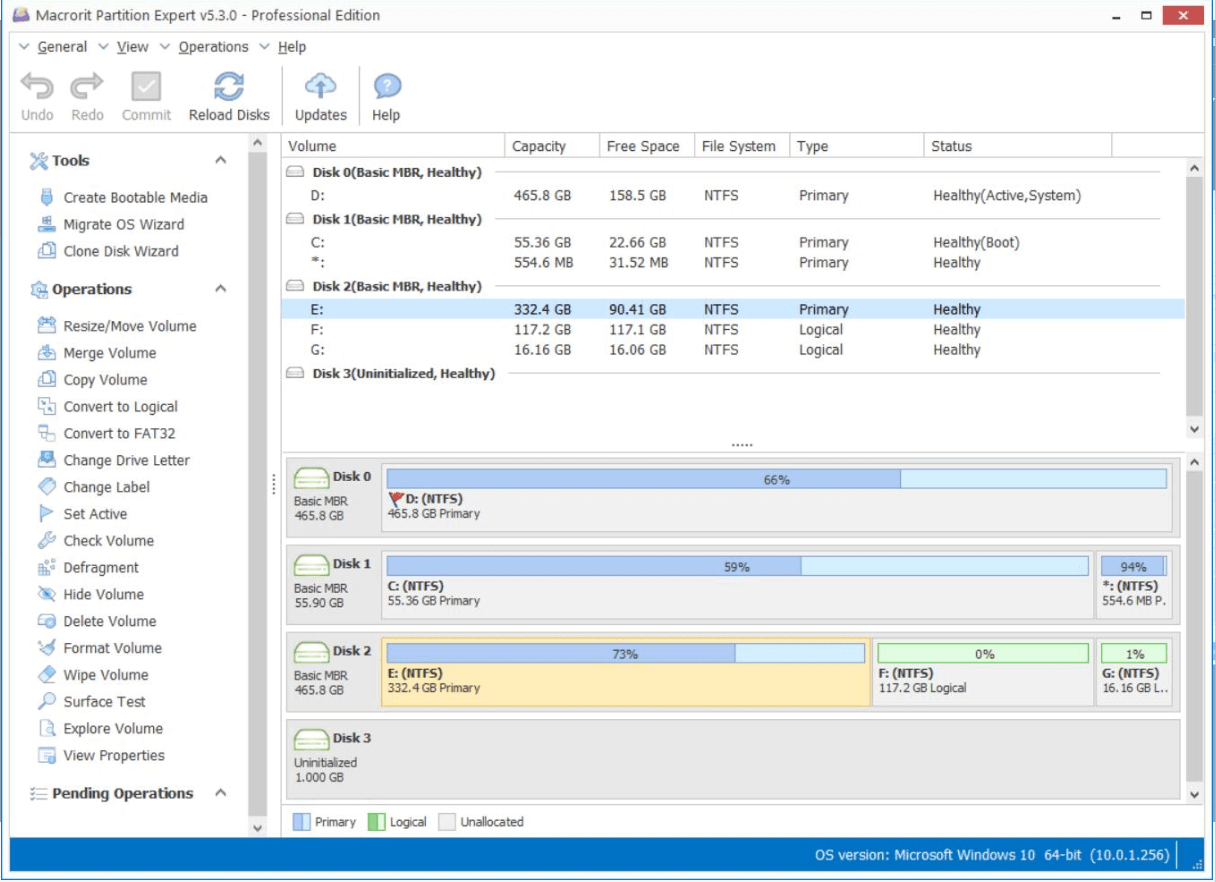
Top 5. Macrorit Partition Expert
Macrorit Partition Expert is a partition manager for Windows XP, Vista, 7, 8, 10, and 11. When users want to modify the drives on PC, they can simply expand system partitions, resize and move partitions, create, format, and delete partitions with its strong capabilities. Its unique data protection technology and the best data moving algorithm can assure data safety and the fastest data partition moving speed.
▶ Key feature list
• Convert dynamic disk to basic disk
• Cancel-at-Will Technology
• Migrate OS
• Resize, move, create, format, delete, merge, copy partition
• Logical/primary conversion
• File system conversion
...
▶ Pros & Cons of Macrorit Partition Expert
|
Pros |
Cons |
|
Simple to use. Provide a mobile version. Basic and advanced choices are supported. |
The free edition cannot handle disks larger than 16T. Windows 11 Microsoft Defender issued a danger alert during installation. |
To resize a partition, select it and then click Resize/Move Volume. Click and drag the header handle to the right in the resize window, then click OK.

Ending
If you meet some trouble when you use Windows built-in Disk Management in Windows 11, then the disk management tools for Windows 11 we show in this article will offer you more ideas to efficiently manage your partitions and disks.

