How to Transfer Files from PC to PC in Windows 11
This post shows how to transfer files from PC to PC in Windows 11 with 5 ways for users to choose based on their conditions.
By Lucas / Updated on May 12, 2023
The pace of computer updates is increasing as digital technology advances, it is not unusual for someone to switch computers, but what irritates individuals is figuring out how to transfer files from PC to PC. Now Windows 11 has appeared, many users might be searching for an appropriate way to transfer data and files from an old computer to a new Windows 11 PC.
How to transfer files from PC to PC in Windows 11
In this part, we prepared 4 ways for you to select, you can choose the best way according to your situation.
▌Way 1: Transfer files with a removable device
This might be the simplest method to transfer files. You just need to connect a removable device such as USB, external hard drive, portable SSD to the original computer, then copy and paste the files you wish to move into this device.
After that, plug this removable device into the second computer, copy and paste again.
Make sure the removable device has sufficient free space to place the files you’re going to move, and it can be detected by both computers.
▌Way 2: Transfer files with OneDrive
Microsoft has OneDrive for Windows users to save or move files conveniently. Users can upload all files to the OneDrive to store them, if they need them one day, they can download files from OneDrive. Here are detailed steps to use OneDrive to transfer files from PC to PC in Windows 11.
Step 1. Sync the files you want to transfer. Once you’re on the OneDrive website, right-click the blank and select “Upload”, “Files” to upload the files you want to add to this cloud storage tool. Here we use OneDrive web.
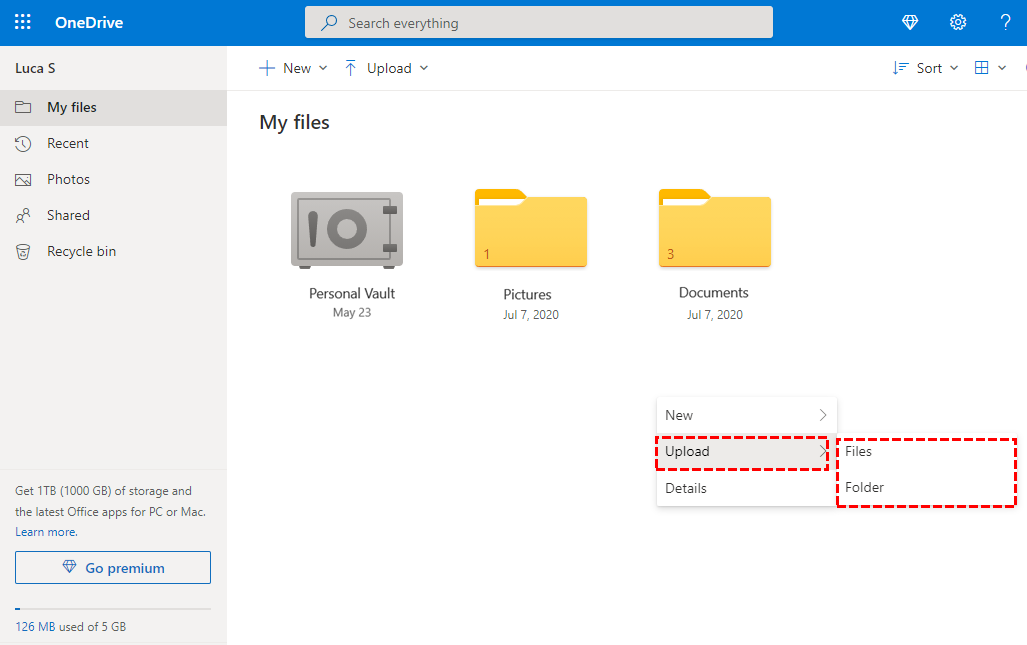
The other way to upload files is to directly right-click your files, and choose “Share” to move them to OneDrive.

Tip: Both the OneDrive app and the OneDrive web allow you to directly drag the files you want to add into it.
Step 2. Sign in to your account in the OneDrive app or website on the target PC.
Step 3. Then download them from OneDrive to the destination place on this PC.
▌Way 3: Transfer files via LAN cable
This part is to show how to transfer files from one PC to another with a LAN cable, so you need to prepare a LAN cable (CAT5 is nice) to connect the source computer to the destination computer, please make sure the connection is steady to avoid the transmission interruption
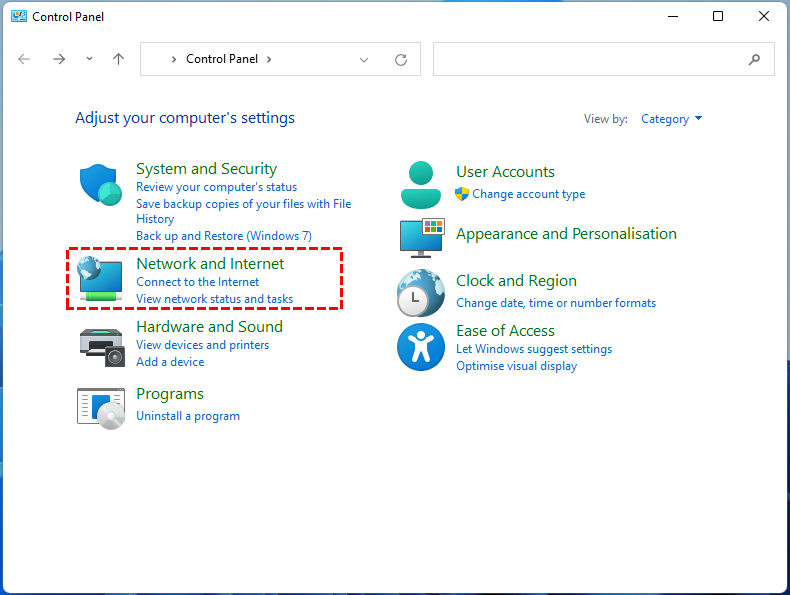
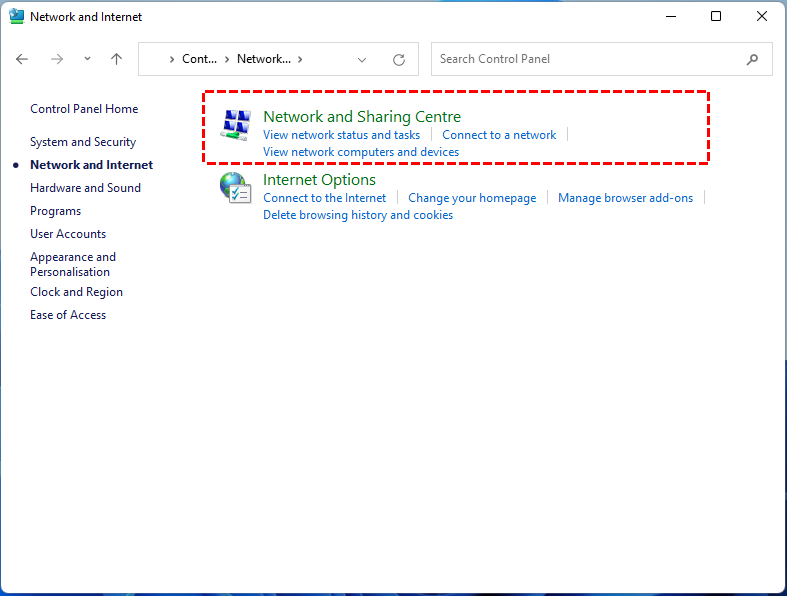
Step 1. After connecting two computers with the cable, on both computers, please go to:
Control Panel > Network and Internet > Network and Sharing Center > Change Advanced sharing settings
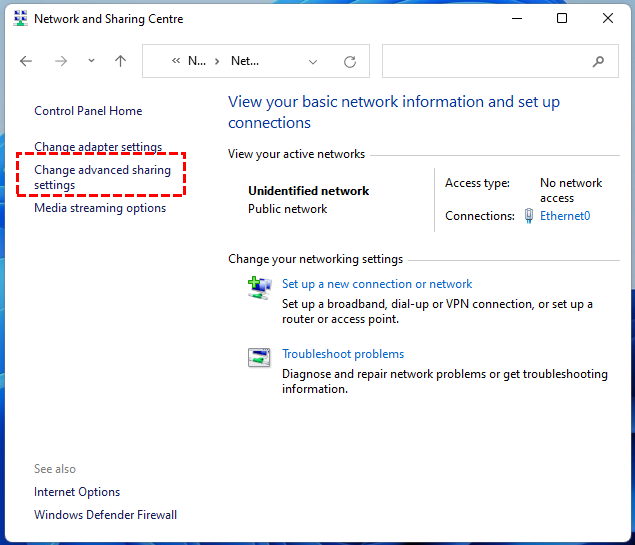
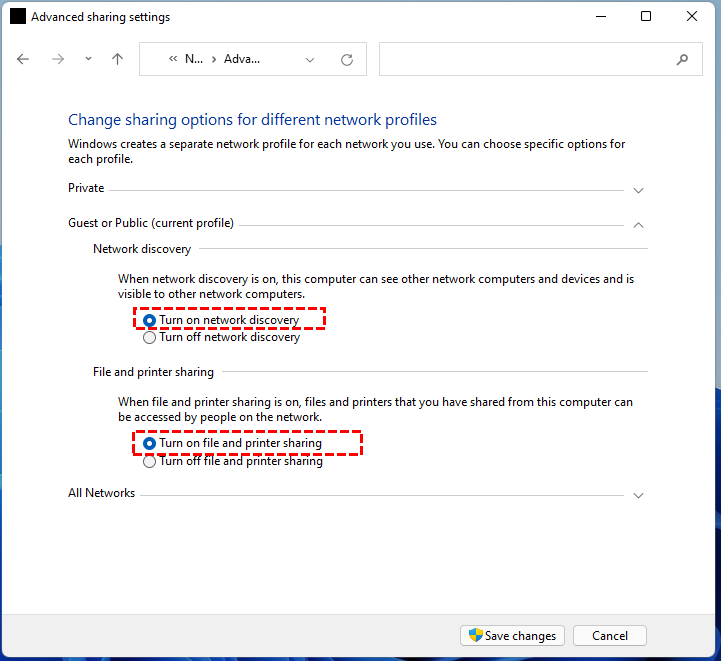
Step 2. Find the following settings and click them each by each, and save your settings.
• Turn on network discovery
• Turn on file and printer sharing
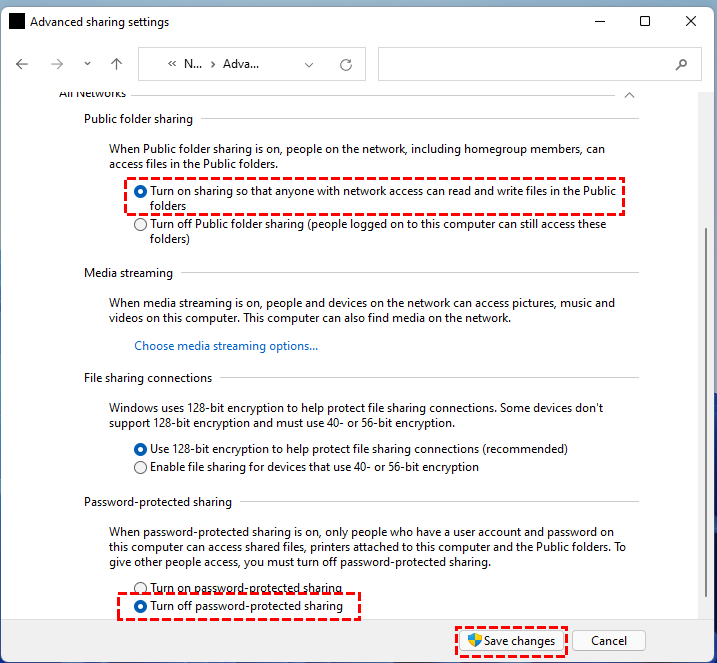
• Turn on sharing so anyone with network access can read and write files in the Public folders
• Turn off password protected sharing
Step 3. Choose the folder or file you want to transfer, right-click it, select “Give access to…” and click “Specific people”.

Step 4. In the new window, select “Everyone” in the bar, click “Add”. When the “Everyone” icon appears under the bar, click “Permission Level” and set it “Read/Write”, then click “Share”.
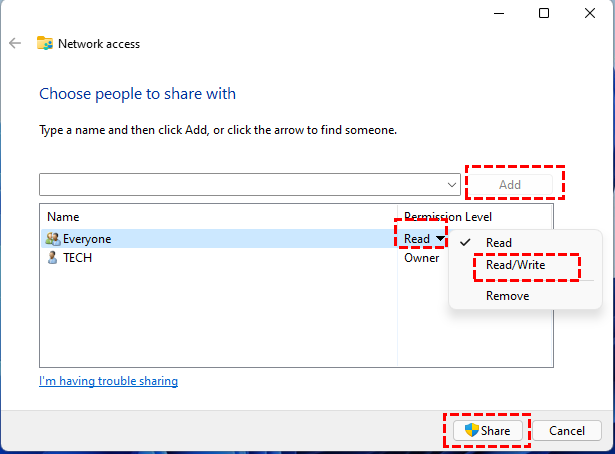
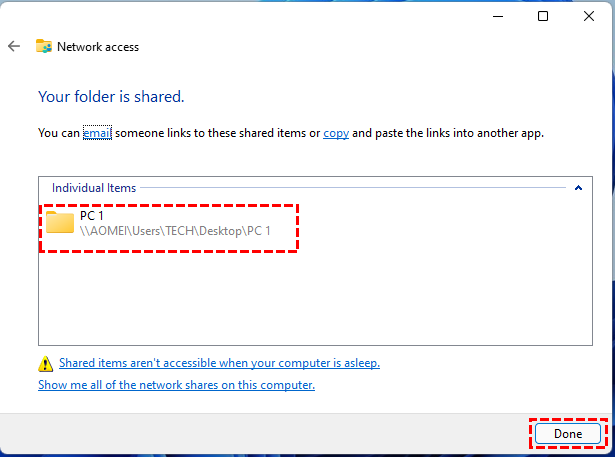
Step 5. In the “Network access” window, you can see your folder is shared, click “Done”.
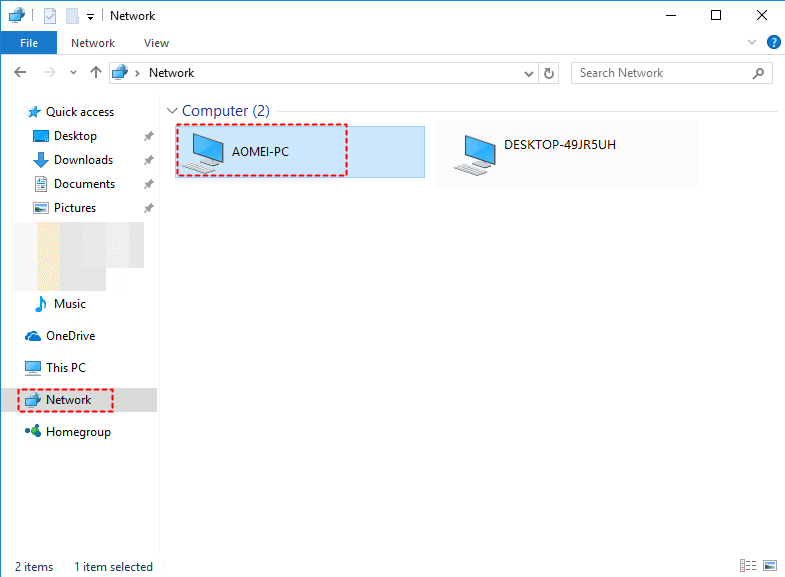
Step 6. On the destination computer, open File Explorer, go to “Network” in the left menu. Click the source PC twice, then you’ll see the folder you have to access, now you can transfer it to your second PC.
Note: You could only share one folder at once, if the folder has many files, it’ll need much time.
▌Way 4: Transfer files via WIFI
Before we start to show how to transfer files with WIFI in Windows 11, please make sure two computers are connected on the same WIFI, and ensure this WIFI is steady. The first three steps are the same as the third method. So we’ll start from the different step.
Step 1. In the File Sharing window, you need to copy or type the path of this file or folder, and send it to the destination computer.
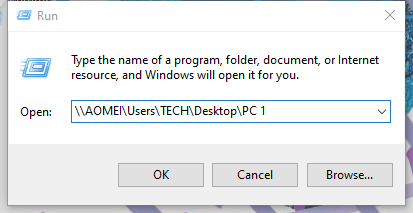
Step 2. On the destination PC, press “Windows” + “R” together, and input or paste the path of the folder or file from the source computer, hit “OK”.
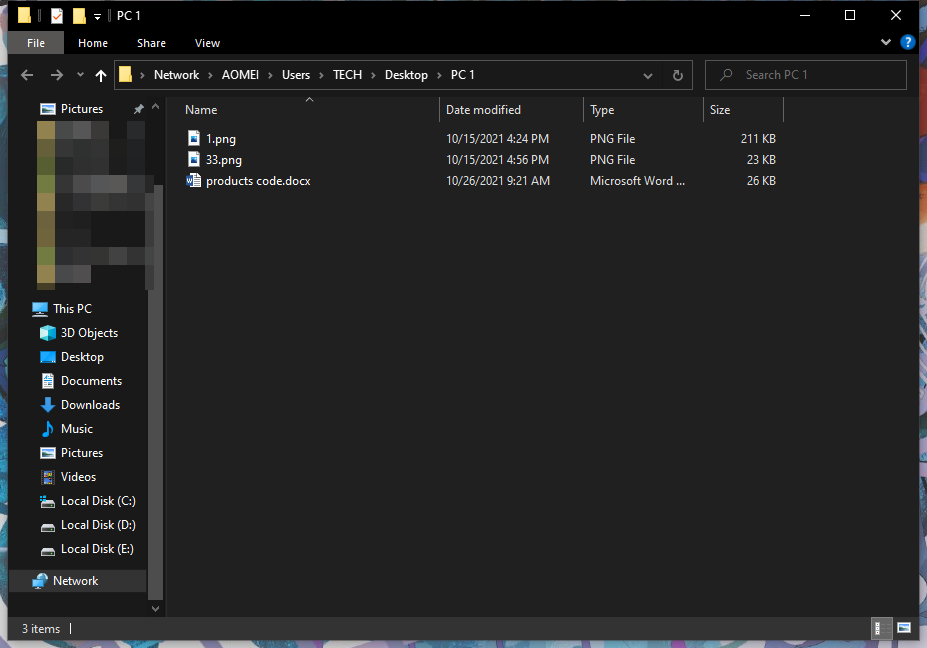
Then, you’re visiting the shared folder, and you can transfer files to the destination PC.
Be patient if the folder or file is large, it may take a while.
Further tip: Move programs to another PC in Windows 11
If you’re just looking for a method to transfer files, the four methods we mentioned above are all available for you. However, if you need to transfer installed programs from one PC to another, all four ways above might be not within the power to help you.
But, don’t be upset, AOMEI Partition Assistant Professional can help you. It is a professional disk and partition assistant for all Windows Users (Server edition for Windows Server users). The installed programs are larger than files and the data files of the programs are stored deeply and dispersedly in the disk, which makes it almost impossible to manually transfer the installed programs.
But, the “APP Mover” function of AOMEI Partition Assistant can automatically search all relevant data files of these programs and move all with the programs. You don’t even need to waste time to reinstall it all again, it can directly run as before. What’s more, it allows users to transfer more than one program once, very convenient, right?
Here are details about how to transfer programs from one computer to another.
Step 1. Connect the disk of the destination computer to the source computer. Install and run AOMEI Partition Assistant. In the main window, click “Free up”, then select the “App Mover” feature.

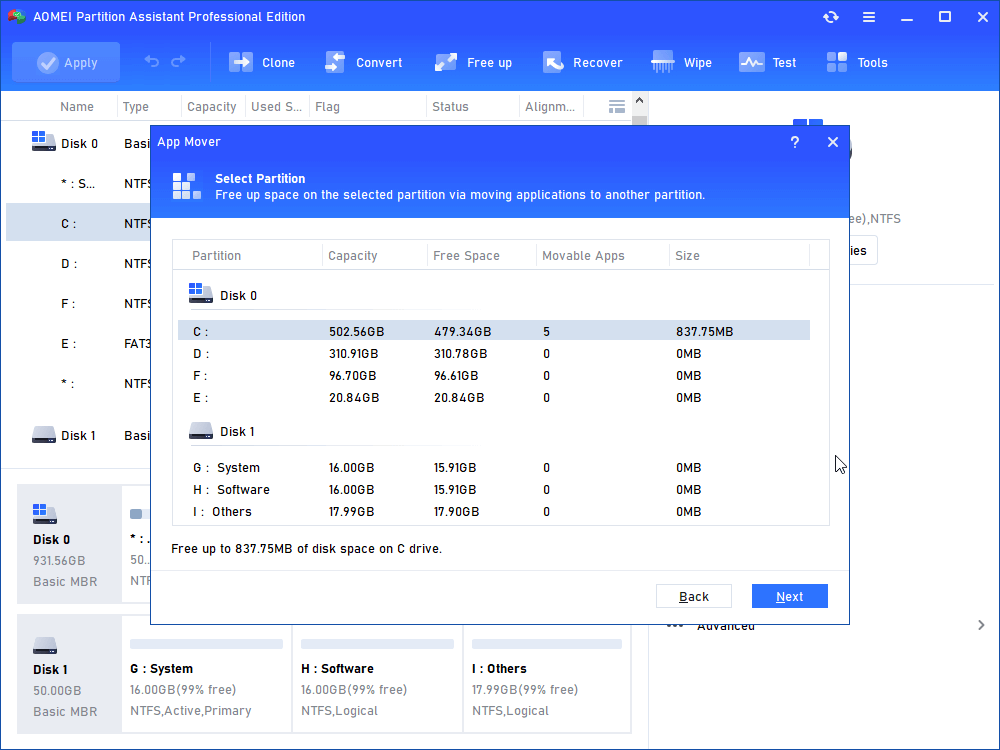
Step 2. After choosing the "App Mover", in the new window, there’s a partition list with the number and size of installed programs. Select the source drive that you want to move programs from and click "Next".
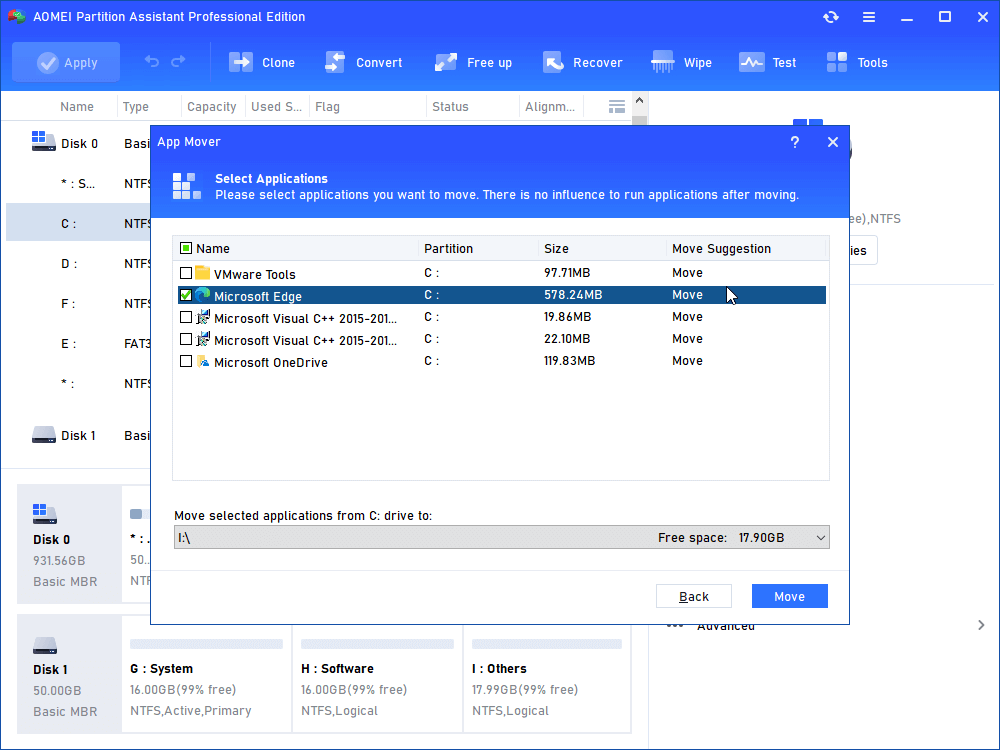
Step 3. In the next window, select the applications you want to move and select the target location, then click "Move".
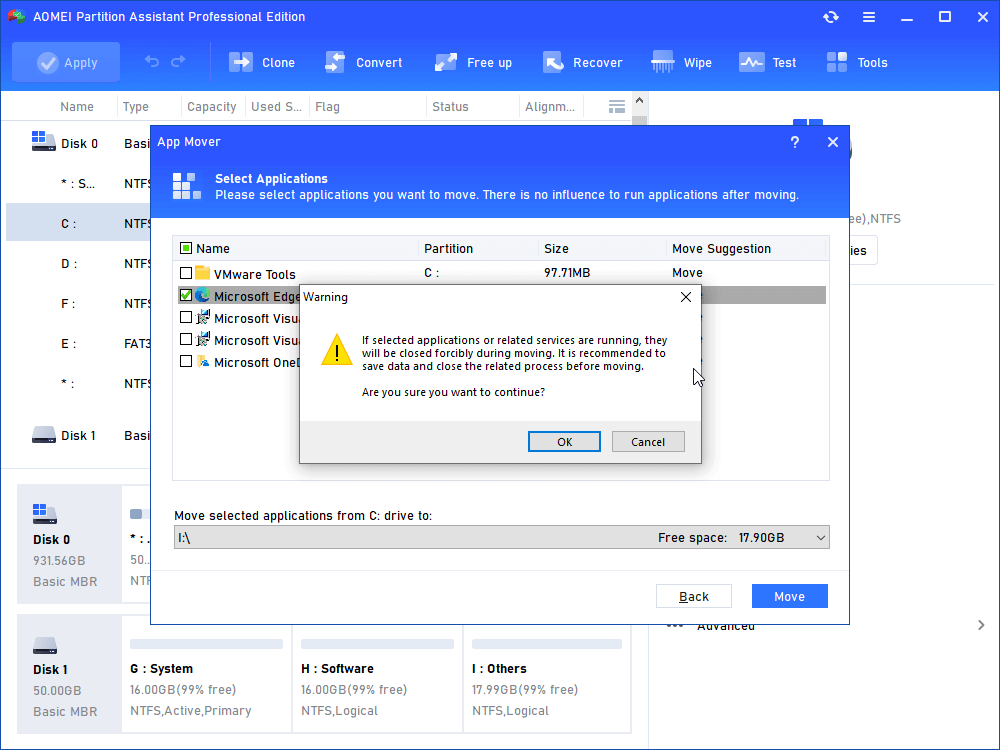
Step 4. In the next window, please confirm forcibly closing running applications when moving starts. Click "OK" to begin the process.
After the move, you can plug the disk back into the destination computer, and try to launch a program to check. After moving the programs, you can run PC cleaner to do a disk clean.
Final words
We offer you 4 ways to solve “How to transfer files from PC to PC in Windows 11”, 1 way is to transfer programs, hope all can help you. With AOMEI Partition Assistant, you can also: extend drive space, clone disk, secure erase SSD, migrate OS without reinstalling…

