How to Wipe Hard Drive from Bootable USB (HDD & SSD Safe)
How can you make a bootable USB wipe hard drive on Windows PC? In this post, we’ll show you how to easily wipe your disks without hurting them.
By Lucas / Updated on January 28, 2026
Why make a bootable USB wipe hard drive?
Before discarding or selling a new desktop computer or laptop, it is required to erase the internal hard drive. Almost everyone is aware that formatting hard drives is a simple task that can be accomplished using Windows' built-in Disk Management tool.
However:
- You cannot wipe the C: drive while Windows is running on it.
- Formatting a hard drive might be difficult if your operating system does not boot correctly or your disk fails to function regularly.
This is why you need to make a bootable USB wipe hard drive. A bootable USB drive built by a bootable USB hard drive wipe utility like a third-party program or a Windows installation disk. You can boot your PC without accessing the Windows system after creating a bootable USB.
How to erase hard drive bootable USB
To erase a hard drive with a bootable USB, you’ll need to make one if you don’t have any Windows installation media. Now, you can follow our steps to create a bootable USB, and wipe the hard drive.
Part 1. Create bootable Windows installation USB media via Media Creation Tool
Tips:
• The USB drive should be at least 4GB of storage (for a 32-bit operating system) or at least 8GB (for a 64-bit system).
• Back up files you have stored on the USB drive because the drive will be formatted during this process and all files on it will be erased.
• Carefully follow the commands. Diskpart is slow and difficult for beginners.
Step 1. Download Media Creation Tool from the Microsoft website and run it as an administrator.
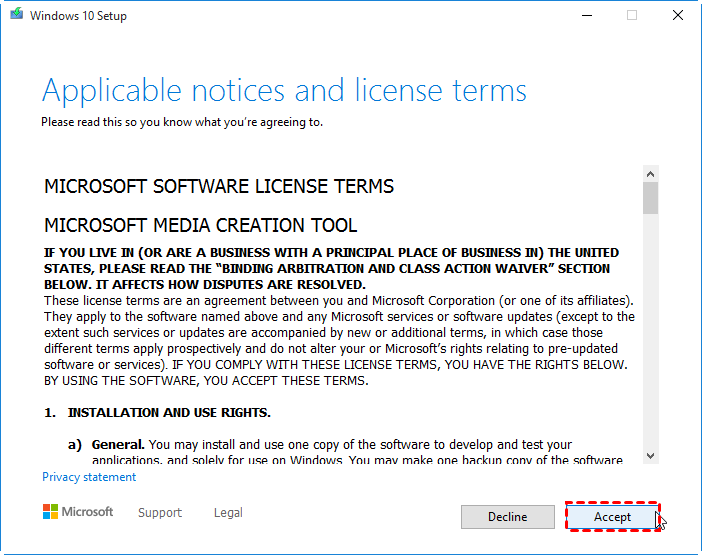
Step 2. Select ”Accept” in the license terms screen.
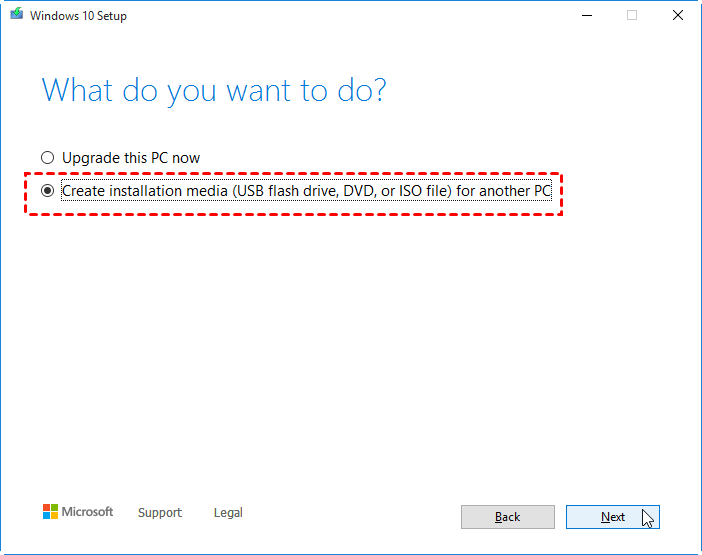
Step 3. Select “Create installation media for another PC”, and then select Next.
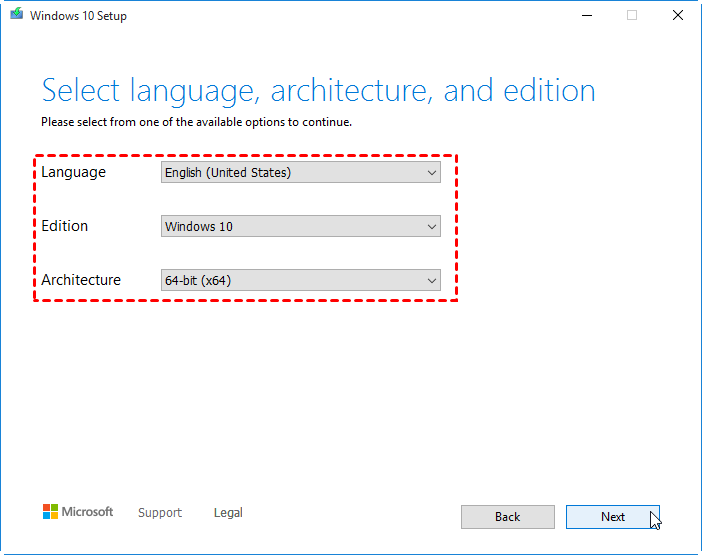
Step 4. Choose the language, edition, and architecture (64-bit or 32-bit) for Windows 10.
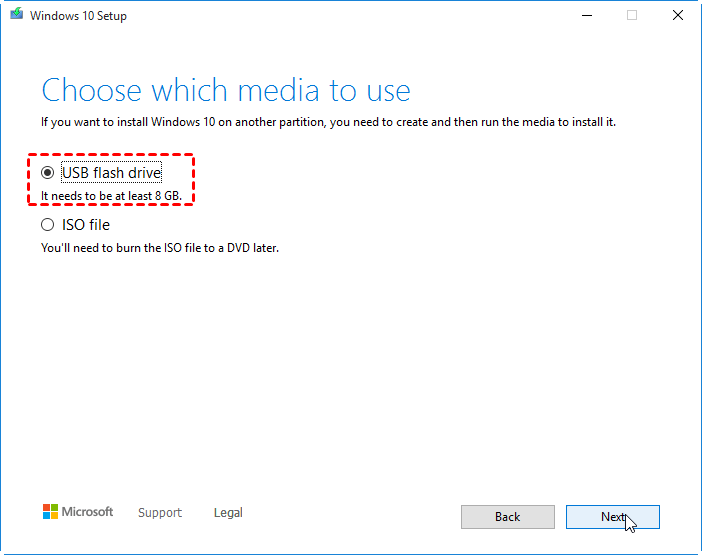
Step 5. Choose ”USB flash drive” and click “Next”.
Step 6. Choose your prepared USB drive from the list, then ”Next”.

Now you can boot from this USB and go to Part2 to wipe the hard drive.
Part 2. Format hard drive from bootable USB
Step 1. After you boot from USB, click “Repair Your Computer” --> “Command Prompt.”
Step 2. In the CMD window, please type the following commands one by one and press “Enter” after each:
• diskpart
• list disk
• select disk x (x is the number of the target disk)
• clean
• create partition primary
• select partition 1
• format fs=ntfs quick (if you plan to create UEFI bootable USB using Diskpart, type “format fs=fat32 quick” instead to format it into FAT32 file system)
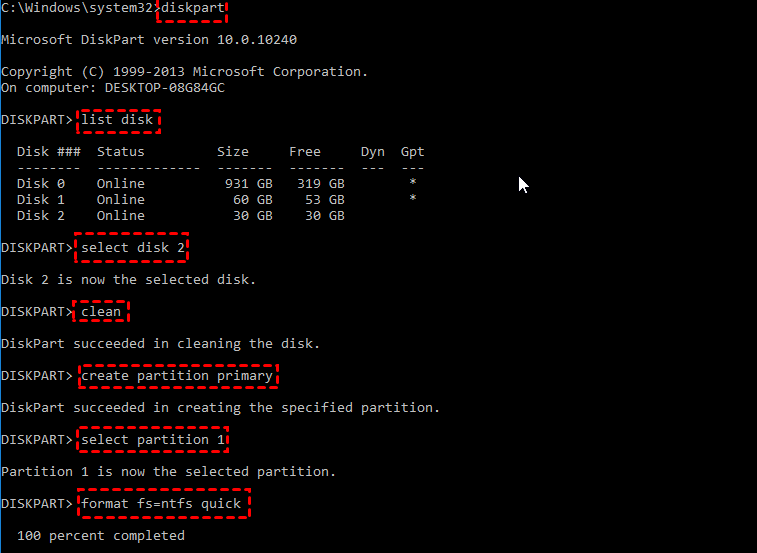
Then your hard drive is formatted.
Best hard drive wipe utility for Windows PC
However, formatting or deleting won’t completely erase the data on the disk. Both can’t resist the data retrieval of any recovery software. If you wish to wipe the hard drive for selling, you must wipe your data thoroughly, not just delete or format.
We suggest you choose a reliable data wiper that is capable of making a USB bootable and easing data completely and permanently. AOMEI Partition Assistant Professional is such a tool. It’s a disk and partition management tool for Windows 11/10/8/8.1/7 PC.
This disk wipe program has 4 wiping approaches to totally and securely remove the data. It also has an easy-to-use interface that simplifies all operations. In only a few clicks, you can clean a bootable hard disk.
Stage 1. Create bootable USB
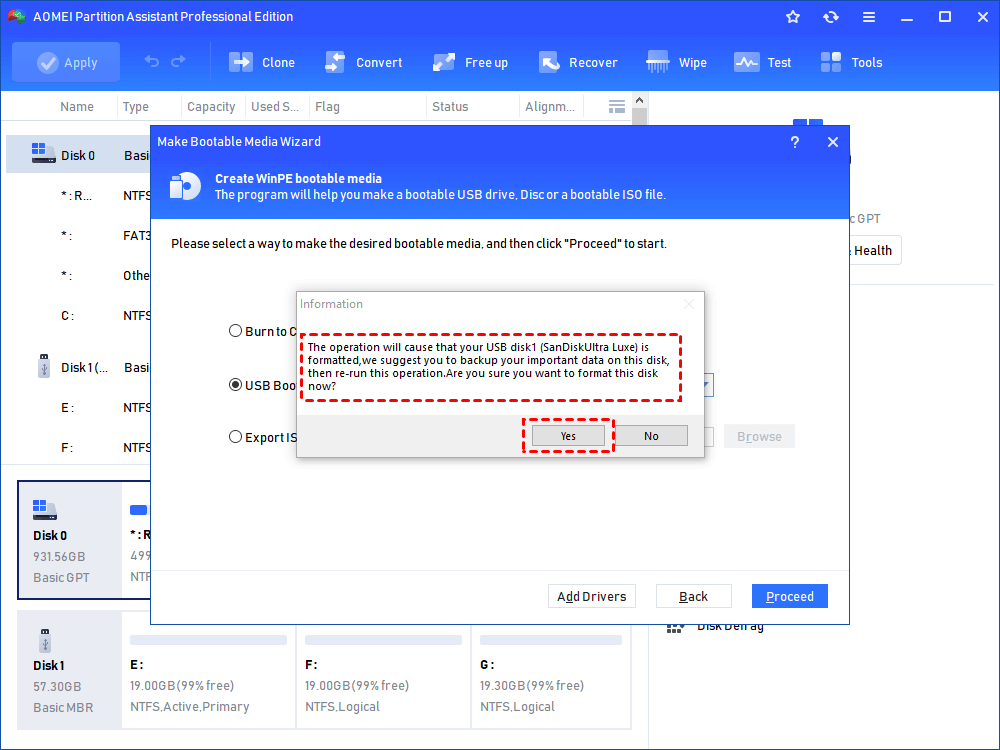
Step 1. Install and open AOMEI Partition Assistant, on the main console, choose "Tools">"Make Bootable Media".

Step 2. Choose "USB Boot Device", select the disk you prepared, and click "Proceed" and it will note to you that the drive will be formatted, click "Yes" to continue.
Step 3. Insert the bootable drive to your computer, and enter BIOS to boot the computer from it.
Stage 2. Use bootable usb to wipe hard drive in 3 steps
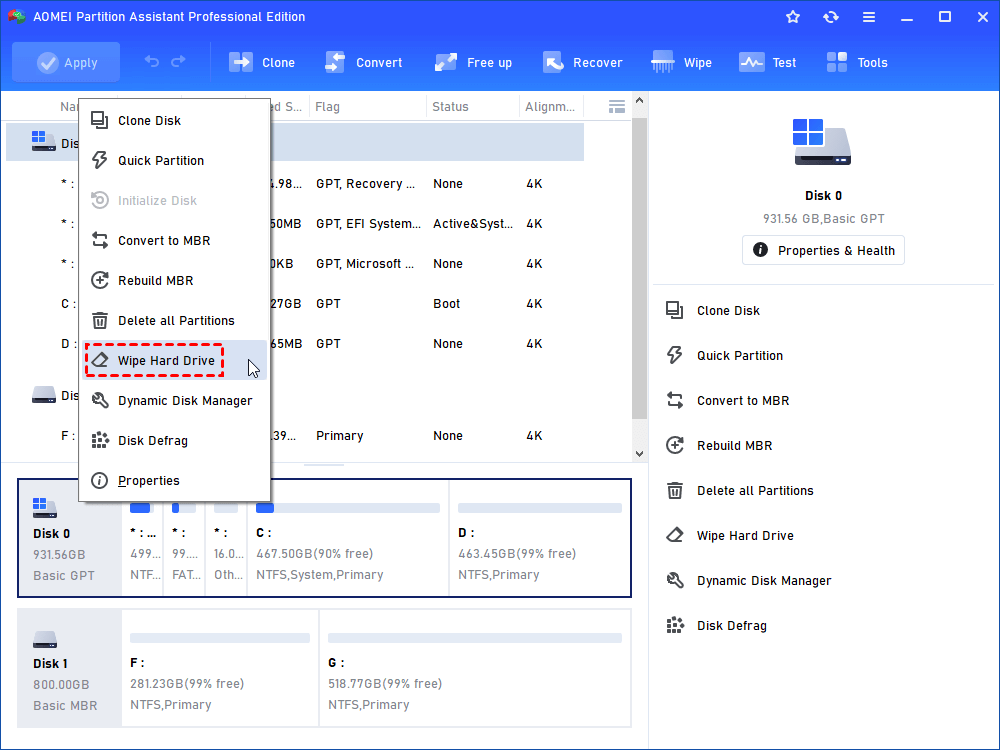
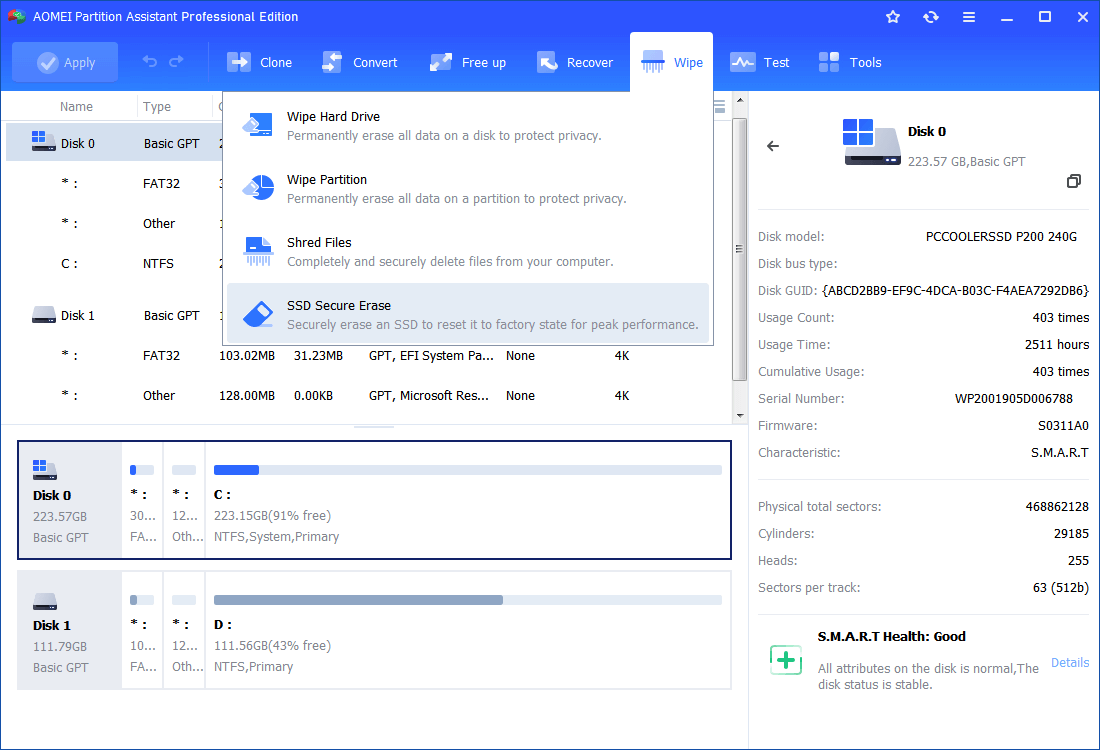
Step 1. Then you will see the main console of the AOMEI Partition Assistant, click the "Wipe" main tab and select "Wipe Hard Disk" option. (You can also right-click the Disk you want to wipe and select the "Wipe Hard Drive" option.)
❗Attention: Do not use this function on your SSD. If you want to clean your SSD, please skip to Further knowledge: Secure erase your SSD.
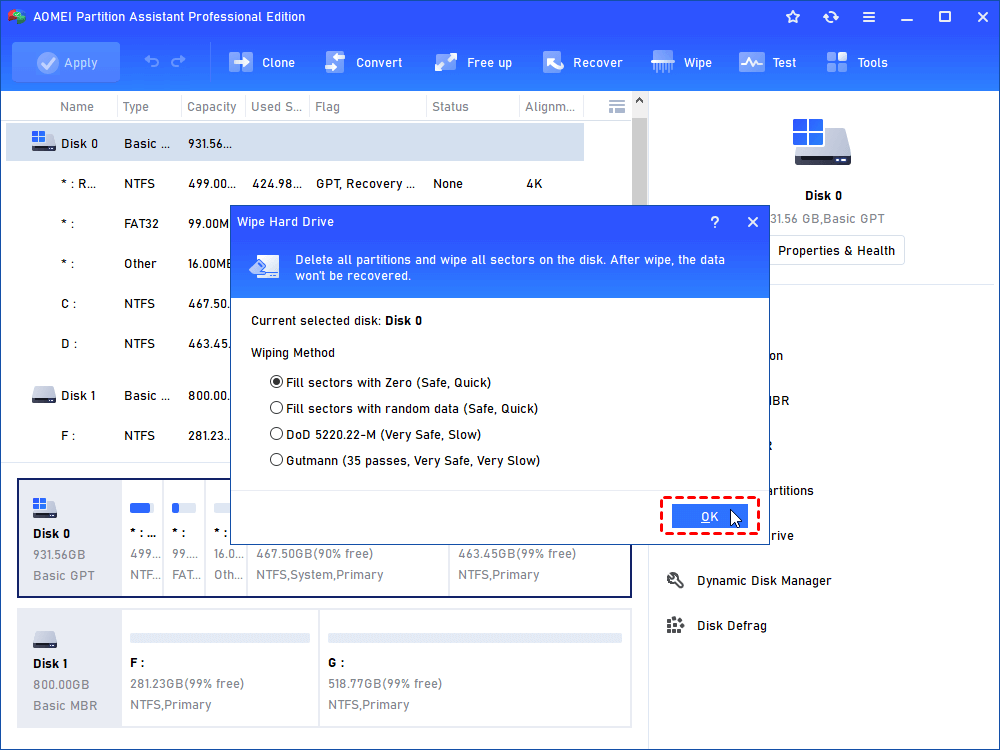
Step 2. select a wiping method to wipe the selected hard drive according to your requirements and click "OK". (By default, the wiping method is Fill in 0.). But If you’re going to sell the disk or give it to another user, we sincerely suggest you use the other 3 ways: Fill sectors with random data, DoD 5220. 22-M, and Gutmann. All these methods are offered for HDD.
★ Note:
Fill in 0: Overwrite all sectors with zeros. It is common to wipe a personal hard drive. It is safe and fast.
Fill in random information: It overwrites the hard drive with random data. It is more secure than the first one.
DoD 5220.22-M: DoD standard is firstly pubilished in Department of Defense of the U.S. It will overwrite addressable locations on the hard disk with binary 0's, binary 1's, and a random bit pattern from once to seven times. The more times you choose to overwrite, the longer the process will take. Three times to five times are recommended. It is more secure than "zero-filling" and "random data filling" and faster than the Guttman. Thus it is often adopted by companies and organizations.
Gutmann: It overwrites a hard drive with 35 passes. It is the safest way here, but it also takes the longest time.
Step 3. You can preview the shrink operation by viewing the "Pending Operations". To commit the "Pending Operations", please click "Apply" and "Proceed".

Then your hard drive will be completely erased.
Further knowledge: Secure erase your SSD
If your computer is using an SSD, it uses a different way to store data. In the same way, wiping it can have a negative impact on its lifespan, so do not wipe your SSD. To clean an SSD, AOMEI Partition Assistant Professional has a mechanism for erasing an SSD without harming it.
Simply make a bootable USB drive and attach the SSD to a functional Windows 7 machine via SATA connector. And then, click on the SSD, select "Wipe"> "SSD Secure Erase," and follow the guides to complete the remaining steps.
Final lines
Using a boot disk to wipe hard drive might not be a nice option if you sell the target disk. But you can make a bootable USB wipe hard drive for reuse. If you need a safer wipe, AOMEI Partition Assistant is a better choice.
The Professional edition includes the ability to assign free space, migrate the operating system to an SSD, relocate installed programs, convert main partitions to logical partitions, recover data, and more. AOMEI Partition Assistant Server includes all of the sophisticated features found in Windows Server 2025/2022/2019/2016/2012(R2) Professional version. You can have a try if you have a server computer.
FAQ
Q1: Can I wipe the hard drive where Windows is installed without a CD/USB?
Answer: Generally, no. You cannot completely wipe the system drive (C: drive) while the operating system is running because Windows locks the files it is using. You must boot from external media (like a bootable USB) or use the "Reset this PC" feature in Windows 10/11 with the "Clean the drive" option selected.
Q2: Does wiping a hard drive remove the Operating System?
Answer: Yes. Wiping a hard drive erases everything, including the Windows operating system, installed programs, and personal files. The disk will be completely empty (unallocated space) afterward, and you will need to reinstall Windows if you plan to use the computer again.
Q3: What is the difference between wiping an HDD and an SSD?
Answer: HDDs store data magnetically and require overwriting (writing 0s and 1s) to prevent recovery. SSDs store data electronically. Overwriting an SSD reduces its lifespan and may not fully erase data due to "wear leveling." For SSDs, you should use a specific "Secure Erase" method which sends a voltage spike to reset all cells instantly and safely.
Q4: Is a bootable USB wiper safe for my hardware?
Answer: Yes, if used correctly. Software like AOMEI Partition Assistant is safe for hardware. However, ensure you select the correct wiping method: use "Wipe Hard Drive" for traditional HDDs and "SSD Secure Erase" for Solid State Drives to avoid unnecessary wear on the drive.

