[Fixed] Cleaned My PC Now It Won’t Turn On
“After cleaned My PC now it won’t turn on”. Many users have met this issue but the solutions are not clear. So this post will show how to check your PC and fix the boot failure issue.
By Lucas / Updated on May 12, 2023
Scenario: Cleaned my PC now it won’t turn on
▶ Case 1
So I was cleaning my PC this morning with a dry paintbrush, compressed air, and isopropyl alcohol. I made sure to hold the air upright to avoid any condensation on the pieces. When I reconnected everything, the computer would not boot. There would be no response, no fans whirling, nothing. I attempted to remove my power supply and replace it with a nice, functional one. The same effect - the pc will not boot. Did I blow up my system? How can I tell if a component of my computer is faulty?
▶ Case 2
My computer was completely reset yesterday because I'm ready to sell my PC. So I removed all files and personal information from it then I restarted my computer while holding down the "shift" key, then performed as instructed, and removed all of my data. The issue currently is that Windows will not start. I let Windows do its job of removing everything because I'd been advised it would take a few hours, but when I got up today, the PC wouldn't start. I'm not sure what's wrong. It simply will not start... Do you have any suggestions about how to solve it?
Why won't my computer turn on?
In the scenario part, there are 2 cases showing the PC won’t turn on normally after 2 ways of cleaning the PC. So we need to analyze the problem from two sides.
Case 1. PC won’t turn on after cleaning dust
In case NO.1, the user opened the case to physically clean the dust in the computer, and after cleaning, the PC won’t turn on normally. Since he needs to unplug and disconnect machine components, the most possible reason is that some components are damaged during the cleaning procedure:
• Loose cables or damaged hardware
• Static shock
• Hidden dust
• Thermal paste
• Power issue
• Motherboard dead
…
Case 2. PC not turning on after system cleanup
In case No.2, the user resets the system and tried to clear all data files before selling the computer, but when the user needed to boot the PC, the computer boot failed. There’s no physical damage on the computer so it’s probable that some system boot files are lost or corrupted.
How to solve [PC won’t turn on after cleaning]?
Now you know PC not turning on after cleaning will occur to different situations and factors. Therefore, in this part, we’ll separately show you how to check the computer and how to fix PC boot failure after system cleanup.
Part 1. Check the computer after dusted
1. Check all cables
After you open the PC case and unplug the components to clean the dust, the first thing you need to check is to make sure all cables are connected correctly and steadily.
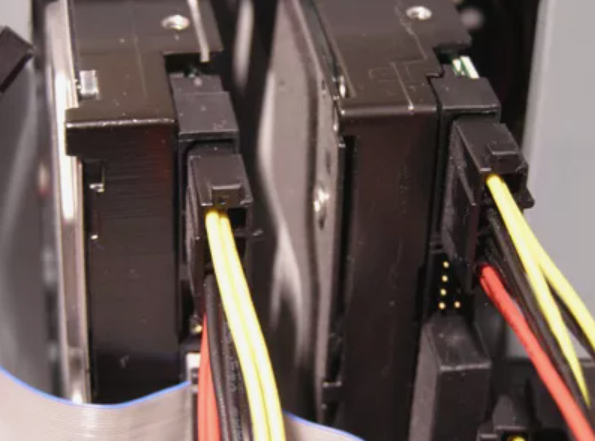
If the various components of your computer didn't connect well, then the machine will be unable to interact with them and will not be able to boot up correctly. Check sure all wires and components are snugly and securely linked. Unhook and rehook wires, and remove and reseat RAM and cards. Examine your complete case, not just the areas you believe you have touched previously.
Check that everything is correctly connected, and then restart your computer.
2. Check the motherboard
The second one is to check whether the motherboard is working or not. You can check the light on the motherboard. The flashing debug light will tell you which part has a problem. If you’re using an old motherboard, you might hear beep sounds if it is damaged.
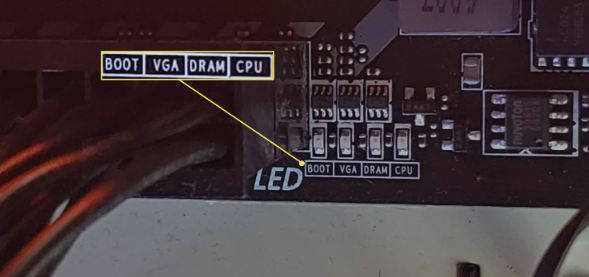
◤ BOOT: A red light near the BOOT indication indicates that something is amiss with the boot devices, which are the hard disk. More specifically, it is the hard disc on which the operating system is stored.
◤ VGA: A red light near the VGA or GPU indication indicates that the graphics card has not been identified or properly placed.
◤ DRAM: A red light near the DRAM indication indicates that a RAM module is not properly placed. If you notice that the side clamps on each side of a RAM stick are not secured down, this is most likely the cause of the problem.
◤ CPU: A red light near this indication indicates that the motherboard does not recognize the CPU, which might signal a variety of factors. The CPU may not be properly plugged in, or one of the pins may be bent. It's also possible that the CPU fan is unplugged. And a dead CMOS battery might cause the red light to illuminate.
3. Static shock
Your motherboard may also be destroyed by the electro-static discharge, also called (ESD). Any components with electric capacity can be destroyed by static electricity.
If you accidentally touched your video card or CPU while cleaning and felt the familiar zap of a static charge, you may have damaged that component. Using a static-generating cleaning instrument, such as a dry brush, can cause a charge to be generated insensibly. Touching another component might unintentionally release this voltage, potentially killing your computer.
To avoid static shock, you can touch a metal part of the chassis itself prior to handling components, wear an anti-static wristband and connect it to your PC case, or directly seek the assistance of a skilled technician to test your components for indications of life.
4. Check the fans
You can also find something wrong if the fans of the GPU and CPU can’t spin. If they are not working, check the cables and plug all cables again.
Part 2. Fix PC boot failure caused by system cleanup
If your computer can’t boot successfully after you clean the files or update the system.
1. Reset the computer
When a PC’s system files are missing or damaged, resetting the PC is a nice option.
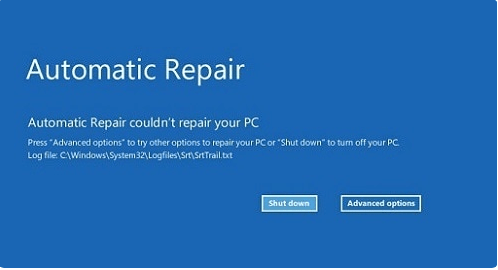
Step 1. Reboot the PC and shut it done once the logo of Windows appears. Repeat the step 3 times and then, you’ll be redirected to the screen of automatic repair. Now, select “Advanced Options”.
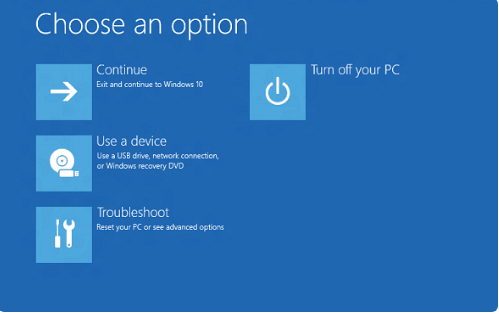
Step 2. Click on “Troubleshoot”.
Step 3. Reset this PC.
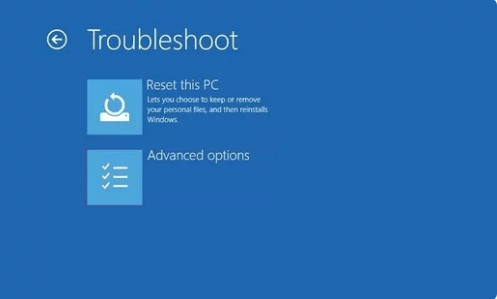
Step 4. You can decide whether to retain your personal files before resetting the PC.

2. Use Windows Startup repair
This way requires a Windows installation USB or disc to boot your PC.
Step 1. Shut down your computer and unplug all peripherals.
Step 2. Insert the Windows installation tool and turn on your computer. You may need to enter the computer’s BIOS to change the boot sequence so that you can boot from the Windows installation tool.
Step 3. When it gives you the message “Press any key to boot from CD or DVD...”, press any key to boot your computer.
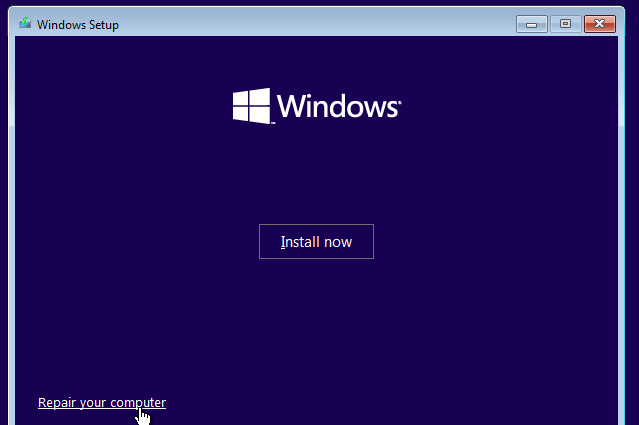
Step 4. When the Windows install screen shows up, click "Repair your computer" in the lower-left corner.
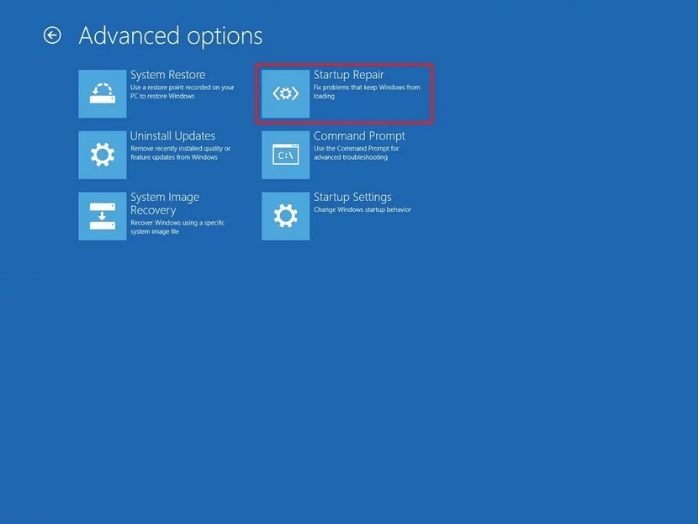
Step 5. Click Troubleshoot -> Advanced options -> Startup Repair. The Windows will scan your new drive and automatically detect that the boot sector has been damaged or is missing and will apply the appropriate fixes.
Unplug the Windows install media and reboot your computer to check if the problem is solved or not.
3. Rebuild the MBR part
MBR damage is a common error if you want to fix it without damaging any data on your PC. To rebuild the MBR part, you can turn to AOMEI Partition Assistant Professional for help. Unlike the CMD tool which needs many complex commands, this tool only requires clicking. The “Rebuild MBR” feature can help users to rebuild damaged MBR parts without Windows installation media.
1. A USB drive larger than 32GB.
2. A working Windows PC with AOMEI Partition Assistant Professional installed on this PC.
Step 1. Insert the USB drive into the working Windows PC and make sure it can be detected. Launch AOMEI Partition Assistant. Click "Tools"> "Create Bootable Media" to make a bootable USB.

Step 2. Unplug the USB drive from the working PC and insert it into your unbootable Windows. Get into BIOS to change the boot order so that it can boot from the bootable USB drive you created.
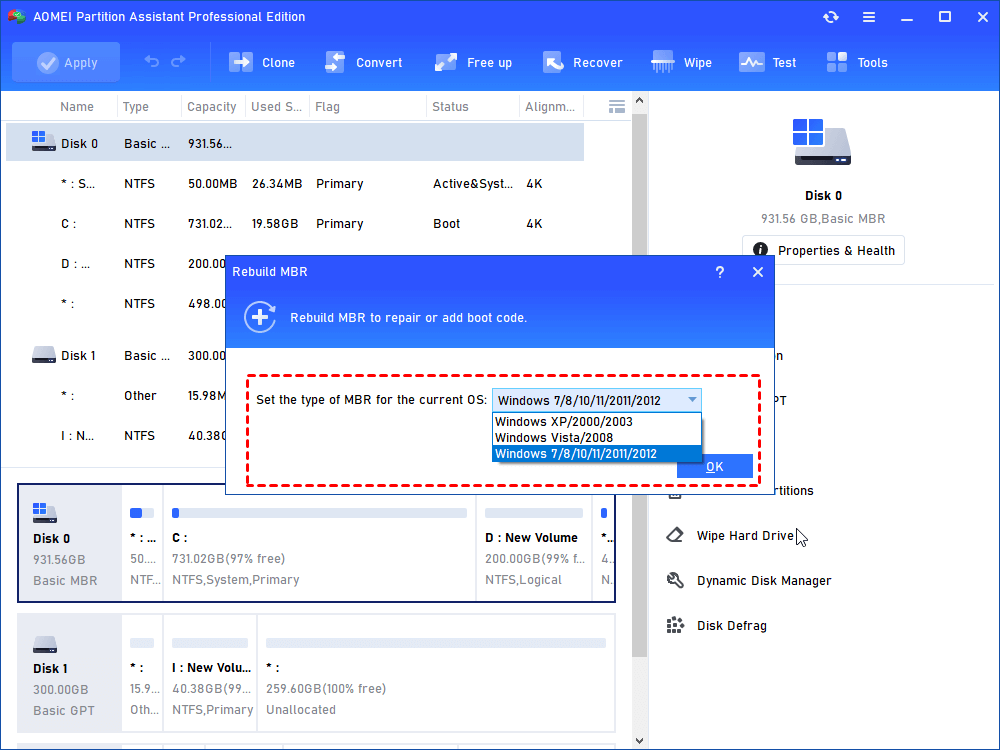
Step 3. When it boots from the USB drive, you’ll see the main interface of AOMEI Partition Assistant, right-click the system disk and select “Rebuild MBR”.

Step 4. Set the type of MBR for the current OS, and click OK.
Step 5. When you back to the main interface, click “Apply” -> “Proceed”.
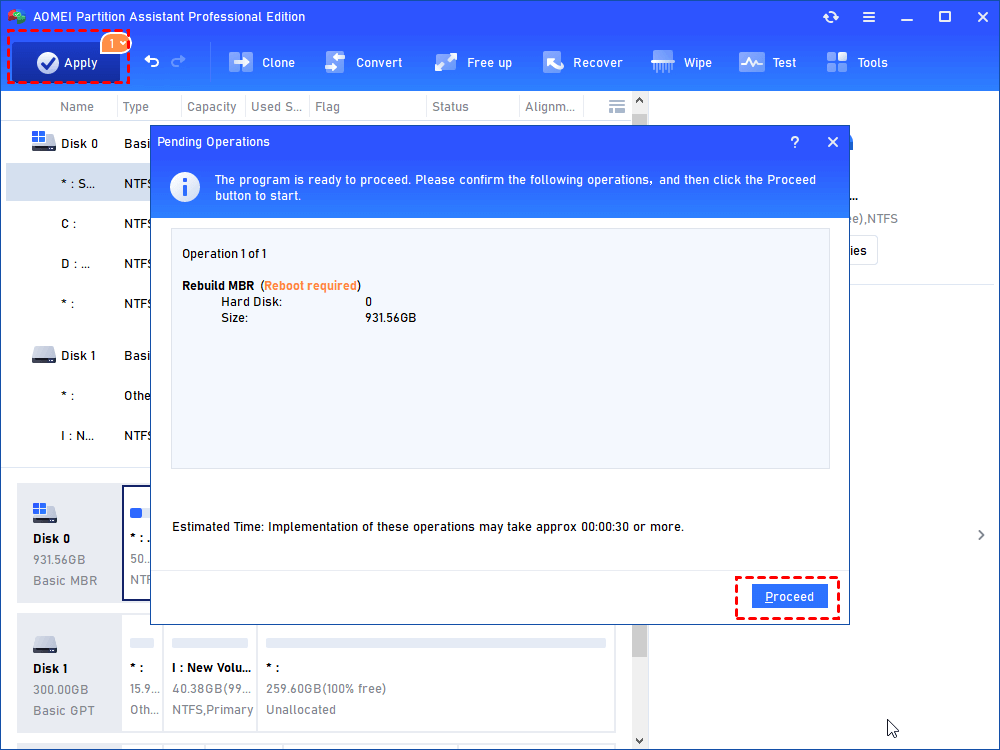
After a while, when it completes, unplug the USB drive and restart your computer.
Ending lines
“After cleaned my PC now it won’t turn on” is not a problem many users can fix easily, you may need to try many ways to find the solution to your situation. AOMEI Partition Assistant is a disk and partition manager for Windows users. If your PC boot failure is caused by damaged system files and MBR part, this tool can help you. And it has many other practical functions like disk cloning, OS migration, extending partition, App/folder mover, etc.
In addition, it has the Server Edition for Windows Server 2025/2022/2019/2016/2012(R2)/2008(R2)/2003 users to manage their computers.

