How to Create Partitions from BIOS in Windows 11, 10, 8, 7?
How can I create partitions from BIOS properly? In this post, you’ll not only learn whether you can create partitions from BIOS, but also, learn the best way to create partitions before booting into Windows.
By AOMEI / Updated on April 11, 2025
Is it possible to create partitions from BIOS?
The short answer is no—you cannot create disk partitions directly from the BIOS. BIOS (Basic Input/Output System) is firmware that initializes hardware during the boot process and provides runtime services for the operating system, but it does not include tools for managing disk partitions.
When you refer to creating partitions "from BIOS," they often mean doing so before the operating system boots. While the BIOS itself doesn't offer partitioning features, you can use bootable tools—such as a Windows installation USB or third-party partition managers (like AOMEI Partition Assistant)—which run before Windows loads. These tools allow you to create, delete, or modify partitions without needing to boot into the OS.
The Best Windows Disk Partition Manager and PC Optimizer
To enter the BIOS or boot menu (which lets you choose a bootable device), you can typically press a key like F2, F10, F12, DEL, or ESC during startup—depending on the computer's manufacturer. While BIOS cannot create partitions, it plays a role in booting into tools that can.
How to create a partition from BIOS?
To create partition from BIOS, you will have 2 methods to do it.
Method 1. Create a partition from BIOS using a Windows installation media
By using a Windows installation media and setting it as the first boot device in BIOS, you can create partitions in Command Prompt by inputting corresponding commands. It might be a little difficult if you’re not a professional user, but it does work well.
Step 1. Create a Windows installation media using a Windows media create tool.
Step 2. Boot your Windows PC from the installation media after setting it as the first boot device.
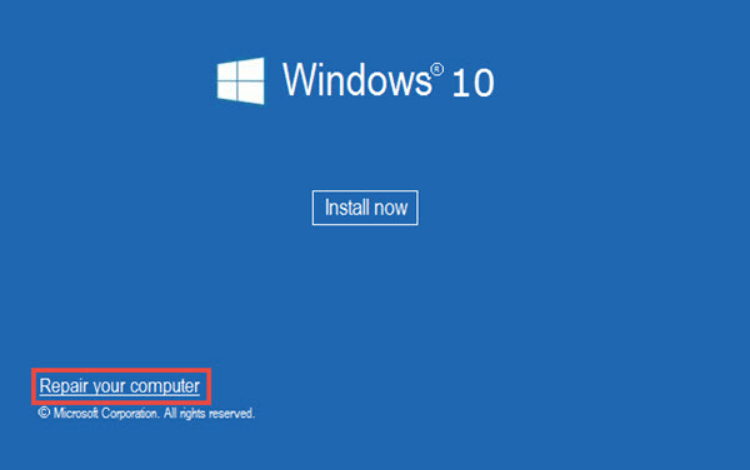
Step 3. Once the Windows Set is fully loaded, you’ll be presented with the window as the screenshot shows. In the windows, you can set the language, time and currency format, and Keyboard or input method. When everything is complete, hit "Next".

Step 4. Hit : "Repair your computer" at the bottom left of the window.
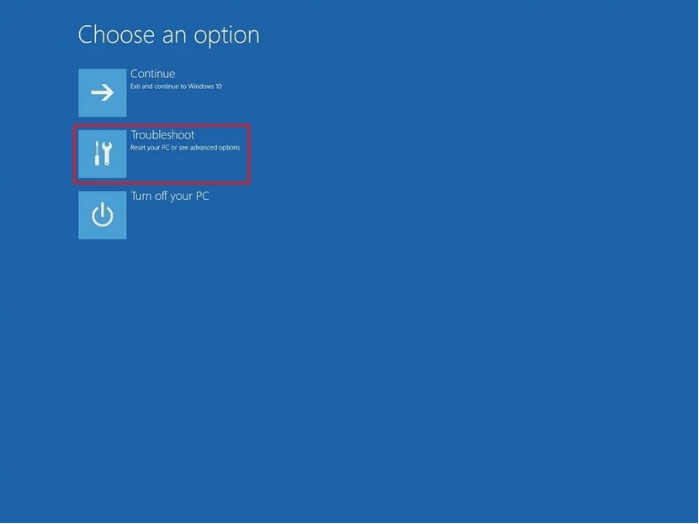
Step 5. Choose the "Troubleshoot" option.
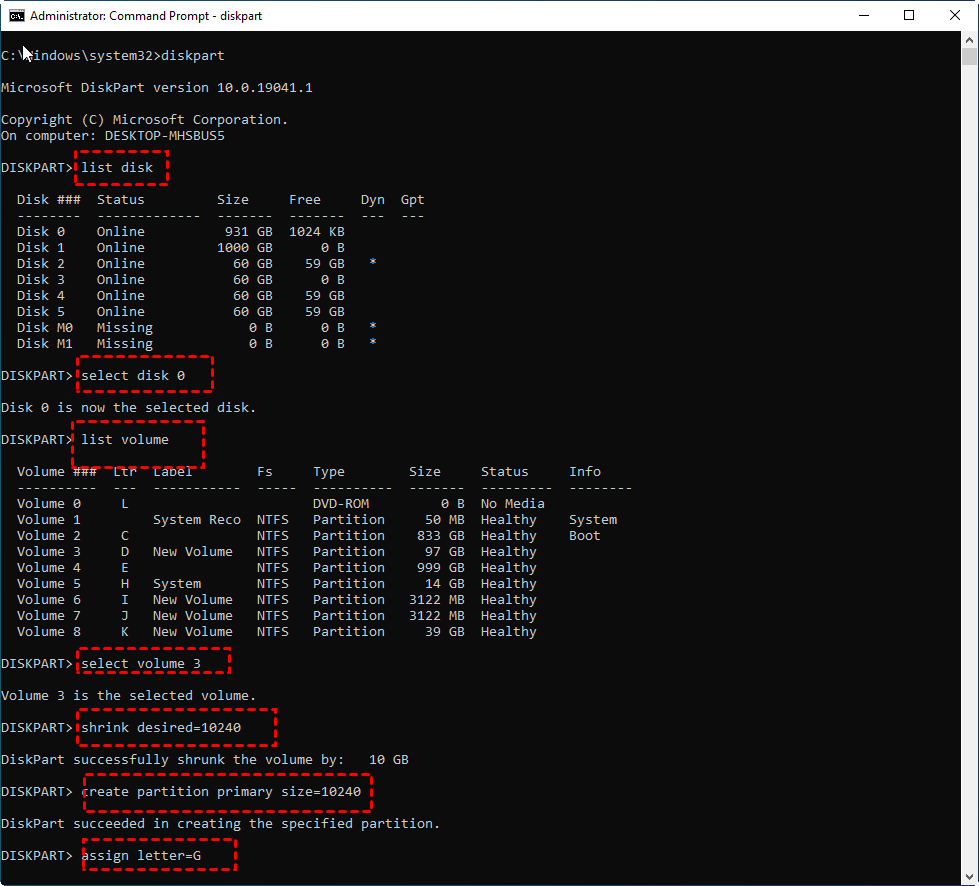
Step 6. Choose "Command Prompt". In the CMD window, type "diskpart" and hit "ENTER" to launch Diskpart. Type "list disk" and hit "ENTER" to list all hard disks on your PC.
Step 7. Type "select disk *" and hit "ENTER". Here, * represents the hard disk where you want to create partitions. Type "list volume" and hit "ENTER" to list all partitions on the disk. Type "select volume *" and hit "ENTER". * represents the partition you need to shrink.
Step 8. Type "shrink desired=10240" and hit "ENTER". Here, we take 10240 for example that’s the amount of space to shrink. Type "create partition primary size=10240" and hit "ENTER" to create a partition. Type "assign letter=G" and hit "ENTER" to give the new partition a drive letter. Here, you can replace other letters as long as they haven’t been occupied by other partitions.
Quit Diskpart and reboot your PC. Then, you’ll find there’s a new partition of 10GB.
Method 2. Create a partition from BIOS with the best third-party disk manager
As mentioned earlier, creating partitions using traditional methods like Command Prompt can be tedious, complex, and time-consuming. If that approach feels overwhelming, there's a much simpler and more efficient alternative—AOMEI Partition Assistant.
This powerful third-party disk manager allows you to create a bootable USB drive that you can boot into by changing the boot order in BIOS. Once you boot from the USB, AOMEI provides an intuitive interface that lets you easily create, resize, delete, or format disk partitions—far beyond what the Windows installation media offers.
Compared to the limited partitioning options available during a Windows installation, AOMEI Partition Assistant offers more features, a user-friendly interface, and greater flexibility. So, if you’re wondering how to create a hard drive partition through BIOS, try this ultimate disk manager to make the process much easier and more efficient.
The Best Windows Disk Partition Manager and PC Optimizer
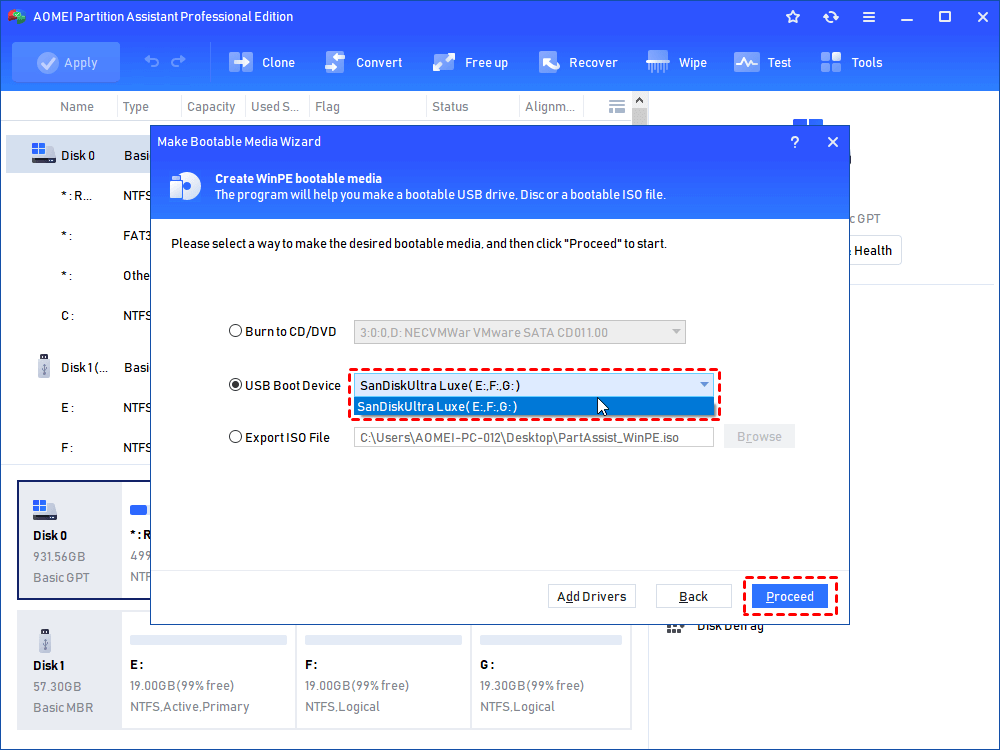
Step 1. Plug a usable USB drive into a working PC, install, launch AOMEI Partition Assistant, and then in the top toolbar, click “Tools” > “Make Bootable Media”.

Step 2. Choose the USB drive beside "USB Boot Device" and hit "Proceed".
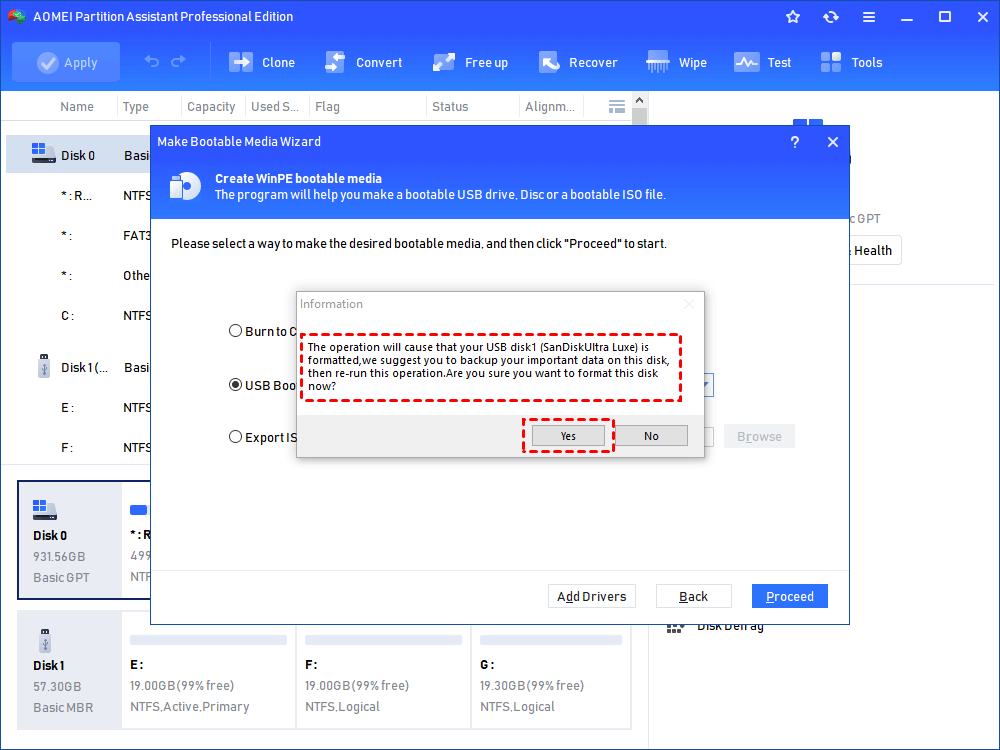
Step 3. Hit "Yes" after reading the popup notification.
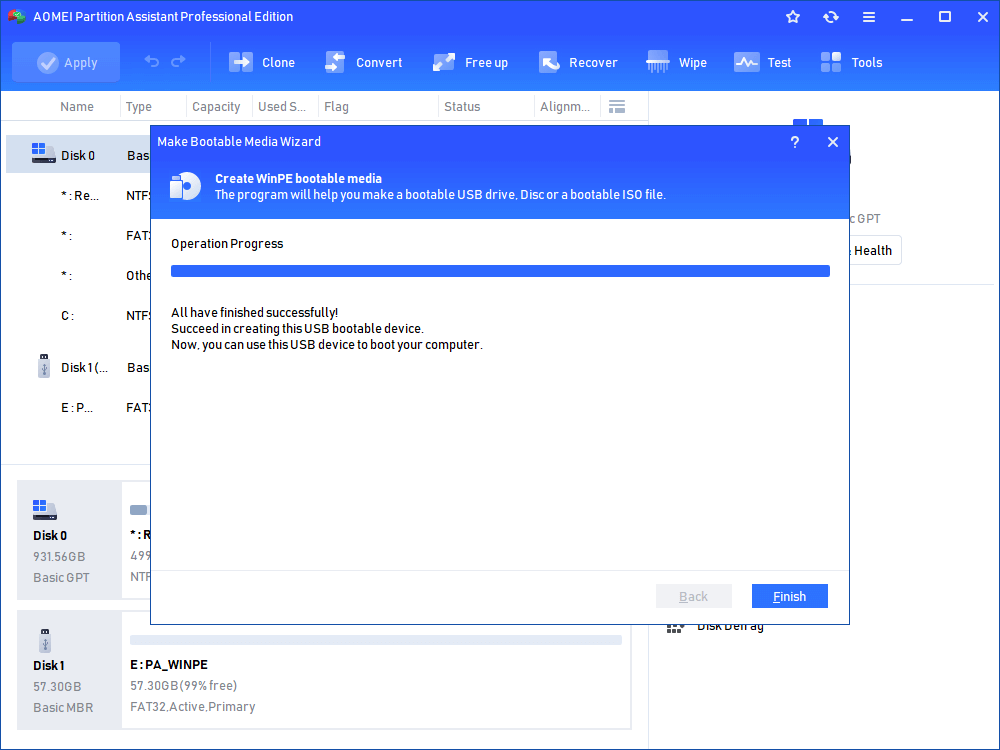
Step 4. Wait for the process to be completed.
Now, connect the USB drive to the computer where you want to create partitions. Change the boot order from BIOS and boot from it.
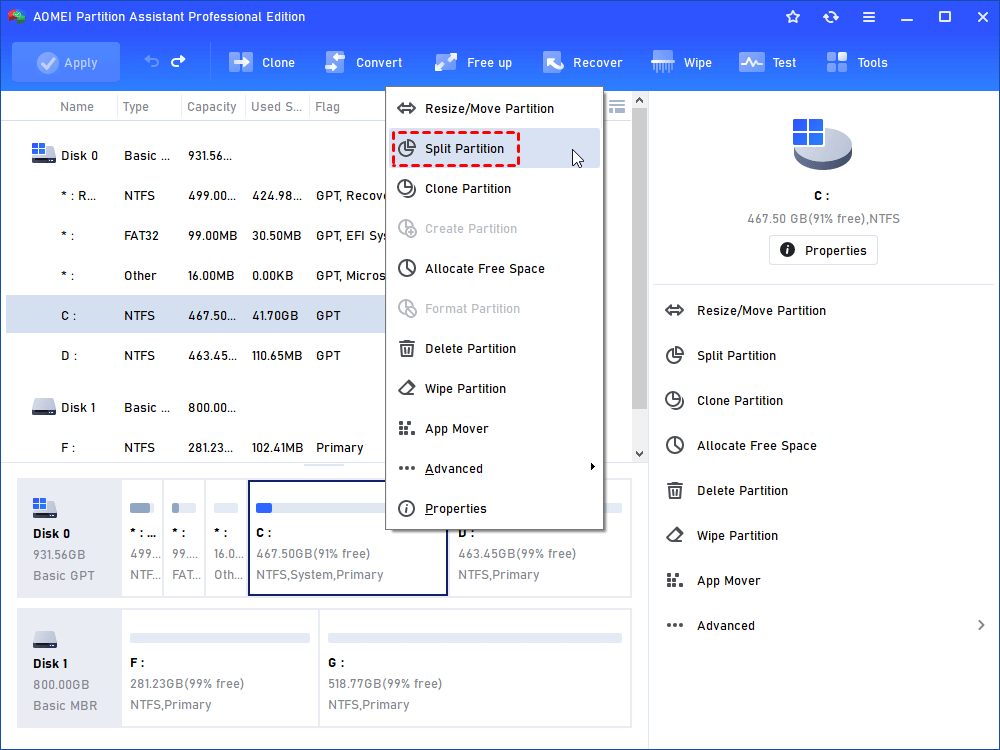
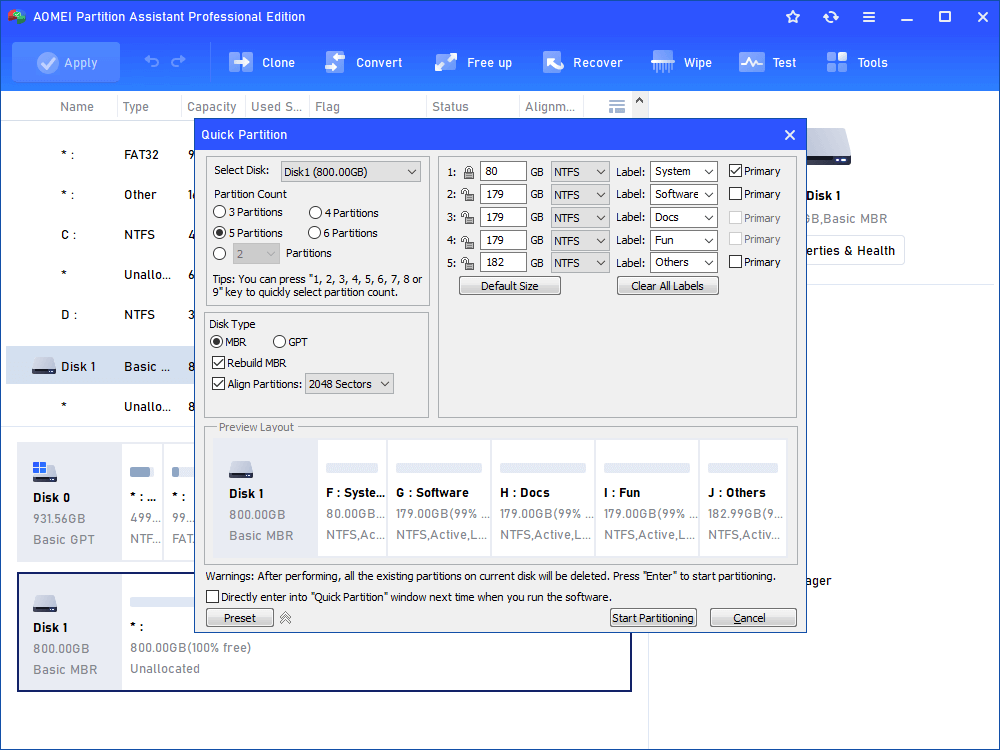
You will be directly sent to the home interface of the AOMEI product. There’re multiple ways in which you can create partitions including splitting partitions and quick partitions.
The Best Windows Disk Partition Manager and PC Optimizer
With "splitting partitions", you can divide 1 partition into 2 partitions; with "quick partitions", you can create more than 2 partitions at the same time from a single hard drive.
Conclusion
How to create partitions from BIOS for different purposes? In this post, 2 practical solutions are provided. With CMD, you can get it done after a long process while with AOMEI Partition Assistant, it can be done more easily within a short time. If you want to partition your hard drive on Servers with the AOMEI product, you can try the Server edition.

