Stop Code CRITICAL PROCESS DIED 0x000000EF Dead in Windows 10
This article shows how to stop CRITICAL PROCESS DIED/0x000000EF error to repair BSOD caused by 0x000000EF code in Windows 10.
By Lucas / Updated on May 12, 2023
About error code--CRITICAL PROCESS DIED/0x000000EF

A blue screen of death (BSOD) is a type of system malfunction. When this mistake occurs, data may be corrupted, and system security may be compromised. There are many kinds of error codes of BSOD issues, however, CRITICAL PROCESS DIED might be the most dreadful one.
Based on the official explanation from an article of Microsoft, 0x000000EF is the value of the bug check of CRITICAL PROCESS DIED, which means an uncertain system process died for some reason.
If a critical process pauses, the system will be forced to execute a bug check. Then a blue screen with the error code: CRITICAL PROCESS DIED will appear.
The possible causes are:
• Hardware fault
• The incompatible programs or Windows update
• System files corrupted
…
Fix: Blue screen critical process died in Windows 10
No matter what reason that leads your computer to CRITICAL PROCESS DIED 0x000000EF error, how to resolve is the point. Thus, we’ll introduce 6 ways for you to solve CRITICAL PROCESS DIED in Windows 10.
Method 1. Remove all newly added hardware
The first method you need to try is to unplug all external devices or newly added devices, such as external drive, scanner, digital plate, etc. because we need to exclude any failure of connection or any device confliction that may cause 0x000000EF error.
If the 0x000000EF is still exited, you may need to boot into the safe mode to try more methods.
Method 2. Update your Windows Driver Software
Step 1. Press “Win”+ “R” at the same time, then type “device manager”, choose “Device Manager”.
Step 2. Expand “Disk drivers”, right-click the OS hard drive, choose “Update Driver Software” in the small menu.
Now, please exit Safe Mode to save the changes and to execute the operation.
Step 1. Press Windows + R keys, type msconfig, and press Enter.
Step 2. Follow: "Boot tab" > "Boot options" > Uncheck "Safe boot" box.
Step 3. Click "OK" and "Apply".
Then, restart your PC.
Method 3. Uninstall Recent Windows Updates
Step 1. After you boot your PC in Safe Mode, press “Win”+ “R” together, type “Control Panel” in the search bar to open it.
Step 2. Click “Programs”, “Default Programs”, “Programs and Features”.
Step 3. In the left menu, click “View installed updates”.
Step 4. Right-click the latest Windows update, and click “Uninstall”.
Step 5. In the warning window, click “Yes” to confirm.
Step 6. Then, click “Restart Now”.
Exit Safe Mode as method 1 to save the changes and to execute the operation.
Method 4. Use System Restore
Step 1. In safe mode, press "Windows + R" keys at the same time, and type “rstrui.exe” in the box, press “Enter” to open System Restore.
Step 3. Click "Choose a different restore point" > "Next".
Step 4. Choose the latest Windows backup before you install the new Windows 10 update, and click "scan for affected programs".
Step 5. Click "Finish"
Step 6. In the warning window, click "Yes" and wait for the process.
Method 5. Repair corrupted system files via the SFC command
Step 1. Type “cmd” in the search bar and right-click on Command Prompt from results and “Run as administrator”.
Step 2. In the Command Prompt window, type: DISM /Online /Cleanup-Image /RestoreHealth and hit “Enter”.
Step 1. Press the power button for 10 seconds to turn off Windows 10.
Step 2. Re-press the power button to start the PC and hold the power button for 10 seconds to turn off it.
Step 3. Press the power button again to turn on the computer, once Windows starts, hold the Power button again for 10 seconds to turn it off.
Step 4. Retry to power on your computer until Windows fully restarts and enters WinRE (Windows Recovery Environment).
Click "Troubleshoot" > "Advanced options" > "Startup Settings" > "Restart”
Wait for the process to get completed, when it’s finished, restart your computer.
Now your PC is in Safe Mode.
Method 6. Repair bad sector on C drive
Because your PC has died already, thus you need to boot your computer from other ways. If you have a bootable USB, you can skip to the repair section.
- ★Note:
- 1. The next solution needs you to boot your computer from a Windows 10 bootable media, DVD, or USB, if you don’t have one, don’t be panic. Before we start to fix CRITICAL PROCESS DIED/0x000000EF, let’s make a Windows bootable media.
- 2. The USB drive should be at least 4GB of storage (for a 32-bit operating system) or at least 8GB (for a 64-bit system).
- 3. Back up files you have stored on the USB drive because the drive will be formatted during this process and all files on it will be erased.
It will be easier to create the Windows bootable media with AOMEI Partition Assistant Professional, for if you use CMD, there’s the risk of failure caused by the wrong orders you insert in. This convenient software will make the creation safer and simpler. And it’s suitable for Windows 10/8/7/XP/Vista users.
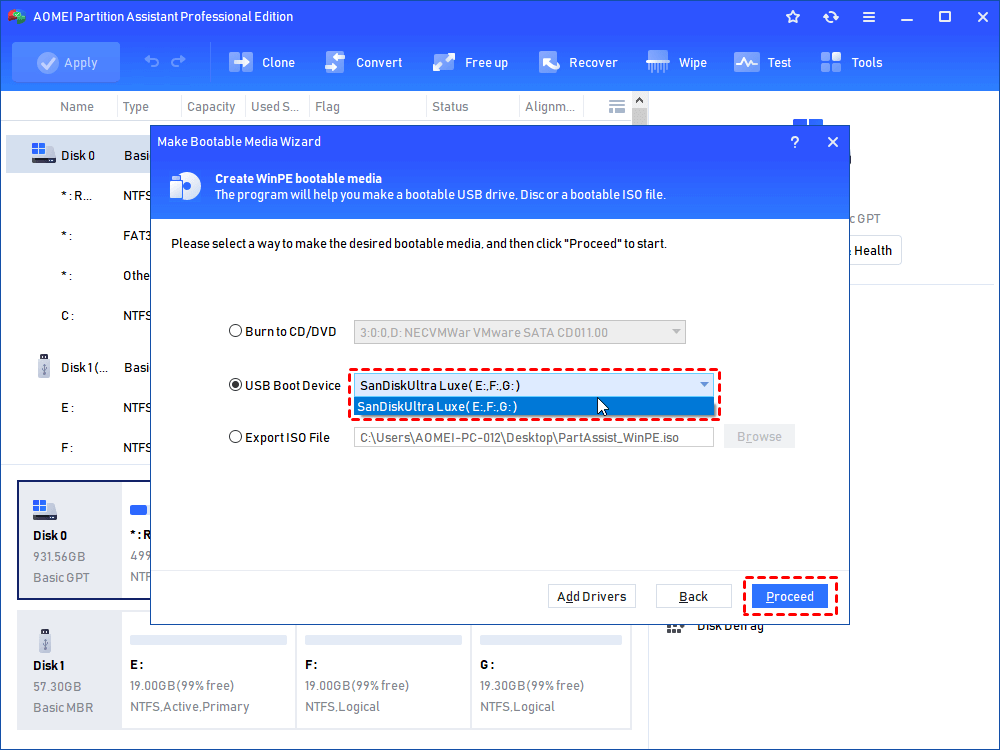
Step 1. Install and run AOMEI Partition Assistant Professional Demo. Click "Tools"> “Make Bootable Media” in the upper menu and hit on “Next” to proceed.

Step 2. Choose the right USB drive under “USB Boot Device” and click “Proceed”.
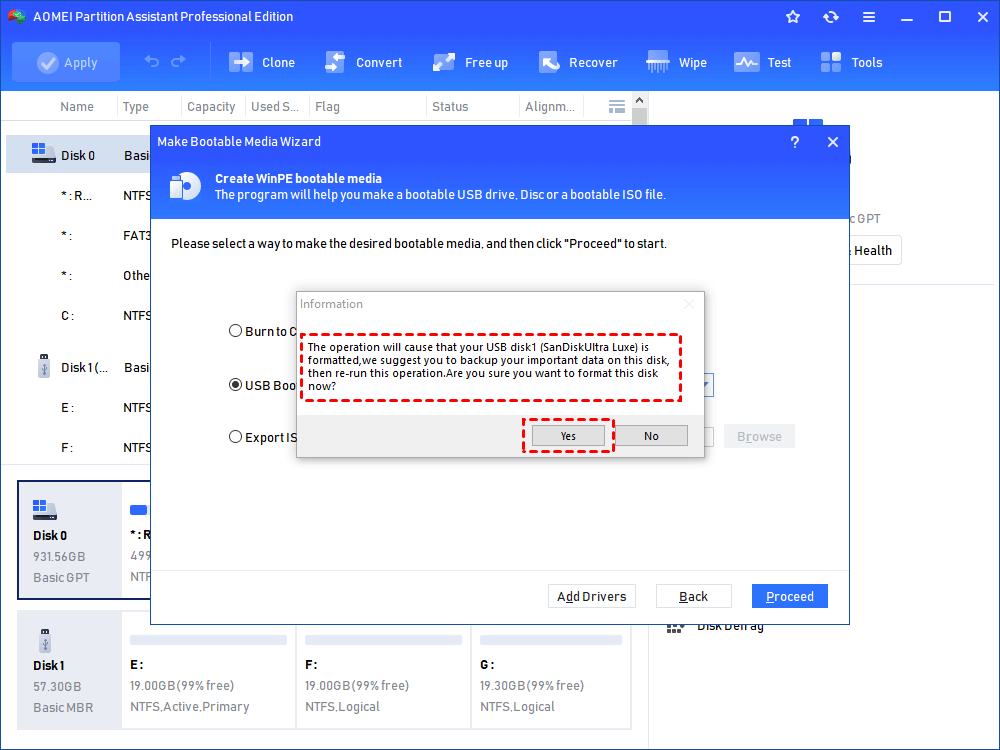
Step 3. Then you will be told the USB will be formatted, please back up important data. If you have done that, click “Yes”.
Step 4. Wait for the process to be completed.
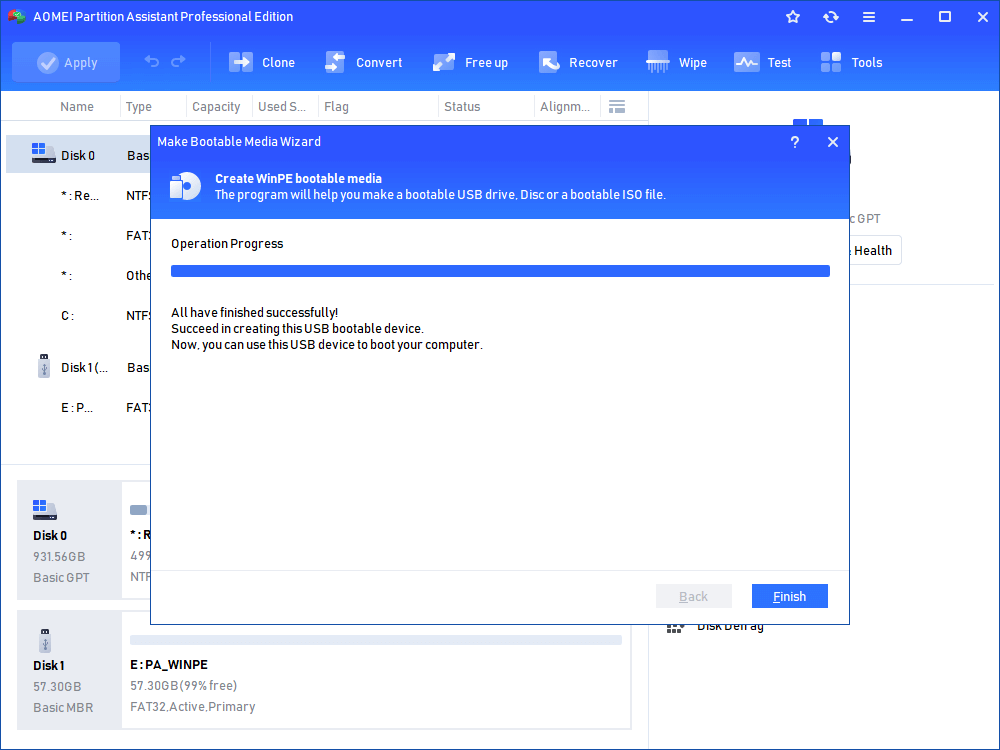
Note: The bootable USB drive contains the pre-installed AOMEI Partition Assistant Professional. So you can try to use it to solve the drive issues.
Now, let's get into the repair part.
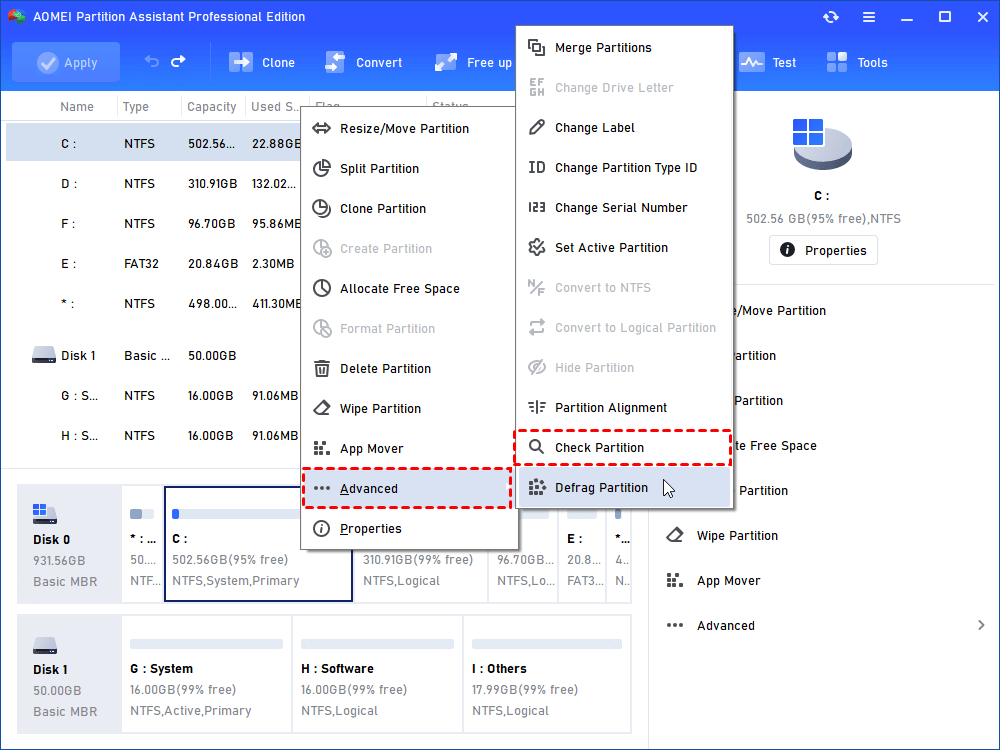
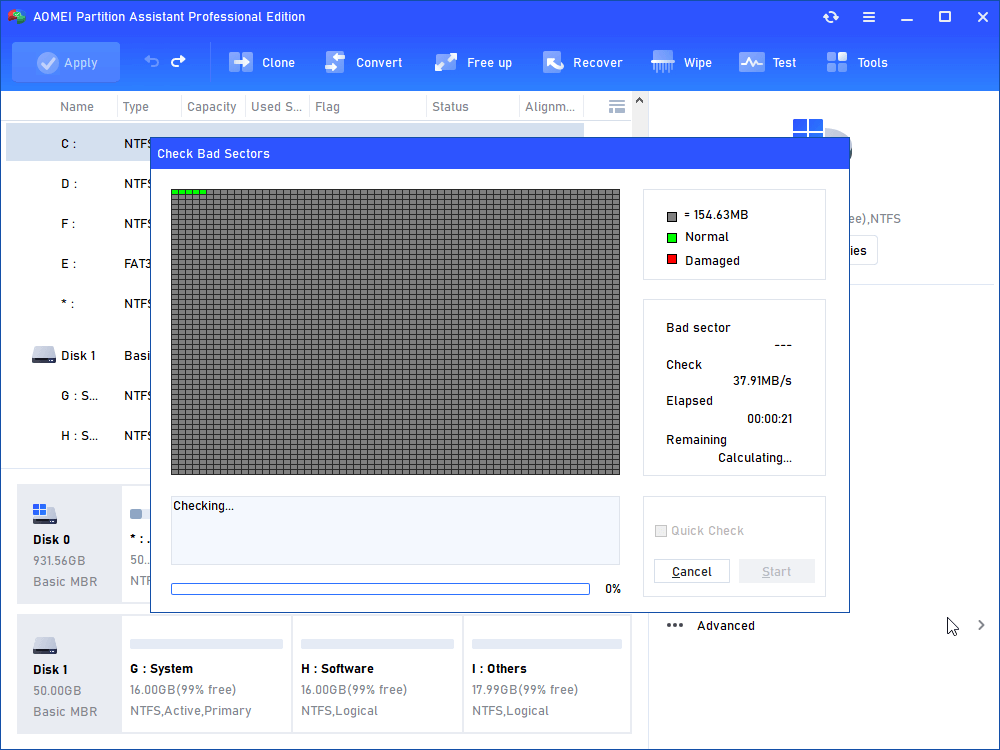
AOMEI Partition Assistant Professional can complete check and repair errors without complex operations, you can easily check and repair the bad sectors in your drives.
Step 1. Launch Partition Assistant. It will display to you the basic situation of your hard drives. Select the partition that you want to check for, right-click it, select Advanced -> Check Partition.
Step 2. It will pop up a small window that you can select the way of checking errors to perform. Choose the first one and click OK. It will proceed immediately.

Step 3. Click " Start".
When the fix process is finished, reboot your computer to check whether the problem is solved or not.
Method 7. Clean Windows 10 install
If all the above methods are unavailable, you may need to do a clean installation.
Step 1. Insert your Windows 10 bootable USB we created. Restart your computer, and press a required key as the screen shows, usually is “DEL” or “F2” to access the BIOS.
Step 2. Choose the “Language to install”, “Time and currency format”, “Keyboard or input method” and click “Next”.
Step 1. In the Setup window, click “Install now”.
These are 6 methods we recommended for you to solve the CRITICAL PROCESS DIED/0x000000EF BSOD error code. This issue is a little prickly for amateurs, but be patient, it’s not unfixable. AOMEI Partition Assistant is a versatile tool, it has the “Check Partition” function and the “Surface Test” feature to monitor all disks, so you can manage your disks and partitions much conveniently.

