Fixed: Disk Check Could Not be Performed Because Windows Does Not Have Access to the Disk
Sometimes, when you need to check a hard drive for errors by Windows “Check” feature, you may see an error message saying the disk check could not be performed because Windows does not have access to the disk. This post will offer you 3 effective ways to fix this issue.
By Hedy / Updated on May 12, 2023
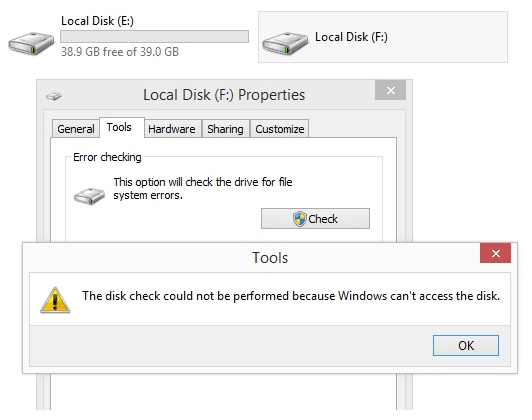
Error: "The disk check could not be performed because Windows cannot access the disk."
Windows disk checkup tool is very useful to scan and fix some hard drive issues on the computer. But some users reported that when checking an external disk for errors, they often see an error message saying "the disk check could not be performed because Windows does not have access to the disk". Here is a live example from Microsoft Community:
"If I click properties on external hard disk, it has zero bytes free and used space, and if click the 'check now' in the tool tab under error checking it says 'The disk check could not be performed because Windows cannot access the disk.' Is there anything I can do the fix this error and be able to operate my external hard disk again? Please help me."
This error may be caused by various reasons such as a loose connection or a corrupted file system. If you cannot access hard drive Windows 10 when using the "Check" feature, please refer to the following content to get the solutions.
Solution 1. Check the disk connection
The first reason for "the disk check could not be performed because Windows does not have access to the disk" is because of a loose connection between your hard disk and the computer. To check the disk connection, you can try the steps below:
1. Please make sure all cables are properly connected between your PC and hard drive.
2. Unplug the disk and reconnect it to your computer or try a different USB port.
3. Try connecting your hard disk to another computer.
If it has nothing to do with the disk connection, you should move on to the next solution.
Solution 2. Change the driver letter (3 ways)
Every hard drive plugged into a Windows computer will be assigned a specific letter of the alphabet. If the drive letter is missing or mismatched, you are most likely to receive the "disk check could not be performed because Windows does not have access to the disk" error message.
Thus, you can get rid of this error by changing the drive letter. There are three ways for you to choose from: Disk Management, Command Prompt, and a third-party disk manager. You can select one as you like.
▶ Way 1. Using Disk Management
If you choose to change the drive letter via Disk Management, you can do as follows:
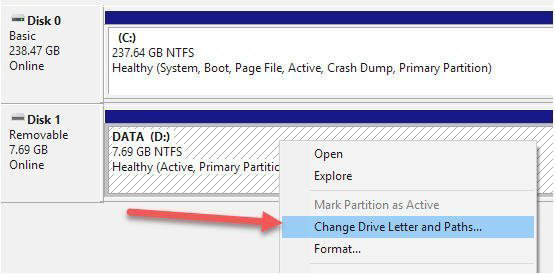
Step 1. Right-click the Windows icon and choose "Disk Management" from the list to open Disk Management.
Step 2. Right-click the problematic partition and then select "Change Drive Letter and Paths…" from the extended menu.
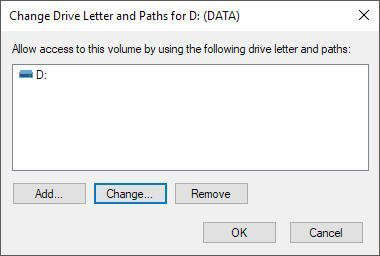
Step 3. Click the Change button in the newly popping-up window.
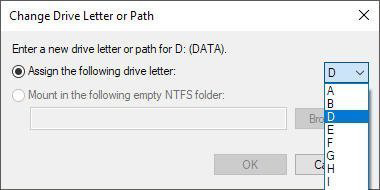
Step 4. Then, you can choose a different drive letter from the drop list and then click "OK" to confirm this change.
▶ Way 2. Using Command Prompt
In addition to Disk Management, Windows has another built-in tool called Command Prompt to help change the drive letters. This is a command-based utility that you need to input command lines by yourself. Here are the steps:
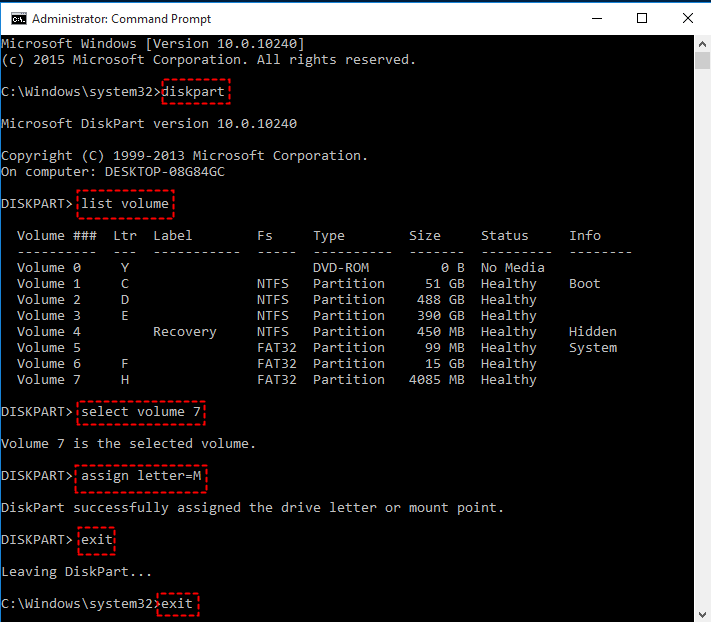
Step 1. Tap the Search button on the taskbar and type "cmd" in the search box. Right-click "cmd" and select "Run as administrator".
Step 2. On the Command Prompt window, please type the following commands and press "Enter" after each command.
diskpart
list volume (this command will list all the volumes on your computer)
select volume 7 (7 refers to the number of the problematic partition)
assign letter=M (M is the new drive letter you want to assign to the problematic partition)
exit
Although Disk Management and Command Prompt is easy to use, you should note that these two tools only support assigning drive letter on FAT or NTFS partitions. If you are using other type of file system, you need to format it to NTFS or FAT, or try another way to change the drive letter.
▶ Way 3. Using a third-party disk manager
Compared with the above two methods, a free third-party partition manager called AOMEI Partition Assistant Standard is more powerful. It allows you to change drive letter on any file system, which can be done within three clicks with the help of its user-friendly interface and simple operations.
Most importantly, it has more practical functions to manage your disks and partitions including resizing/moving partition, cloning partition, deleting partition, and so on.
Here is a simple guide on how to change the drive letter via AOMEI Partition Assistant Standard to erase the "disk check could not be performed because Windows does not have access to the disk" error.
Step 1. Install and launch AOMEI Partition Assistant Standard, right-click the drive you want to change its drive letter, and select "Advanced" > "Change Drive Letter".
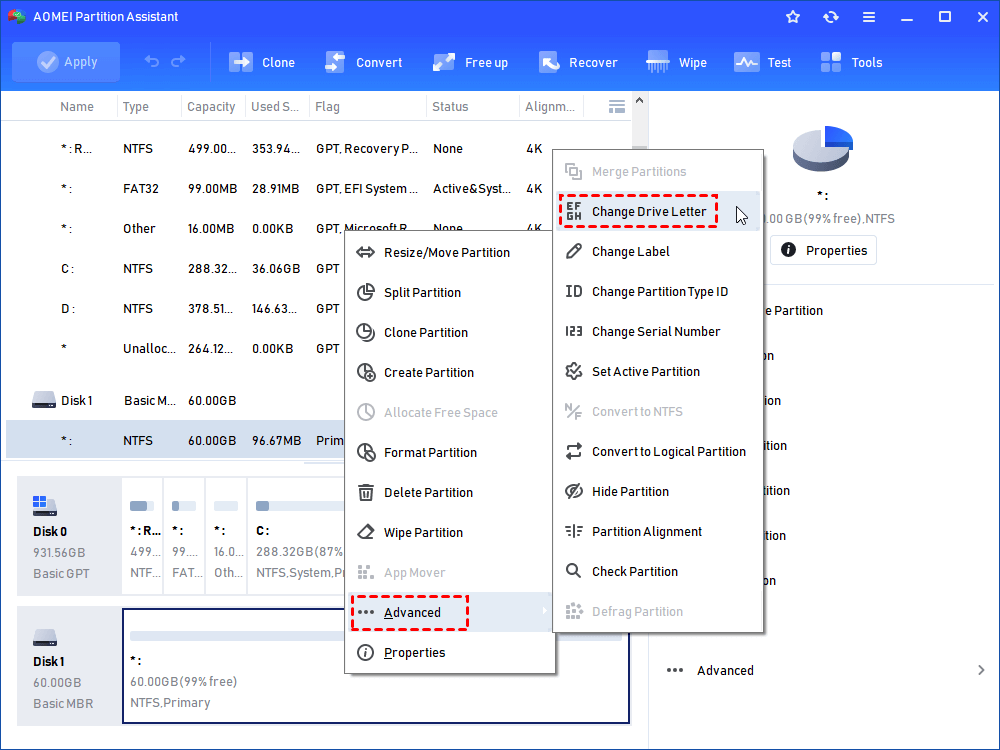
Step 2. Then, choose a drive letter for the selected drive.

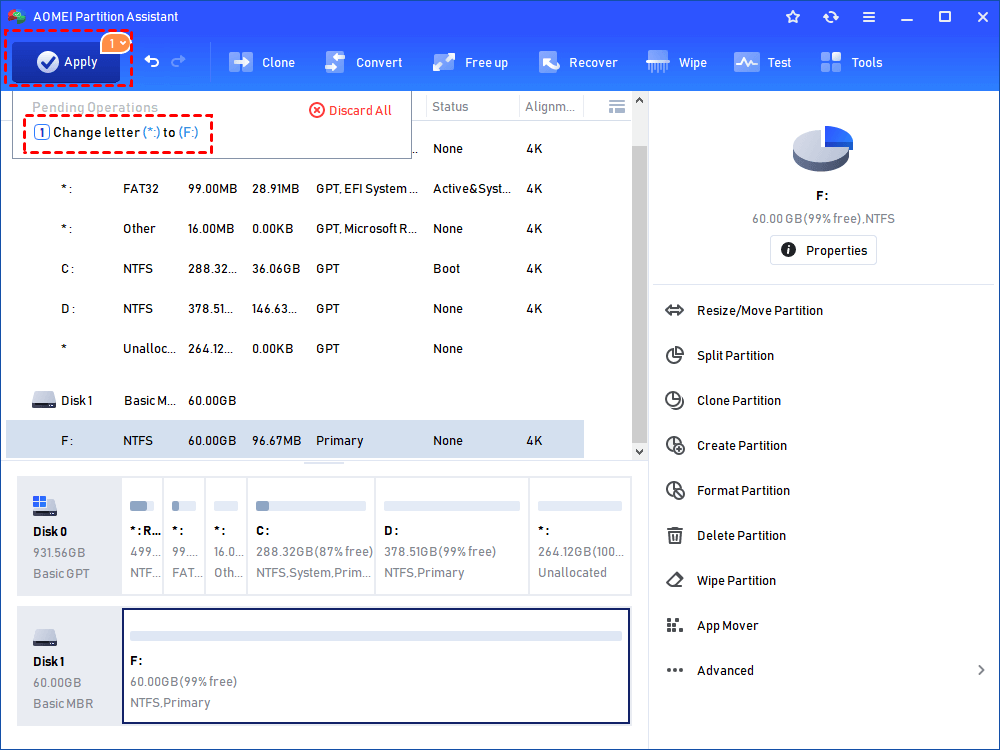
Step 3. Click "Apply" to submit the task.
Solution 3. Check the disk error (2 ways)
If the message "The disk check could not be performed because Windows cannot access the disk" still pops out after you apply the above solutions, it is very likely because there are some errors on your hard drive. In this part, you can find two ways to help check the disk error.
▶ Way 1. Using a disk health checker
AOMEI Partition Assistant is also an HDD or SSD health checker which can scan and fix errors on the selected partitions and disks quickly and securely. Refer to the following guide to check the error.
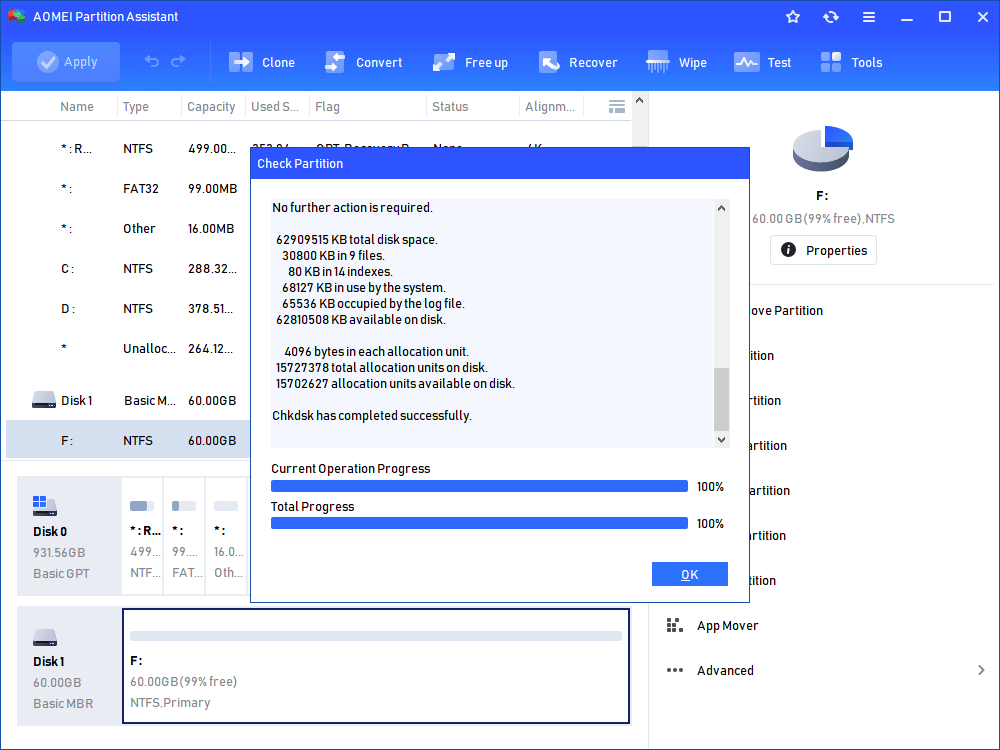
Step 1. Right-click on the partition which you are going to check and choose "Advanced" > "Check Partition".

Step 2. Select the way of checking partition.
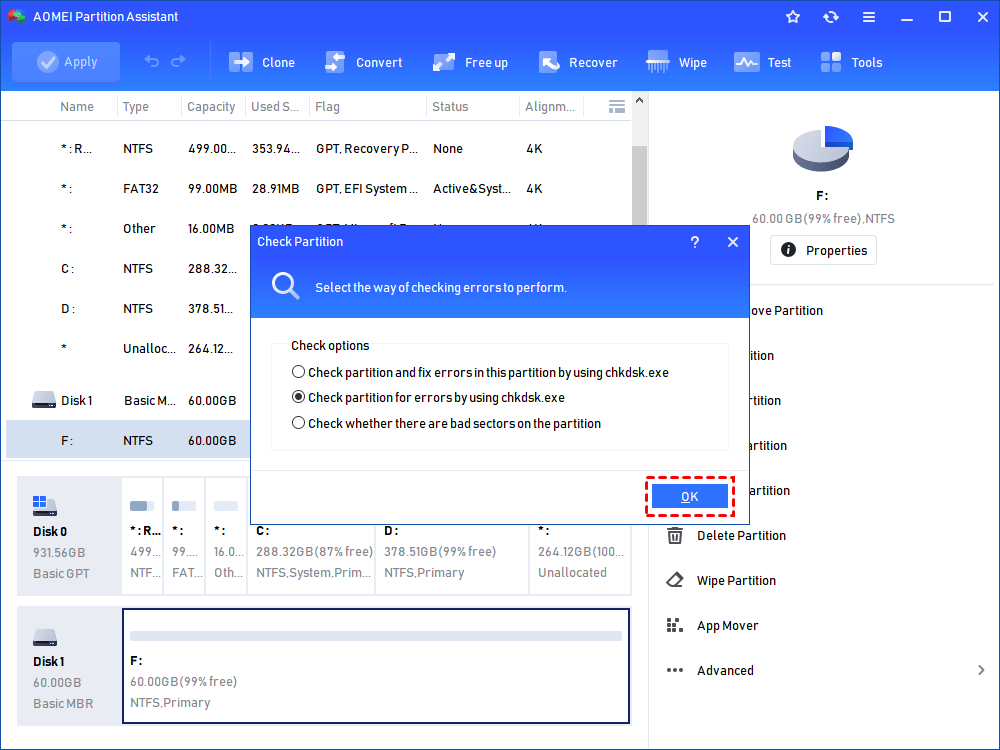
Step 3. The operation will be completed successfully in a few seconds or minutes. Click "OK" to finish this task.
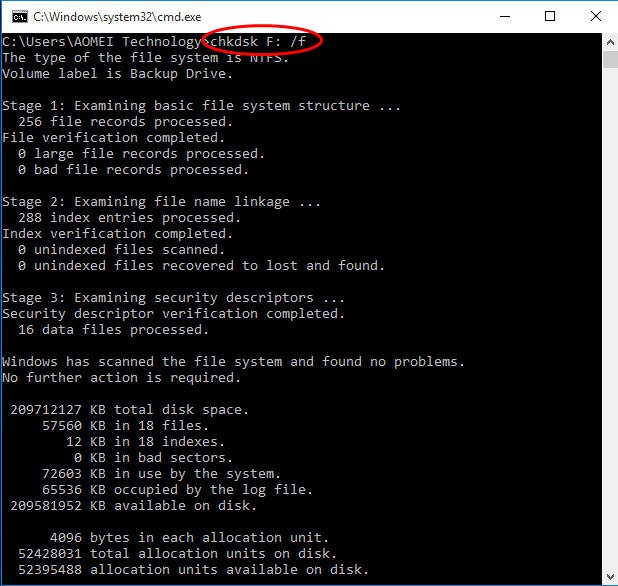
▶ Way 2. Using CHKDSK command
If you don't want to use a third-party hard drive health checker, we recommend you run the CHKDSK command instead of using the simple "Check" feature. However, this command easily causes data loss. Thus, you are suggested to clone the hard drive to USB flash drive as a backup and then perform this command.
Step 1. Run Command Prompt as administrator.
Step 2. Type chkdsk d: /f (you can replace "d" with the drive letter of problematic partition) and hit "Enter"to execute the command.
After that, restart your computer and check whether the "cannot access hard drive Windows 10" error is missing.
Conclusion
After reading this article, hope you could solve the “disk check could not be performed because Windows does not have access to the disk” issue. All three solutions in this passage are proven to be effective and useful, try them one by one until one works for you.

