How to Run DISM Check Health in Windows 11
DISM command-line utility is a multi-purpose tool. If you want to learn how to run DISM check health in Windows 11, you can read this post and learn more details of how to run commands to check you disk.
By Lucas / Updated on March 25, 2026
Overview of DISM check health commands
"Deployment Image Servicing and Management" (DISM) is a sophisticated built-in utility that can be accessed through the Command Prompt in Windows 11 to prepare, modify, and repair system images. Nevertheless, it may be implemented in conjunction with the System File Checker (SFC) to resolve system-related complications.
Typically, the SFC tool is employed to replace corrupted and missing system files when troubleshooting a problem, such as performance issues, a specific error, or a boot problem. Nevertheless, the restoration will not be effective if those files are also damaged. If this is the case, you can utilize the DISM utility to restore the local image to a healthy state and subsequently utilize the SFC command to resolve the setup.
Key Features and Uses of DISM:
1. Repair System Files
DISM can fix issues with system files when tools like SFC (System File Checker) fail to repair them. It can download the necessary files from Windows Update to replace corrupted ones.
2. Service Windows Images
DISM can mount and modify Windows images (.wim or .esd files). This is useful for IT administrators who need to customize Windows installations.
3. Install and Manage Features
DISM allows you to enable, disable, or manage Windows features and packages in both online (running system) and offline (Windows image) states.
4. Driver Management
DISM can add, remove, or list drivers included in an image.
5. Check and Repair Windows Component Store
DISM can repair issues in the Windows Component Store (WinSxS), where Windows keeps system files.
…
3 Commands to run DISM check health in Windows 11
The DISM command-line utility is a versatile tool that enables system administrators to prepare and service Windows images. By executing specific commands, your Windows computer can be repaired. The DISM CheckHealth, DISM ScanHealth, and DISM RestoreHealth commands are all that is required. Consequently, we will now examine how to utilize the DISM online repair commands to inspect devices.
Command 1. Check system health option
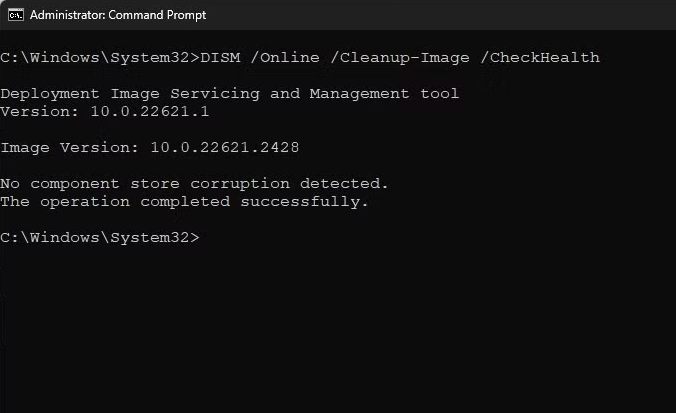
The DISM CheckHealth command can be employed to verify the existence of any file corruption. A diagnostic instrument is employed to identify and report system image corruption. Nevertheless, it does not execute any repairs.
Step 1. Open Start, and search for Command Prompt, right-click the top result, and select the Run as administrator option.
Step 2. Type the following command to perform an advanced DISM scan and press Enter: DISM /Online /Cleanup-Image /CheckHealth
Command 2. Scan health option
The ScanHealth option performs an advanced scan to find issues with the image. To check image problems with the ScanHealth option, use these steps:
Step 1. Open Start, and search for Command Prompt, right-click the top result, and select the Run as administrator option.
Step 2. Type the following command to perform an advanced DISM scan and press Enter: DISM /Online /Cleanup-Image /ScanHealth

The scan could take some time to check whether Windows 11 needs any repairs.
Command 3. Restore health option
The DISM's RestoreHealth option automatically scans and repairs common issues on Windows 11. To repair system problems with the DISM commands, use these steps:
Step 1. Open Start, and search for Command Prompt, right-click the top result, and select the Run as administrator option.
Step 2. Type the following command to repair the Windows 11 image and press Enter: DISM /Online /Cleanup-Image /RestoreHealth
Advanced: DISM repair to change an alternate repair source
If the DISM RestoreHealth command encounters issues, such as being unable to replace damaged files due to a lack of internet connectivity or problems with the Windows Update component, you can use a local source for the repair. A suitable option is a Windows installation media or a mounted Windows 11 ISO file. However, it is essential to ensure that the ISO matches the version, edition, and language of the system you are attempting to repair.
You need to download Windows 11 ISO and double-click the ISO file to mount it to File Explorer. Then, confirm the drive letter of the mount from the left navigation pane.
After you complete the steps, you can use the "Source" option to repair the local image via recovery image.
Step 1. Open Start, and search for Command Prompt, right-click the top result, and select the Run as administrator option.
Step 2. Type the following command to repair the Windows 11 image and press Enter: DISM /Online /Cleanup-Image /RestoreHealth /Source:E:\Sources\install.wim
In the command, replace"E"with the ISO mount point drive letter in File Explorer.
(Optional) Type the following command to limit the use of Windows Update and pressEnter:
DISM /Online /Cleanup-Image /RestoreHealth /Source:E\Sources\install.wim /LimitAccess
(Optional) Type the following command variant to accomplish the same task and pressEnter:
DISM /Online /Cleanup-Image /RestoreHealth /Source:wim:E:\Sources\install.wim:1 /LimitAccess
A user-friendly alternative to DISM check health command tool—AOMEI Partition Assistant
If DISM check health commands not work, don’t worry, you can try AOMEI Partition Assistant. This disk management tool is user-friendly and exhaustive, intending to assist users in the effective management and repair of disks.
It is an exceptional substitute for command-line utilities such as DiskPart, as it offers a comprehensive array of features and a graphical interface. This software enables both novice and advanced users to effortlessly execute disk-related duties, such as partition resizing, formatting, conversion, and boot repair to specialize in repairing damaged or missing boot files.
1. Check Partition for errors
Step1. Install and run AOMEI Partition Assistant. Right-click the partition you want to check and select “Advanced”> “Check Partition”.
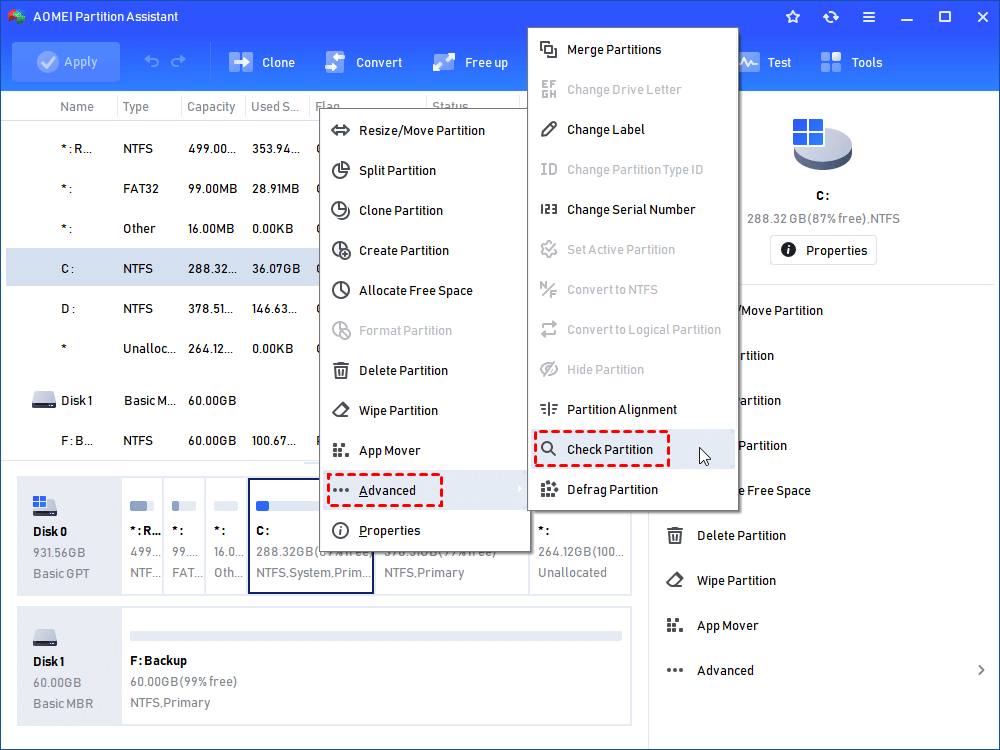
Step 2. In the pop-out window, you have three options available, check and fix error by using chkdsk.exe, check error only using chkdsk.exe, and find bad sectors. Choose one according to your needs and click “OK”. Then wait for the process to complete.

Besides, you can also right-click the disk you want to scan and select the “Surface Test” to check disk error.
If checking and repairing disk/partition by chkdsk.exe fails, then you can consider the option of rebuilding the MBR of the damaged hard drive. Luckily, AOMEI Partition Assistant could also perform this task.
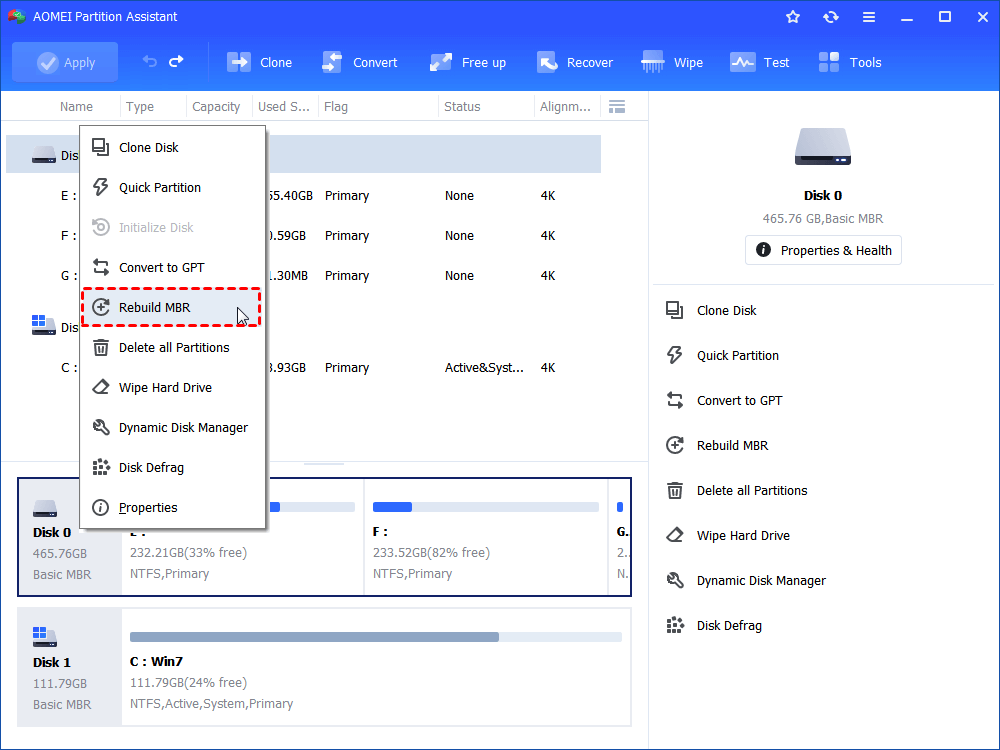
2. Rebuild MBR of corrupted hard drive
Step 1. Open AOMEI Partition Assistant, right-click the corrupted disk and select “Rebuild MBR”.
Step 2. Select a proper MBR type for your current operating system and click “OK”.
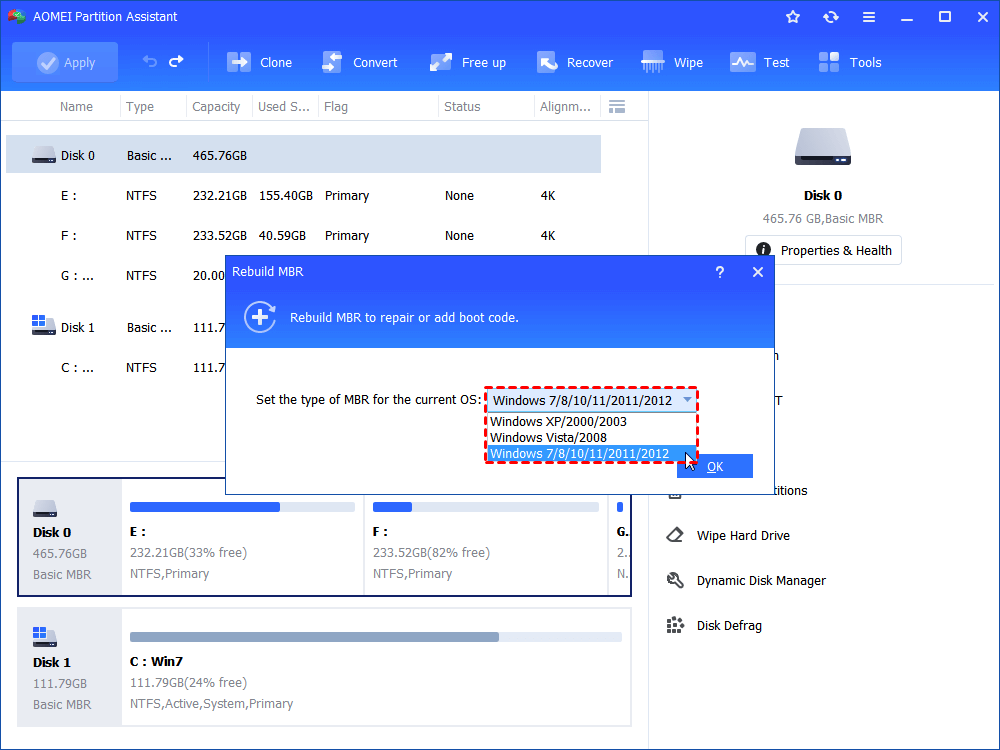
Step 3. In the main interface, click “Apply” on the top left corner to commit the pending operation.
Then, you can check whether the corrupted hard drive can be used normally again. If not, you can try to reformat it via this software.
3. Perform boot repair
If your Windows can't even boot, this method will be very helpful.
Step 1. Install and launch AOMEI Partition Assistant on a working PC, and connect a USB drive to it.
Step 2. Click Recover > Boot Repair on the main interface.

Step 3. Select the create a bootable disk option to create a WinPE bootable media.

Step 4. Connect the drive to the computer that cannot function normally. And then enter BIOS settings to change the boot order to make boot computer from it. Once you log in successfully, it will automatically load the Boot Repair tool and start the boot entries scan process.

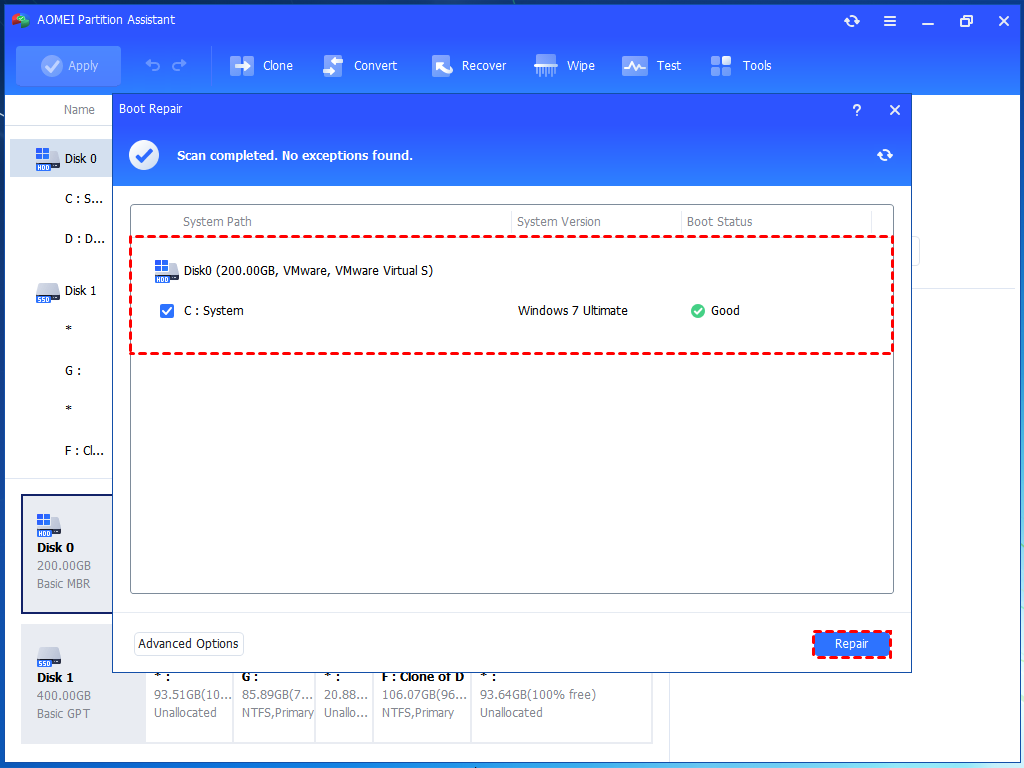
Step 5. Once the process completes, you can see all boot entries on the interface. Select the repairable boot entries you want to repair and click the Repair button.
Step 6. After successful repair, remove the bootable USB drive and boot the PC from the original system drive.

To sum up
The DISM check health in Windows 11 simplifies repairing a corrupt Windows image. It is functional online and offline, utilizing Windows Update and a WIM file. Initially, the process of utilizing DISM may appear complex; however, it is a straightforward process that necessitates only two commands and an elevated Command Prompt to repair your Windows 11 image and installation.
To repair disks and drives, AOMEI Partition Assistant can offer you some help. You can easily check error and repair the problems by some clicks. Besides, this tool can also help you replace old disk without reinstalling, and clean drives to release free space on your system drive. If you need to manage multiple devices or use the Server systems, you can check other advanced editions of this tool.

