[3 Ways] Format Partition to GPT without Losing Data
If you're looking for a way to format partition to GPT, you shouldn't miss this tutorial. Because you are going to learn how to convert MBR disk to GPT without data loss.
By AOMEI / Updated on May 12, 2023
Why format partition to GPT?
As we all know, MBR and GPT are two different disk partition styles, which determine the storage way of data. MBR is an old way of managing partitions, and GPT is a new way of managing partitions. GPT has more advantages than MBR in the number of primary partitions, disk size, and security.
Tip: Click What's the Difference Between GPT and MBR Partition Style to know more about it.
In recent years, more and more people use GPT disks. Not only are GPT disks better than MBR disks, but GPT disks have gradually replaced MBR and become the mainstream. Microsoft has announced that upgrading from Windows 10 to Windows 11 via the Windows Update requires the UEFI boot mode, which means the boot drive must be the GPT disk.
Next, I will show you how to format disk to GPT partition with 3 methods, including CMD, Disk Management, and a third-party utility.
Using CMD to format partition to GPT (Data Loss)
Diskpart is a Windows built-in tool that users can type in the relevant command line to complete the task of managing disks or partitions. But it only supports converting empty disks to GPT, so you need to delete all volumes on the disk before converting.
Step 1. Press “Windows + R”, type in “diskpart” and hit “Enter”.
Step 2. Type the following command lines and hit “Enter” after each.
● list disk
● select disk 1 (1 is the number of target disk)
● clean
● convert gpt
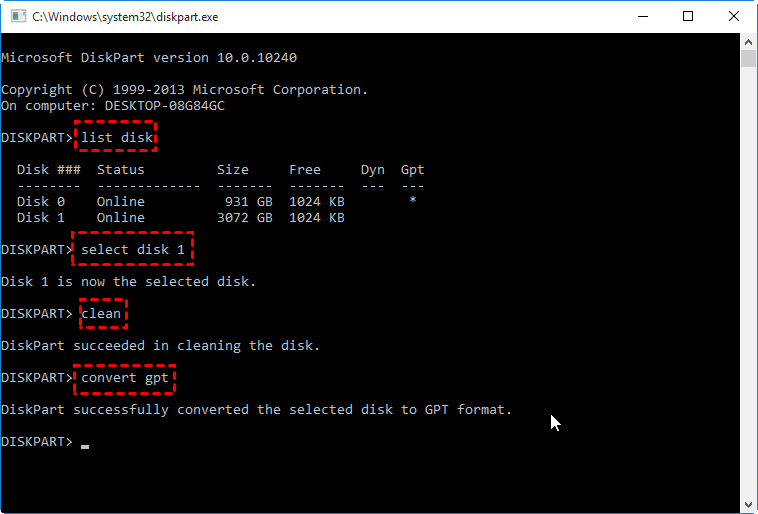
Step 3. Type “exit” to exit Diskpart.
Format partition to GPT with Disk Management (Data Loss)
Similar to Diskpart, Disk Management is also a built-in tool for users to perform some basic disk partition management tasks, such as extending/shrinking/deleting/formatting partitions.
However, If you want to convert the disk with this tool, you need to delete all partitions on the MBR disk first to make it unallocated disk space. Otherwise, Convert to GPT Disk option will be greyed out. And you can't convert the system disk to GPT because Windows doesn't support deleting the system partition.
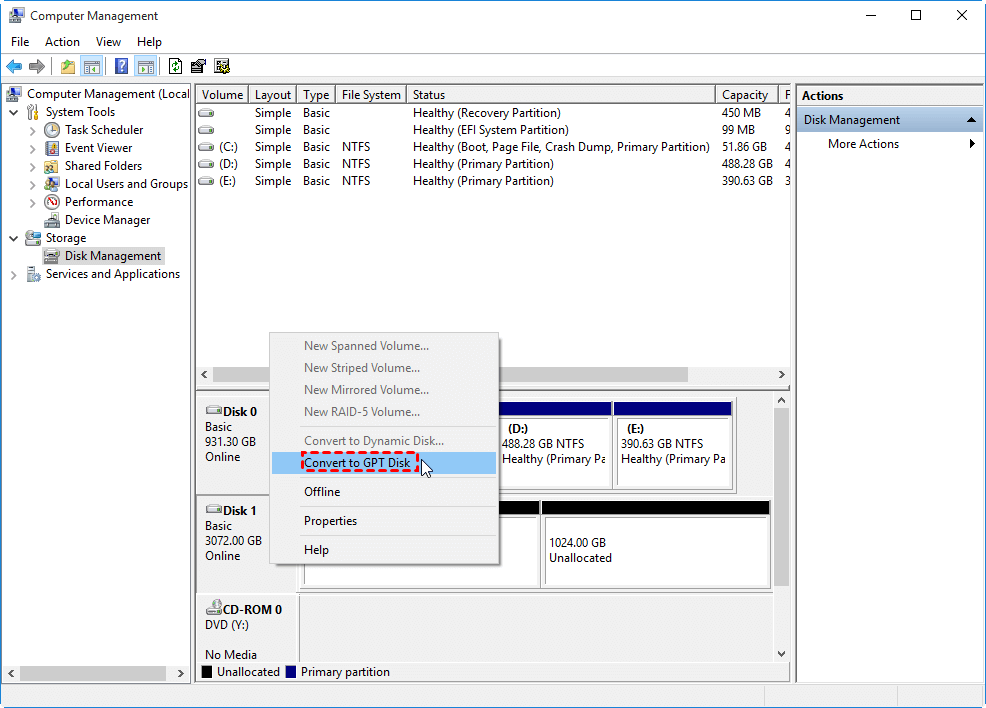
Step 1. Right-click “My Computer/This PC” -->” Manage”-->” Disk Management”.
Step 2. Right-click on each partition on the disk you want to convert and select "Delete Volume" to clean the disk.

Step 3. Right-click on the target disk, and select "Convert to GPT Disk".
How to format MBR partition to GPT without data loss (Hot)
No matter Diskpart or Disk Management, they both require you to empty the volume on the disk, which will cause data loss.
If you want to format partition to GPT without losing data, the free third-party tool AOMEI Partition Assistant Standard can meet your needs. It allows you to convert data disk from MBR/GPT to GPT/MBR in Windows 11, 10, 8, 7. And it can ensure a successful conversion without data loss in the target disk.
Note: To convert the system disk from MBR to GPT, GPT to MBR, GPT to GPT, and MBR to MBR, please turn to Pro Edition. Before converting, you should make sure the device support UEFI boot mode.
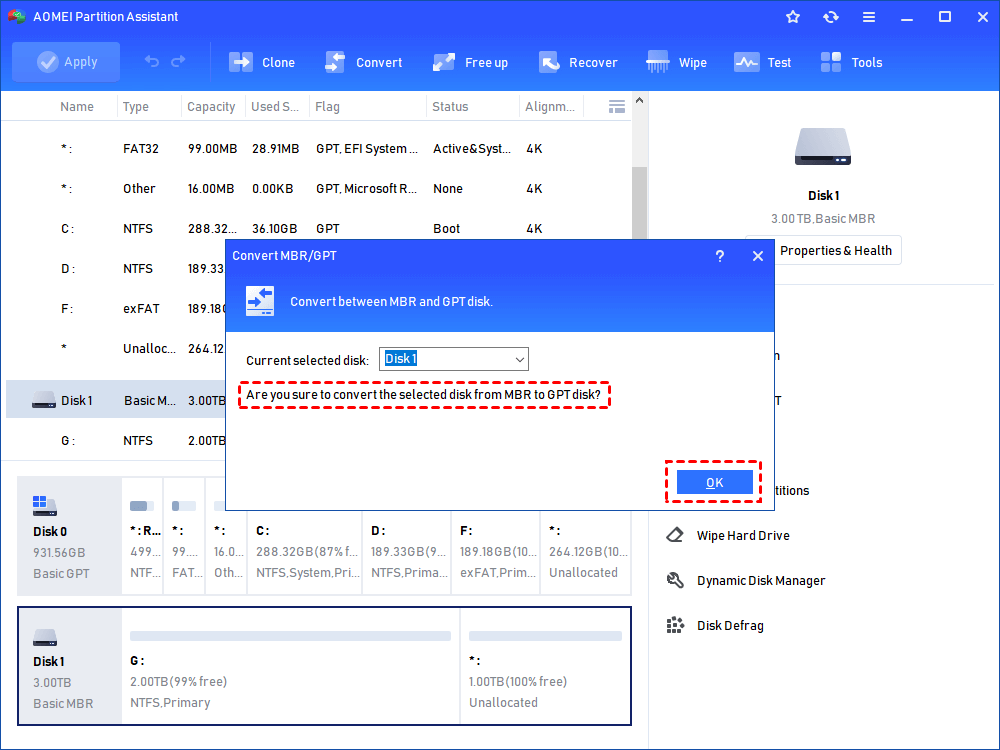
Step 1. Install and open this MBR to GPT converter. Then, right-click the target disk and select “Convert to GPT”.
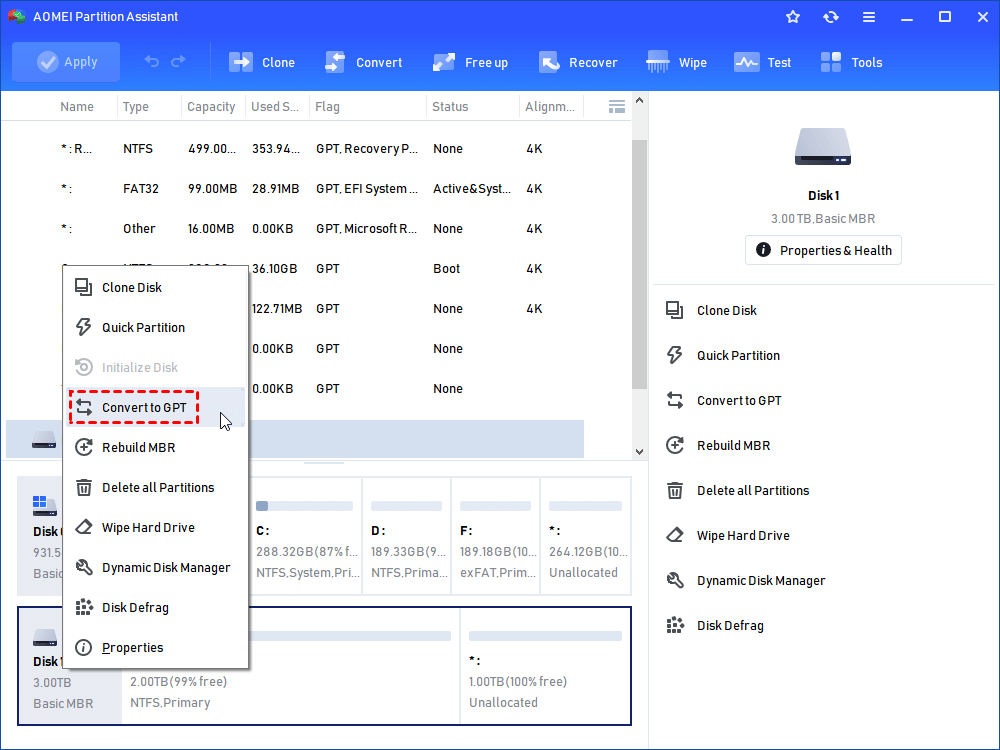
Step 2. After that, read the pop out window and click “OK”.
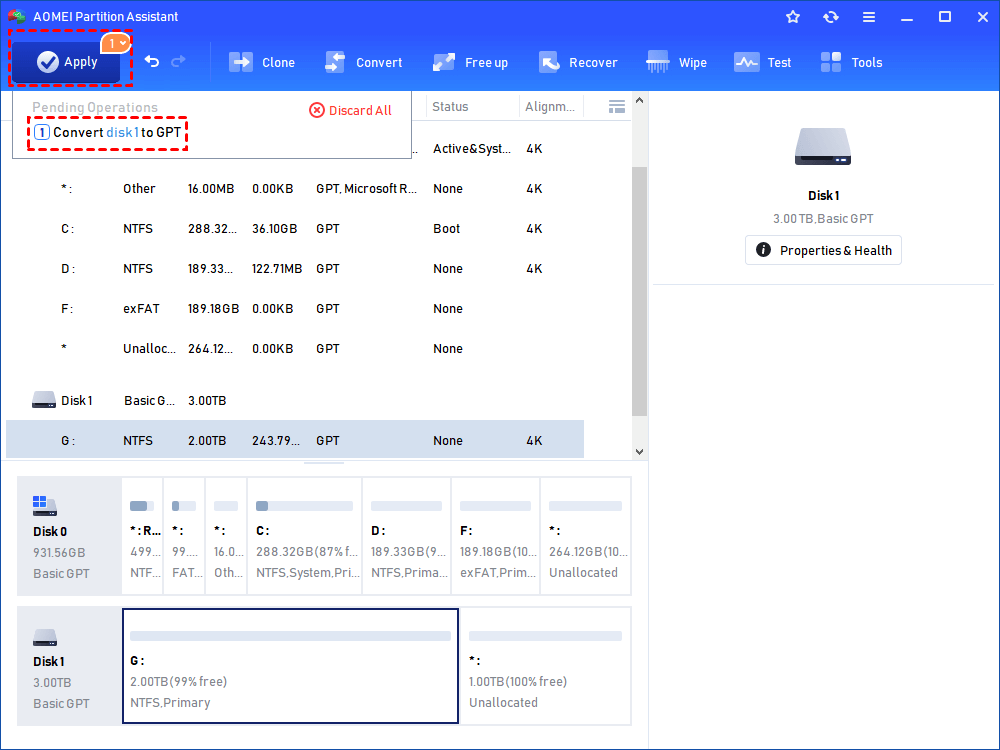
Step 3. Finally, click “Apply” to submit the operations.
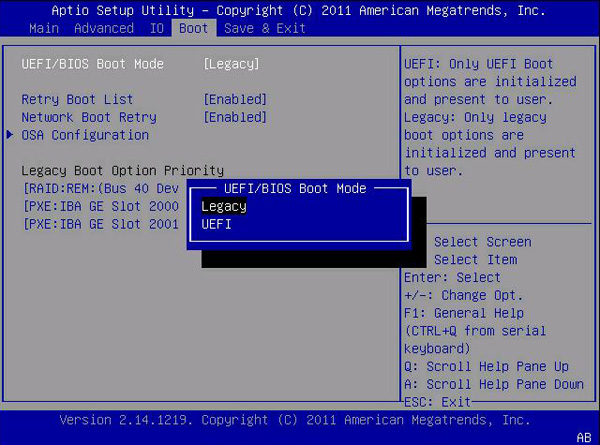
Since GPT disk need to be booted by UEFI, after converting the system disk to GPT, you have to change the boot mode from BIOS to UEFI. Otherwise, the computer cannot start normally.
Step 1. When the screen appears, press the shortcut keys (F10/F11/F12/ESC) at the bottom of the screen continuously to enter the BIOS.
Step 2. After entering, use the keyboard's arrow keys to navigate to the Boot option. Change the boot mode from BIOS to UEFI.
Step 3. After completion, follow the prompts to save the settings and exit.
After that, you made it. This is the whole process of formatting partition to GPT.
Additional content: How to format GPT protection partition
Some users get stuck when formatting GPT partitions with Disk Management, because Disk Management shows GPT is a protected partition. Why did this happen?
The main reason is that the hard drive is connected to a computer running a Windows 32-bit operating system, and the GPT partition table is not compatible with that operating system. The operating system will not be able to identify or manage the hard drive. So you can not format it. In addition, Disk Management also does not support formatting partitions larger than 32GB.

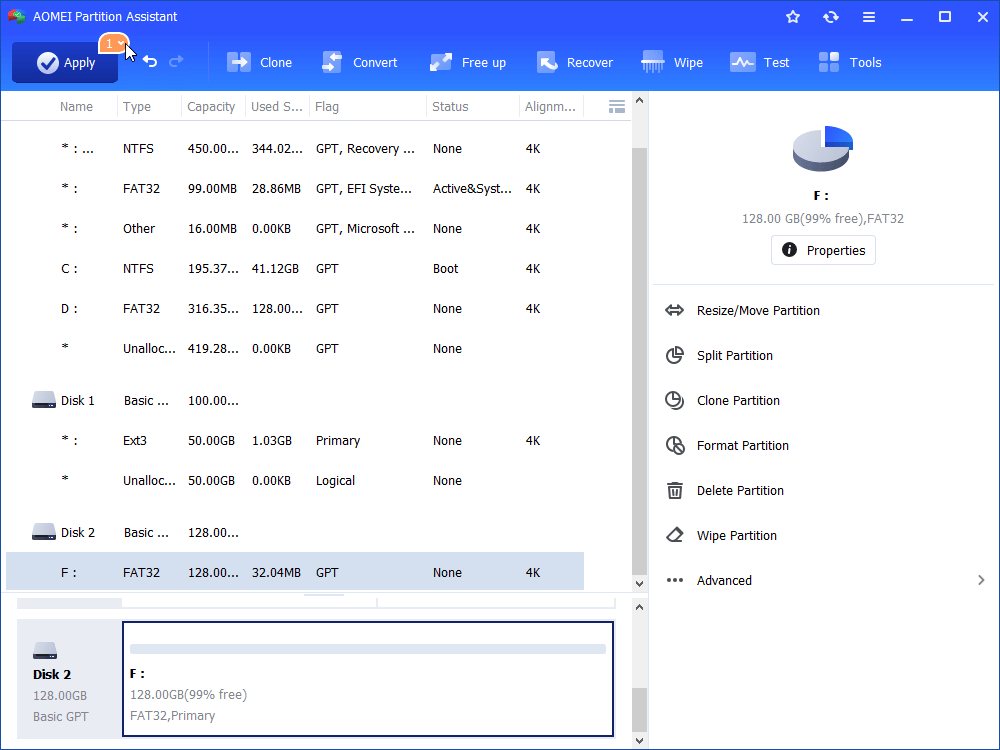
To format GPT protection partition, I recommend you try the Format Partitions feature of AOMEI Partition Assistant Standard. It can format the partition successfully, whether it is a protected partition or larger than 32G.
Step 1. In the main interface, right-click the partition you want to format and select "Format Partition".

Step 2. You can type the drive label and format the partition to what kind of file systems, and click “OK”.

Step 3. Click “Apply” in the toolbar to execute all operations.