How to Configure Disk Defragmentation to Run on a Schedule?
What’s the best way to configure disk defragmentation to work on a schedule on Windows 10? Here, 2 Windows built-in tools along with 1 third-party software utility will be introduced to help with schedule defrag configuration.
By AOMEI / Updated on May 12, 2023
Overview of disk schedule defrag
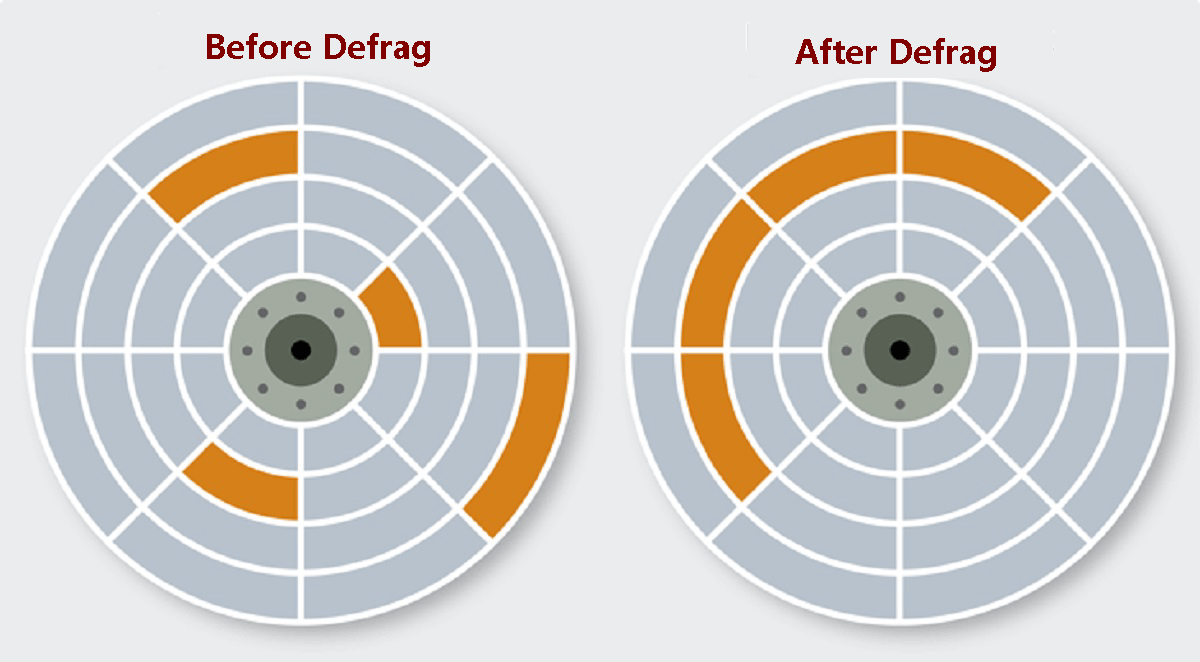
No matter what the spec of your computer is, over time, it can inevitably become slower, less responsive, and sluggish. One of the causes is your hard drives are over fragmented – the segments of your files get scattered across the hard drives which makes it harder for them to be found. In this case, the steps of hard disk defrag becomes imperative. Defragging a disk, namely, reorganizing the files on it, is a way to put the segments mentioned above all together again and reduce the time to be found.
Windows 10 provides its own disk defraggler for users to optimize their hard drives whenever they want. They can manually defrag the drive they want, usually, once a week. However, sometimes, it seems too time-consuming. Then, disk schedule defrag is a better choice, with which you can decide whether to defrag your hard drives daily, weekly, or monthly.
How to configure disk defragmentation to run on a schedule in 3 ways?
Disk defrag on a regular basis is necessary for the health of your hard drives. Thus, schedule defrag configuration is what people need to know. How to configure disk defragmentation to run on a schedule on Windows 10? Here, I provided 3 different ways along with their step-by-step guides for you to get it done with more ease.
Use Windows 10 Task Scheduler
Windows 10 Task Scheduler is a program that helps schedule various performances that Windows 10 supports. And of course, scheduling disk defrag is one of them.
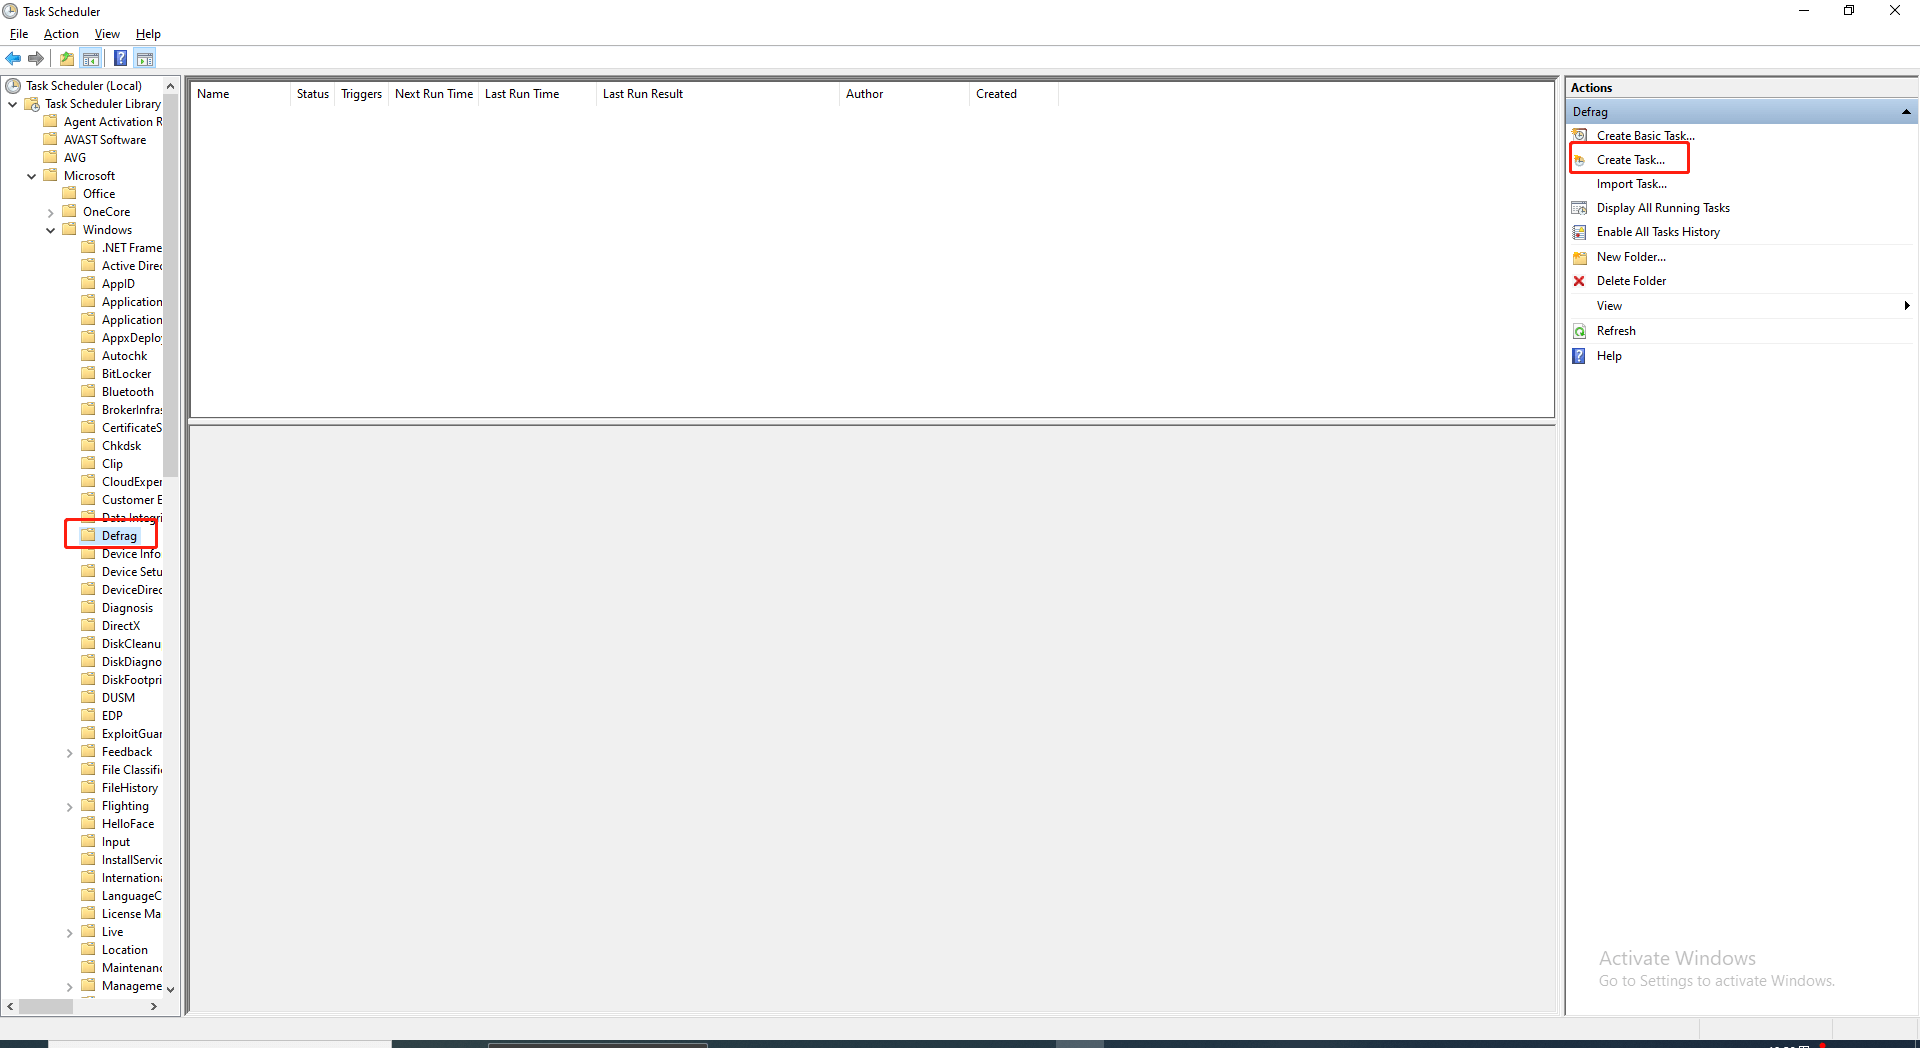
1. Open Task Scheduler, follow Task Scheduler Library > Microsoft > Windows > Defrag and then click on "Create Task" as the screenshot displays.
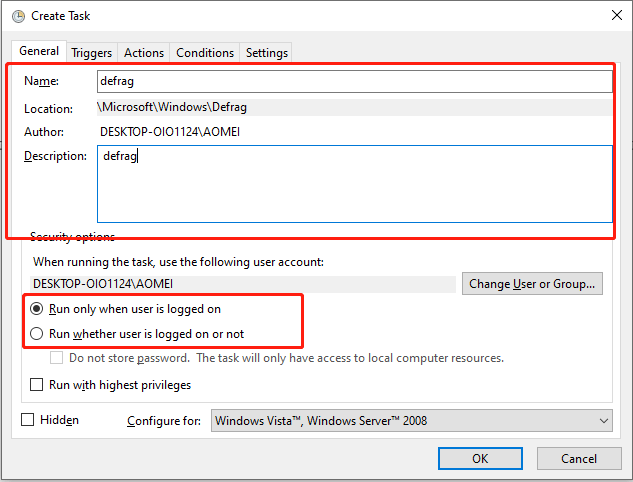
2. In the "Create Task" window, go to the "General" tab, give a name and a description to the task, and preset when to run the task.
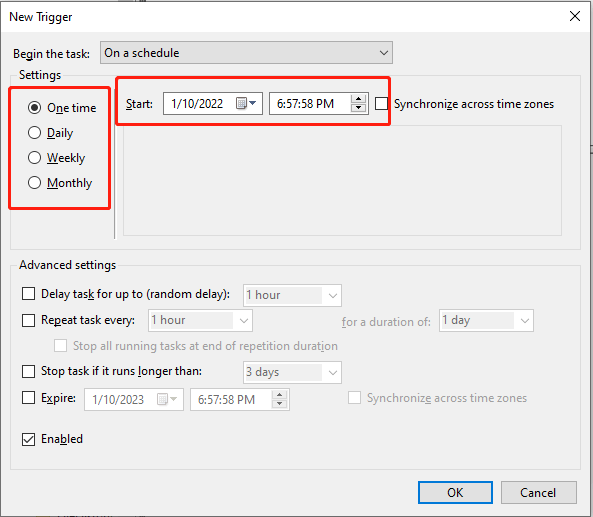
3. Then, go to the "Triggers" tab, click on "New", and customize the settings, for example, whether to defrag once, daily, weekly, or monthly. After all is done, go to the "Actions" tab.
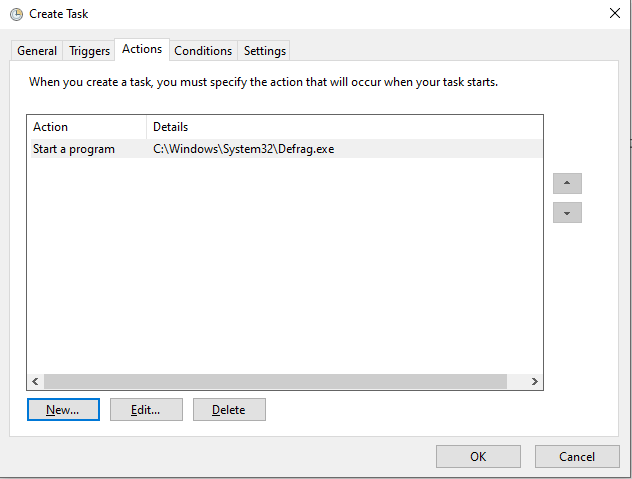
4. Click on "New" and in the popup window, hit the "Browse" button and choose the defrag app.
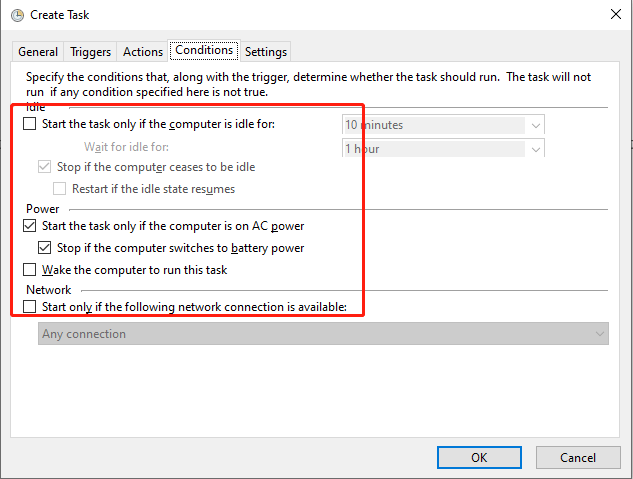
5. Go to the "Conditions" tab and preset on what conditions to run the task.
Now, you can hit the "OK" button to save the changes.
Apply Windows 10 built-in defraggler
Since Windows 10 contains its own disk defaggler, you can not only used it to manually defrag your hard drives whenever you need, but also, you can set a schedule for the defrag. Read on and follow the step-by-step guide to learn to get it done.
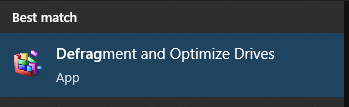
1. In the search box on the lower left of the desktop, type “defrag”.
2. Under “Best match”, choose the item “Defragment and Optimize Drives”.
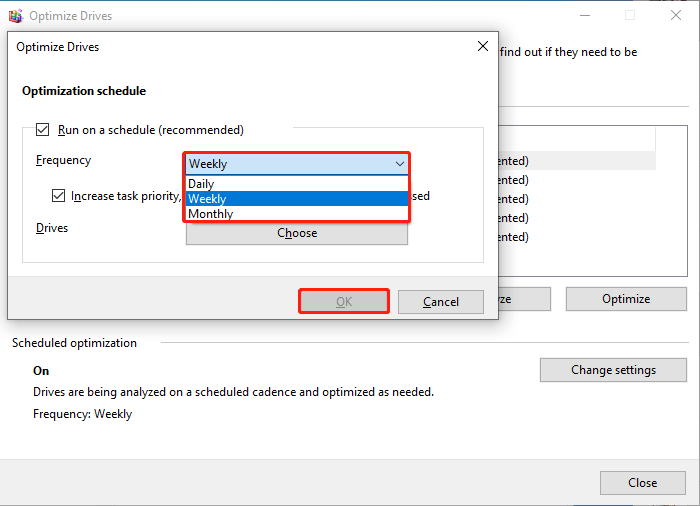
3. Then, in the popup window, hit “Change settings”.
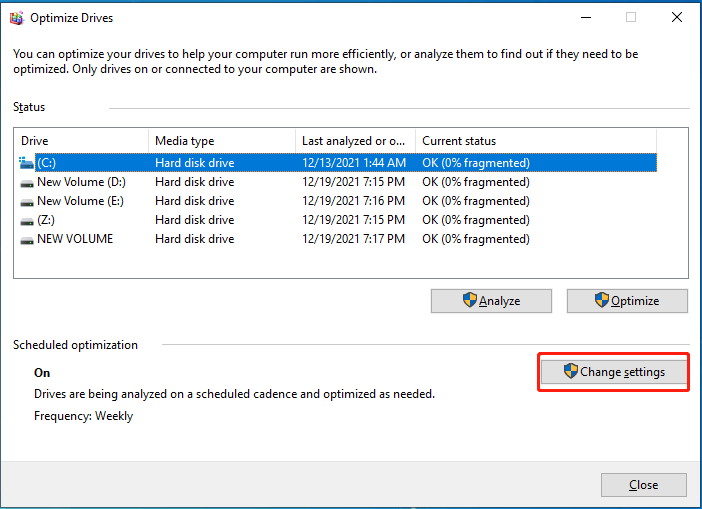
4. Now, tick the option “Run on a schedule” and preset defrag frequency as daily, weekly, or monthly. Choose the drive you want to defrag. Afterwards, click on “OK” to save the changes.
Try a third-party disk manager
Both Windows Task Scheduler and the defraggler helps schedule defrag your hard drives. To some extent, they’re pretty useful. However, many people find their layouts of Task Scheduler is quite different from other people’s and some also complain that the Windows built-in defraggler is too simple and doesn’t provide a decent number of options for auto defrag.
In this case, I recommend another more powerful third-party disk defraggler – AOMEI Partition Assistant Professional – that’s able to schedule defrag Windows 10 efficiently. Meanwhile, like Windows Task Scheduler, it also allows you to choose at which clock to defrag and whether to defrag during startup or logon… Moreover, there’re many other features that keep the health of your hard drives like HDD to SSD clone, SSD secure erase, and partition check.
If you want to configure disk defragmentation to run on a schedule on Windows 10, download the demo of the most powerful disk defraggler to have a try!
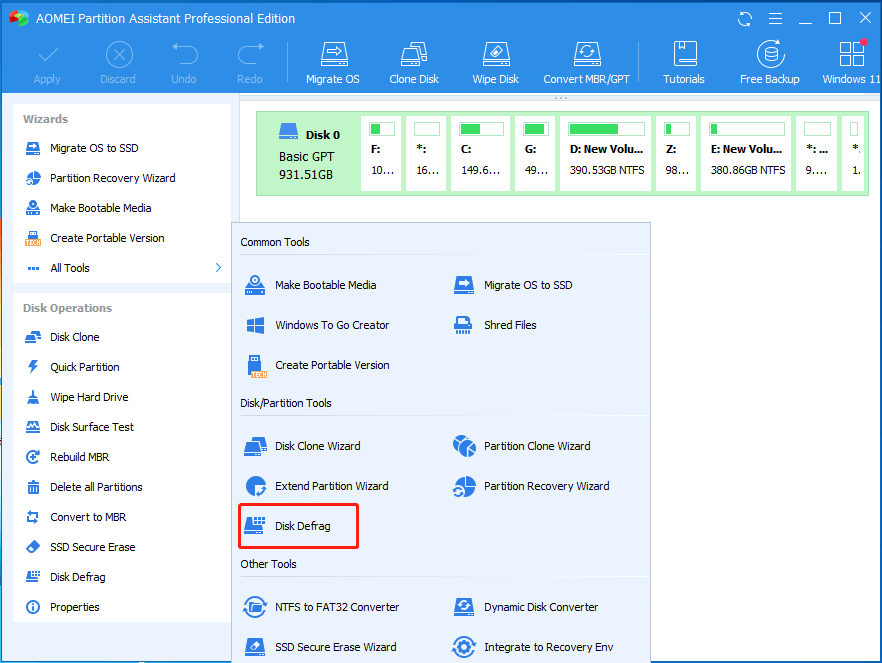
Step 1. Install and run AOMEI Partition Assistant Professional. Right-click the disk, and choose “Disk Defrag”.
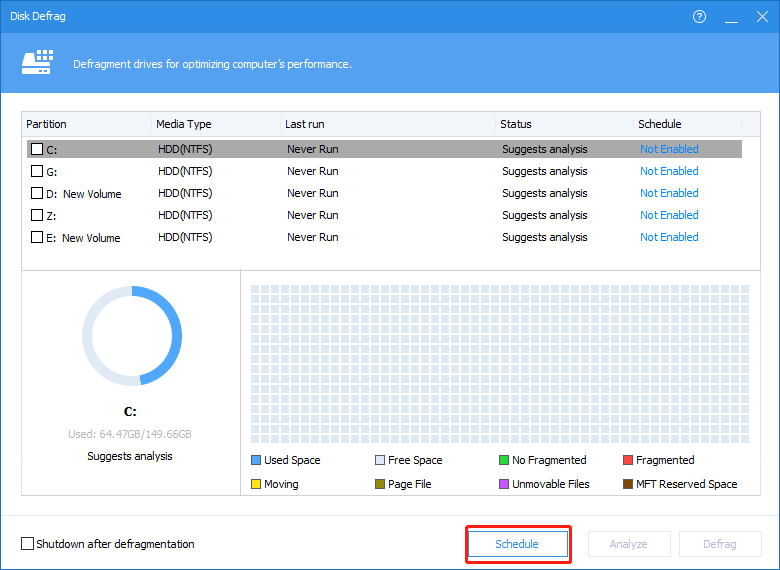
Step 2. In the next window, select “Schedule”.
Step 3. Now, you should preset daily, weekly, or monthly defrag for your hard drives and decide whether to defrag during startup or logon.
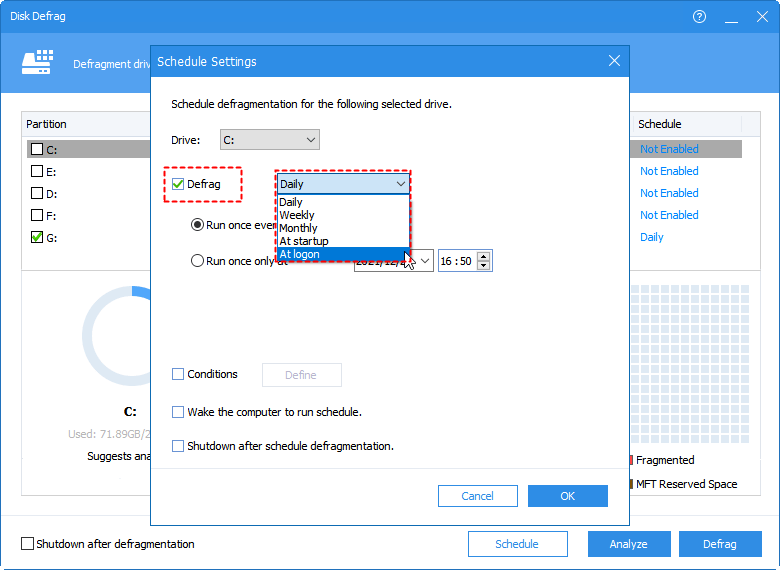
Also, you can decide on what conditions to defrag.
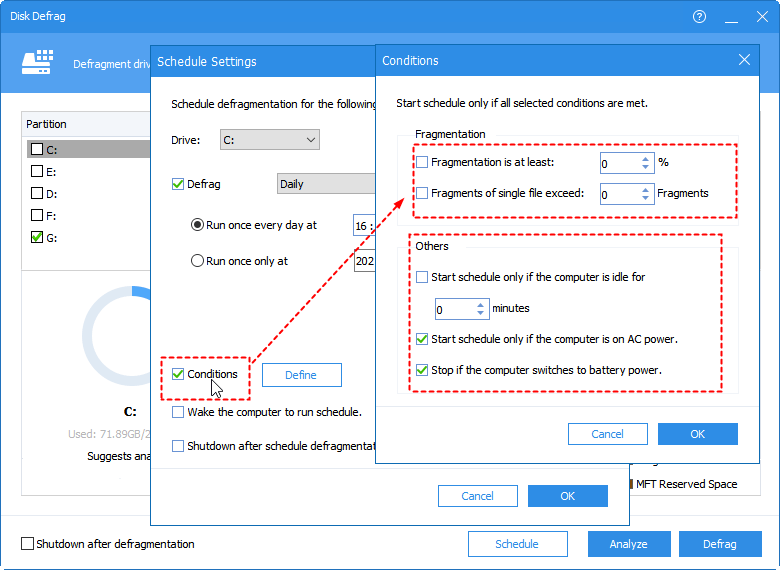
After it’s done, click on “OK” to save the changes.
Conclusion
How to configure disk defragmentation to run on a schedule on Windows 10? You’ve learnt to use both the Windows built-in tools Task Scheduler and the defraggler along with a third-party software utility AOMEI Partition Assistant Professional to get it done. By comparison, the AOMEI product is the most convenient tool with much more options for disk defrag and I really love it. If you own a Server computer and want to schedule defrag its hard drives on a regular basis, you might as well try the Server edition of this software.

