How to Delete All Storage on Windows 10? (With Reasons, Guide, and Tips)
How to delete all storage on Windows 10? This post will introduce the reasons, guide and tips on the topic with methods to help you easily free up space and wipe hard drive on Windows 10.
By Irene / Updated on March 5, 2026
Users are not strange with “Storage” on Windows 10. It generally refers to the data, files, programs, and system files that are stored on the computer's hard drive or other storage devices, such as solid-state drives (SSDs) or external drives.
This storage holds your operating system, software applications, personal files, and other data. But sometimes, you may need to delete all storage on Windows 10 due to the following reasons:
Possible reasons to delete all storage on Windows 10
• Privacy and security: Deleting all storage is crucial to protect personal and sensitive data from potential misuse, especially when selling, donating, or giving away a computer.
• Performance improvement: Wiping storage and performing a clean Windows 10 installation can remove accumulated unnecessary files, temporary data, and unused applications, restoring the system's efficiency.
• Virus or malware cleanup: This operation will erase all storage to eliminate remnants of severe infections.
• Fix corrupted OS: Solve system instability by deleting storage and reinstalling Windows 10.
• Windows version change: For a new Windows version, wipe storage and start fresh for compatibility and stability.
• Unwanted software removal: Deleting all storage on Windows 10 provides a fresh start with only essential software.
• Organizational or Cleanup: Start anew to declutter and reset configurations.
Given these reasons, you may want to perform the task. In the next part, we will share the guide on how to delete all your storage on Windows 10 PC.
How to delete all storage on Windows 10
To delete all storage on Windows 10, you can just run the Windows built-in tool like Settings. Here is the specific guidance:
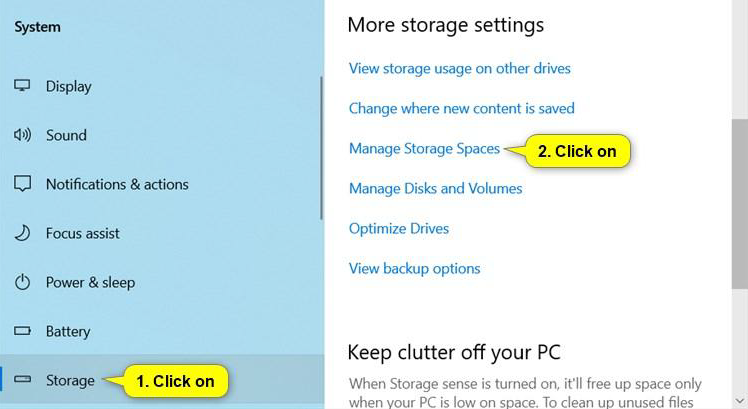
Step 1. Open Settings, then click or tap on the System icon. Next, click or tap on Storage on the left side, and click or tap on the Manage Storage Spaces link on the right side.
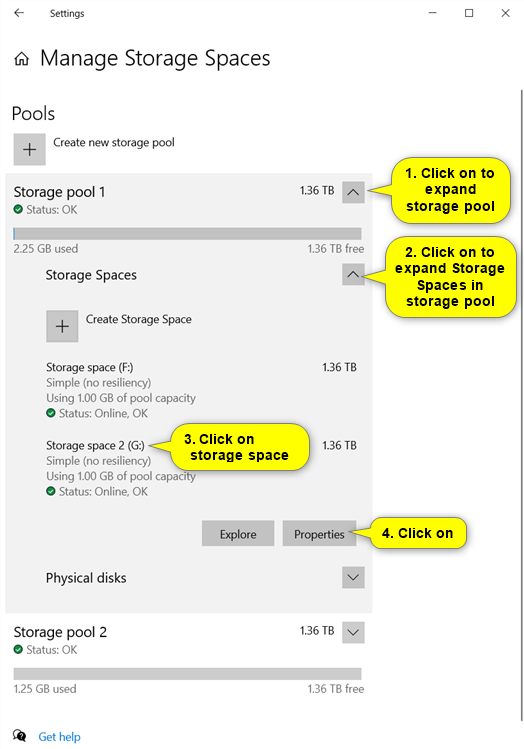
Step 2. To delete a storage space from a storage pool, follow these steps:
▌ Open Storage Spaces for the selected storage pool.
▌ Click or tap on the storage space you want to delete.
▌ Click or tap on Properties.
Step 3. Click or tap on Delete.
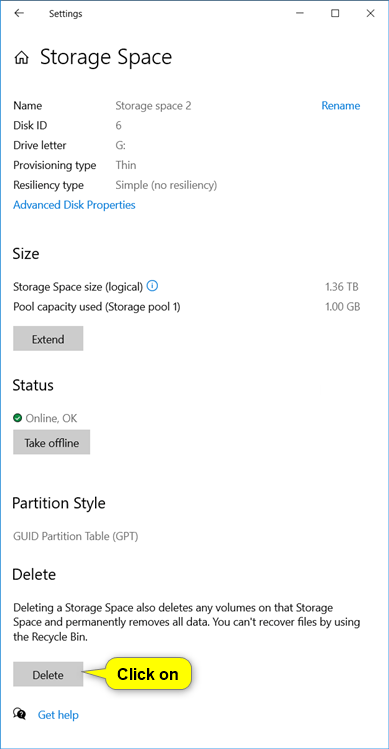
Step 4. Click or tap on Delete Space to confirm the action.

Step 5. The storage space will now be removed from the storage pool. You can choose to close Settings at this point if you wish.
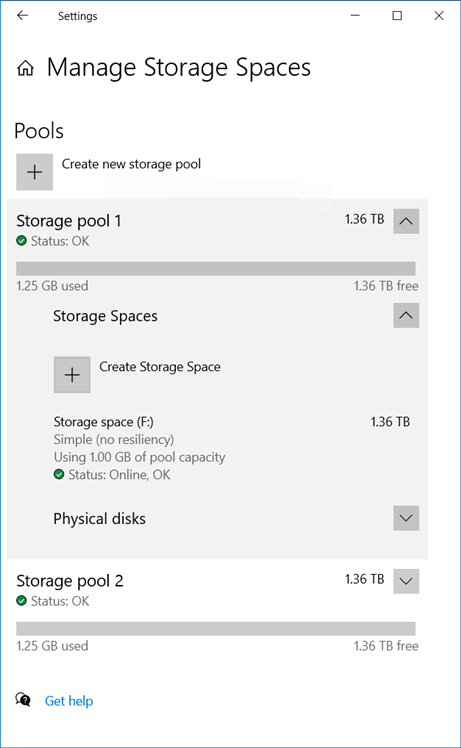
Now, you have successfully delete all storage on Windows 10.
Tips: How to easily manage your PC without deleting all storage on Windows 10
When considering the reasons we discussed earlier for deleting all your storage on Windows 10, it's essential to recognize that there's no need for such action in certain situations. This is due to the potential risks of data loss and the necessity of reinstalling the operating system.
In fact, a comprehensive tool like AOMEI Partition Assistant Professional can offer facile solutions to resolve many of the issues we mentioned previously. You can download the free demo to see how it effectively and easily resolves your computer issues.
Case 1. Erase all data before selling or donating
If you plan to sell, donate, or give away your old computer and need to delete all storage on Windows 10, AOMEI Partition Assistant is a reliable choice. It offers different methods for wiping both HDDs and SSDs. The "Wipe Hard Drive" option is for HDDs, and the "Secure Erase SSD" option is for SSDs.
Furthermore, it professionally overwrites and erases data to to minimize the harms to your device. For added security, you can run it multiple times, especially if the hard drive contains sensitive data. Here we use SSD Secure Erase as an example:
- Note:
- Kindly please notice that the SSD and HDD are different, so using the wrong method may harm your disk.
- the “SSD Secure Erase” only works on Windows 7 system-based on the computer, and SATA SSD drive. If your SSD is installed on Windows 10 or Windows 8 computer, please first connect it to a Windows 7 PC.
Step 1. Connect your SSD with Windows 10 to a Windows 7 computer via SATA port (since SSD Secure Erase is only workable in Windows at present). Install and run AOMEI Partition Assistant Professional.
Step 2. In the main interface of AOMEI Partition Assistant, click "Wipe" > "SSD Secure Erase Wizard" and click "Next".
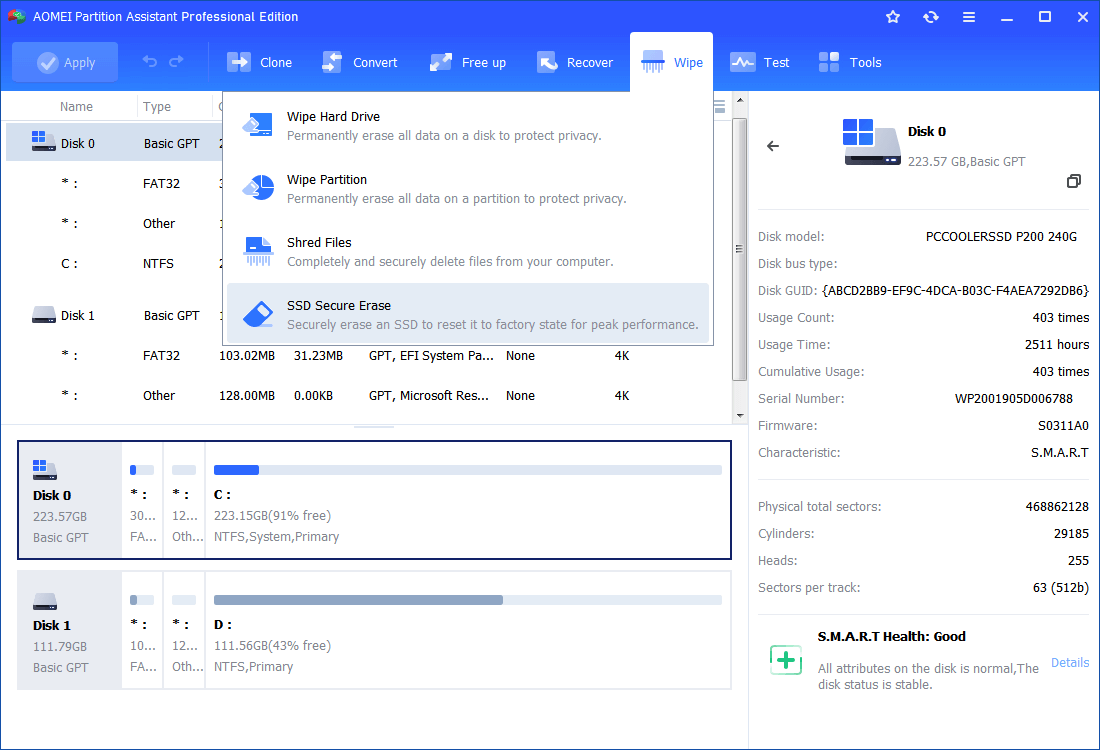
Step 3. Select the SSD that you want to securely erase and click "Next".

Step 4. Double-check the SSD identification information in case of erasing the wrong SSD because the data is unrecoverable after the Erase. Now, you will see the SSD is in a frozen state. To continue, you need to perform a hot-swap.
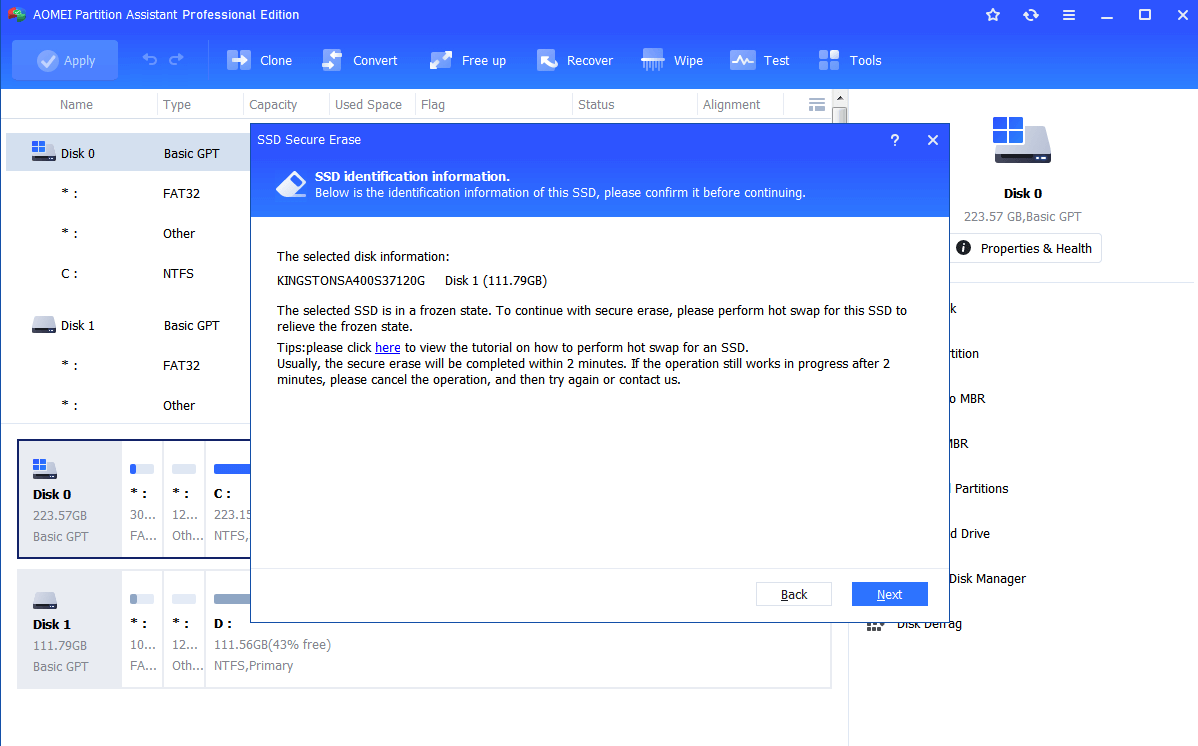
▶ Secure Erase SSD requires hot-swapping the drive to unlock it from the frozen state:
1. Open your computer case. If it is a laptop, open the computer's rear cover or drive shell.
2. Locate the SSD that needs to be securely erased.
3. Unplug the power cable from the SSD.
4. Disconnect the SATA data cable from the SSD.
5. Then reconnect the SATA cable to the SATA port on the SSD.
6. Finally, plug the power cable back into the SSD's power connector to complete the hot-swap.
Step 5. click "Next" to start the SSD Secure Erase.
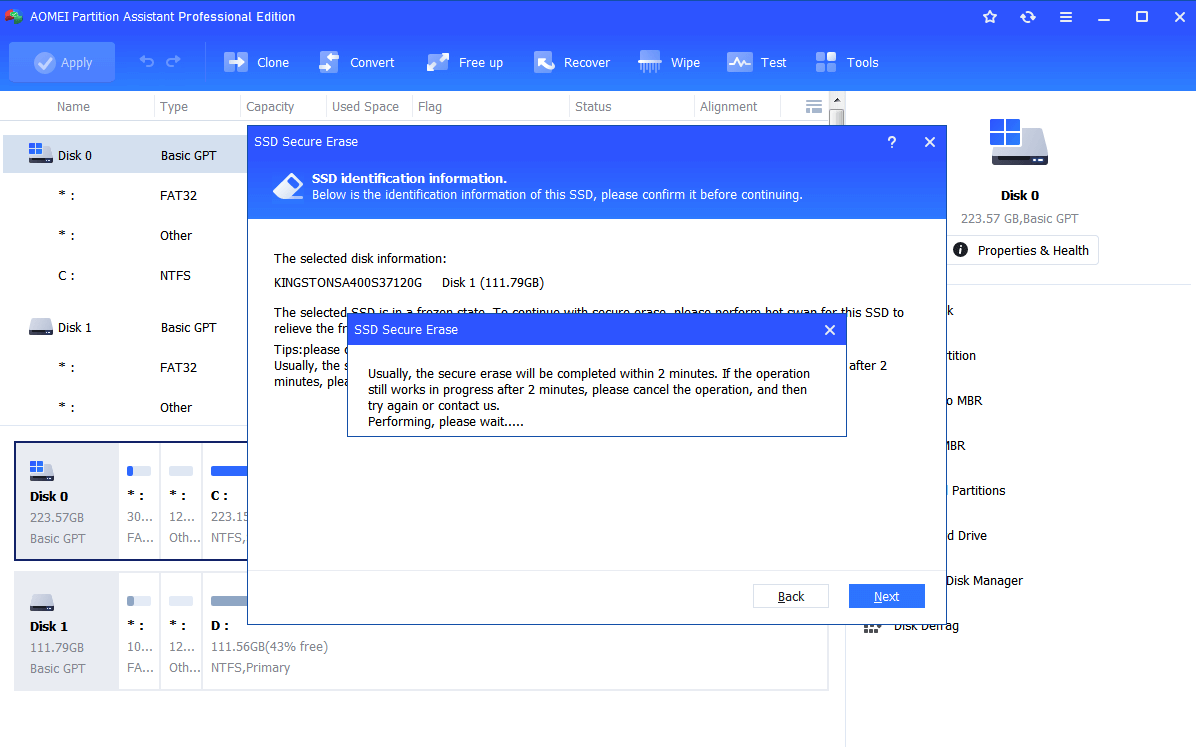
When the task is finished, your SSD will show as unallocated space.
Case 2. Effectively free up space
If you've received a “Low Disk Space Warning”, you might consider deleting all your storage and performing a fresh installation to rejuvenate your computer. With this multifunctional software, you can know how to free up space on Windows 10 effectively and effortlessly.
One of the most popular features is the "App Mover", which enables you to transfer large or infrequently used programs to another drive with ample storage capacity. With this function, you can move your installed programs without any concerns about complex or unfamiliar operations.
Step 1. From the top pane, select the “App Mover” under "Free up".

Step 2. In the new window, click “App Mover”.
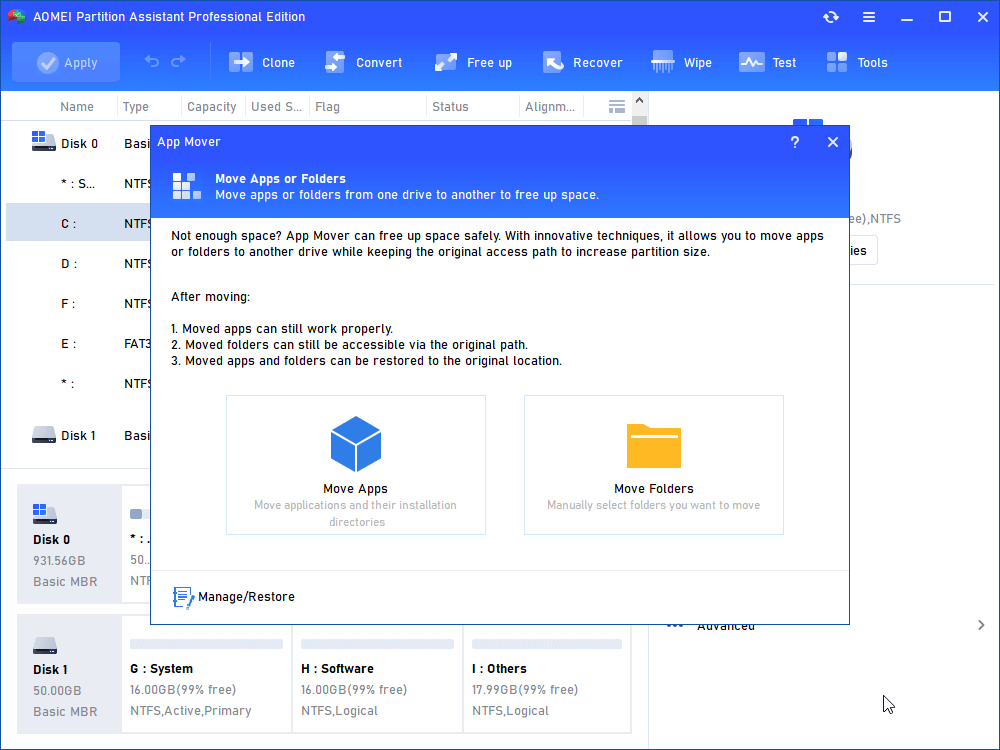
Step 3. Choose one partition that Photoshop located and click "Next".
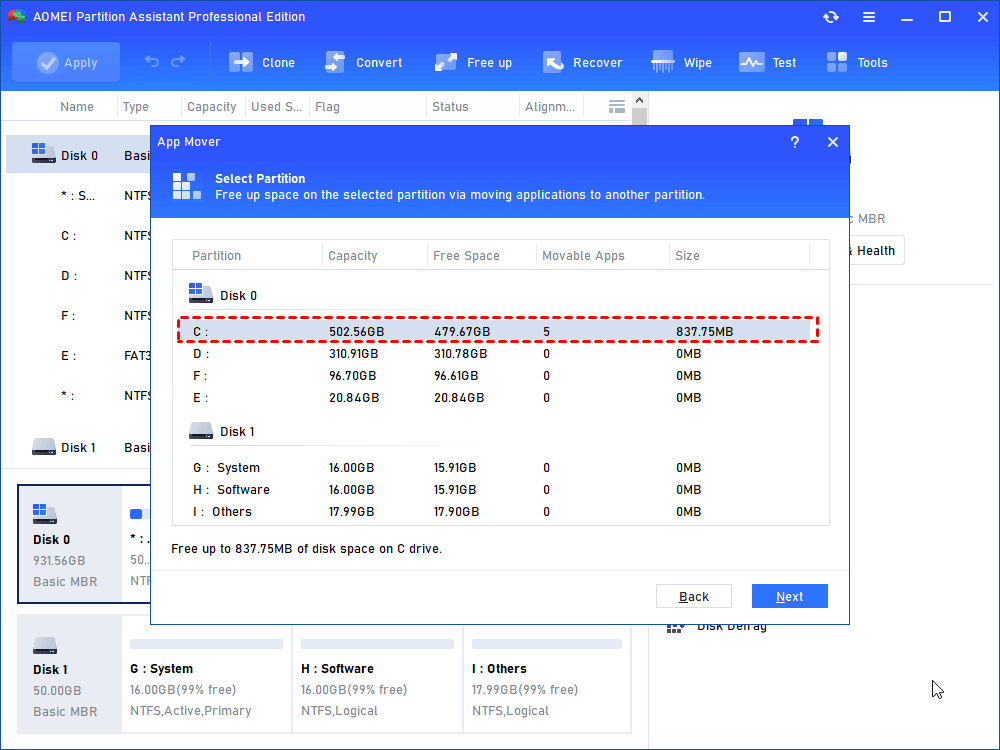
Step 4. All movable apps in the selected partition will be listed, choose the large apps (take Microsoft Office as an example) and select the target location, then click "Move".
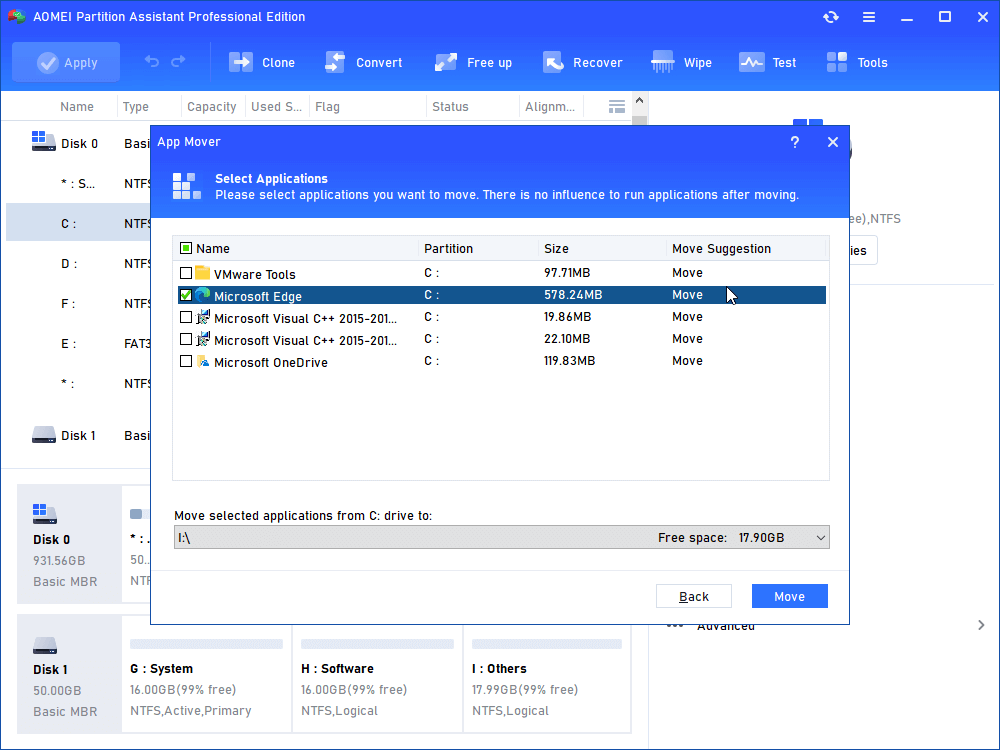
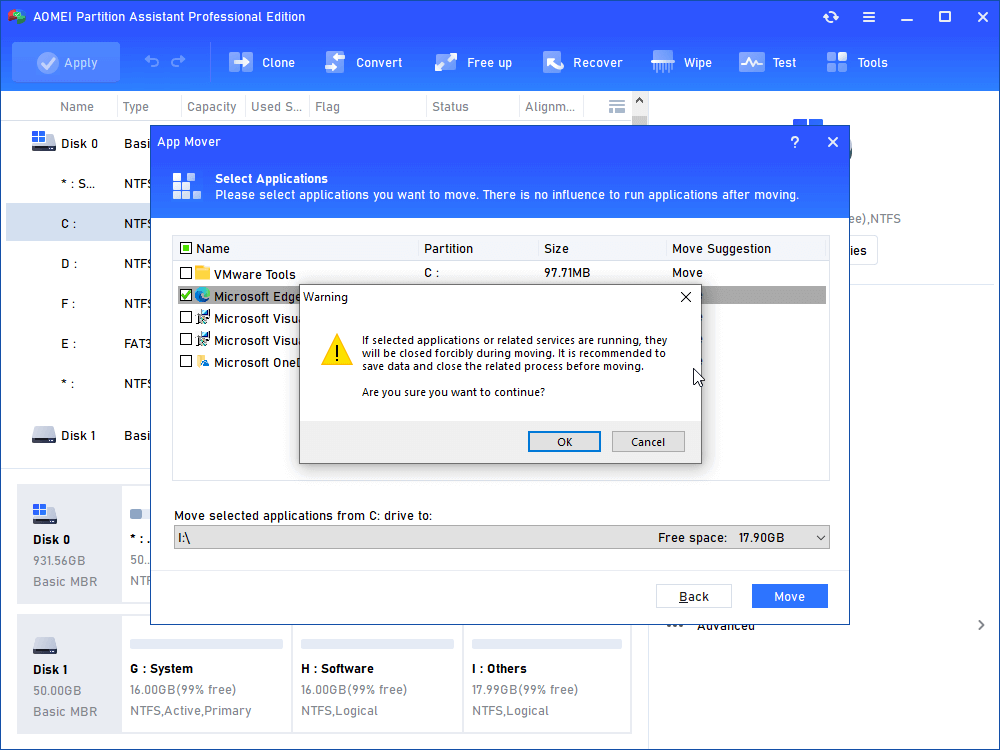
Step 5. Read the prompts carefully, and click “OK” and “Move”.
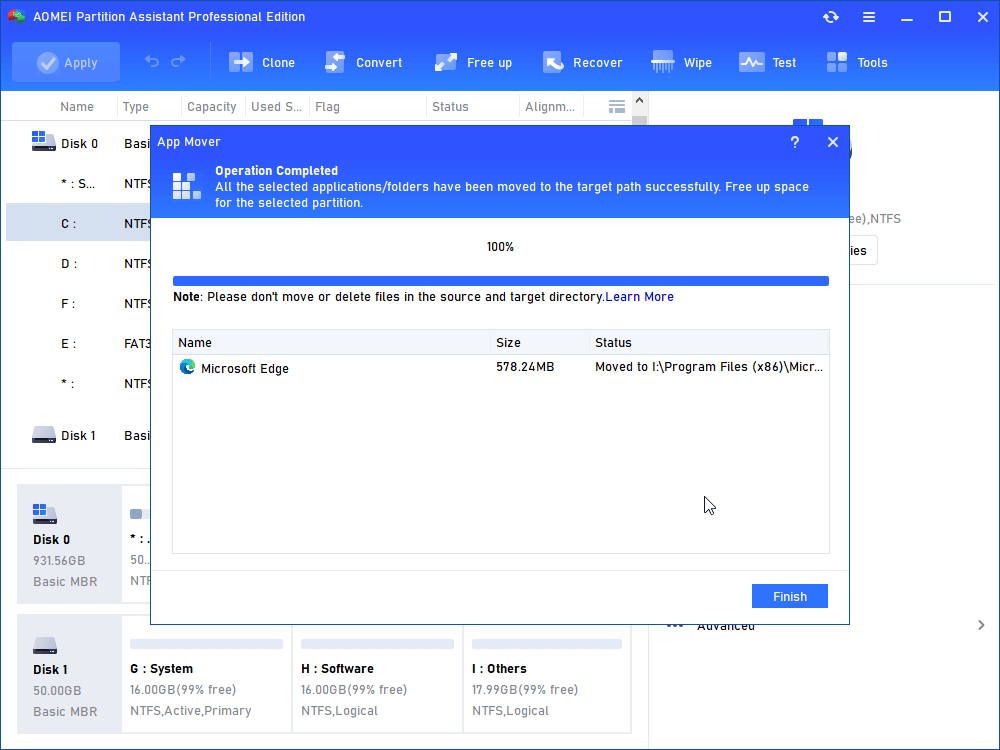
Step 6. Wait a moment, the program will be moved to target drive.
Afterward, it is also recommended to use Delete Large Files, Duplicate Files Finder, or Allocate Free Space to fully leverage the capabilities of this powerful tool for freeing up space.
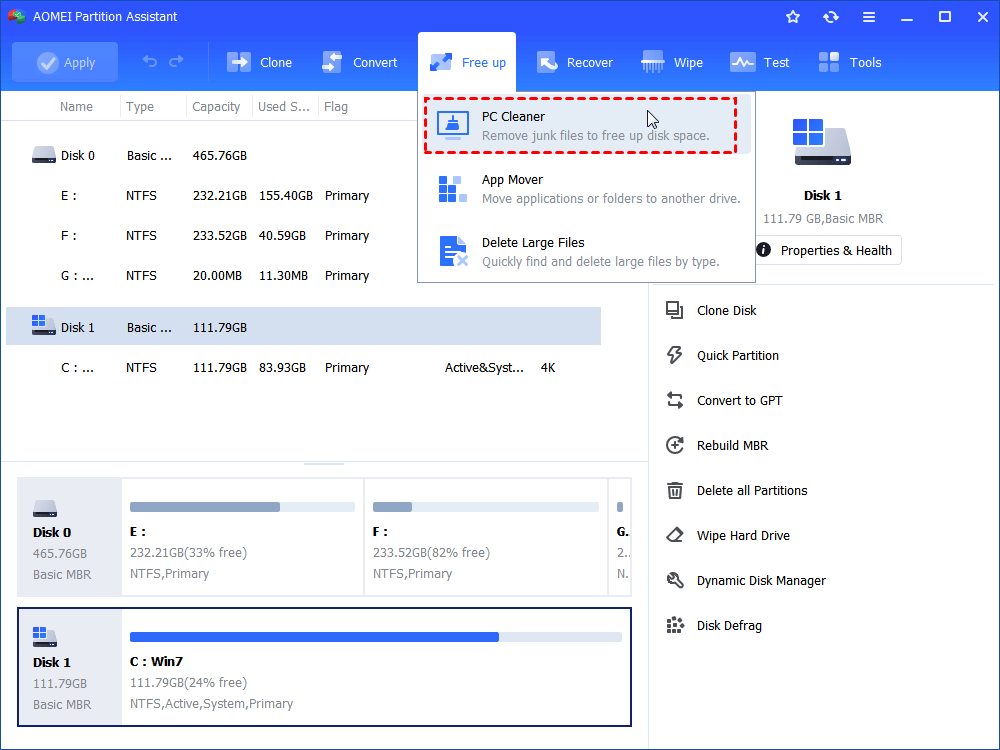
Case 3. Remove potential viruses and malware
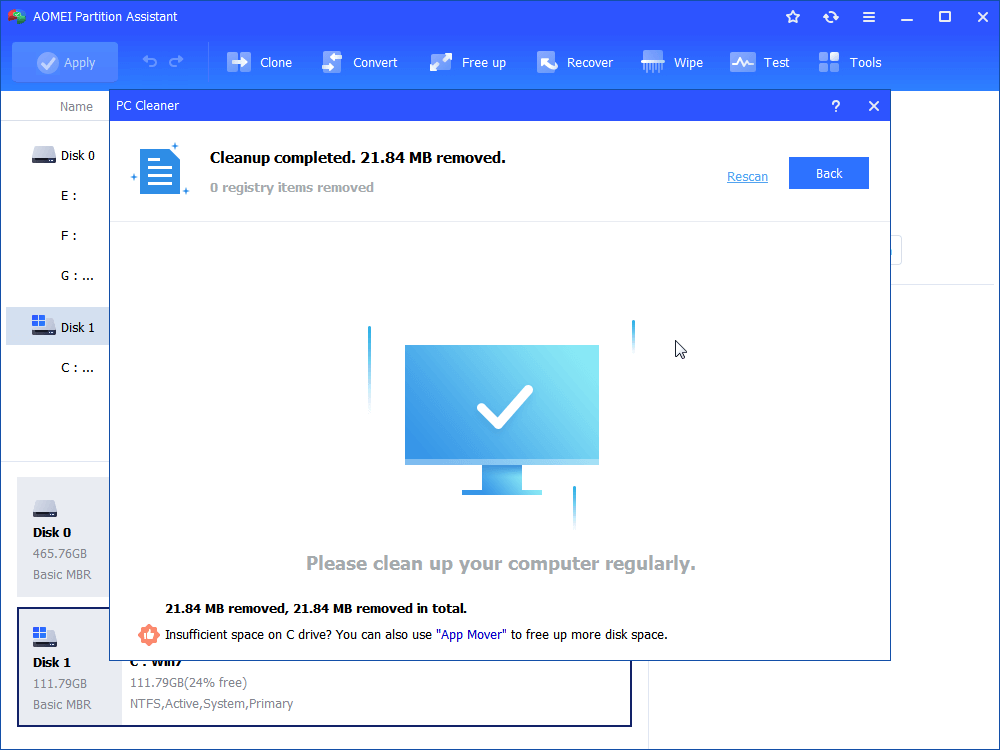
This program has a useful feature called "PC Cleaner." It checks your computer for unnecessary files and removes them. With this program, you can easily get rid of unneeded files or data on your system, which helps protect your computer from potential and hidden viruses and malware.
Step 1. From the top pane, click "Free up" > "PC Cleaner" in turn.
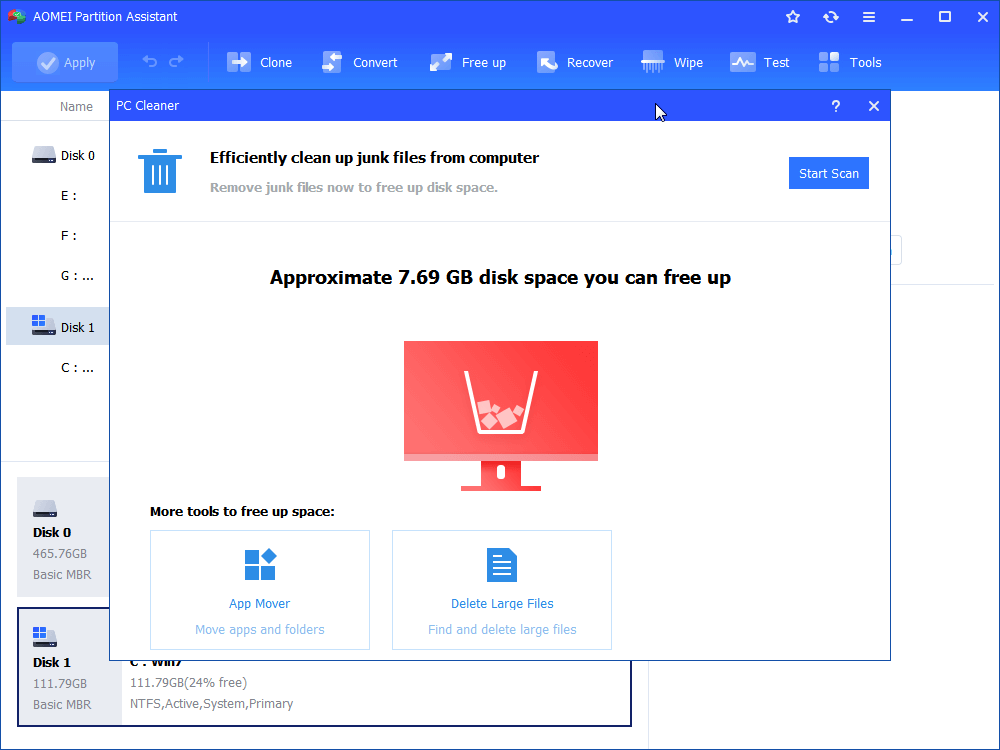
Step 2. In the pop-up window, click "Start Scan" to scan for junk files.
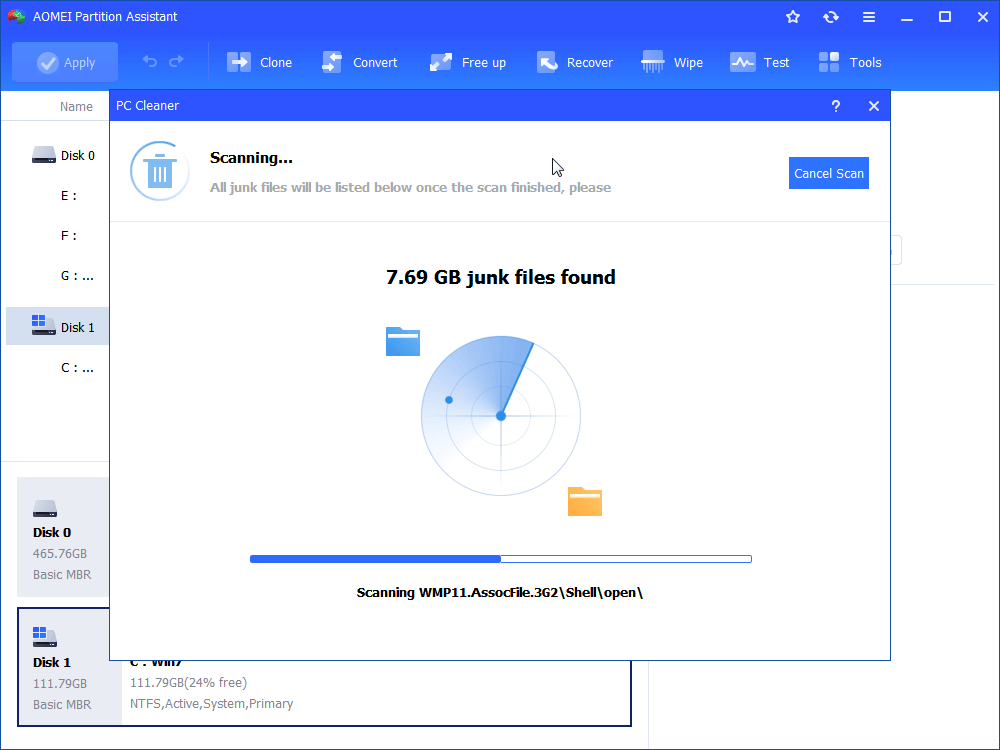
Step 3. Wait until the scanning process completes. If you want to stop, just click "Cancel Scan".
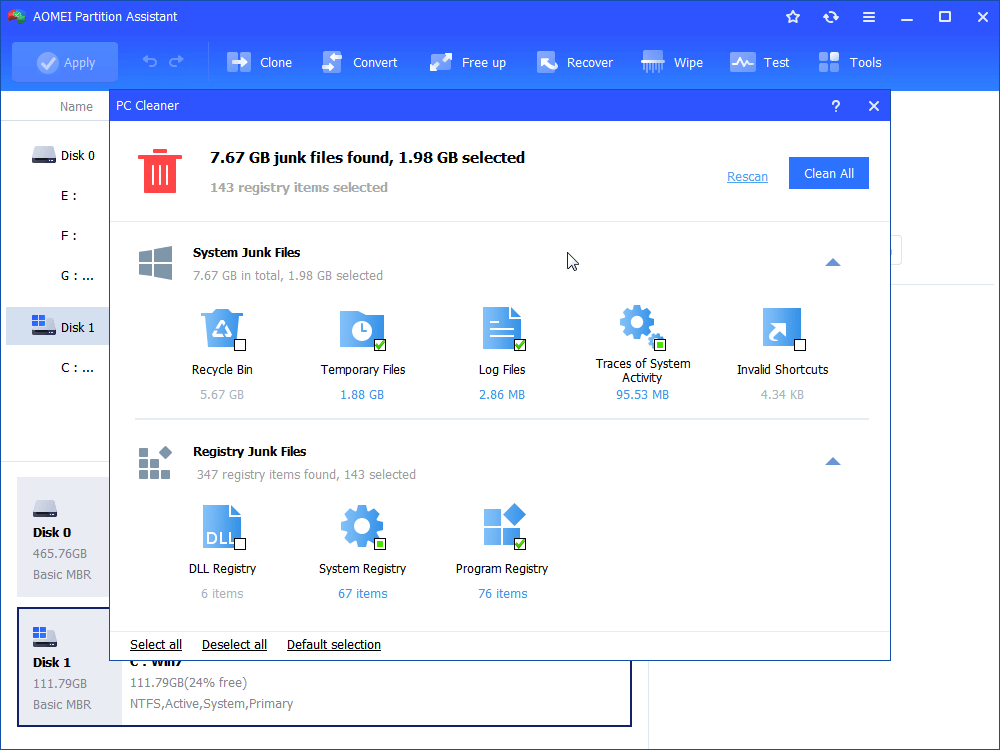
Step 4. After the scan is completed, all kinds of available junk files will be listed. Then, tick the options you want to clean, then click "Clean All" to begin the cleaning process.
Step 5. When you see a correct symbol displayed in the interface, you can click "Back" to exit the Window.
Conclusion
This post shares how to delete all storage on Windows 10. For safety and effectiveness, it's advisable to consider gentler approaches when addressing computer issues, such as using AOMEI Partition Assistant. Apart from aforementioned functions, Clone Disk, OS Migration, and Convert system disk between MBR/GPT are all widely recommended functions among users

