How to Format a USB Drive to FAT32 on Windows 11/10
Wondering how to format a USB drive to FAT32 on Windows 11/10? Read this tutorial and learn 4 easy FAT32 formatting ways including Files Explorer, Disk Management, Command Prompt, and professional FAT32 formatter.
By Hedy / Updated on December 6, 2023
Should I format my USB drive FAT32?
Deciding whether to format your USB drive to FAT32 depends on your specific needs and device compatibility.
There are three Windows file systems: FAT32, exFAT, and NTFS. FAT32 (File Allocation Table 32), introduced by Microsoft in 1977, is the oldest file system, replacing FAT16. Compared with FAT32, NTFS and exFAT stand as two newer and more contemporary file systems.
And there are some reasons for formatting USB to FAT32 in Windows:
1. Broad Compatibility: FAT32 is widely compatible with new or old devices and operating systems, making it ideal for transferring files between different platforms.
2. Legacy Devices: Older devices, such as gaming consoles (like PS3 or Xbox 360), some cameras, and certain media players, often require FAT32 for compatibility.
3. Size Considerations: If your USB drive is 32GB or smaller and you need broad compatibility, FAT32 could be a suitable choice.
In these cases, users may feel inclined to format their storage drives to FAT32. But how to format a USB drive to FAT32 on Windows 11/10? Please continue to read.
How to format a USB drive to FAT32 on Windows 11/10
The following guide details four effective methods for formatting a USB drive to FAT32 in Windows 11/10.
Warning: Formatting will wipe hard drive and disk data. Please back up important files before formatting.
Option 1. Format USB to FAT32 using File Explorer
File Explorer in Windows not only facilitates file display and management but also provides basic disk management capabilities, including formatting file systems. Here's a step-by-step guide on how to use the inbuilt FAT32 formatter to perform the formatting operations:
Step 1. Connect the USB drive to a Windows 11/10 PC.
Step 2. Open File Explorer, locate and right-click the USB drive, and select "Format".
Step 3. Set FAT32 as the target file system, check "Quick Format", and click "Start" to launch the format.
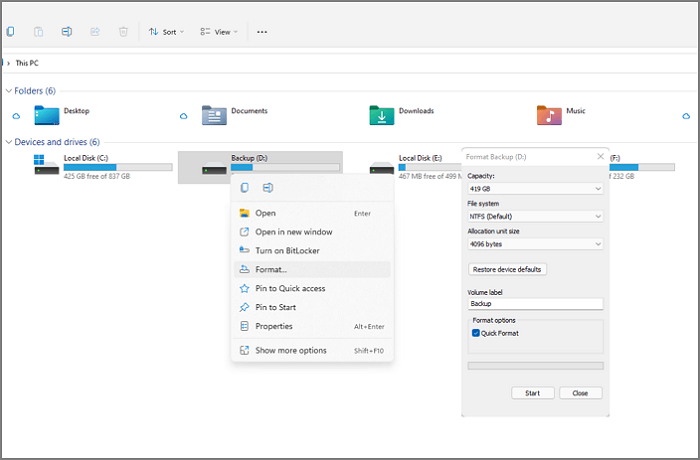
When the process is complete, click OK to confirm. Now your USB is FAT32.
Option 2. Format USB to FAT32 using Disk Management
Although File Explorer offers partition formatting, the Disk Management tool is essential for formatting a drive to the FAT32 file system.
Warning: Exercise extreme care while using this FAT32 format tool. An accidentally deleted USB partition could result in permanent data loss.
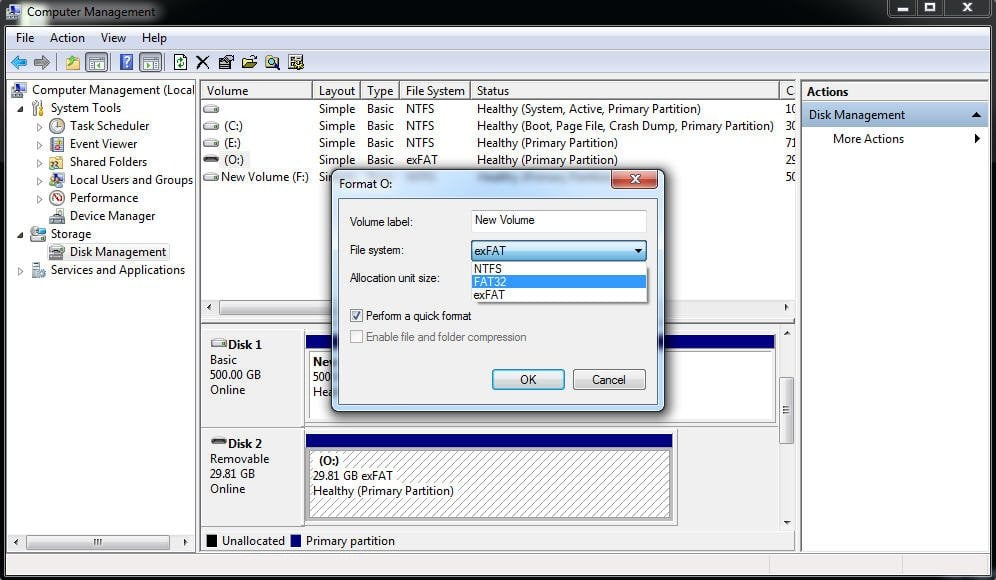
Step 1. Type "Disk Management" in the search bar and select "Create and format hard disk partitions." This action displays all available hard drives and partitions.
Step 2. Right-click on the intended drive and choose "Format".
Step 3. Here, you can configure settings such as Volume label, Allocation unit size, and File system. Switch the File system to FAT32 and adjust other settings as per your requirements.
Option 3. Format USB to FAT32 using Command Prompt
Want to format your flash drive to FAT32 using Command Prompt? If you're inclined to use Command Prompt or the Windows Terminal, included in the Power Menu of Windows 11 and resembling Command Prompt in Windows 10, follow these steps:
Step 1. Press "Win+X" and select "Command Prompt" with admin privileges. Remember to note the drive letter.
Step 2. Once the Command Prompt window opens, input the following commands, hitting "Enter" after each step:
•list disk
•select disk X (Replace X with the disk containing your target USB drive)
•list partition select partition Y (Replace Y with the target partition needing formatting)
•format fs=fat32 or format fs=fat32 quick
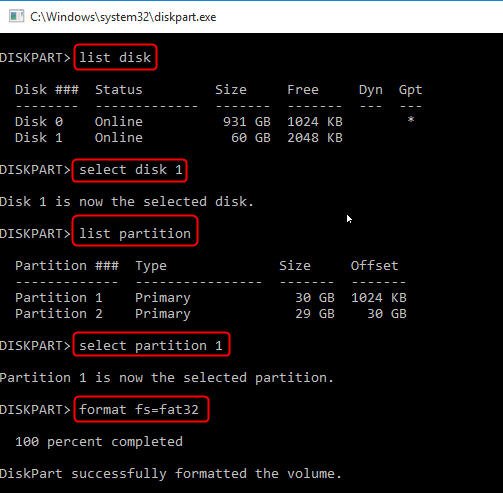
Step 3. The operation result will be displayed.
However, quite a few users report that they can't format to FAT32 for USB drives using the above methods. Here is a real case from Microsoft Community:
"When I was trying to format my USB flash drive to FAT32 with Disk Management, I found there were only exFAT and NTFS left to choose. Where is the FAT32 option? How to format USB to FAT32 on Windows 11/10? Is there any solution?"
Why is Windows 11/10 not showing the FAT32 Format option? This is because the default Windows formatting tool restricts FAT32 partitions to drives of 32GB or smaller. If your partition or drive exceeds this size, the FAT32 option might not be available. In such a case, you will need a third-party FAT32 formatter.
Option 4. Format USB to FAT32 using a Professional FAT32 Formatter
Among all the Windows FAT32 formatting tools, AOMEI Partition Assistant Professional is highly recommended for its user-friendly interface and detailed operation guidance. It shows great advantages in formatting, especially in formatting flash drives larger than 32 GB as FAT32.
So, what sets this software apart from FAT32 format Windows 11/10 native tools?
❀ It can format USB drives of various sizes, including 32 GB, 64 GB, 128 GB, and 256 GB.
❀ It supports diverse storage devices, such as USB drives, SD cards, and external/internal hard drives.
❀ It is able to format drive to Ext4/Ext3/Ext2, FAT32, exFAT, and NTFS within clicks.
❀ It helps convert file systems without formatting, causing no data loss.
❀ It will recover data after format and other data-loss scenarios.
Way 1. Format partition
Follow the below steps to see how to format a USB drive to FAT32 on Windows 11/10 even when the drive is larger than 32GB:
Step 1. Install and launch AOMEI Partition Assistant Professional.
Step 2. Right-click on the USB drive and choose "Format Partition".
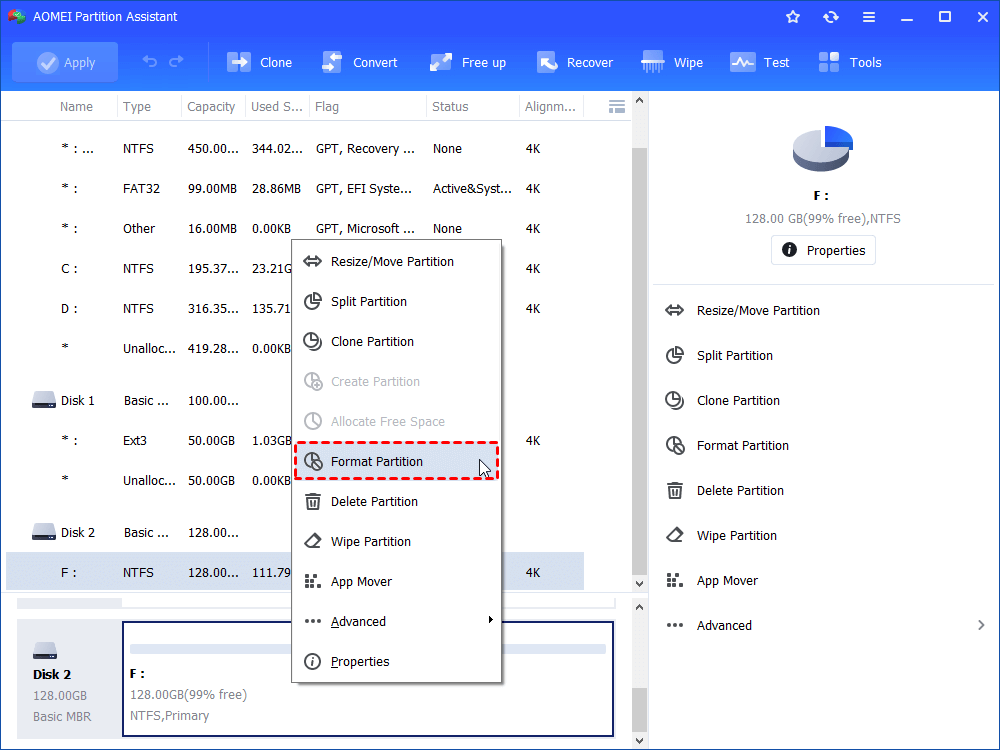
Step 3. Add a partition label if needed. Then set the file system as "FAT32".
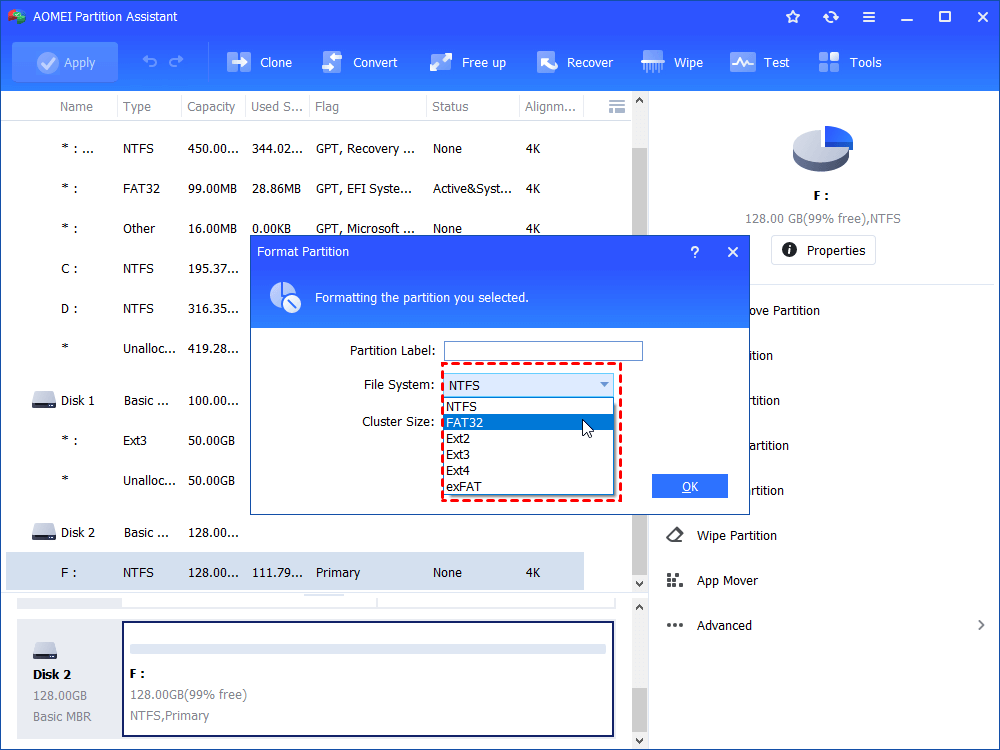
Step 4. Once the process completes, your USB flash drive now operates with the FAT32 file system.
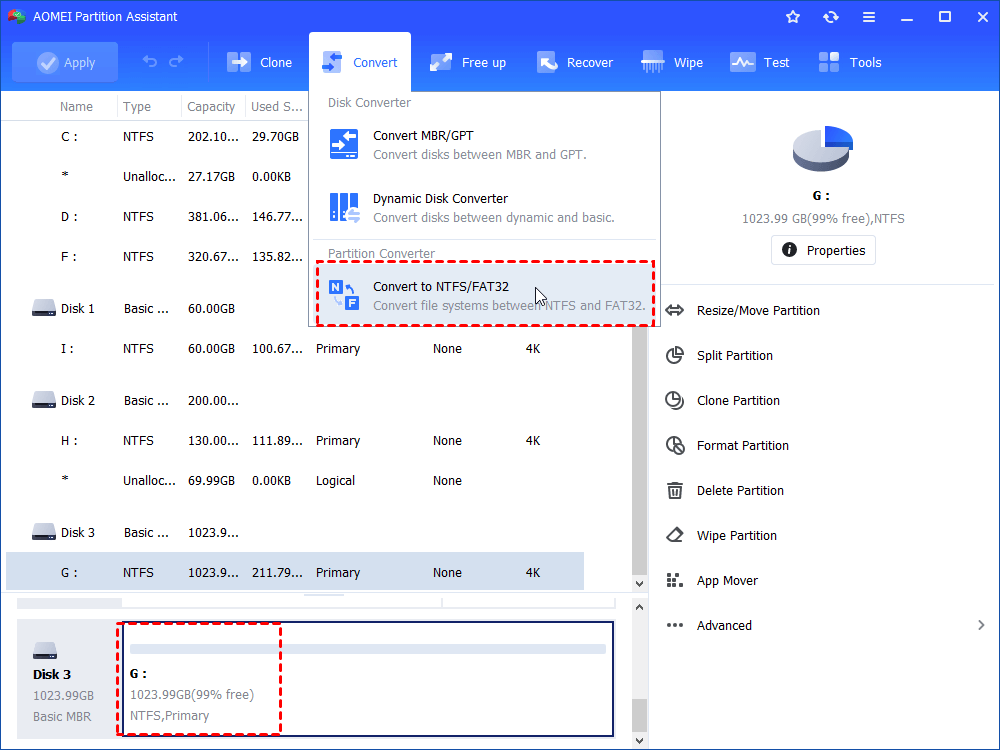
Way 2. Convert to FAT32 without formatting
As previously mentioned, formatting a storage device results in the deletion of all data stored on it. However, if your USB comes per-formatted as the NTFS file system, there's an option to utilize the "Convert to NTFS/FAT32" feature to directly convert the file system from NTFS to FAT32 without formatting the USB. As a result, there's no need to worry about data loss during this conversion.
Step 1. Launch AOMEI Partition Assistant Professional.
Step 2. Click on "Convert" > "Convert to NTFS/FAT32".
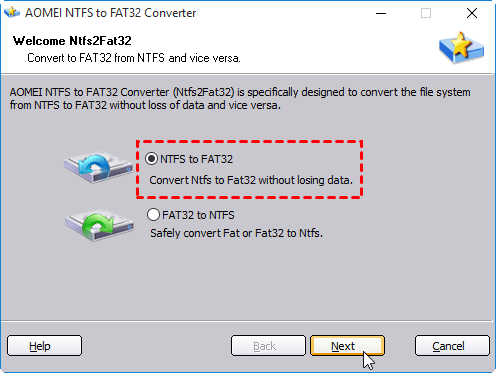
Step 3. Select "NTFS to FAT32" > "Next" in the prompted window.
Step 4. Choose the USB drive and proceed with "Next".

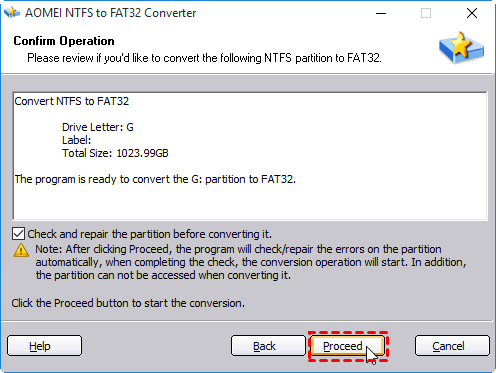
Step 5. Confirm the operations by clicking "Proceed." After completion, click "Finish."
Your USB drive is now successfully formatted to FAT32 in Windows 11/10 without any data loss.
Conclusion
This comprehensive guide presents four reliable methods on how to format a USB drive to FAT32 on Windows 11/10. The first three tools cater to USB drives smaller than 32 GB, while the fourth option, AOMEI Partition Assistant Professional, surpasses this limitation by formatting USB drives of varying sizes, ranging from 32 GB to 256 GB. Additionally, this safe FAT32 format tool can directly convert file systems to FAT32/NTFS as well.
For extensive formatting capabilities and exploration of enhanced features across Windows Server 2025/2022/2019/2016/2012, and 2003, consider opting for the AOMEI Partition Assistant Server edition.

