How to Use HP Secure Erase to Wipe HDD Or SSD in BIOS
Secure Erase option is a crucial resource to protect data on a hard drive/SSD in HP laptop or computer. This post will illustrate how to use HP Secure Erase option to wipe data in HP BIOS, and provides a fix when the hard drive is locked.
What does HP Secure Erase do?
When HP users need to sell their hard drive or SSD or to eliminate viruses and malware, they will erase the hard drive using Secure Erase in BIOS. With HP Secure Erase, users can ensure that SSD and HDD drives are completely clean and meet current minimum industry standards. HP Secure Erase is an option for HP administrators to protect their sensitive data from being lifted.
HP erasing methods will overwrite all data on a hard drive with DoD (Department of Defense) standard, which overwrites a storage device with 3 passes. In this way, all data on an erased drive will be fully removed and basically cannot be recovered.
HP Secure Erase Download
HP provides an erase option in the BIOS, and you don't need to download HP Secure Erase tool. However, some users have reported that they can't find the Secure Erase option in the BIOS. This may be because HP Secure Erase is locked or not working.
Fortunately, there is powerful HP wiping software- AOMEI Partition Assistant Professional. This reliable tool provides the following 4 erasing methods to completely remove data on your HP laptop:
● Write sectors with zeros: It is also called the “zero-filling” method. It replaces data with a series of zeroes to stop recovering data by most software-based software.
● Write sectors with random data: This method overwrites data with random data, which is more secure than zero-filing way.
● DoD 5220.22-M: It is the method HP Secure Erase uses. And it writes multiple patterns on every sector to make it very safe, and it is used by lots of HP users.
● Gutmann: It is the most secure way to a hard drive here. It will prevent all software-based file recovery tool from retrieving any information. But it takes a long time.
This software provides an “SSD Secure Erase” feature that erases various drives in Windows PC without damaging lifespan and performance. Next, this post will illustrate how to secure erase a drive in HP laptop or computer.
How to Securely Wipe an HP Laptop with HP Secure Erase Tool
If you are not familiar with computers, this part will provide two programs to securely erase HP computers.AOMEI Partition Assistant supports HDD and SSD erasure. The official HP program is only for erasing SSDs in the BIOS. You can choose according to your actual situation.
Wipe SSD with the Best Software for Erasing SSD Data
With a simple interface, AOMEI Partition Assistant is suitable for all users to wipe an HDD. Follow the steps to protect your data better:
Guide 1. Steps to wipe an HDD
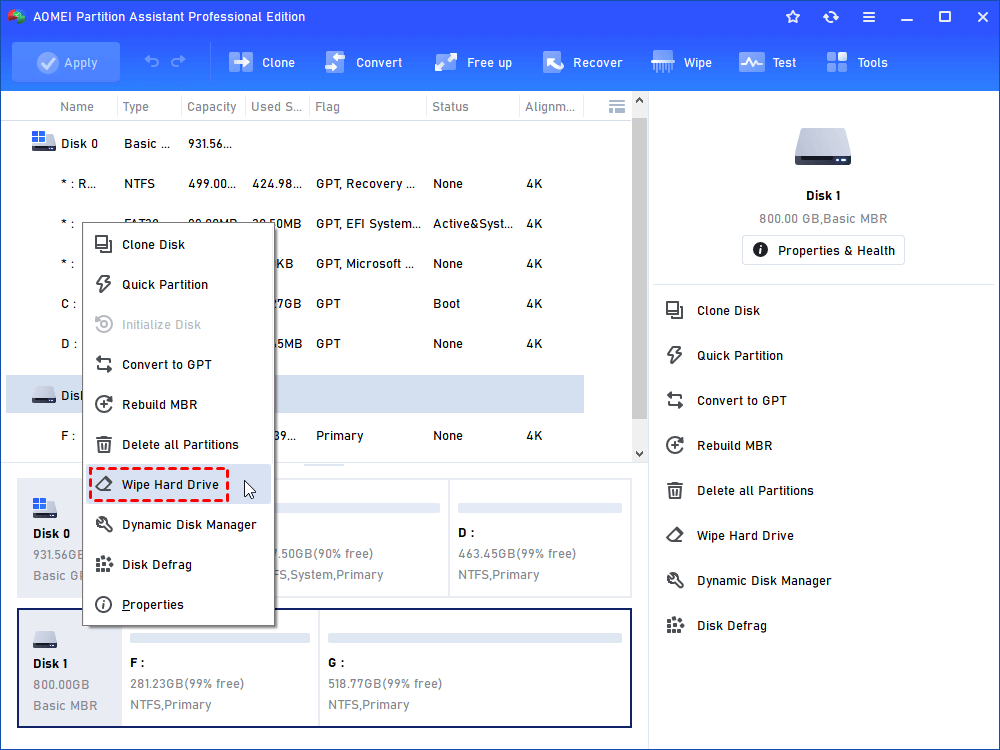
Step 1. Launch this reliable tool, you can view all disk information on the main interface. Right-click on the hard drive your will to erase, and choose “Wipe Hard Drive”.
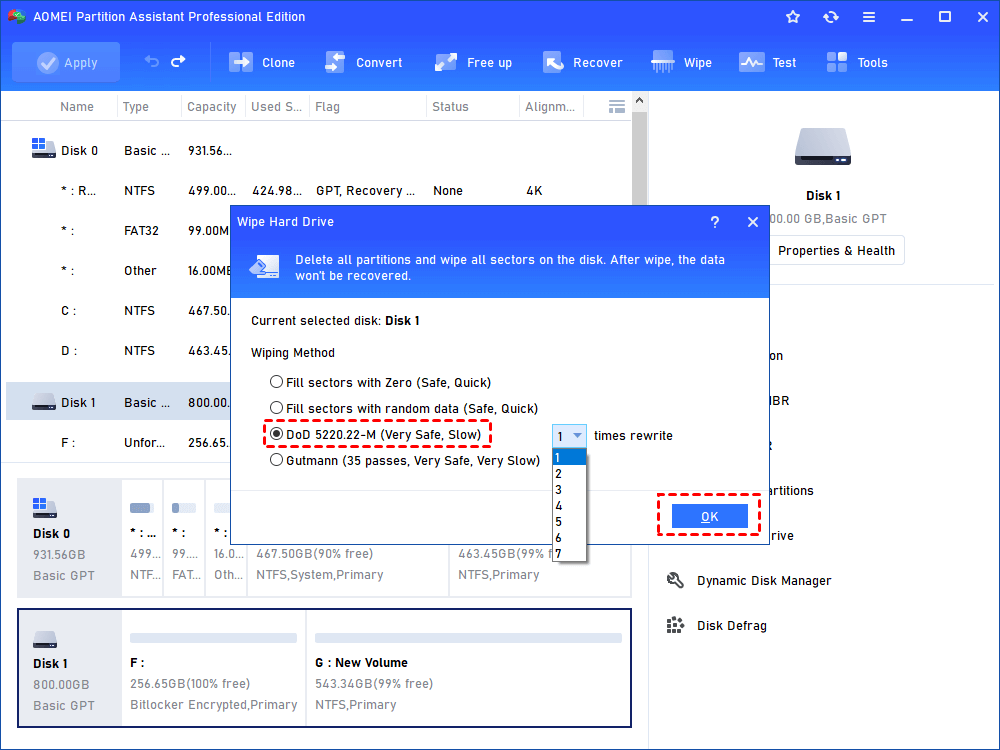
Step 2. The 4 wiping methods will be listed on the window. you can use “DoD 5220.22-M” like HP Secure Erase, or other wiping methods. And choose overwriting times.
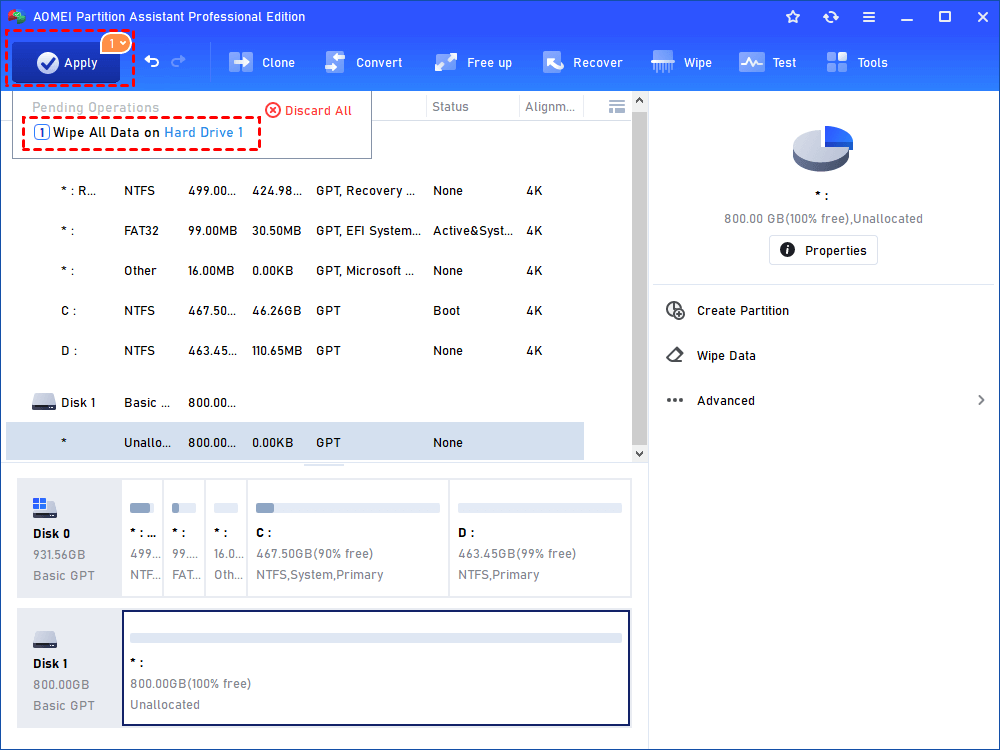
Step 3. And in the main interface, check the pending operation, and click “Apply” to execute it.
✍ Note: As for wiping the system disk, you will be asked to “restart into PreOS mode” or “restart into Windows PE mode”. If you don’t have Windows PE, choose the former operation.
Guide 2. Steps to erase an SSD
At present, “Secure Erase SSD” is only working in the Windows 7 environment. Before proceeding, please connect the SSD with a PC running with Windows 7.
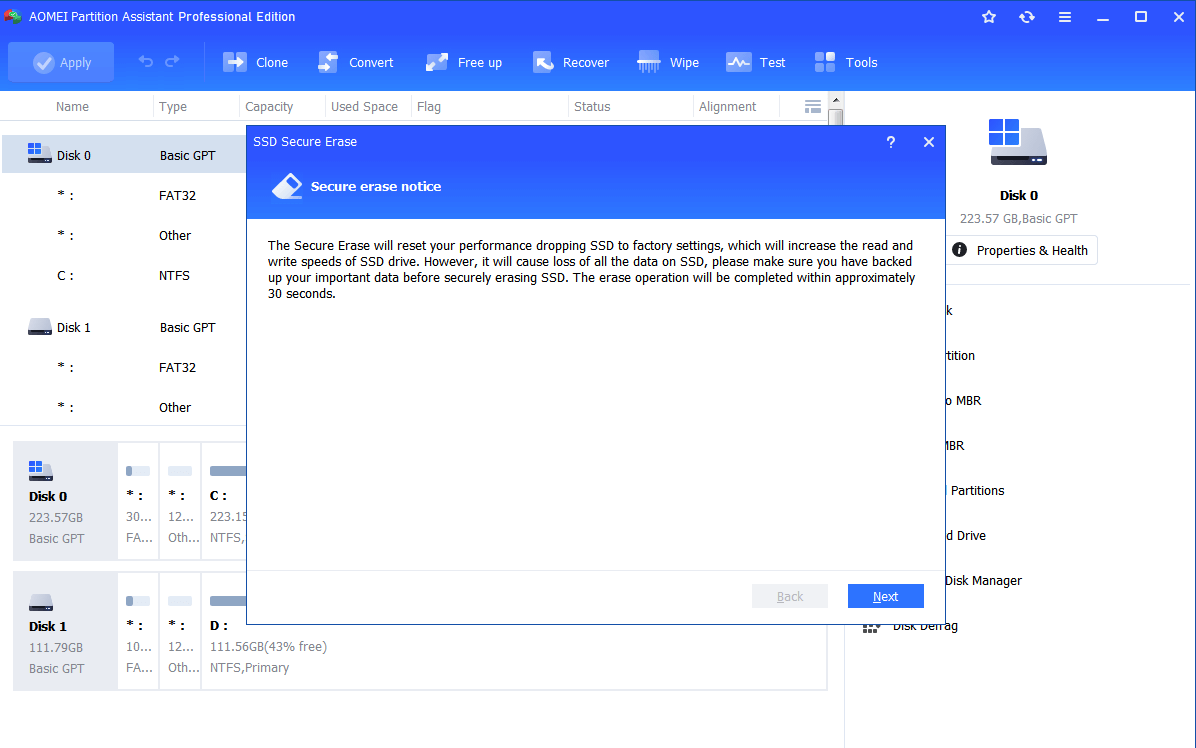
Step 1. Launch AOMEI Partition Assistant, click "Wipe"> “SSD Secure Erase” on the top side of the interface and click “OK” on the pop-up window.
Step 2. Choose an SSD, and click “Next”.
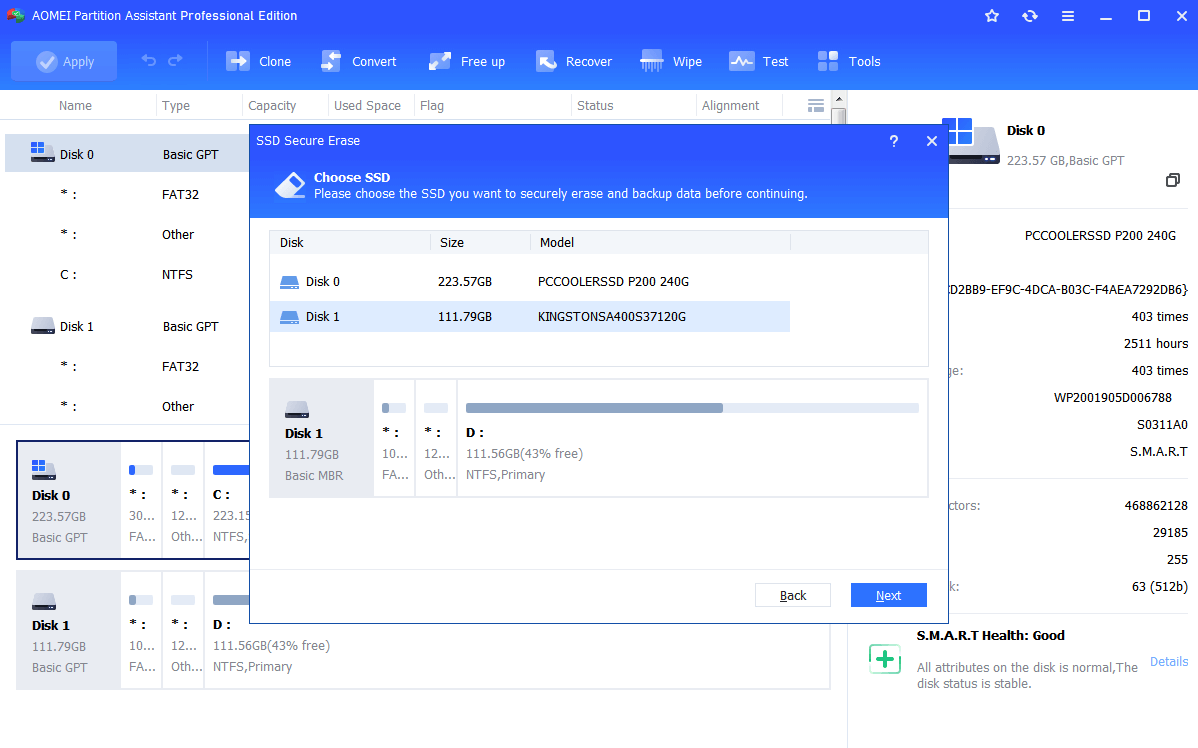
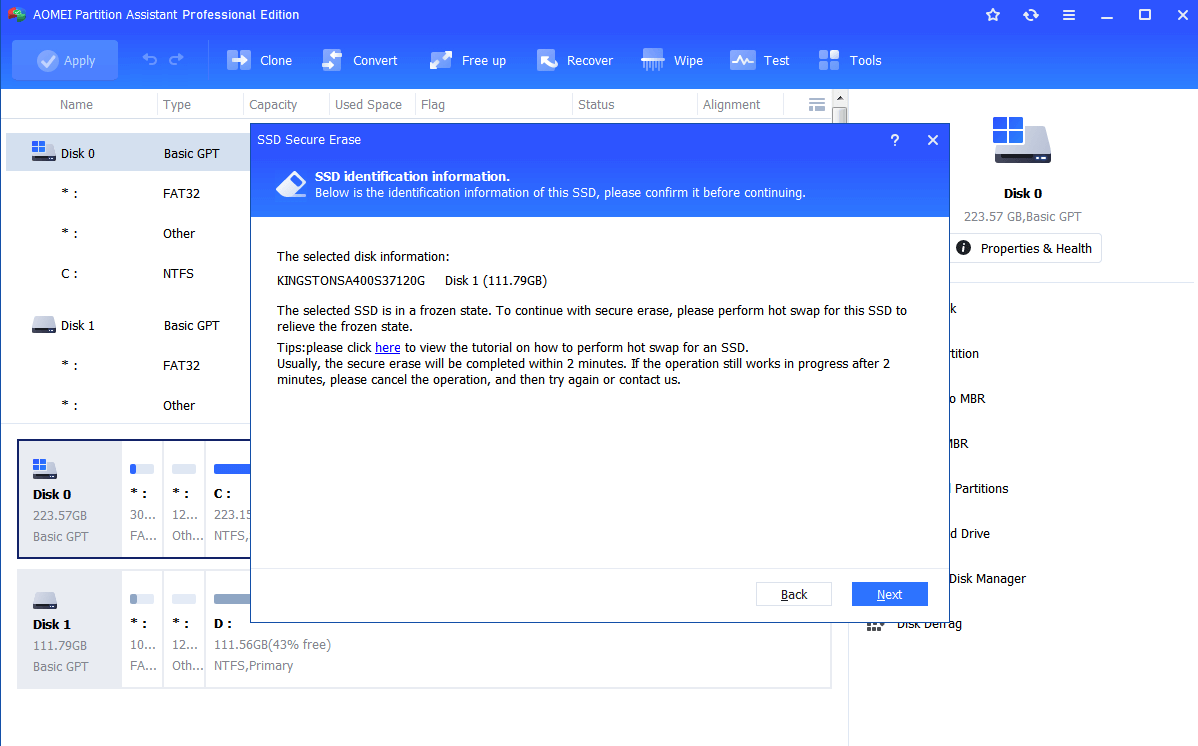
Step 3. Check the information of the SSD, and click “Next”.
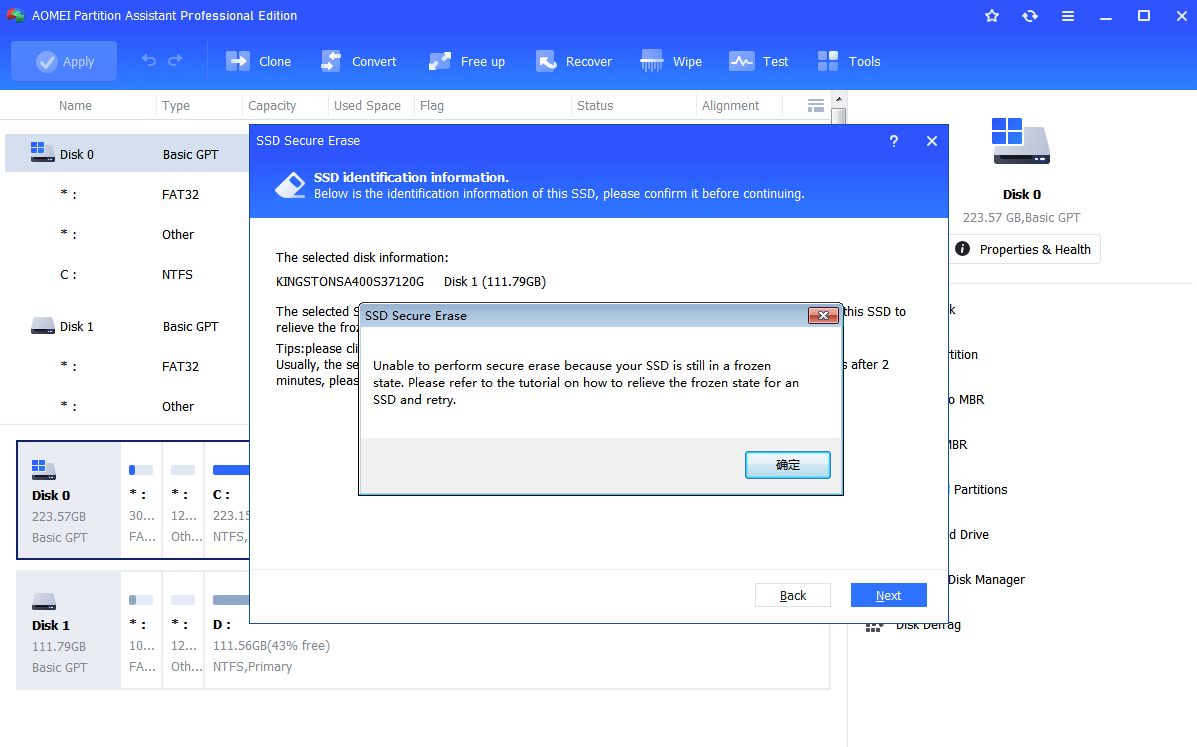
Step 4. If the SSD is in a frozen state, the program will unable to perform the task. You will need to unplug the SSD and reconnect it to relieve the frozen state.
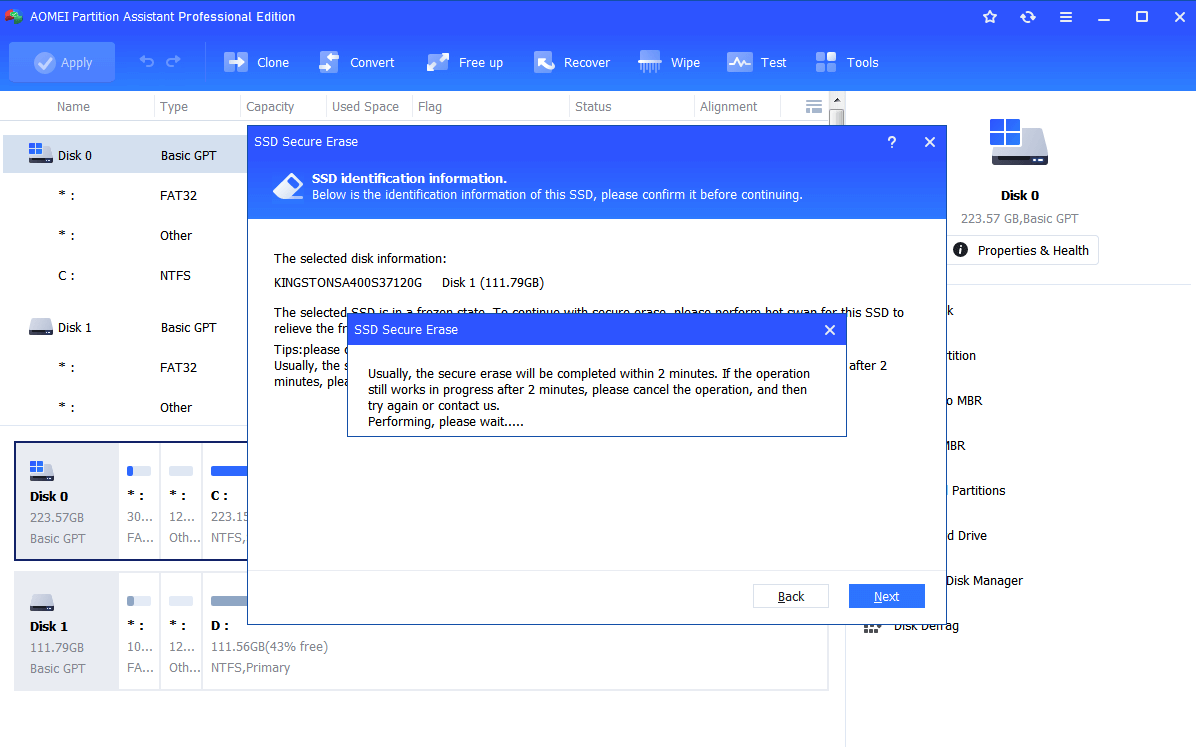
Step 5. Click the “Next” to continue the operation.
use HP Secure Erase to wipe an HDD/SSD in BIOS
✍Note: HP allows you to wipe an HDD or SSD. But we do not suggest you erase an SSD in this way. Because it will shorten the service life. You can go the next part to employ an alternative tool to erase an SSD securely.
Step 1. Power on your HP computer. Press “F10” repeatedly as soon as the HP logo appears on the screen.
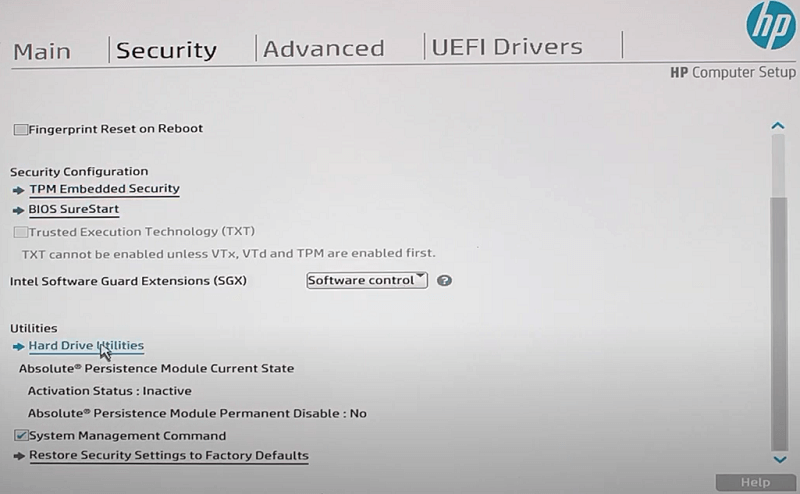
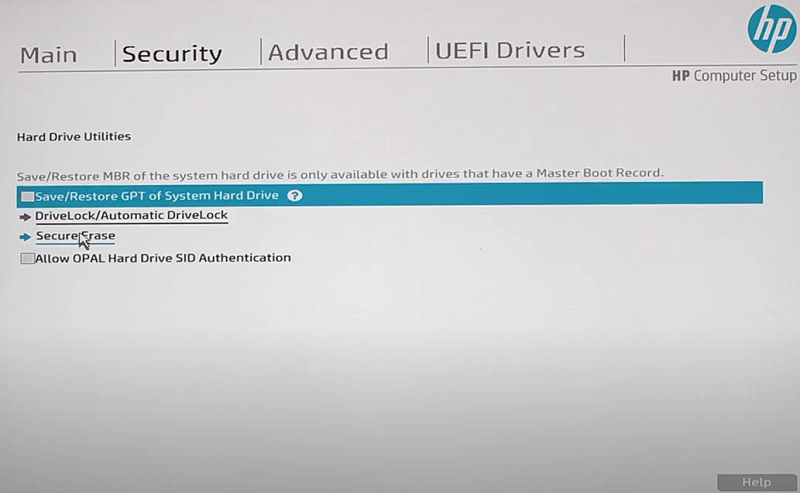
Step 2. You will enter BIOS setup. Then select the “Security” tab.
Step 3. Choose “Hard Drive Utilities” or “Utilities”, “Hard Drive Tools”.
Step 4. Choose “Secure Erase” to launch HP Secure Erase.
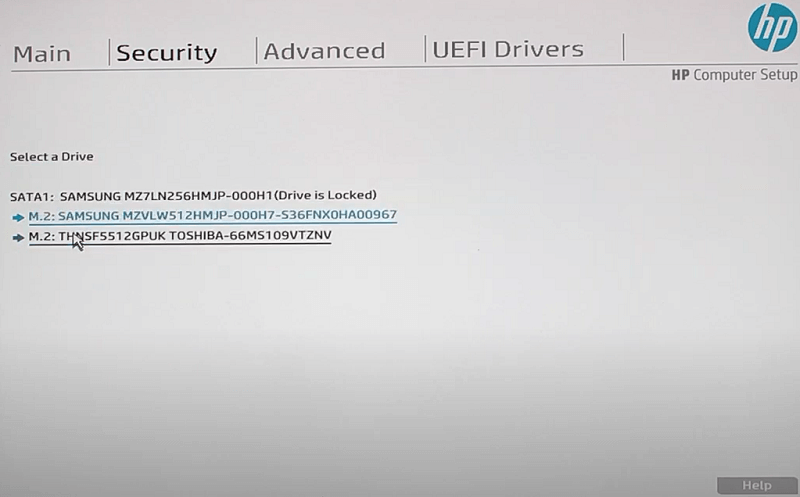
Step 5. Choose the drive from the listed storage devices.
Step 6. This program will warn you that this operation will erase all data on the hard drive, confirm the operation and click “Continue”.
After a few minutes, the hard drive will be erased.
Bonus Tip: Secure Erase is Locked or Not Working
Lots of users reported that they failed to wipe a hard drive via the HP Secure Erase option. For example, a hard drive can be locked when you try to erase it. And you will need the BIOS password to unlock it. If you forget the password, you can’t wipe an SSD/SSD in HP BIOS.
Also, HP Secure Erase doesn't work when you can't find the Fuck Erase feature. You can refer to the following steps to learn how to access Secure Erase:
- Click Security.
- Click Hard Disk Utility or Hard Disk Tools.
- Select Secure Erase or Disk Cleaner to open the tool.
- Follow the on-screen instructions to destroy your data.
However, for simpler data wiping and extra hassle, we highly recommend you to use AOMEI Partition Assistant directly.This tool is a trustworthy and proven software to handle various drive tasks. Whether it is HDD or SSD, you can easily erase data.
Conclusion
Now you have known how to use the HP Secure Erase option to wipe a hard drive. It is wise to erase all data on a hard drive before you give it away.
When the option is not working, you can turn to AOMEI Partition Assistant Professional, especially if you want to clear an SSD. And this software also has other functions to manage storage devices, such as, recover files from SSD, create partition, format partition.
If you want to perform the operation on Windows Server systems, please try AOMEI Partition Assistant Server.

