How to Manage User and Group Properties in Windows 10
Sometimes, it’s necessary to manage user and group properties. In this post, you will learn how to manage users and groups in Windows 10 using built-in Computer Management and a third-party Users and Groups tool.
By Hedy / Updated on September 29, 2025
Benefits of managing users and groups effectively
Managing users and groups effectively brings several important benefits for both individuals and organizations. Here are the key advantages:
1. Improved security: By assigning permissions to groups instead of individual users, sensitive information and system resources are better protected. Access control becomes more consistent, reducing the chances of unauthorized access.
2. Simplified administration: Instead of managing permissions for each user separately, administrators can manage groups. Adding or removing a user from a group instantly applies the necessary access rights, saving time and reducing errors.
3. Better resource management: Grouping users based on roles or departments ensures that each person has access only to the tools, files, and applications they need, preventing resource misuse.
4. Enhanced collaboration: Users within the same group can share resources more easily, which boosts teamwork and productivity across departments or projects.
5. Scalability and flexibility: As organizations grow, effective group management makes it simple to onboard new users and assign them to the correct roles without manually adjusting every permission.
6. Cost and time efficiency: Less time spent on repetitive administrative tasks allows IT teams to focus on more strategic work, reducing operational costs in the long run.
How to manage User and Group properties in Windows 10
You can manage these settings using Windows’ built-in Computer Management tool or by relying on third-party software for advanced features. Below, we’ll explore both methods in detail.
Way 1. Using built-in Computer Management
Windows 10 includes Computer Management, a built-in tool that lets you manage local users and groups without extra software.
Part 1. Manage User properties
Step 1. Press Win + X and select Computer Management.
Step 2. Expand Local Users and Groups → click on Users.
Step 3. Right-click on a user account and choose Properties.
Step 4. In the Properties window, you can:
◆ Change the full name or description.
◆ Set or clear the “User must change password at next logon” option.
◆ Disable or enable the account.
◆ Configure password-related options.
Step 5. Click Apply and OK to save changes.
Part 2. Manager Group properties
Step 1. In Computer Management, expand Local Users and Groups → click on Groups.
Step 2. Right-click on a group (e.g., Administrators, Users) and choose Properties.
Step 3. In the Group Properties window, you can:
◆ Add or remove members.
◆ Control access levels by assigning users to different groups.
Step 4. Save changes by clicking Apply and OK.
This method is straightforward but may feel limited if you need advanced management features.
Way 2. Using a third-party Users and Groups tool
For more flexibility and convenience, you can use third-party tools designed to manage users and groups with advanced options such as bulk editing, permissions auditing, or easier navigation.
While AOMEI Partition Assistant is best known as a powerful disk management tool, it also offers a handy Users and Groups management feature. This allows administrators to easily control user accounts and group memberships without relying solely on Windows’ built-in tools.
With this feature, you can:
➢ Manage User accounts: Create, delete, enable, or disable user accounts, as well as reset forgotten passwords.
➢ Edit User properties: Change usernames, passwords, or other details to keep accounts updated and secure.
➢ Manage Group properties: Add or remove users from groups to assign appropriate permissions, ensuring that every user has the right access level.
➢ Simplify administration: Compared to traditional methods like Computer Management or Command Prompt, AOMEI provides a more user-friendly interface, making account and group management faster and easier.
In short, AOMEI Partition Assistant is not only useful for partitions and disks but also a convenient tool for managing users and groups in Windows, helping both home users and IT administrators maintain better control over their systems.
Part 1. Manage User properties
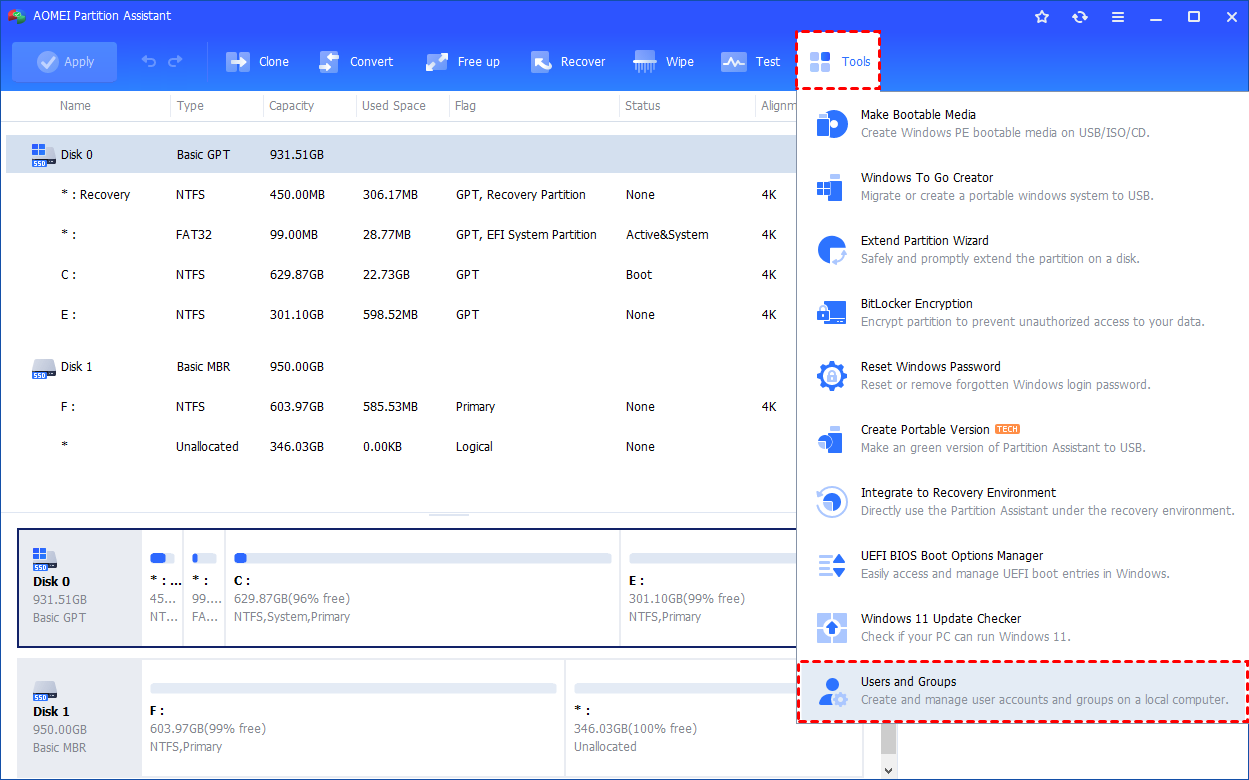
Step 1. Install and launch AOMEI Partition Assistant. Click the "Tools" main tab and select "Users and Groups".
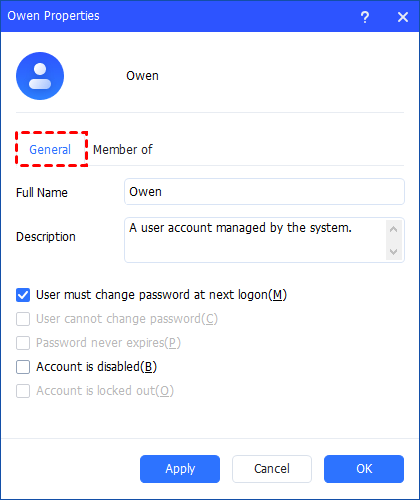
Step 2. Under the "User" tab, click the "Properties" option to check and change the user settings. In the "General" option, you can select or clear the check boxes of the user settings. Click "Apply" or "OK" to apply the change.
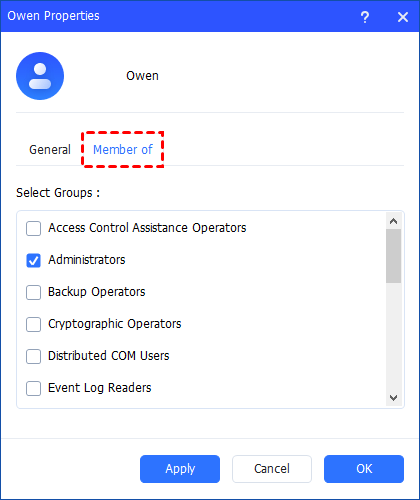
Step 3. Under the"Member of" option, you can add the user account to group(s). Click "Apply" or "OK" to apply the change.
Part 2. Manager Group properties
Step 1. Install and launch AOMEI Partition Assistant. Click the"Tools"main tab and select"Users and Groups".
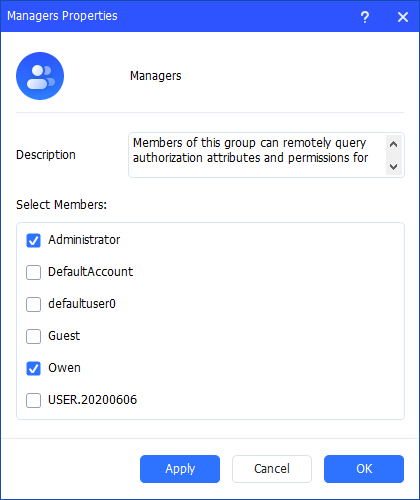
Step 2. Under the "Group" tab, click the "Properties" option to check the group properties. You can change the description of the group and add/remove user account(s) to the group. Click "Apply" or "OK" to apply the change.
Conclusion
Effectively managing users and groups in Windows 10 improves security, streamlines administration, and enhances collaboration. By assigning permissions through groups, organizations ensure better resource control, scalability, and efficiency. While Windows’ built-in Computer Management tool handles basic tasks, third-party software like AOMEI Partition Assistant offers advanced, user-friendly features for managing accounts and groups, saving time and reducing errors, making it an excellent solution for both individuals and IT administrators.

