[Free] How to Resize USB Partition on Windows 11 Without Data Lose
Do you want to know how to resize USB partition on Windows 11 without losing data? You can do it with three methods including Disk Management, Command Prompt and free USB partition resize software.
By Lucas / Updated on January 22, 2024
Why need to resize the USB partition on Windows 11
USB is the most popular data storage device in people’s life. Thanks to its portability and safety, many users choose it to store important data, including files, images and videos.
Generally, people expect to resize USB partitions on Windows 11/10/8/7 for two reasons:
1. Resize a USB partition in Windows 11
Partitioning a USB flash disk is generally acceptable. Unfortunately, Microsoft's restriction allows you to see just one partition of a USB flash drive in Windows. It indicates that you may change one partition on Windows.
If the USB is partitioned and cannot access other partitions, you can use the partition tool to erase them and expand the primary partition. Finally, the USB flash drive only has one partition, which you may adjust.
2. Free up or extend partition
What frustrates us is that USB frequently indicates inadequate space. Here are several strategies to help you boost your USB storage. Before utilizing either approach, you should back up crucial files.
Therefore, extending or shrinking the USB partitions is necessary. In this tutorial, I will provide you with two ways to resize the USB partition on Windows 11, including Windows built-in tool Disk Management and a free Windows USB partition tool on Windows 11.
How do I resize a USB partition on Windows 11 with Disk Management?
Disk Management is a built-in tool that can help you resize a USB drive with simple steps, you can refer to the following steps.
Warning: Due to the limitations of Windows, Disk Management didn’t support resizing a USB partition. However, users can use Disk Management to extend or shrink partitions since Windows 10 1703 with ADK installed. If you can't resize the Windows partition USB disk with Disk Management, please skip this method.
● Shrink a USB partition
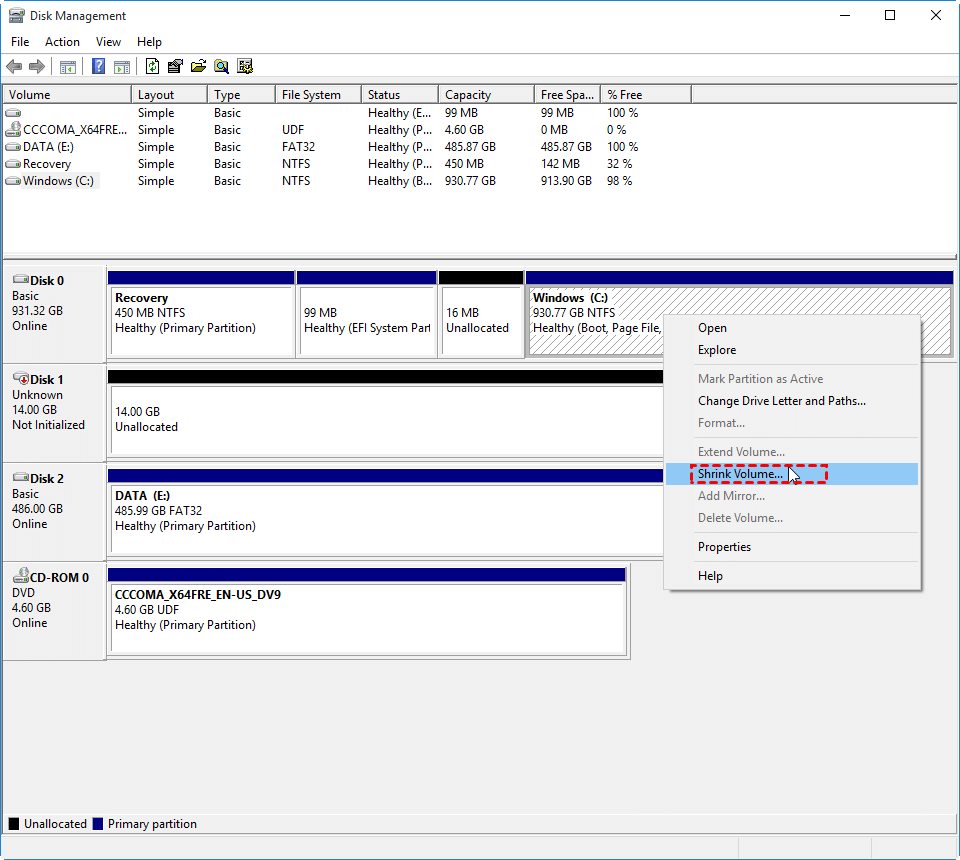
Step 1. Press and hold the "Windows + R" together, then input “diskmgmt.msc” in the window popped.
Step 2. Right-click the partition you want to shrink and select "Shrink Volume".
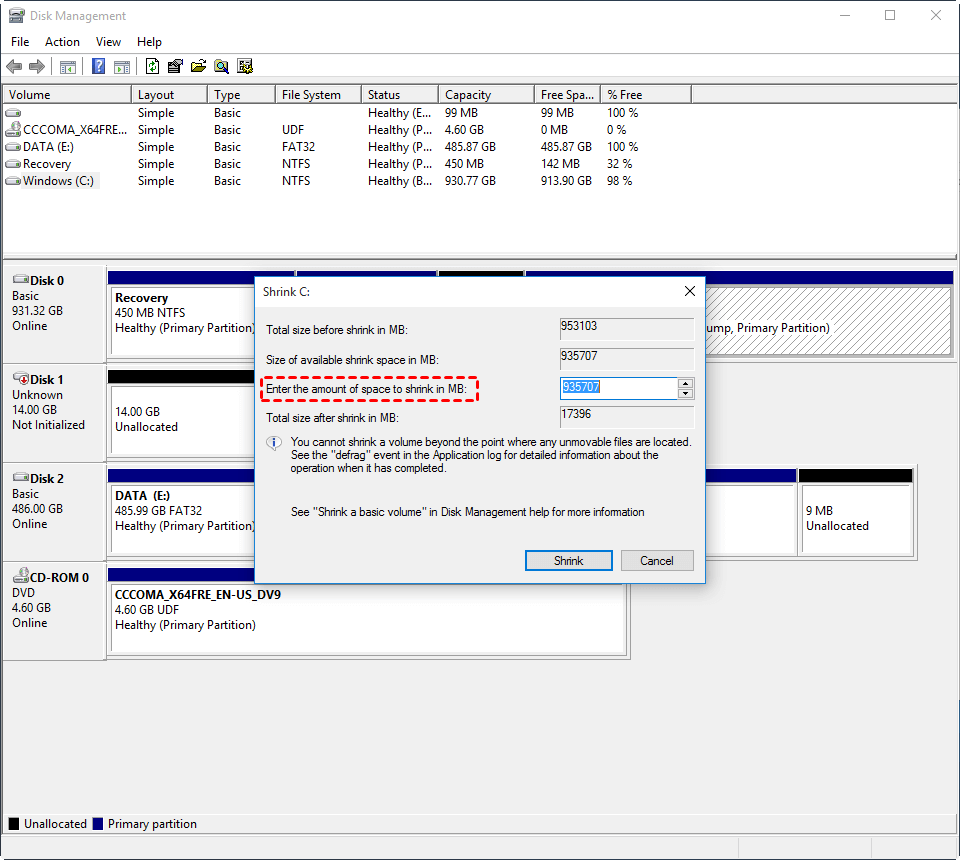
Step 3. Input the amount of space you want to shrink and click "Shrink".
Tips:
✎ If you ignore unmovable files at the end of the partition you want to shrink, you can't resize the windows partition USB disk with this tool.
✎ The partition must be NTFS or RAW. (Disk Management only supports shrinking or expanding partitions in NTFS and RAW formats. If the USB partition is the other file systems, Shrink/Extend Volume will be greyed out. You can convert the USB to NTFS first and try again.)
● Extend a partition
Step 1. Open Disk Management as the step mentioned above.
Step 2. Right-click the partition you decide to extend and select "Extend Volume".
Step 3. Follow the guidance ejected to complete the rest steps.

Tip: Unallocated space on the USB must be adjacent to the partition which will be extended, or Extend Volume will be greyed out.
Using freeware to resize USB partition on Windows 11
If you can’t use Disk Management to resize the USB partition, then you can try AOMEI Partition Assistant Standard. This is a USB partition resize tool for free download on Windows 11, 10, 8, 7, XP, and Vista.
With this powerful tool, you can not only avoid various limitations of Disk Management, but also escape from the risk of data loss caused by the wrong operations. It allows you to shrink/extend partitions in various file system formats or different states (resizing encrypted partition is welcomed), and extend partitions without adjacent unallocated space. You can download it to see how it works.
Tips:
✍ Make sure there is no error in the USB partition you want to resize.
✍ Please close all files on the target USB partition.
✍ Don’t cut off the power resource when resizing the USB partitions.
● Shrink a USB partition
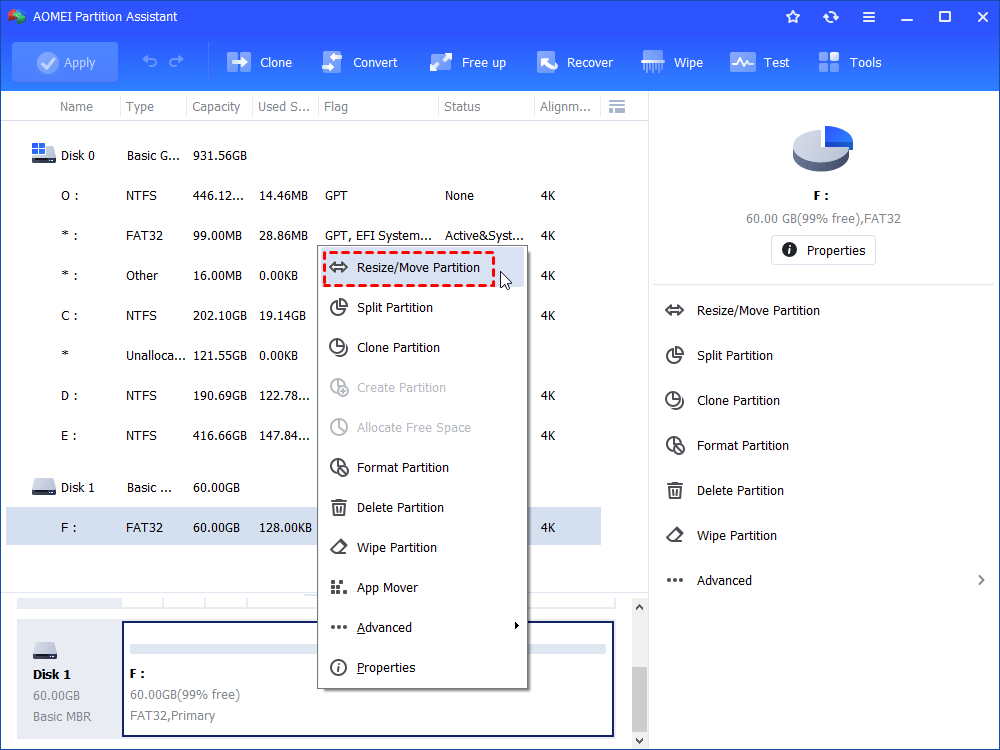
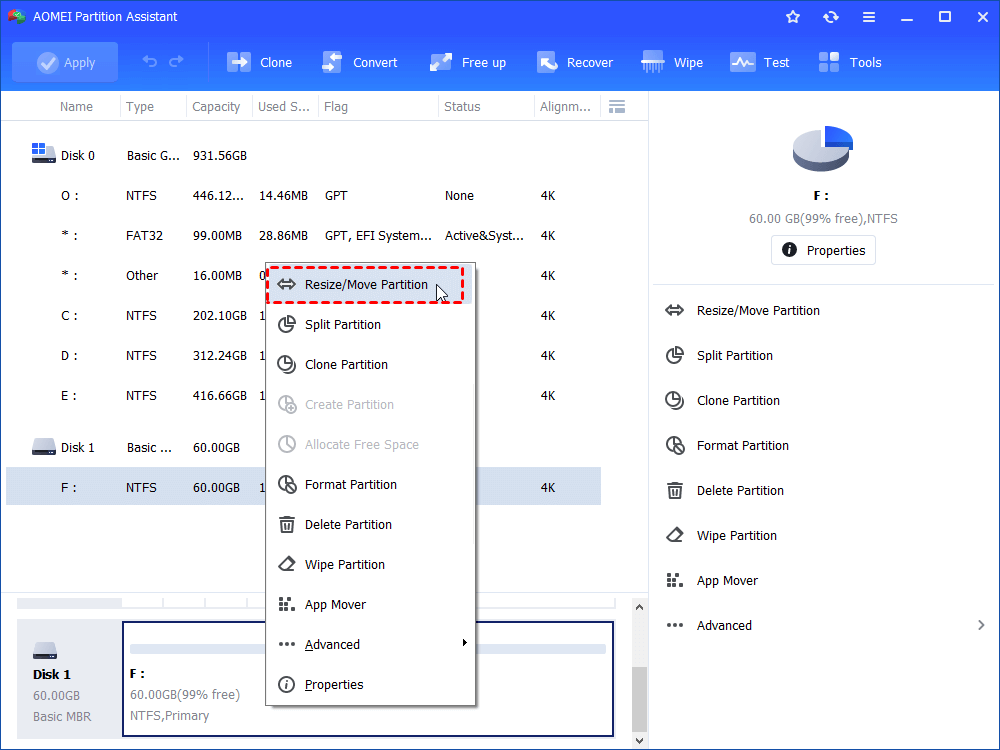
Step 1. Install and open AOMEI Partition Assistant Standard, Right-click the USB drive and choose "Resize/Move Partition".
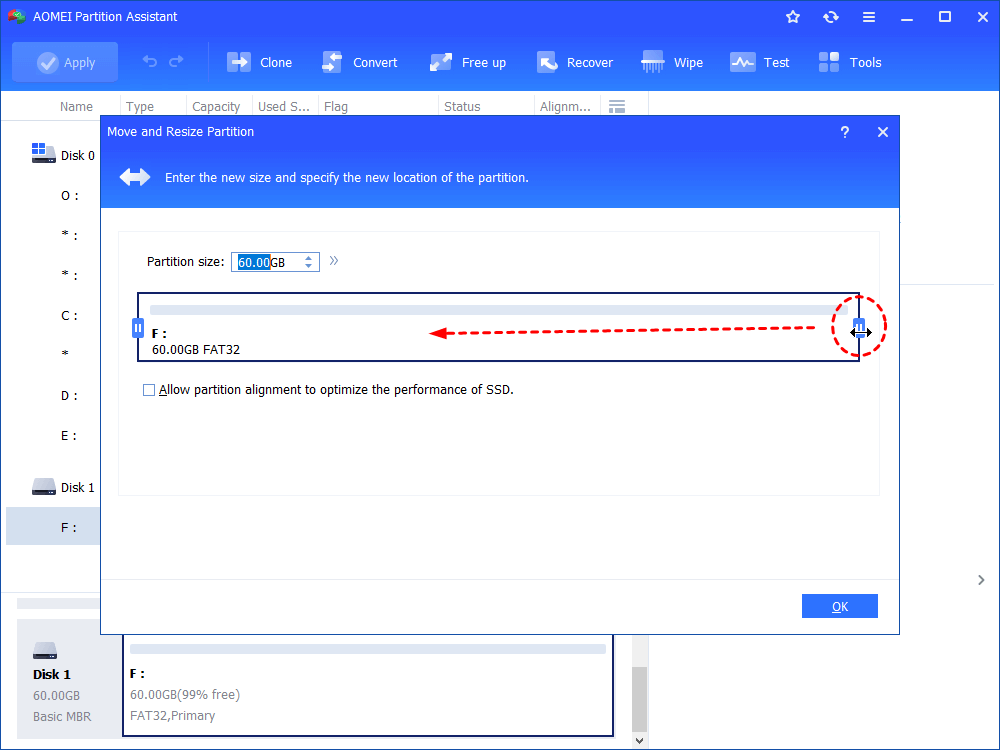
Step 2. In the popped window, put the mouse pointer on the right border of the USB partition and drag the border leftwards to shrink the partition.
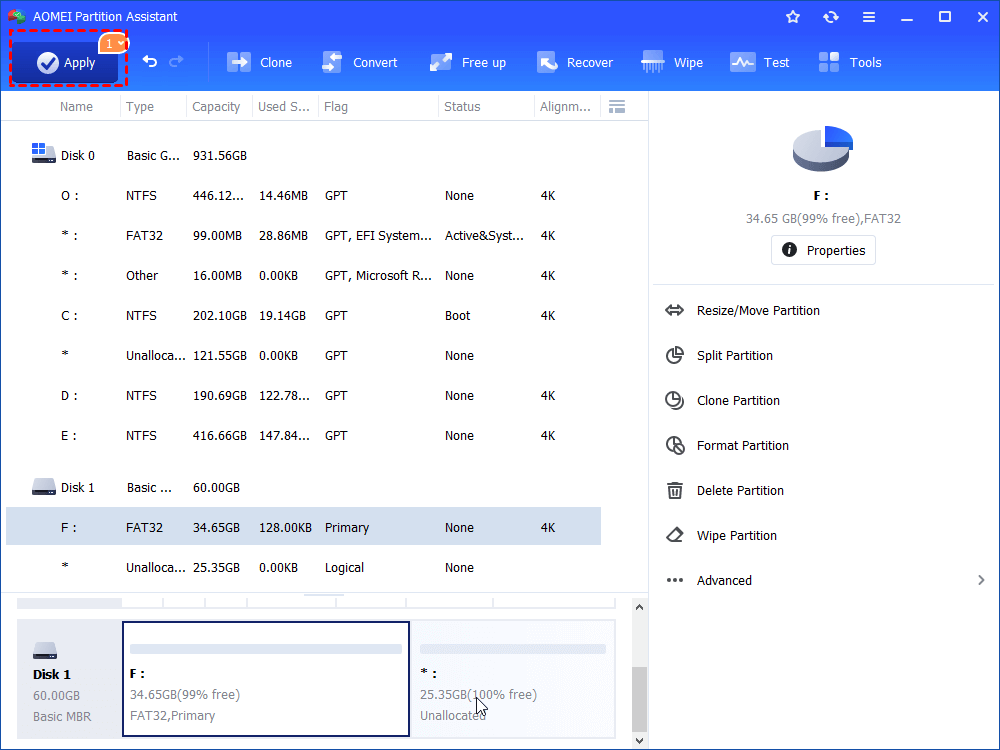
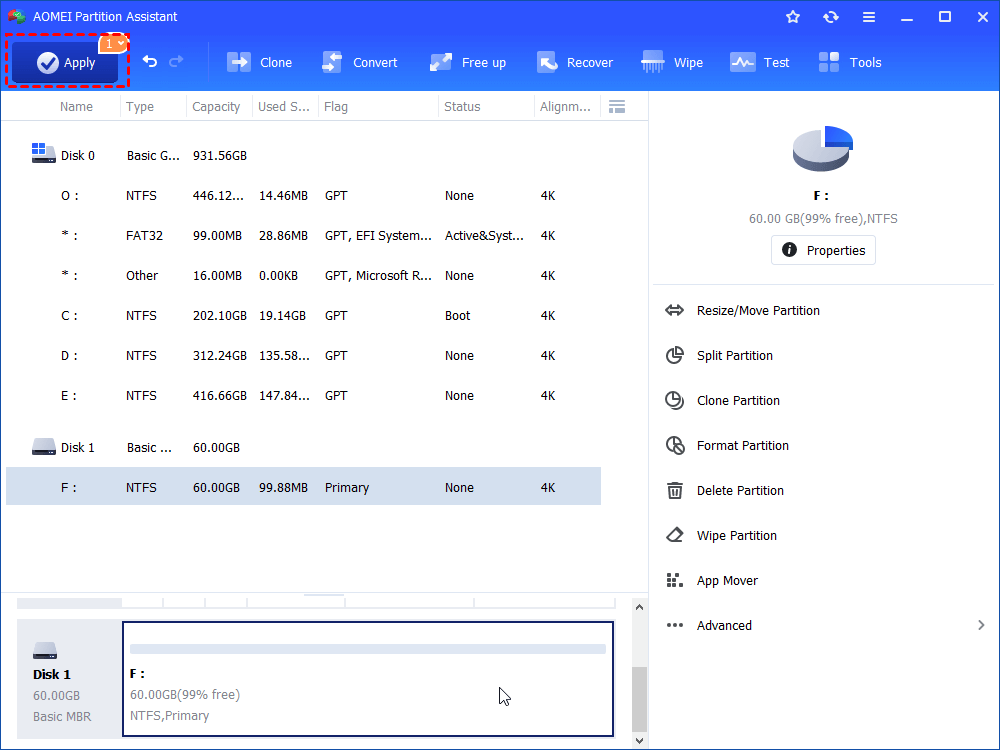
Step 3. Click Apply and Proceed to perform the pending operation.
● Extend a partition
→ Solution 1. Resize a partition
Step 1. If there's adjacent unallocated space on the right of the target partition. Install and open AOMEI Partition Assistant. Find out the USB flash drive, right-click the partition on it and choose "Resize/Move Partition".
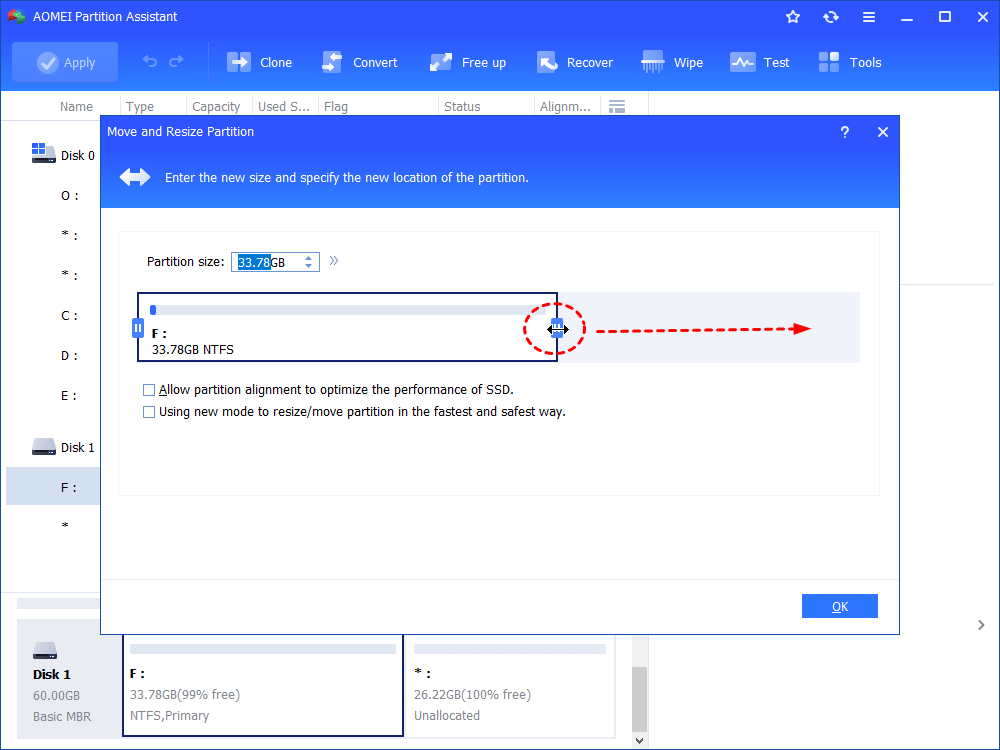
Step 2. Extend the partition by moving the double-headed arrow rightwards. Then, click on "OK".
Step 3. Click "Apply" and"Proceed" to execute the pending operation.
→ Solution 2. Merge partitions
Step 1. If there is no adjacent unallocated space next to the target partition, you can right-click the partition you decide to extend and select Merge Partitions under Advanced.
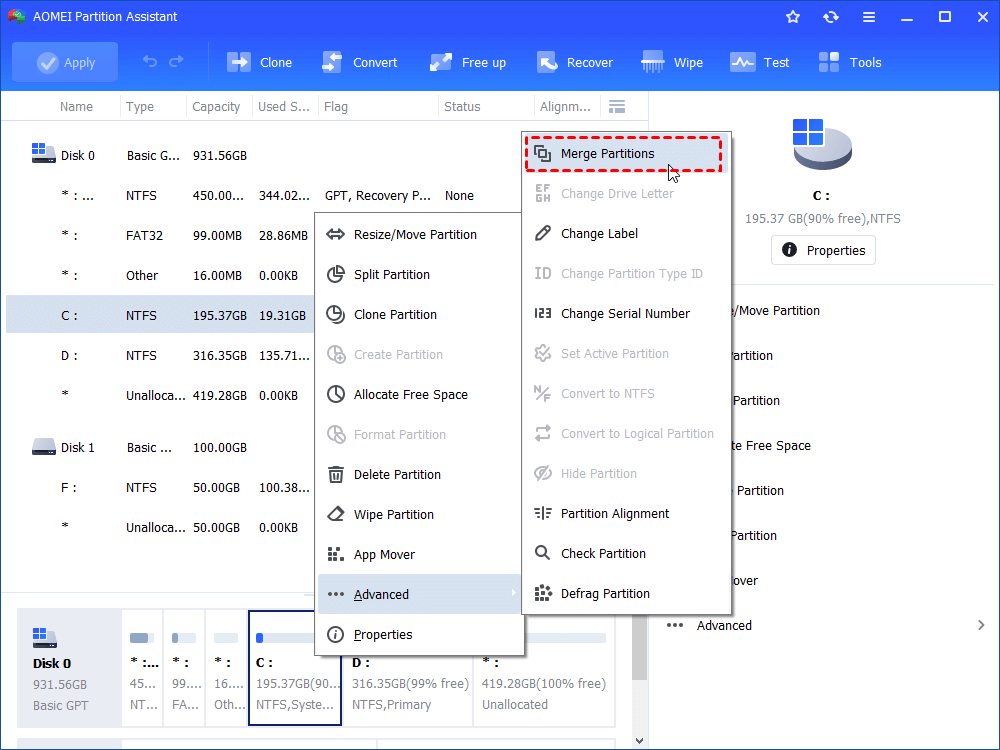
Step 2. Select the unallocated space or other partitions to extend the partition you want to extend.
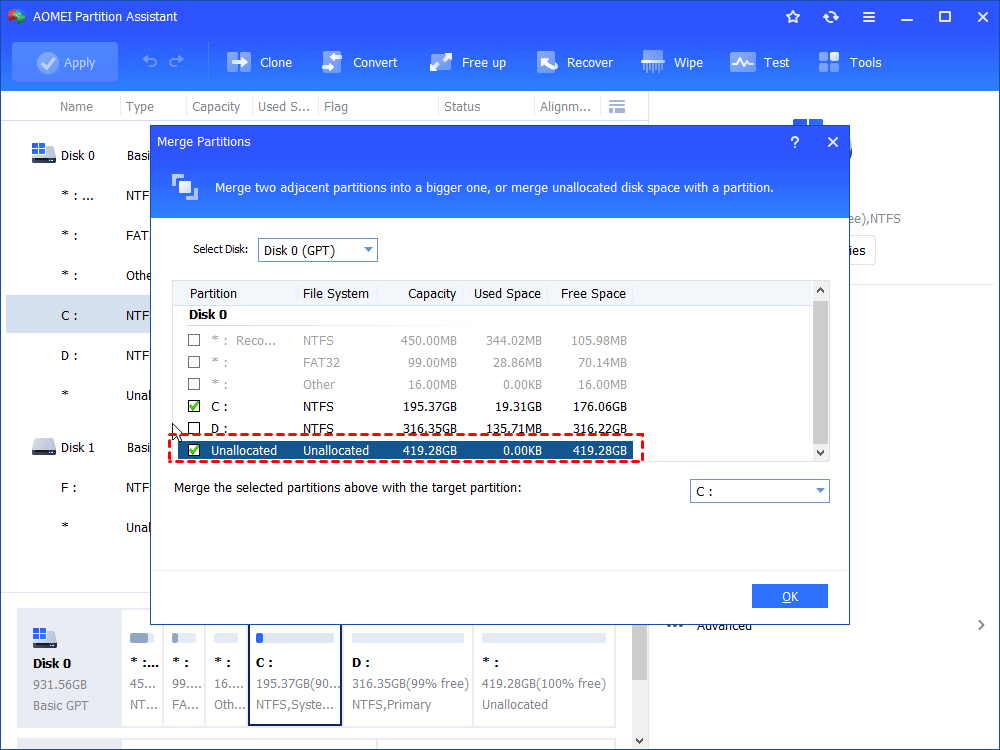
Step 3. Click "Apply" and"Proceed" to execute the pending operation.
Tip: If your USB drive stores many files, you can also use this tool to scan junk files and duplicate files among all things, and delete them to release more space.
Conclusion
To conclude, from the two methods mentioned in this article, you may understand how to resize USB partitions on Windows 11 effectively. By comparing each other, you can find that AOMEI Partition Assistant Standard is the safest and fastest one you can rely on.
Last but not least, you can also increase the space of the target partition by allocating free space if there is no unallocated space or moving installed programs to free up space after you upgrade to AOMEI Partition Assistant Professional.

