Fixed: Lenovo SYSTEM_DRV Partition Problem in Windows 7/8/10/XP
What is Lenovo SYSTEM_DRV partition? Can I delete it? And other SYSTEM_DRV partition problems are listed in this article aim to solve these issues for you in Windows 10/8/7/XP.
By Lucas / Updated on October 7, 2023
Lenovo SYSTEM_DRV Partition
The SYSTEM_DRV partition is a small partition on Lenovo computer and quite unique, which is Lenovo's current version of the standard Windows 7/8/10 BIOS system partition. This partition contains the Rescue&Recovery environment and some essential system files like boot loader that makes Windows boot. It could exist in Windows XP, Windows 7, Windows 8/8.1, and Windows 10.
Generally, the SYSTEM_DRV partition has no drive letter (hidden partition) and only seen in Disk Management. We recommend you not to delete the SYSTEM DRV Partition in Lenovo computers, if you do so, you will face the problem that you can’t boot up your Lenovo.
If I Delete Lenovo SYSTEM_DRV Partition Unintentionally?
However, everything is possible. If you remove Lenovo SYSTEM_DRV in Windows 10/8/7 incautiously, what should you do? There are 3 solutions for you to find a fix.
Way 1: Restore SYSTEM_DRV Partition with AOMEI Partition Assistant Professional
AOMEI Partition Assistant Professional is a powerful disk partitioning software and gives you the best solution to restore SYSTEM DRV in Lenovo computers.
Note: You can download the demo version to have a try!
1. Install and run AOMEI Partition Assistant Professional. On the main interface, select “Partition Recovery” under "Recover".
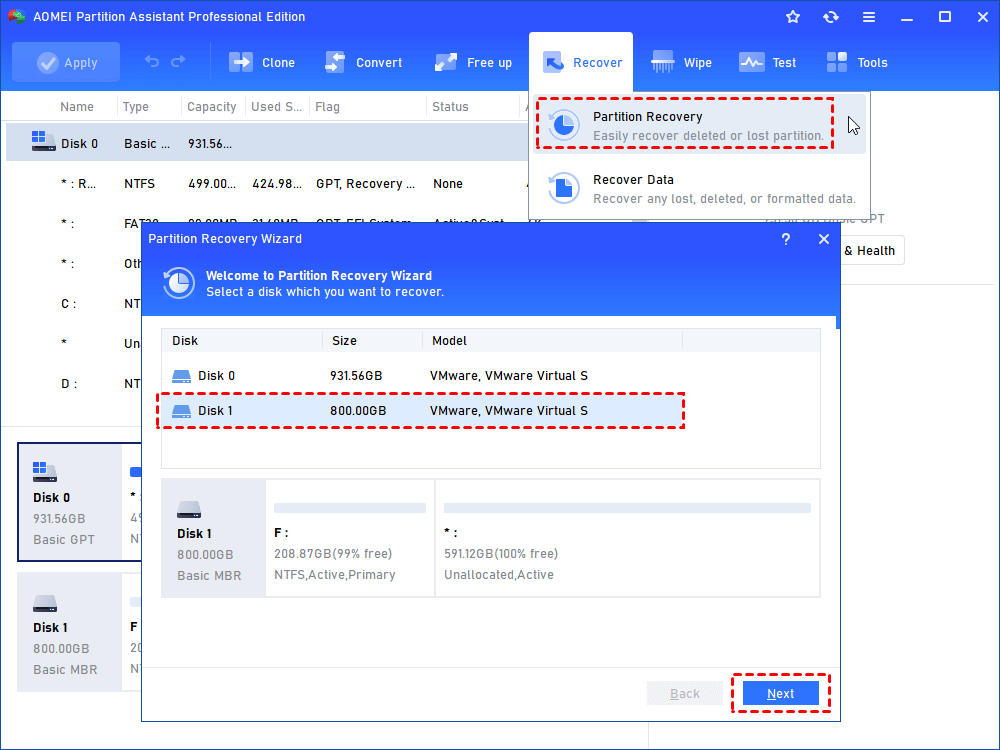
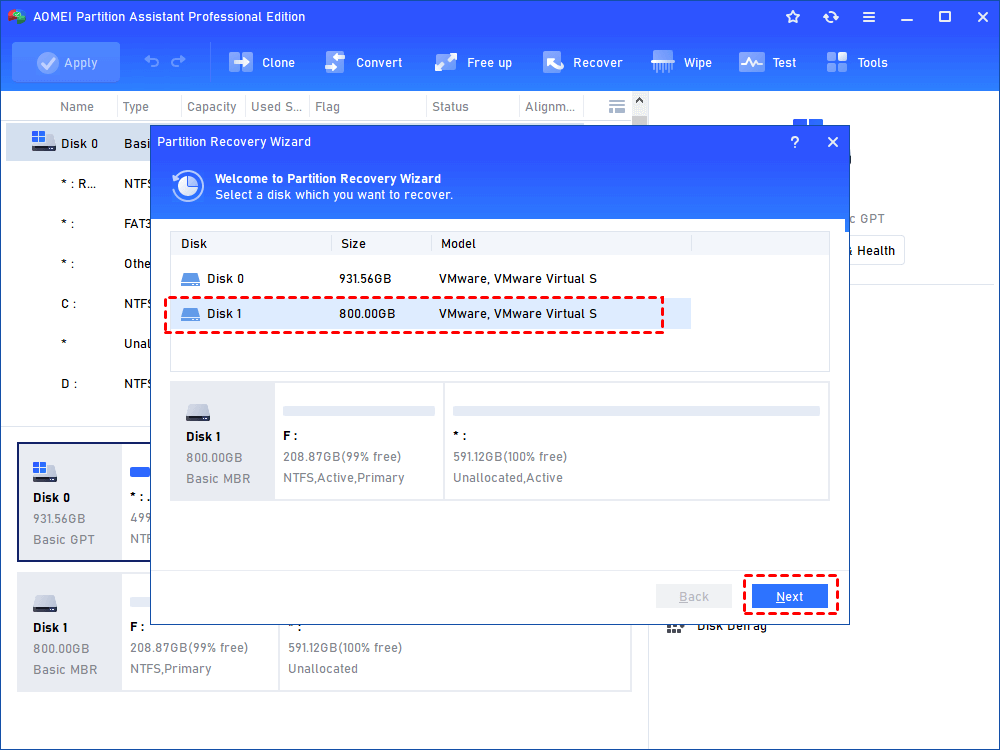
2. Choose the disk you want to recover, click “Next”.
3. Select “Fast Search”, hit “Next” to go on.

4. Tick the SYSTEM_DRV partition in the list, press “Proceed”.

As you can see, try Recover Data if you have lost any important data.
Way 2: Backup Windows System Before Deleting
To avoid this deletion, you have to backup Windows with AOMEI Backupper before deleting, including the system partition, Lenovo Recovery partition, installed programs on system drive, and other relevant system partitions. If you deleted this SYSTEM_DRV partition in Lenovo PC accidently, you can restore it without issues.
How to Solve SYSTEM_DRV Suddenly Appeared in File Explorer?
Sometimes, the SYSTEM_DRV partition will appear in File Explorer due to Windows Update. To prevent the Lenovo SYSTEM DRV partition from deleting, you have to hide it to protect the data.
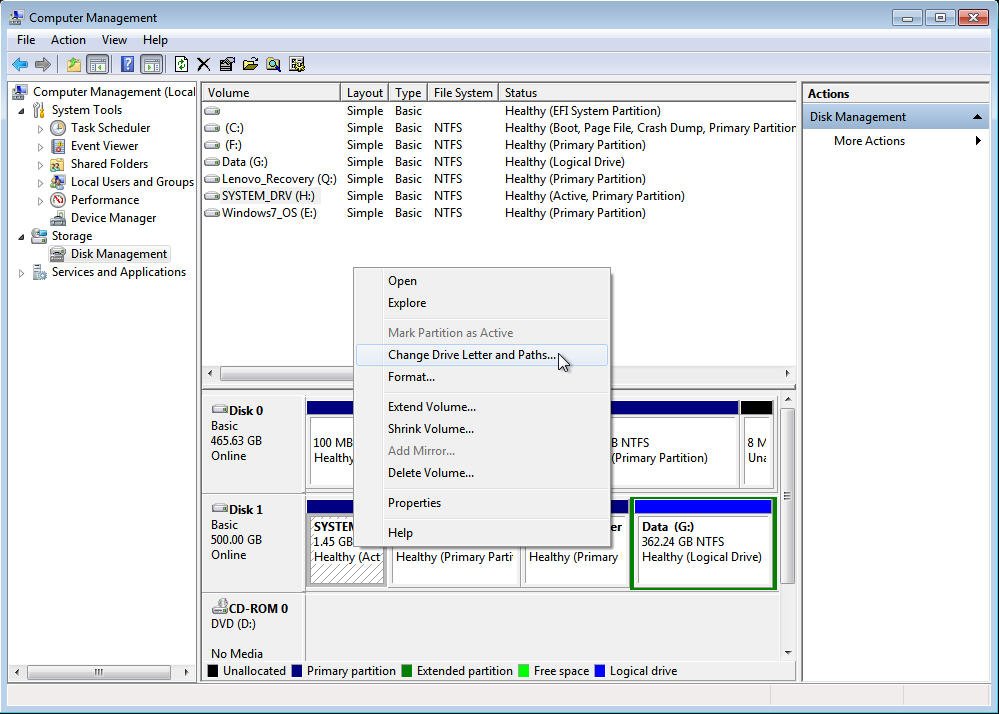
Thus, if you can see the drive letter in Disk Management, remove drive letter for SYSTEM_DRV partition in Lenovo PC. Refer to the picture below:
Or you can use AOMEI Partition Assistant Professional to remove drive letter with “Change Drive Letter” function.
1. Right-click the SYSTEM_DRV partition and select “Advanced”>”Change Drive Letter” on the drop-down menu.
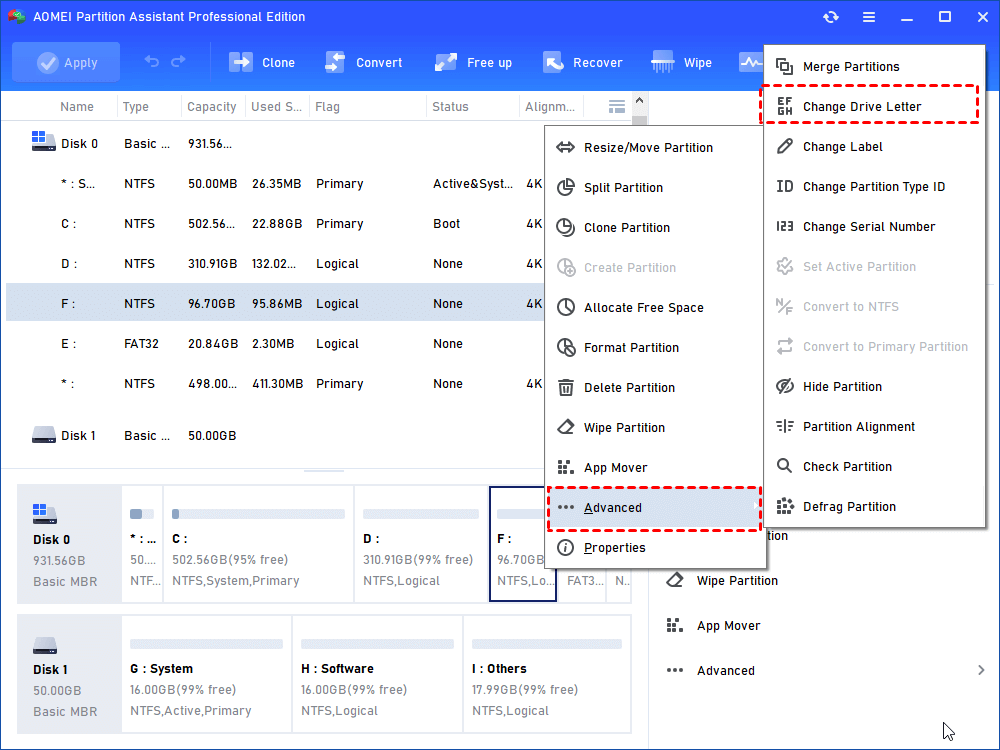
2. Choose “None” as New Drive Letter and press “OK”.
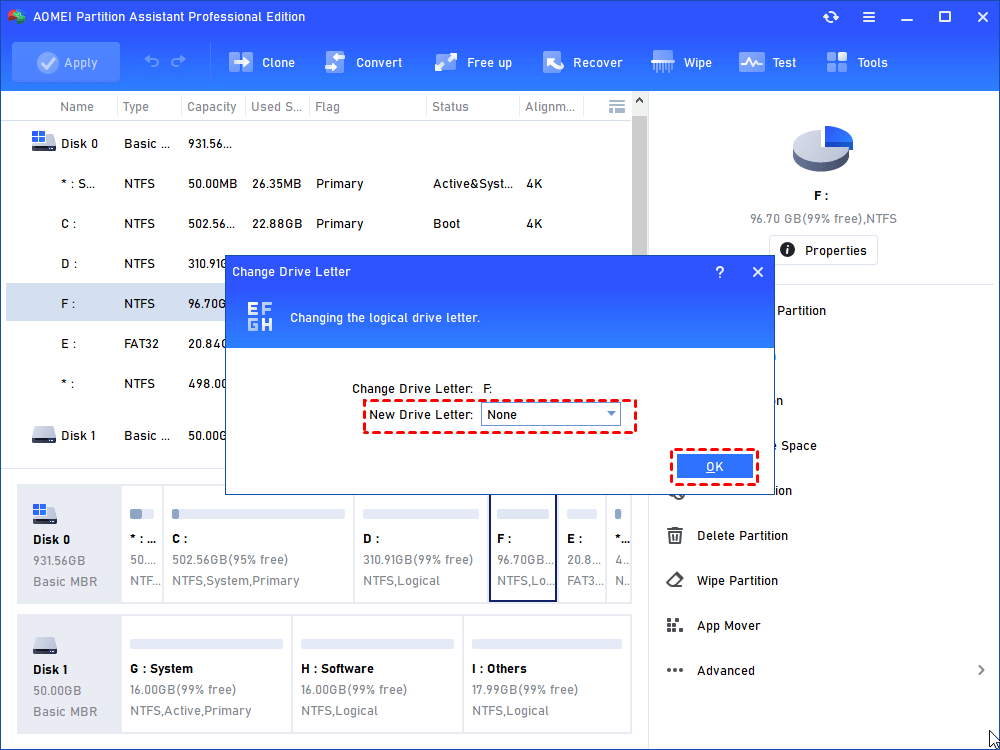
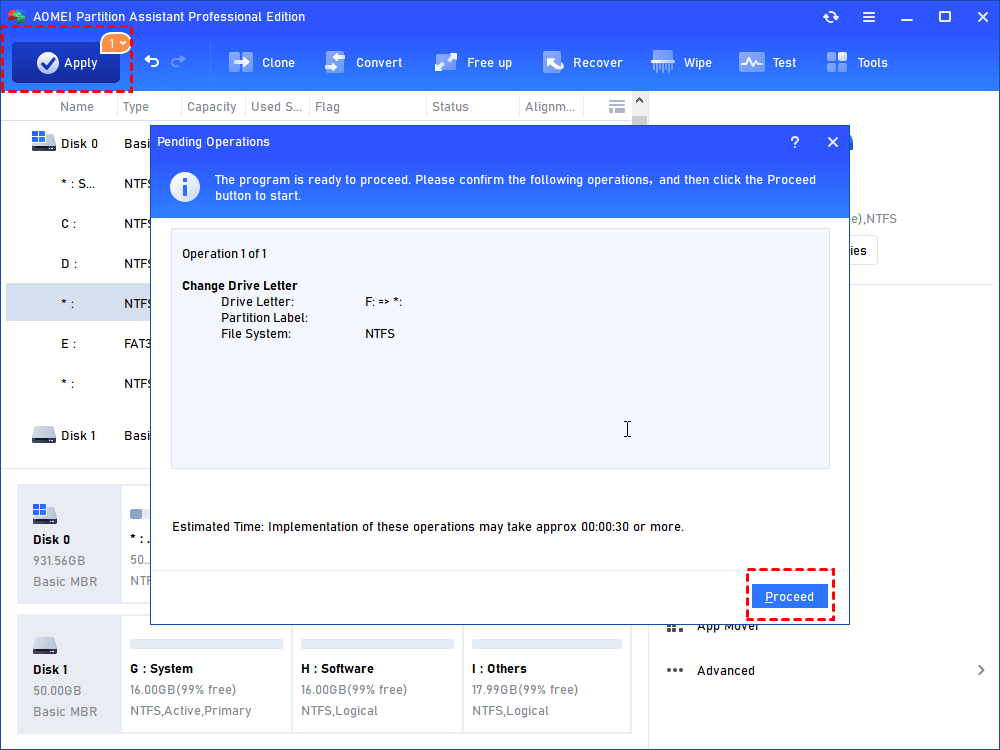
3. Click “Apply” to remove the drive letter.
Besides, if the SYSTEM_DRV partition does not appear as a disk on Disk Management, you could restart your PC to have a try or check if this problem is solved after Windows update.
Final words
Furthermore, if you want to delete SYSTEM_DRV partition to free up space, you may delete Lenovo Recovery partition instead of SYSTEM_DRV partition to generate more space and merge it to system partition.

