Fixed: Unspecified Error While Copying Files or Folder in Windows 10/11
How to fix “unspecified error” when copying files or folders from an external drive? In this post, you’ll not only learn why it happens, but also, learn some best solutions to it.
By AOMEI / Updated on May 12, 2023
Receive “Unspecified error” while copying files in Windows 10
“Planning to copy some images from my flash drive to my laptop. I inserted the storage device into the computer. After I copied and pasted some files to my F: drive in Windows 10 Explorer, I only got the message – Unspecific error under Error Copying File or Folder title. Why did I fail to copy files from my removable device to the PC? How to fix Unspecified error?"
Why does “Unspecified error” occur when you copy files?
“Error Copying File or Folder Unspecified Error” pops up while you copying files from one drive to another can be a result of various events:
1) There is not enough free space on the target partition.
2) The target drive is write-protected.
3) The destination partition has file system limit.
4) The target drive is corrupted.
5) The file that you want to copy is too large
6) There is a conflicting application running on the PC.
…
How to fix “Unspecific error” while copying files or folders?
Firstly, reboot your PC and then see whether you can copy files successfully. If you still failed to move files to the drive, you can temporarily disable the anti-virus app. If it doesn’t work, change source files or destination place to see whether the problem is with the files themselves or the target drive. If the error is relevant to the target drive, you can take further measures given in the following content. You don’t need to try every solution and you just need to choose the ones that meet your requirements best.
➢ Solution 1. Convert FAT32 to NTFS for the destination drive
If the target partition is FAT32 file system and you copy an individual file beyond 4GB and "Unspecific error" occurs, you can convert the drive from FAT32 to NTFS without losing data via the following two ways. If you are familiar with CMD, you can choose the first way; if not, choose the second way.
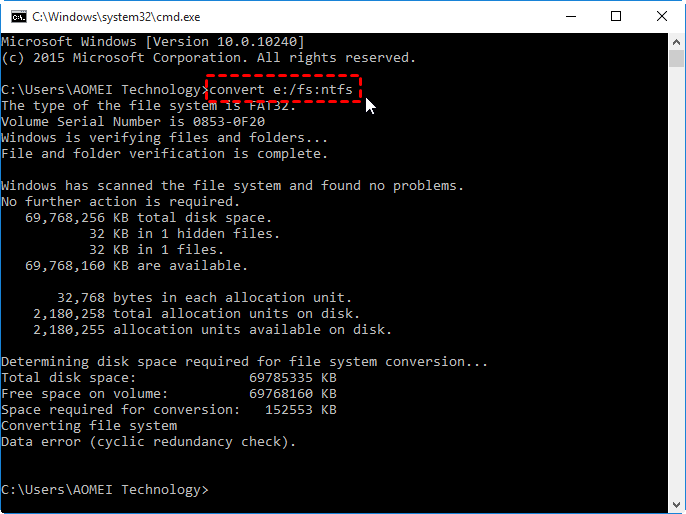
Convert FAT32 to NTFS using CMD
CMD, or Command Prompt, is the default command-line interpreter for your operating system. It’s able to perform various operations related to disk management via command lines.
Step 1. Run CMD as administrator (Press Windows + R simultaneously, input cmd and click OK).
Step 2. Type convert e:/ fs:ntfs and hit Enter. Here, let's take the E drive for example.
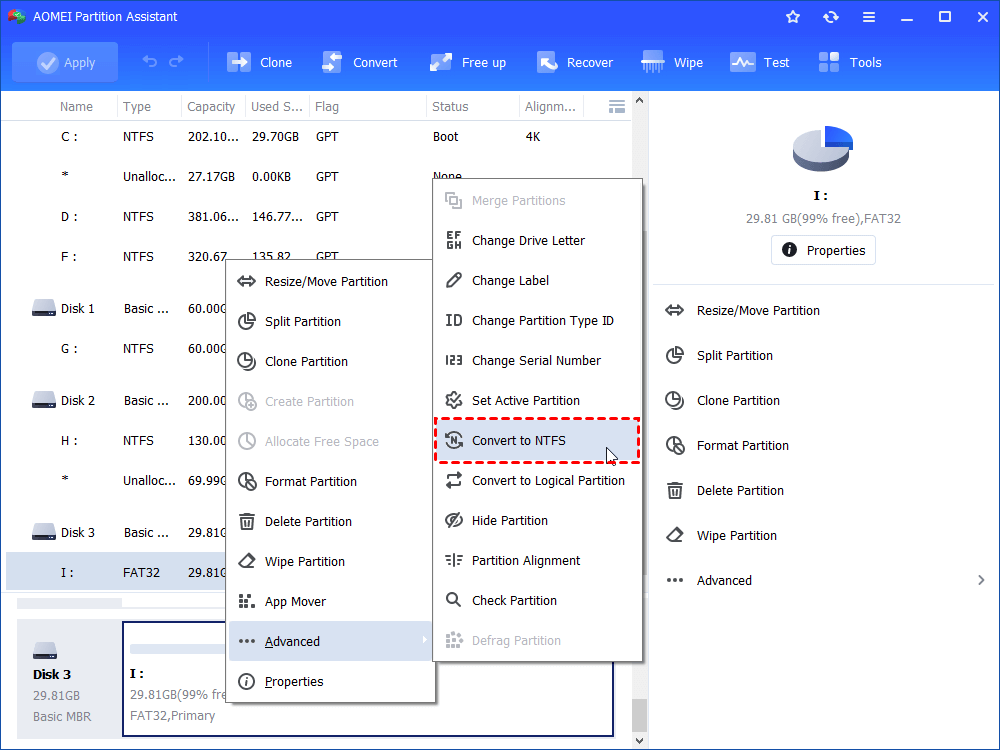
Convert FAT32 to NTFS via a GUI tool
If you’re not familiar with command lines or just think it’s too complex to use Command Prompt for FAT32 to NTFS conversion. Then, the GUI tool AOMEI Partition Assistant Standard should be your best choice. It’s able to convert a partition from FAT32 to NTFS without data loss and in only a few clicks.
Step 1. Free download the best practical GUI partition tool to have a try!
Step 2. Install and run the AOMEI product. Right-click the partition that you need to convert, go to “Advanced” > “Convert to NTFS”.
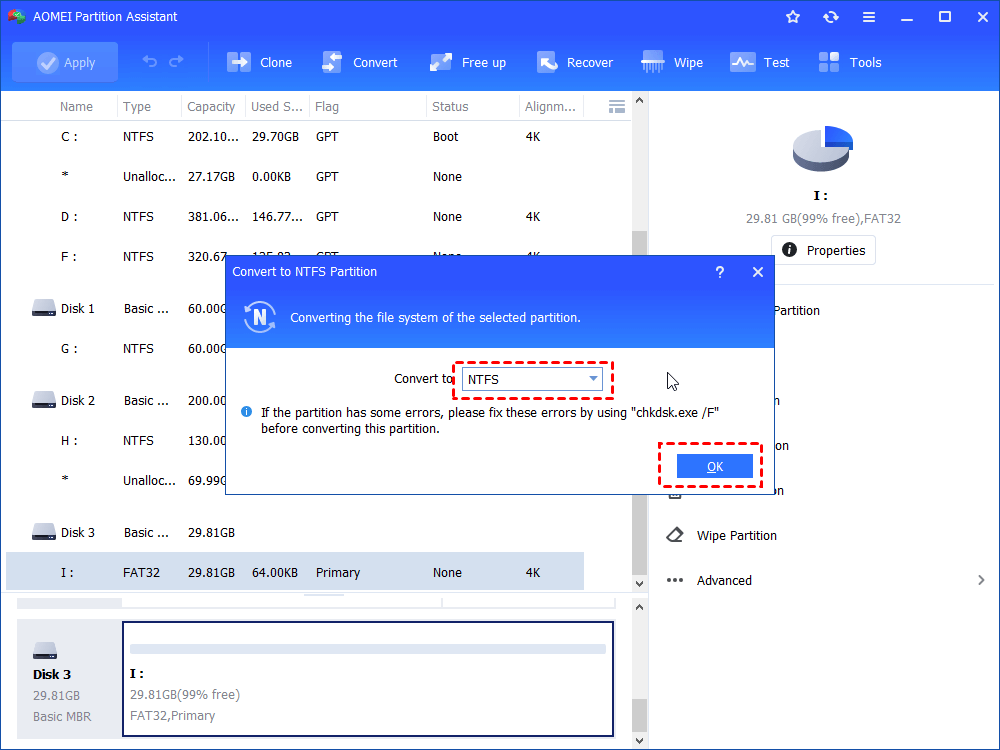
Step 3. Click "OK" to continue the operation.
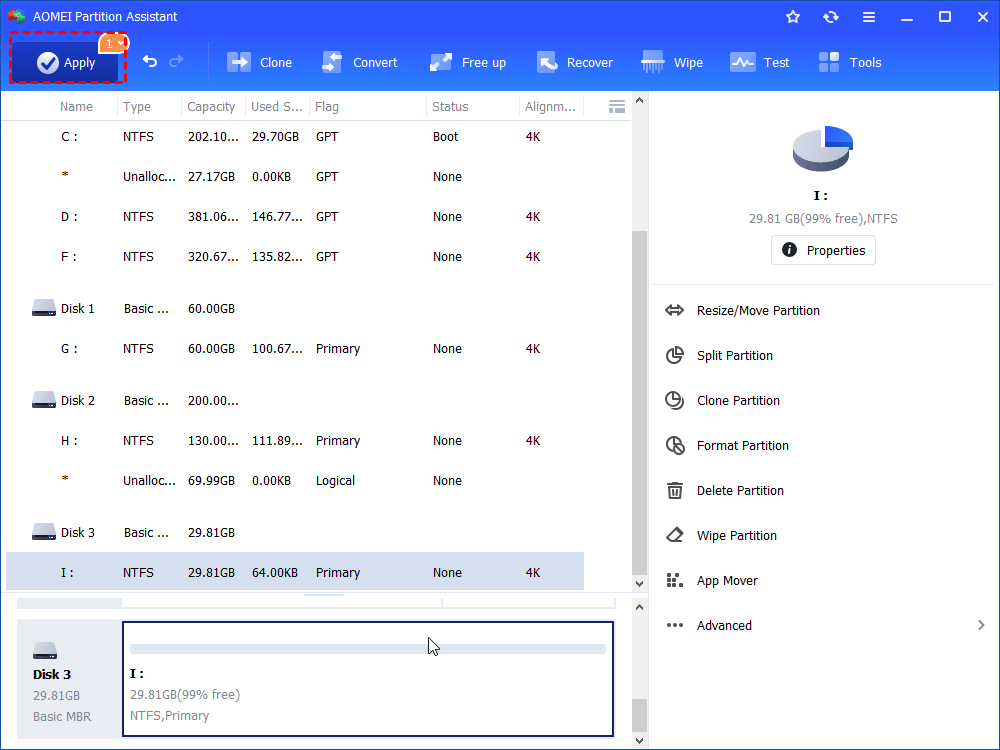
Step 4. Here you can preview the operation result. Click “Apply” and “Proceed” to commit.
➢ Solution 2. Increase the capacity of the target partition
If there is little unused space left on the destination drive, you may face the unspecified error when copying files or folders. In such a situation, you can extend the target partition or delete unnecessary files to free up disk space. Supposed that there is unallocated space contiguously behind the to-be-extended partition, you can extend it easily in Disk Management. If not, you’ll find the option "Extend Volume greyed out". At this time, you can use the partition tool -AOMEI Partition Assistant Standard. Let’s see how it works:
Step 1. Download, install and run the software. Right-click the partition that has enough space and choose “Resize/Move Partition”. Here, let’s take F for example.
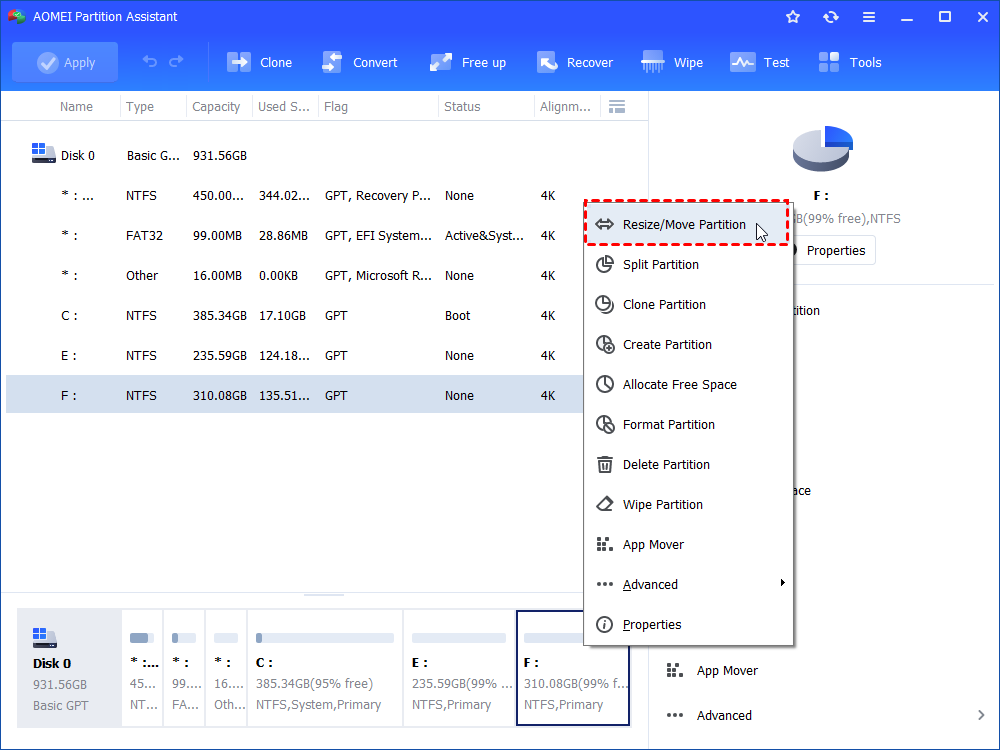
Step 2. In this window, drag the double-headed arrow leftward to shrink F drive.

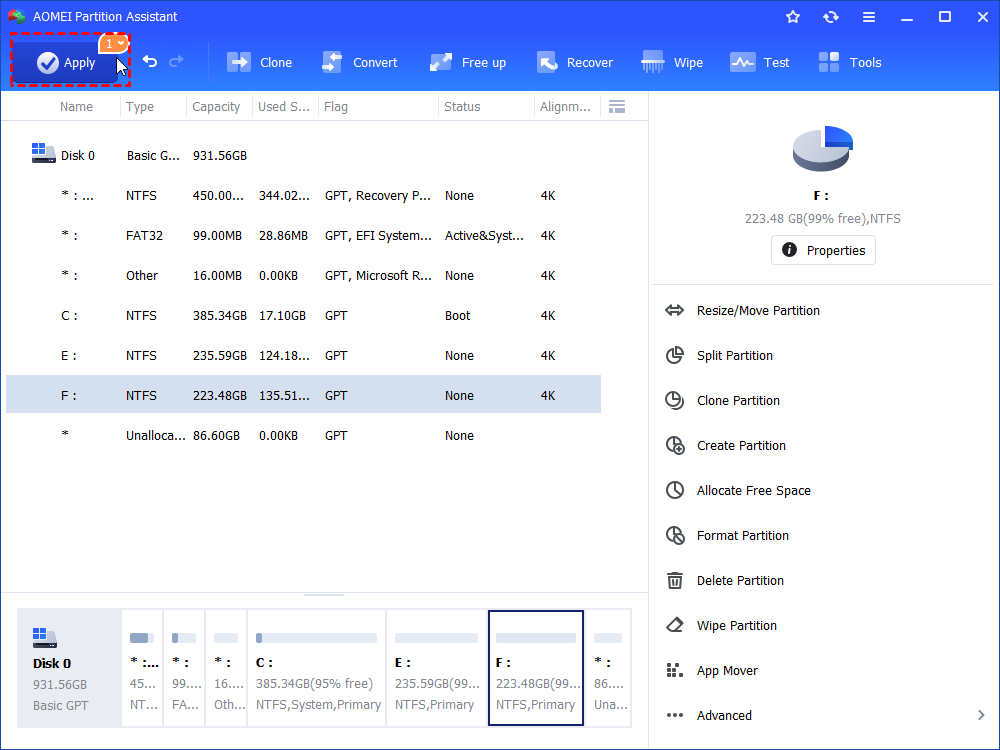
Step 3. Now, you can find a piece of unallocated space appear beside the F drive.
Step 4. Now, there is unallocated space on the hard drive. Right-click the partition that you need to extend, choose "Merge Partitions".
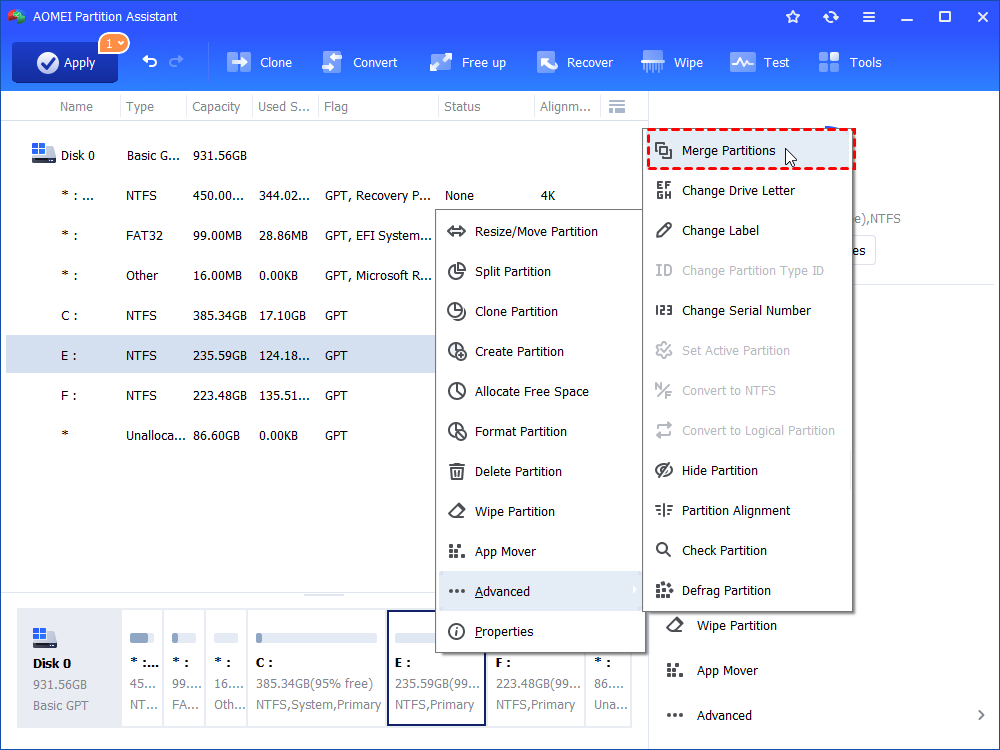
Step 5. Tick the unallocated space and then click "OK". Then, click "Apply" and "Proceed" to commit the operation.

Note:
1. When the hard drive contains the to-be-extended partition has unallocated space, regardless of its position, you can skip Step 1- Step 3.
2. To free up storage space for the target drive, you can move apps to another drive as well after upgrading the standard edition of the AOMEI software to the Pro edition.
➢ Solution 3. Remove write protection from the destination place
When there is nothing wrong with the file system or unused space and you think that the problem is with target drive, it’s time to consider whether the drive is write-protected. Here we offer two command ways to disable read only for target drive.
Clear read-only using Diskart
Step 1. Run Diskpart as administrator (Press Windows + R to open Run dialogue, input diskpart, and click OK).
Step 2. Run the following commands in order:
-
list disk
-
select disk n
-
attributes disk clear readonly
![]()
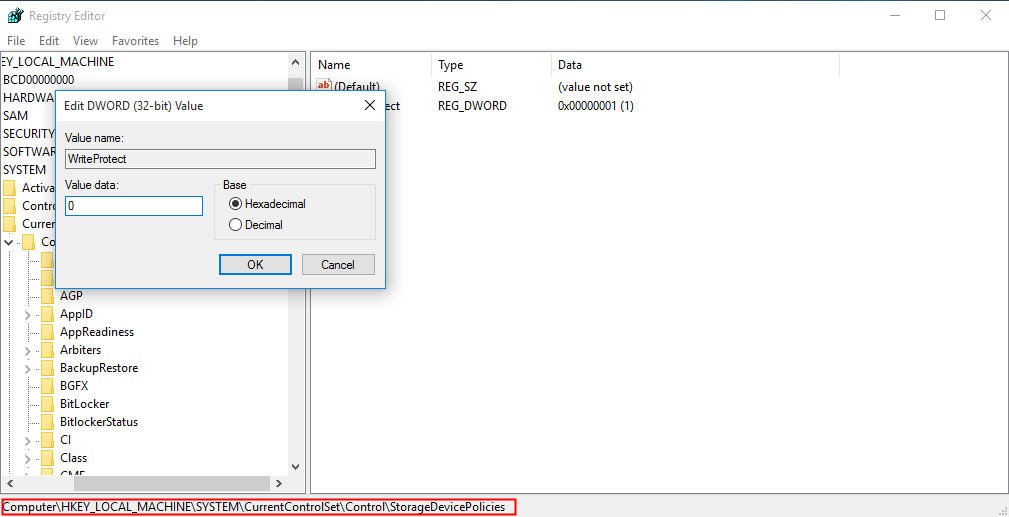
Edit Registry to disable write protection
Step 1. Type “regedit” in Run dialogue.
Step 2. Go to the path below:
Computer\HKEY_LOCAL_MACHINE\SYSTEM\CurrentControlSet\Control\StorageDevicePolicies
Step 3. Double click WriteProtect and Change the value data from 1 to 0. Then, click “OK”.
➢ Solution 4. Format destination drive
If the destination drive is corrupted, try to format it via Disk Management. Here are the detailed steps:
Warning: This will erase all data on the destination drive. Thus, you can back up the necessary files in advance.
Step 1. Open Disk Management (Input “diskmgmt.msc” and press Enter key), locate the target partition, right-click it and choose “Format…”.
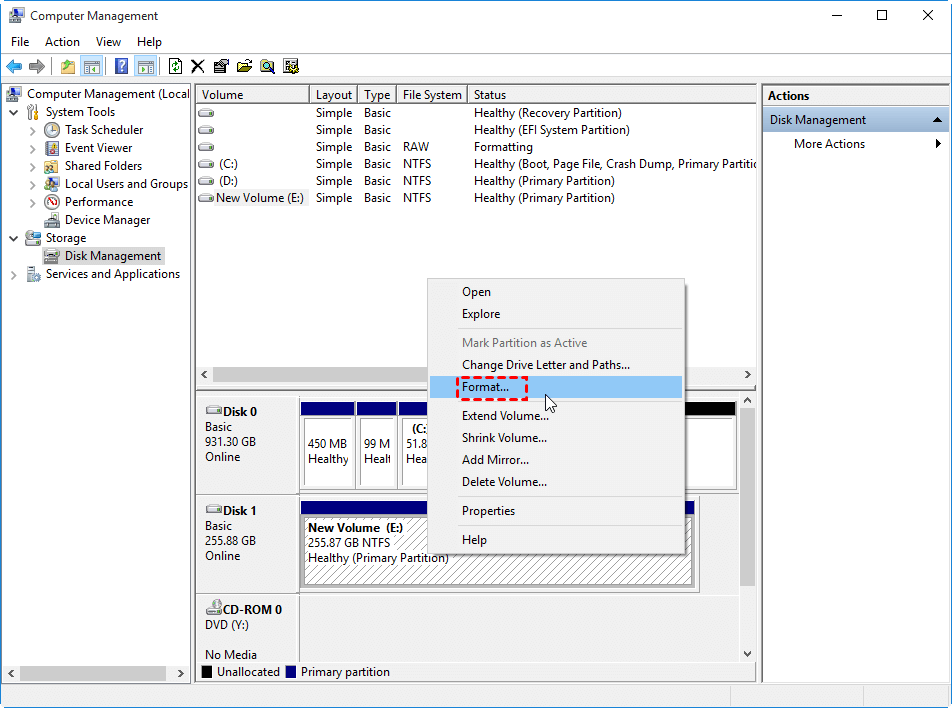
Step 2. Choose a proper file system and click OK.
Notes:
1) If you can’t format the partition in Disk Management, you can delete and create a partition via Diskpart.
2) You are not allowed to format or delete the system drive via Disk Management.
Conclusion
How to fix the unspecified error when copying files or folders from one drive to another? In this post, we’ve discussed what might be the causes to the very issue and meanwhile, corresponding fixes are provided as well. AOMEI Partition Assistant Standard does a big favor as it efficiently helps with FAT32-NTFS conversion and partition extension. If you’re a Server user and want to perform these operations on your computer, you might as well try the Server edition.

