[Most Brands Suits] How to Easily Upgrade SSD for Laptop?
Can you upgrade SSD for laptop on your own? Of course you can! With this guidance, you can easily know how to upgrade SSD on laptop.
By Irene / Updated on June 6, 2024
Why do you need to upgrade SSD for laptop?
SSD, or Solid-State Drive, is a type of data storage device that is used for various purposes in computing. It is favored for storing the operating system, data, and games due to its high performance. Nevertheless, as time passes and data accumulates, available storage space diminishes, potentially causing challenges when storing new data and a noticeable decrease in system responsiveness.
Besides, as SSD prices are consistently dropping, there's really no reason to miss out on getting a better, faster SSD for your laptop. If you've never tried to open up the back and upgrade SSD for laptop on your own before, there's no need to worry. We've prepared a step-by-step guide to help you through the process.
This guidance for upgrading SSD for laptop including brands like Samsung, Crucial (by Micron), Western Digital (WD), SanDisk, Kingston, Toshiba, and others. And it covers the replacement of M.2 NVMe and M.2 SATA, as well as the a 2.5-inch SATA laptop SSD replacement. Now, explore this post to easily learn the process.
Before doing laptop SSD replacement
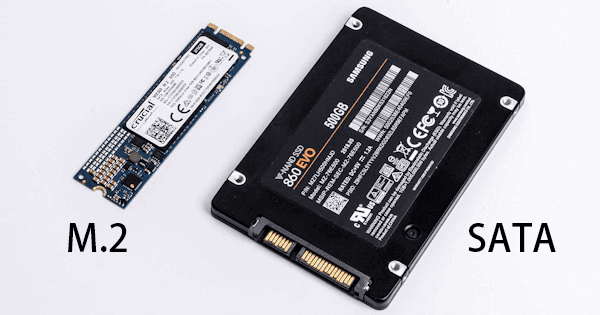
1. Choose the right SSD
Before purchasing a new SSD, it would be advisable to take a moment to ascertain the type of SSD that is suitable for your laptop and whether an upgrade is feasible. In most cases, if your laptop is relatively recent, it is likely equipped with a slot designed for an M.2 SSD (either NVMe or SATA), or it may have space intended for a 2.5-inch SATA drive. There are also instances where laptops provide the option to add a second drive through an extra slot.
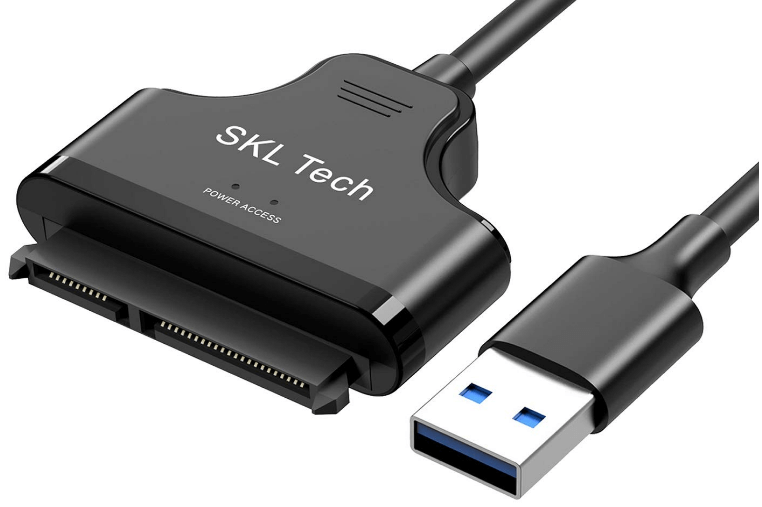
2. Prepare a USB-SATA adapter
How to connect the prepared SSD to your laptop? Using a USB-SATA adapter is a good choice, which can perform better than connecting via a USB cable
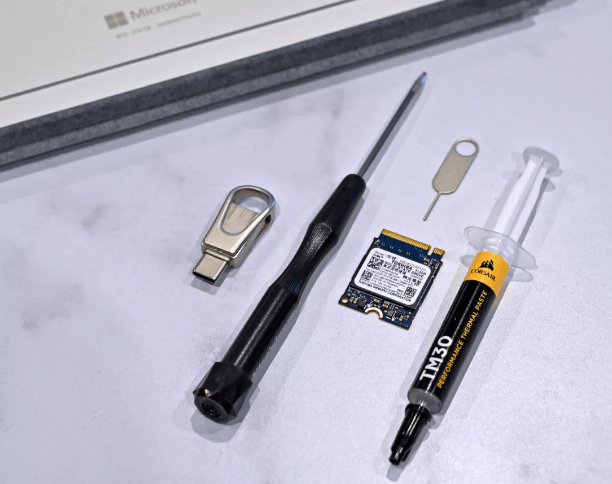
3. Get ready with a specialized set of tools.
To replace the old hard drive with a new one, you'll need specific toolsets like screwdrivers, tweezers, anti-static gloves, and more.
4. Download a professional disk clone software
Following a laptop SSD upgrade, the usual requirement to configure everything from scratch can be quite troublesome, don't you think? To fix that, here is a simple solution — clone all your original disk data to the new one. This can save you a significant amount of time and effort that would otherwise be spent on reconfiguration or file categorization.
AOMEI Partition Assistant Professional is a well-known computer management tool. Its Clone Disk feature allows users to quickly move all the original data to the new disk, including files, programs, and even operating systems, which allows you to avoid any reinstallation.
◆ AOMEI Partition Assistant is compatible with nearly all editions of Windows systems, including Windows 11, 10, 8, 7, XP, and Vista.
◆ It can copy all parts of your hard drive, even the ones you can't normally see or the ones that help your computer startup. This makes sure that you can start your computer safely from the new drive.
◆ By choosing different cloning methods, it can copy disks of various sizes.
◆ It allows you to clone disk between MBR and GPT partition style without disk conversion.
◆ If you can't boot into your PC, you can use AOMEI software to clone the hard drive with a bootable USB.
How to upgrade SSD on laptop without losing data
After making good preparations and downloading the cloning software, it is time to learn how to replace SSD in laptop step by step. By following this guide, you won't have to reinstall Windows or worry about losing data.
Stage 1. Transfer the original data to the new SSD
Step 1. Install and launch AOMEI Partition Assistant Professional Edition.
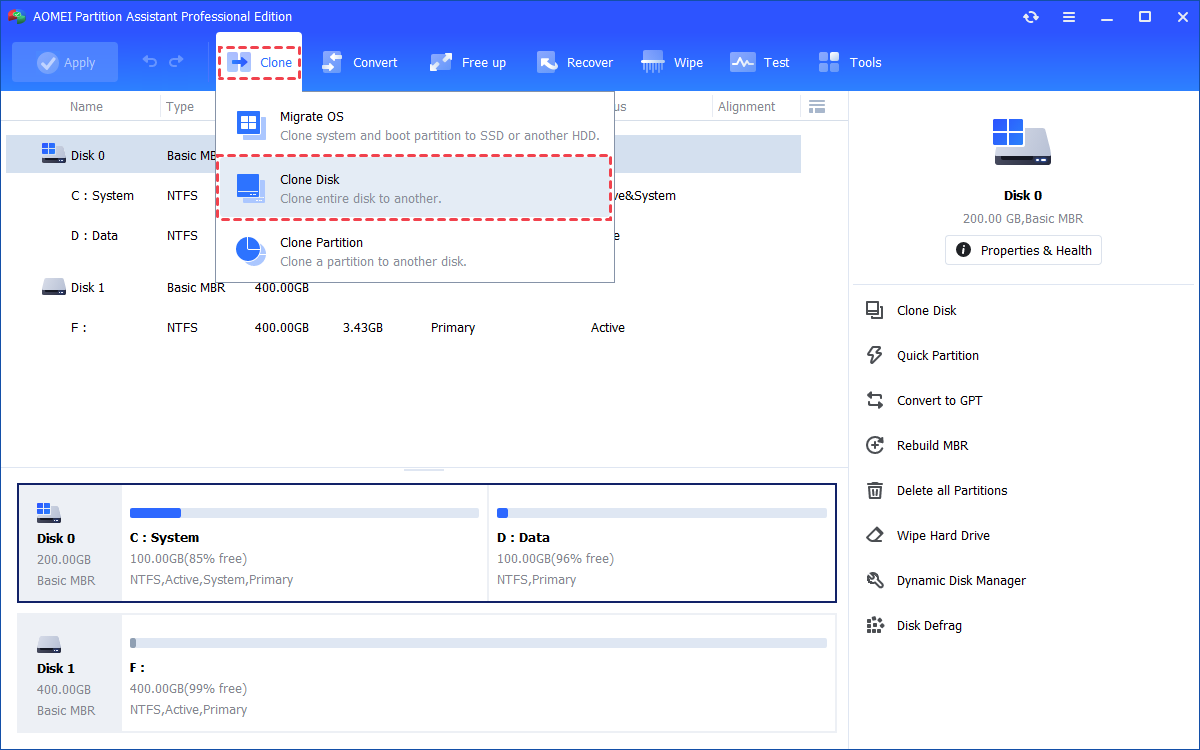
Step 2. Click the "Clone" main tab and select "Clone Disk". (You can also right-click the Disk you want to clone and select the "Clone Disk" tool to run disk clone.)
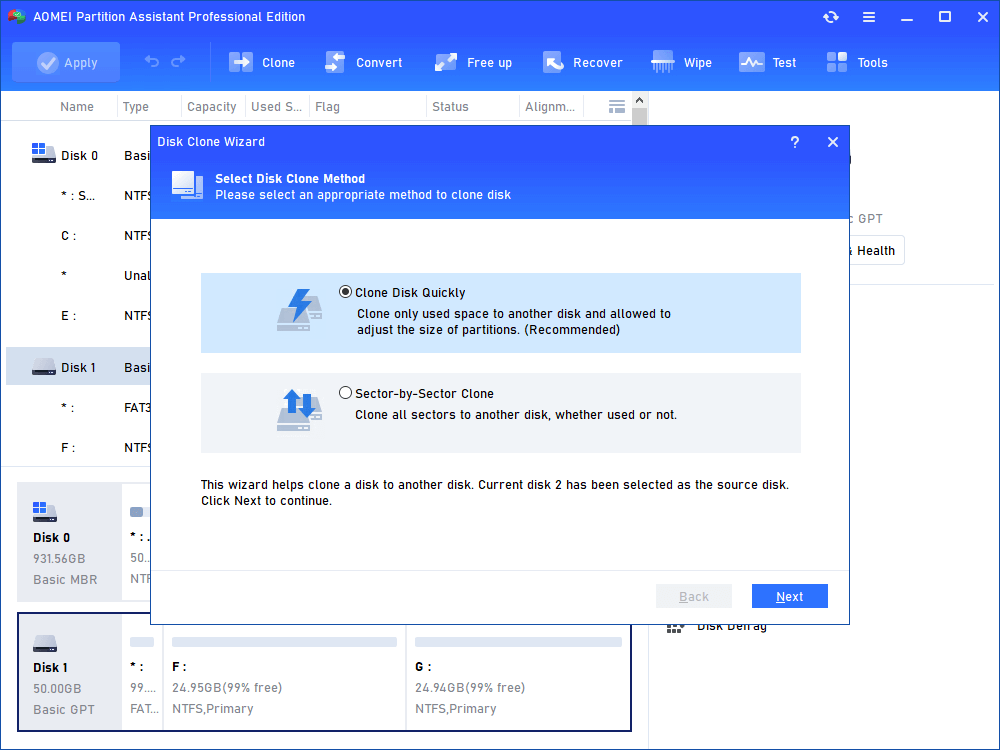
Step 3. Choose the hard disk that you need to clone as the source disk and click "Next".
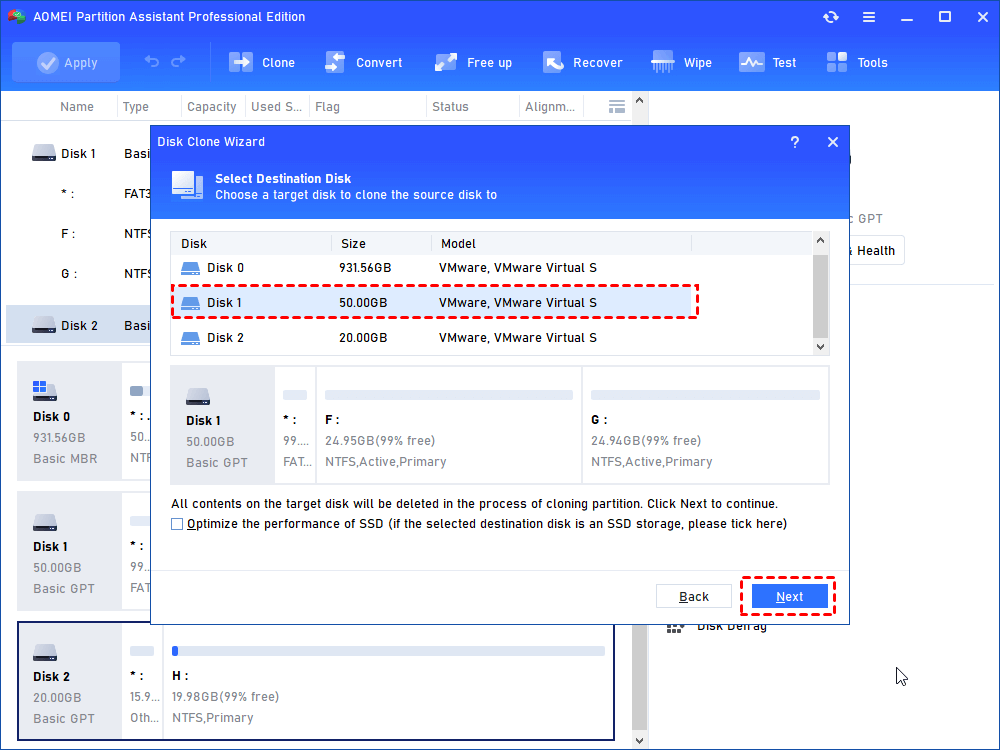
Step 4. Select the destination disk to put the data of the source disk on, and then click "Next".
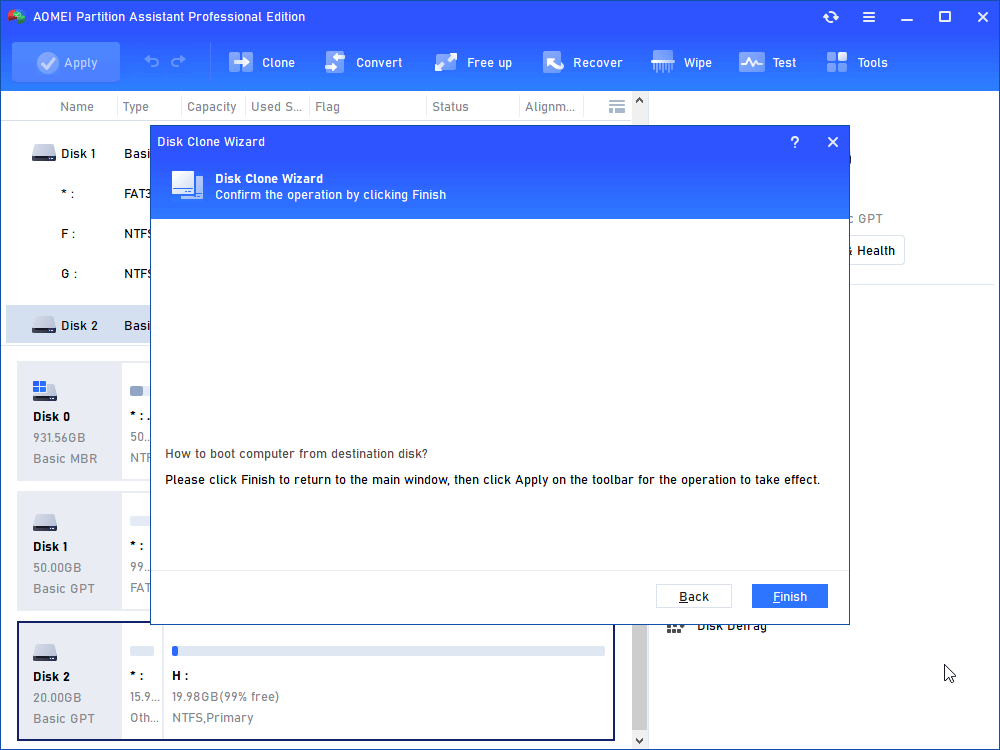
Step 5. Then, you will enter the Confirm interface where you can check the source and destination disk. After all is set, you can click the "Confirm" button to continue.
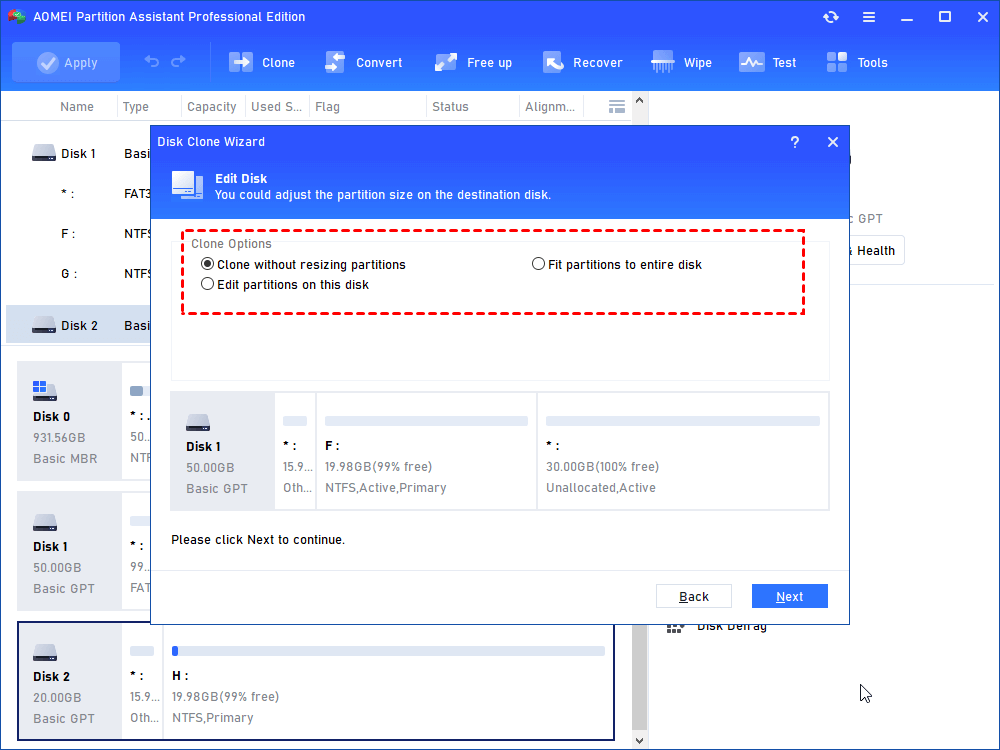
In lower left corner of the window, you can click the "Settings" button to adjust the partition size on the destination disk. There are three options for you:
- Clone without resizing partitions: all partitions will be cloned to the target disk as the original partition size. It is available when the target disk is larger than the source disk. If it is smaller, this option will be grayed out.
- Fit partitions to entire disk: all partitions will be cloned to the target disk and take up its full capacity according to the original partition size proportion.
- Edit partitions on this disk: you can change every partition size on the target disk as you need.
After finishing the adjustment, please click "Save".

Notes:
- You can tick "4k alignment" to improve the reading and writing speed of SSD if the selected destination disk is an SSD storage.
- All data on this selected destination disk will be wiped out after you save the operation to physical disk. If there is important data on the destination drive, please make a backup in advance.
- If you clone to a smaller SSD, the first option is grayed out. If you select Sector-by-Sector Clone, it is unable to adjust the size on the destination disk.
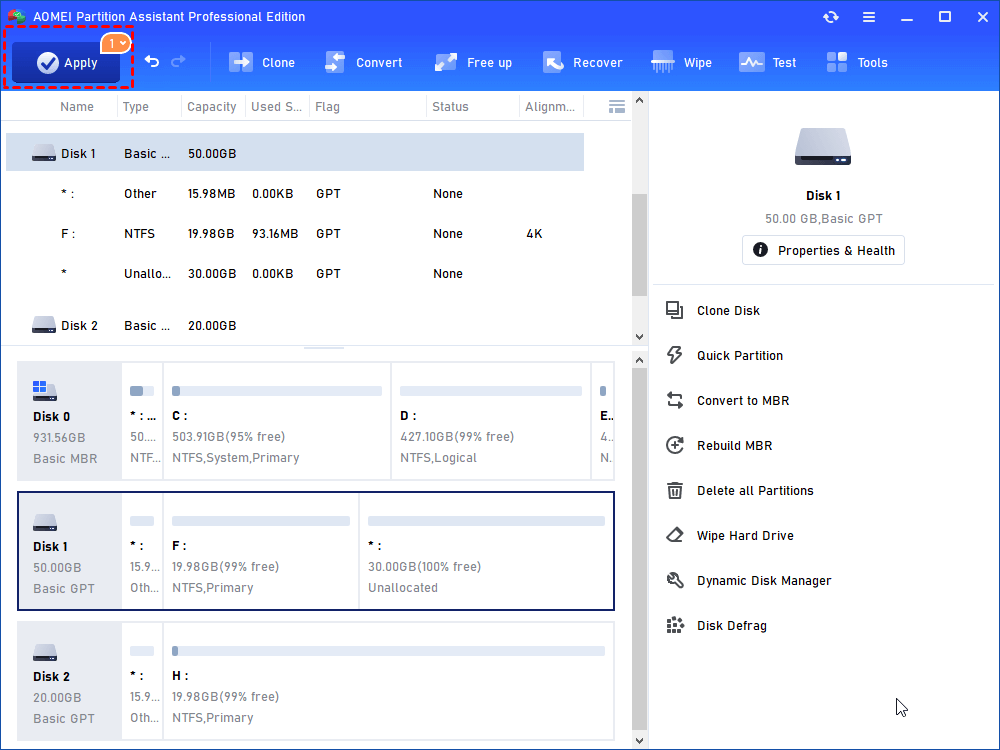
Step 6. You can preview the disk cloning operating by viewing the "Pending Operations". To commit the "Pending Operations", please click "Apply" and "Proceed".
Step 7. The cloning process will start and you can check the cloning process.
Then, everything on the original old drive has been moved to the new one. You can disconnect the SSD from your computer.
Stage 2. Replace the old disk
When doing laptop SSD replacement, there are various sizes and types to consider. M.2 drives resemble RAM sticks, typically measuring 80mm in length (referred to as 2280), but they also come in smaller lengths like 2260, 2242, and 2230. While they commonly use NVMe interfaces, some may utilize SATA. It's essential to confirm the correct type before attempting a laptop upgrade.
In this guide, we provide information on replacing an M.2 NVMe and M.2 SATA SSD, as well as a 2.5 Inch SATA SSD to meet different needs.
▌Case 1. How to replace an M.2 NVMe and M.2 SATA SSD in laptop
Step 1. Ensure the laptop is powered off and disconnected from AC power. Disable or remove the battery accordingly. For laptops with removable batteries, power off, unlock, and remove the battery. If the battery is integrated, access the BIOS and disable the built-in battery.

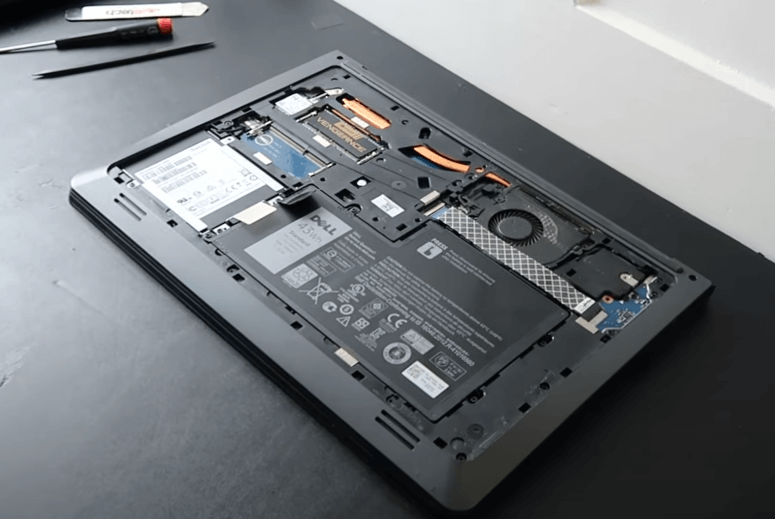
Step 2. Remove the bottom panel or hatch of the laptop. Some laptops have a designated hatch or panel for the drive, while others require removing the entire panel.
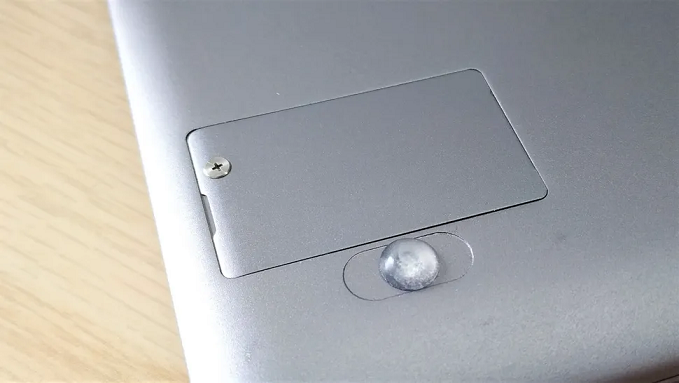
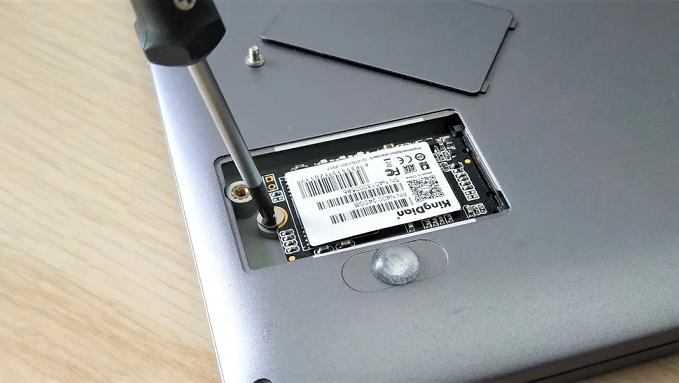
Step 3. Locate the SSD and remove the securing screw.
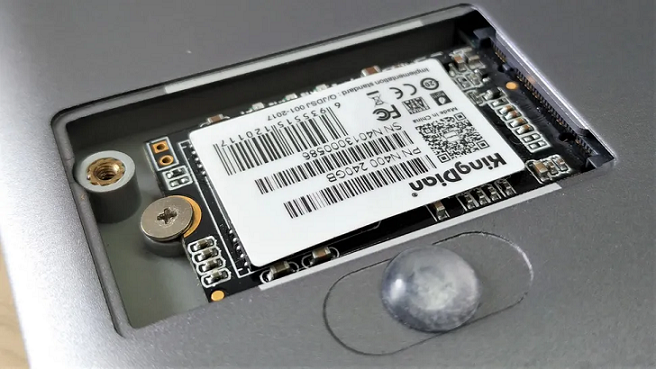
Step 4. Carefully lift the drive from the board with minimal friction, taking note of any adhesive securing the drive and removing it carefully.
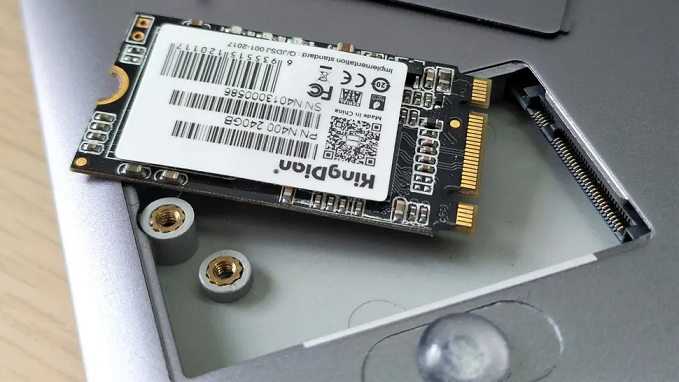
Step 5. Insert the replacement drive at an angle and gently push it into place.
Step 6. Secure the drive in place by replacing the screw.
Step 7. Put back the hatch or panel, ensuring that the SSD does not make contact with it. Power up your laptop. Lenovo users with embedded batteries should connect the power supply during this process to enable the battery.
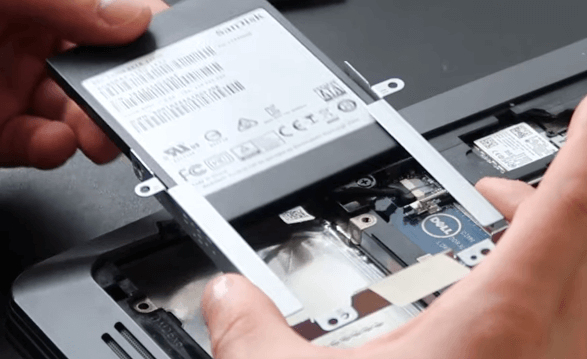
▌Case 2. Upgrade SSD on a laptop with a 2.5 Inch SATA SSD
Step 1. Turn off the laptop entirely, flip it over, and then unscrew and take off the back cover. This will give you a view of the inside of your laptop.
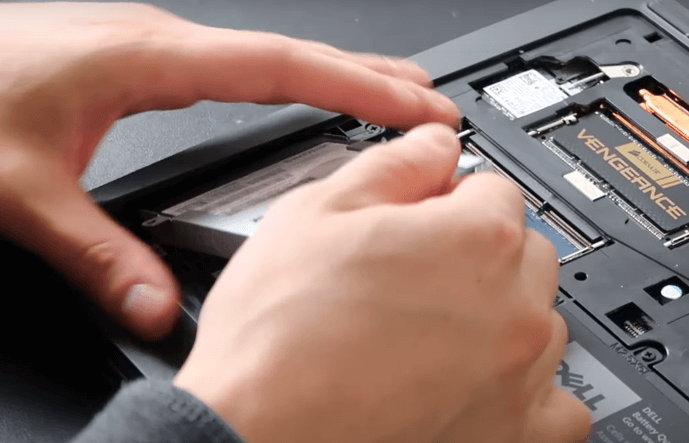
Step 2. Find where your existing hard drive is positioned, and loosen the screws that are holding it in place on your laptop. Gently lift the old disk up at an angle of about 45 or 30 degrees to remove it, and then disconnect it from the connecting cable.
Step 3. Remove the hard drive from the caddy by loosening the screws, and replace it with your new SSD. Next, fasten it to the laptop and reattach the laptop's hard drive back cover.
Stage 3. Boot from the cloned SSD
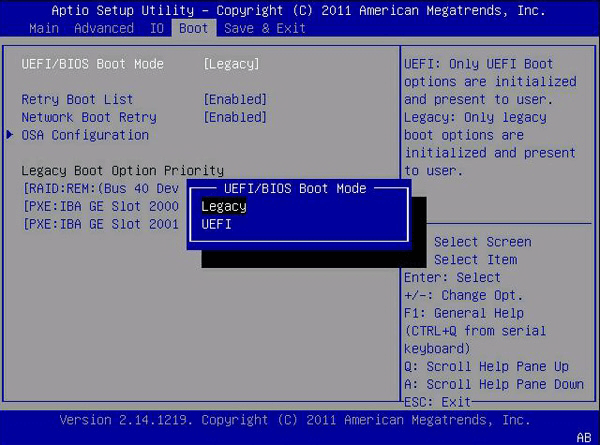
Once all the steps are completed, restart your laptop, and it will boot from the new solid-state disk. However, if your old drive and the new drive use different partition styles, you may need to switch from Legacy BIOS to UEFI boot mode, or vice versa, to ensure compatibility between the partition scheme and boot mode.
When you reboot your PC, press ESC, F1, F2, F8, or F10 repeatedly to access the BIOS setup. Look for the Boot tab, switch the boot mode to either Legacy or UEFI, and then press Enter.
Conclusion
Here is how to upgrade SSD for laptop. AOMEI Partition Assistant shares an effective methods that allows you do laptop SSD replacement easily and effectively. With the help of it, you can even do more in computer management. If you want to free up space, you can use its functions like PC Cleaner, App Mover, Allocate Free Space, and so on. When you encounter problems like boot issues, the feature Rebuild MBR can also be helpful. For Windows Server users, kindly please choose the Server Edition for best compatibility.

