How to Fix Code WDF_Violation BSOD
What is WDF_violation code and why it cause BSOD error on your Windows PC? Don’t worry, this post will give you an answer about how to fix WDF_violation and how to recover los t data caused by this error.
By Lucas / Updated on March 25, 2024
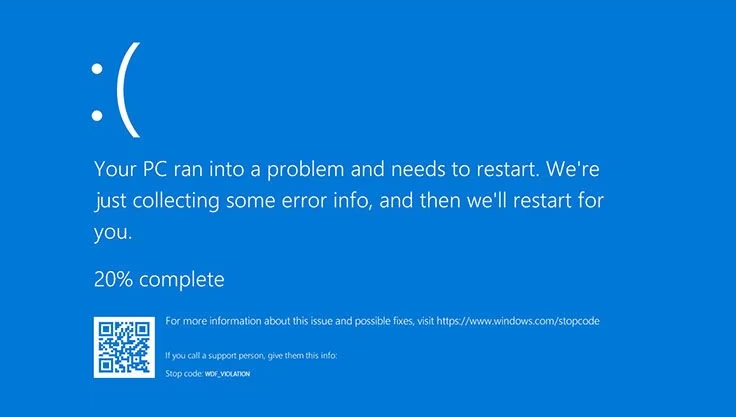
What does WDF_Violation mean?
The Windows Driver Framework (WDF) serves as a comprehensive suite of tools, libraries, and code that empowers developers to craft device drivers tailored for the Windows operating system. These drivers play a crucial role in facilitating seamless communication between hardware devices and the operating system.
If a STOP CODE WDF_violation BSOD error occurs, it signifies an issue or error within the Windows Driver Framework itself. This error typically arises due to complications with the device driver, such as invalid memory access or improper resource utilization. WDF_violations have the potential to destabilize the system and prompt crashes, necessitating thorough troubleshooting to pinpoint and rectify the underlying driver-related problem.
What may cause WDF_Violation blue screen error?
Many factors can cause WDF_ Violation blue screen problem:
1. Faulty or outdated device drivers
Incompatibility, corruption, or outdated versions of device drivers can always lead to WDF_VIOLATION errors.
2. Software conflicts
Conflicts between different software programs or incompatible drivers can result in WDF_VIOLATION errors when they interact with the Windows Driver Framework.
3. Hardware incompatibility
Malfunctioning or incompatible hardware components, such as RAM, hard drives, or peripheral devices, may trigger WDF_VIOLATION errors.
4. System file corruption
Corruption of critical system files, such as those related to the Windows Driver Framework, can lead to WDF_VIOLATION blue screen errors.
5. Failed Windows updates
Occasionally, updates to the Windows operating system may introduce bugs or compatibility issues that result in WDF_VIOLATION errors.
How to solve WDF_violation error
In this part, we’ll show you some solutions to solve WDF_violation blue screen problem. One of it is hp users only, but the rest are all available for all users.
Way 1. Disconnect all peripherals
Many times, WDF_violation is caused by some peripherals. So, to resolve this issue, consider unplugging any accessories from your computer, such as your mouse and camera, and especially your USB drive.
If the preceding method does not work, you can disable the USB ports in the BIOS section. Follow the methods outlined below to do the same.
Some of the keys used in this article to access the BIOS while deactivating the USB ports may change depending on the version of BIOS you have. So, follow the directions on your screen; the guide below is only for reference.
Step 1. To enter the BIOS area, restart your computer and repeatedly hit the "F2" or "Del" keys.
Step 2. Once in the BIOS, go to the "Advanced Tab", then "Miscellaneous Devices", then "External USB Ports", and finally "disable External USB ports".
Step 3. Once you've completed the preceding steps, save and leave the BIOS.
Step 4. Finally, restart your computer to determine if you've successfully solved WDF_violation.
Way 2. Update device drivers
One of the most common reasons for the WDF_Violation error is the corruption of certain drivers. If a driver, particularly the display or video driver, is obsolete, it may be incompatible with your system. Thus, the solution to this problem is to update the drivers.
Step 1. Search and open Device Manager in the taskbar's search box.
Step 2. Right-click on the target device and hit "Update Driver."
Step 3. In the next interface, select "Search automatically for drivers."
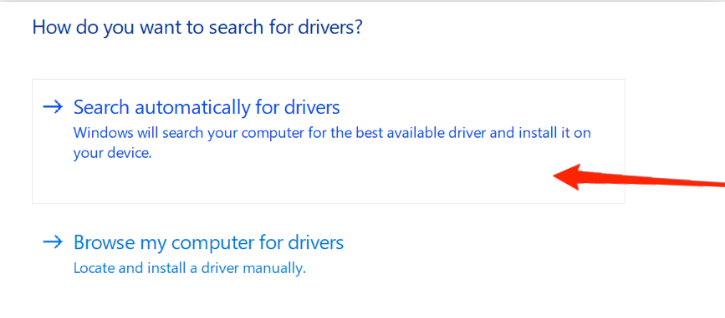
Step 4. For some devices, you may need to visit the manufacturer's official website to obtain and update drivers.
Way 3. Repair corrupted system files
As we’ve mentioned WDF_Violation errors can also be caused by system file inconsistencies or other problems, such as missing, corrupted, or destroyed system files. However, it is difficult for users to find and fix the specific faulty files. In this instance, you will require a professional third-party tool.
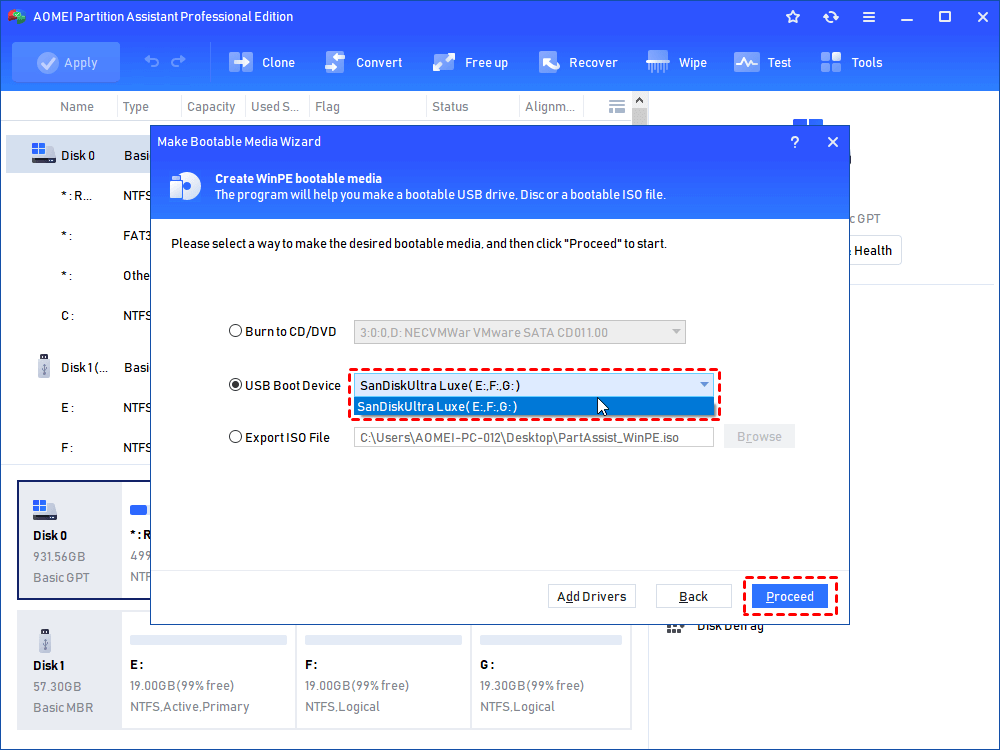
AOMEI Partition Assistant Professional is your powerful disk and drive issue saver. This all-in-one program can help users create bootable repair USB to allow users to fix various problems when PC can’t boot normally.
Part 1. Create bootable media
Step 1. Prepare a USB flash drive of at least 13GB, insert it into another running-well computer, and make sure it is detected.
Note: back up necessary files on the USB drive first because this operation will delete all data on it.
Step 2. Download and execute the program. Select "Tools“ > “Make Bootable Media” in the main interface.

Step 3. Click "Next" at the next window to make sure you have noticed that information.
Step 4. Choose “USB Boot Device” option and select the prepared USB drive, and press “Proceed” to create WinPE bootable disk for Windows 10.
● Burn to CD/DVD: You can create a bootable CD/DVD.
● Export ISO File: You could make a bootable Windows 10 PE ISO File. Then you can burn it to a USB drive or CD/DVD.
Part 2. Rebuild MBR
Connect the bootable media to your computer, and start your PC. When you see the PC logo, tap a BIOS key to enter BIOS setup. Under the Boot tab, set the bootable media as the boot drive. Then save the change and restart your PC. Once you log in, the AOMEI Partition Assistant Standard will run automatically.
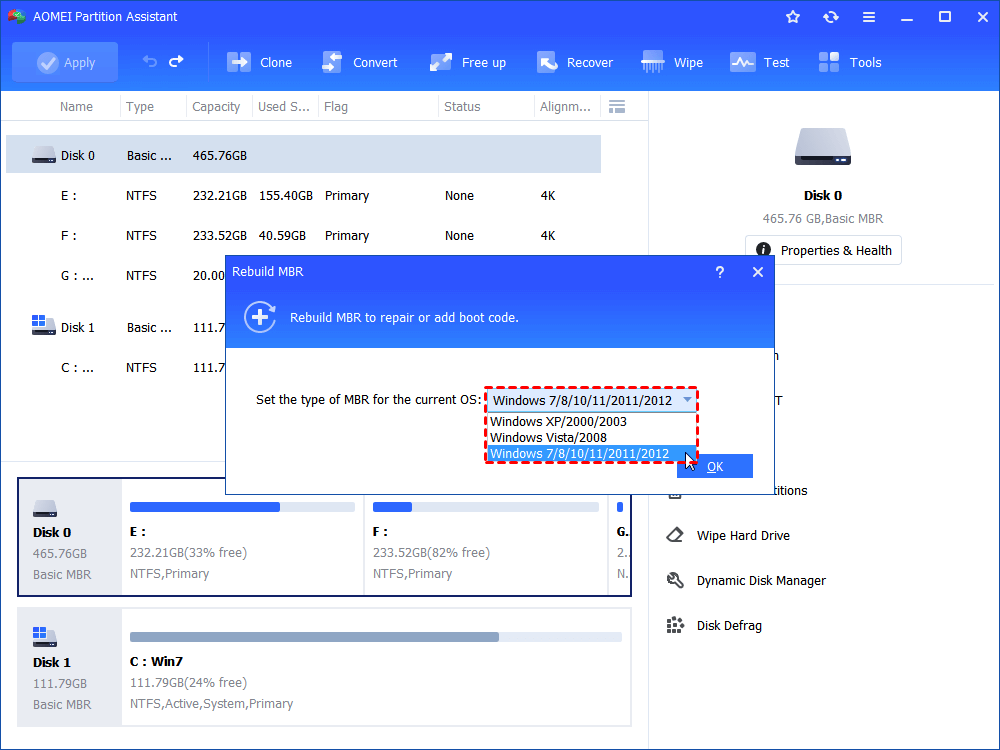
Step 1. Right-click the Seagate hard disk and choose "Rebuild MBR" from the drop-down menu.
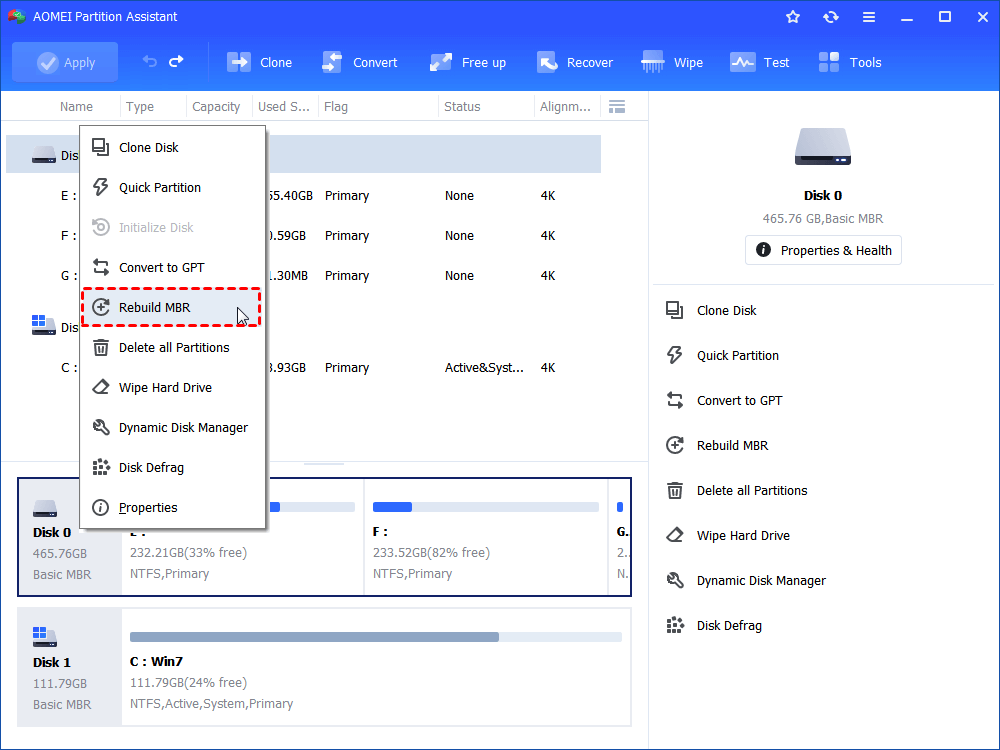
Step 2. Choose a suitable MBR type according to your current operating system and click "OK".
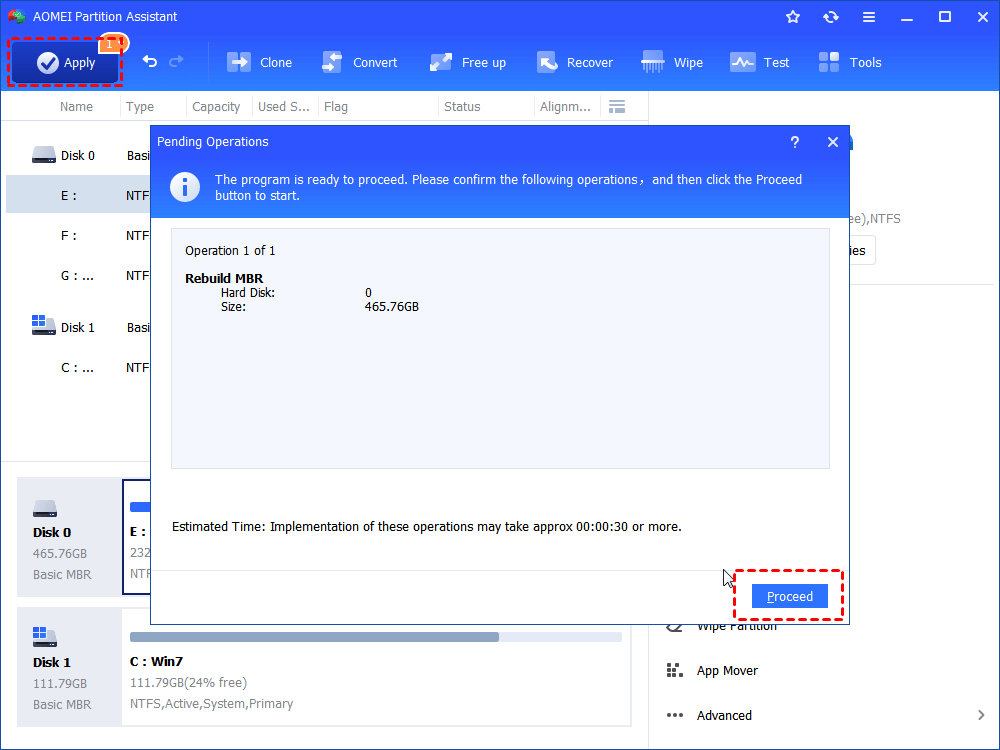
Step 3. Click "Apply" and "Proceed" to commit the pending operation.
Way 4. Uninstall bluetooth driver in Safe Mode
Several people have indicated that this worked and resolved the issue for them. As a result, uninstall Bluetooth Driver in safe mode. You may do this by running Windows in safe mode and then uninstalling or removing the problematic drivers.
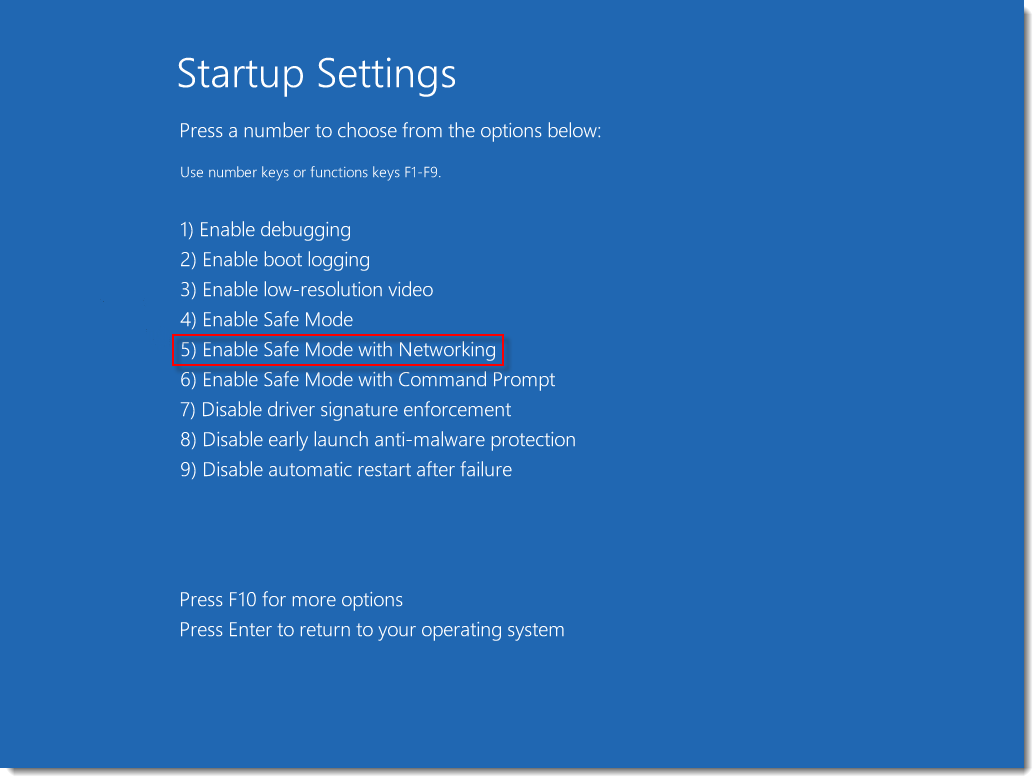
Step 1. Launch Window Recovery Environment (WinRE) and select "Troubleshoot", followed by "Advanced options". Continue the procedure by selecting "Startup Settings" and then "Restart" to enter Startup Settings.
Step 2. Now, click the "F5" key on your keyboard to select "Enable Safe Mode with Networking" so that you may boot your computer in safe mode.
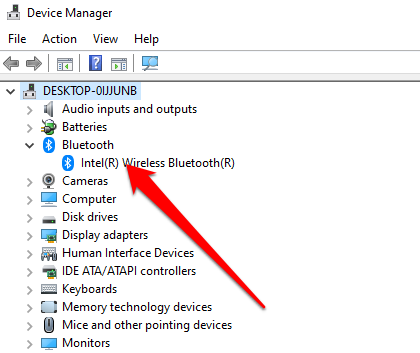
Step 3. Press Win + X keys and select "Device Manager" from the list that comes.
Step 4. Locate your Bluetooth driver and just give a right-click on it. Post this, click on the option saying "Uninstall device".
Way 5. Remove hp keyboard driver (Only hp users)
Step 1. Reboot your PC 3 times to access the Windows RE.
Step 2. Go to "Troubleshoot" > "Advanced options" > "Command Prompt."
Step 3. Input the following command lines according to your Windows version and hit "Enter."
▶ 32-bit Windows version:
dism /Image:C\ /Remove-Driver /Driver: C:\Windows\System32\DriverStore\FileRepository\hpqkbfiltr.inf_x86_f1527018cecbb8c2\HpqKbFiltr.inf
▶ 64-bit Windows version:
dism /Image:C:\ /Remove-Driver /Driver:c:\Windows\System32\driverstore\FileRepository\hpqkbfiltr.inf_amd64_714aca0508a80e9a\HpqKbFiltr.inf
Way 6. Reconfigure HpqKbFiltr.sys
Step 1. Reboot your PC 3 times to access the Windows RE.
Step 2. Go to "Troubleshoot" > "Advanced options" > "Command Prompt."
Step 3. Input the following command lines according to your Windows version and hit "Enter."
c:
cd Windows
cd system32
cd drivers
ren HpqKbFiltr.sys HpqKbFiltr.sys.bak
Exit and restart your computer.
Way 7. Reset your computer
If all other techniques fail, you have one more option: restart your PC. Resetting the PC restores all configurations to their previous condition, which can solve the majority of system issues.
Step 1. Reboot your PC 3 times to access the Windows RE.
Step 2. Go to "Troubleshoot" > "Reset this PC."
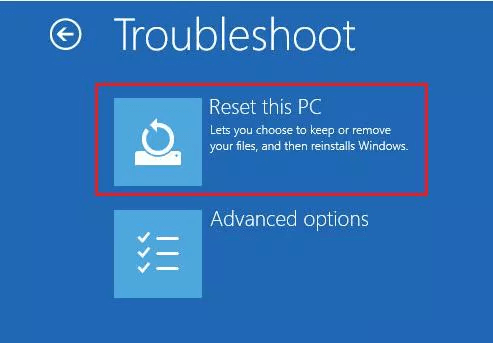
Step 3. Select "keep my files," and then a wizard will show up. Follow its instructions to reset your PC.
Step 4. Restart your computer, and WDF_violation should be gone now.
Further tip: Recover lost data due to WDF_Violation error
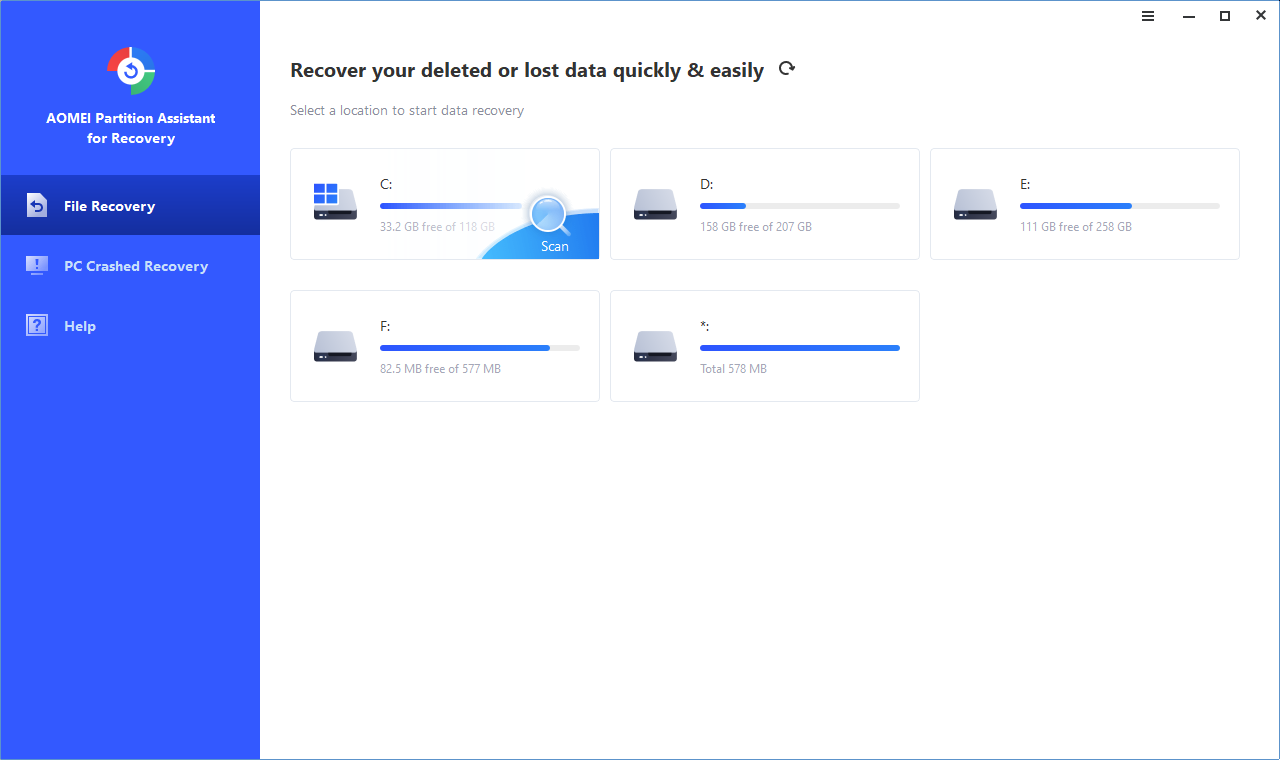
After you solve WDF_Violation error, if you find there is data loss, you can quickly use AOMEI Partition Assistant to recover your lost data. The “Recover Data” function can retrieve more than 200 file types of files from permanently deleted, corrupted, formatted, and more data loss scenarios from external hard drives, USB flash drives, SD cards, HDDs, SSDs, and other storage media.
Step 1. Launch AOMEI Partition Assistant on your computer.
Step 2. Click on "Recover" and then choose "Recover Data".

Step 3: Select the external hard drive where the deleted or lost files were stored and click "Start Scan".
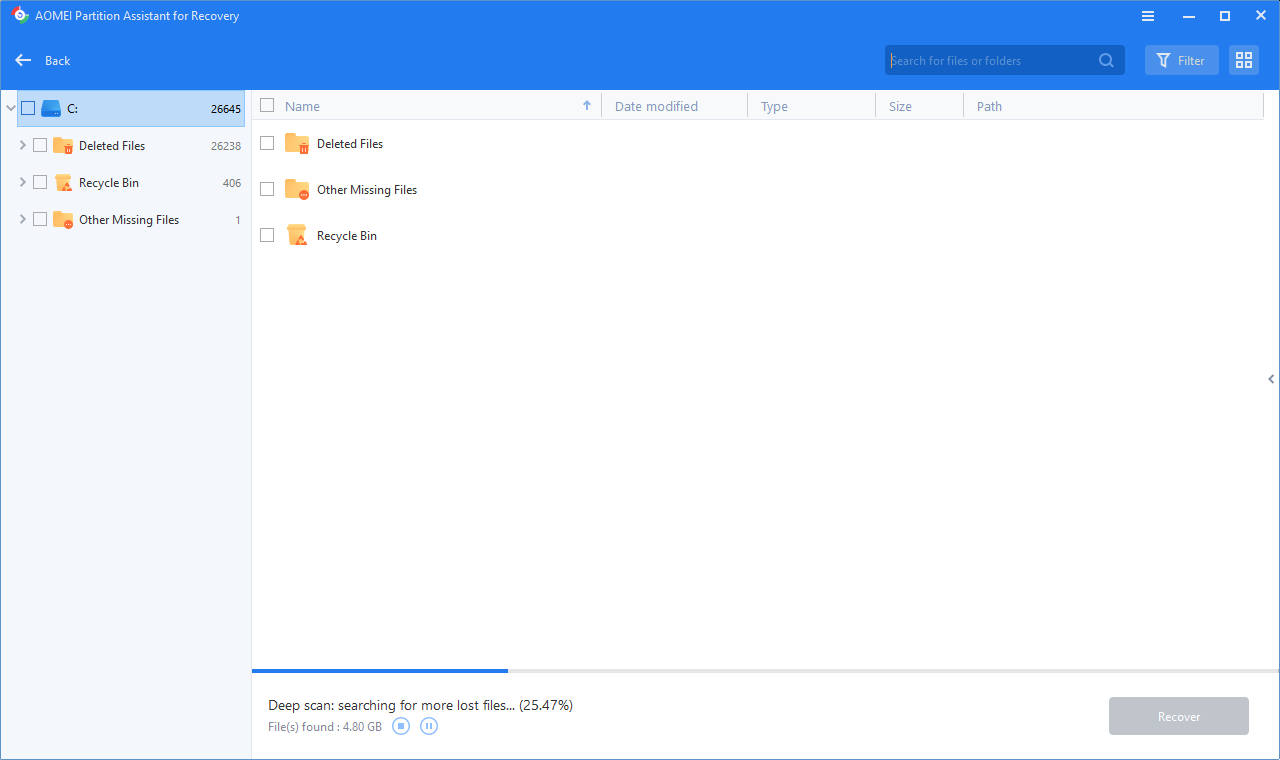
Step 4: After the scan is complete, preview the recovered files, and select the ones you want to restore. Click "Recover".
Step 5. Select a folder path to store the recovered items and click "Select Folder".
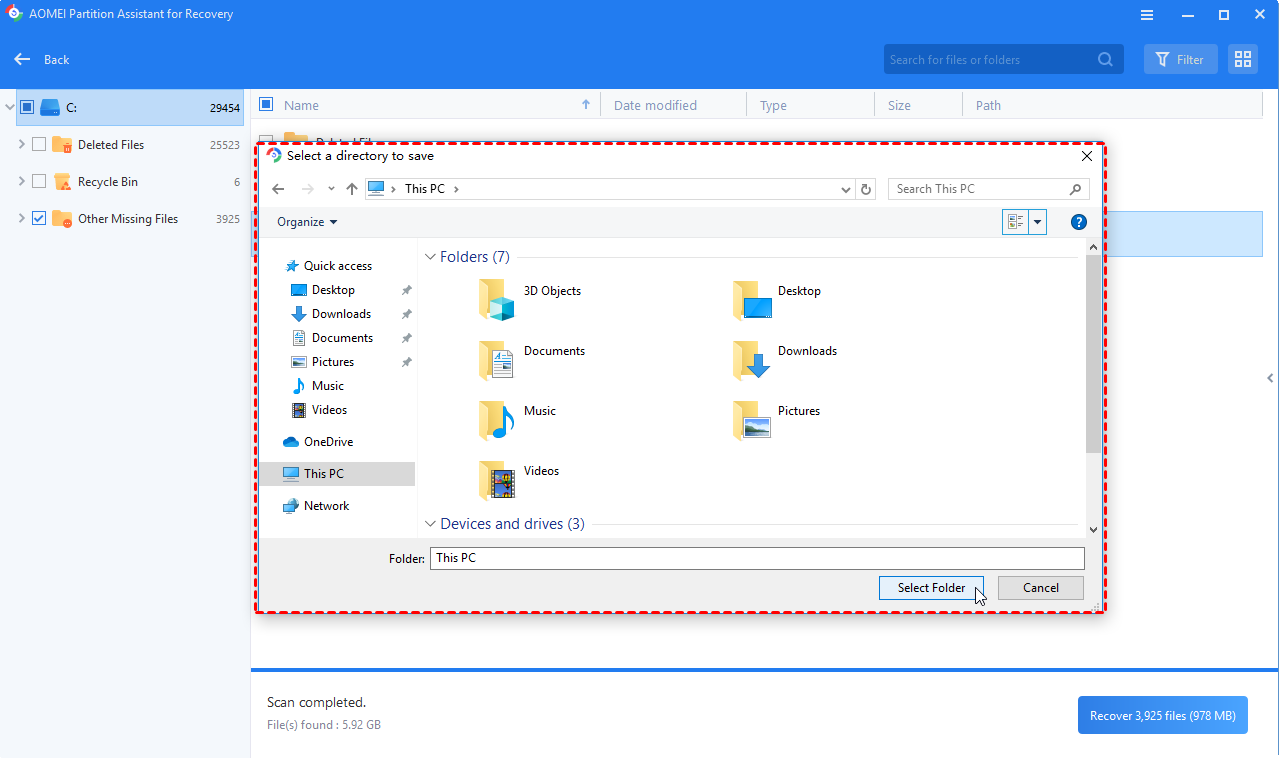
Step 6. When you see the small window below, click "OK".
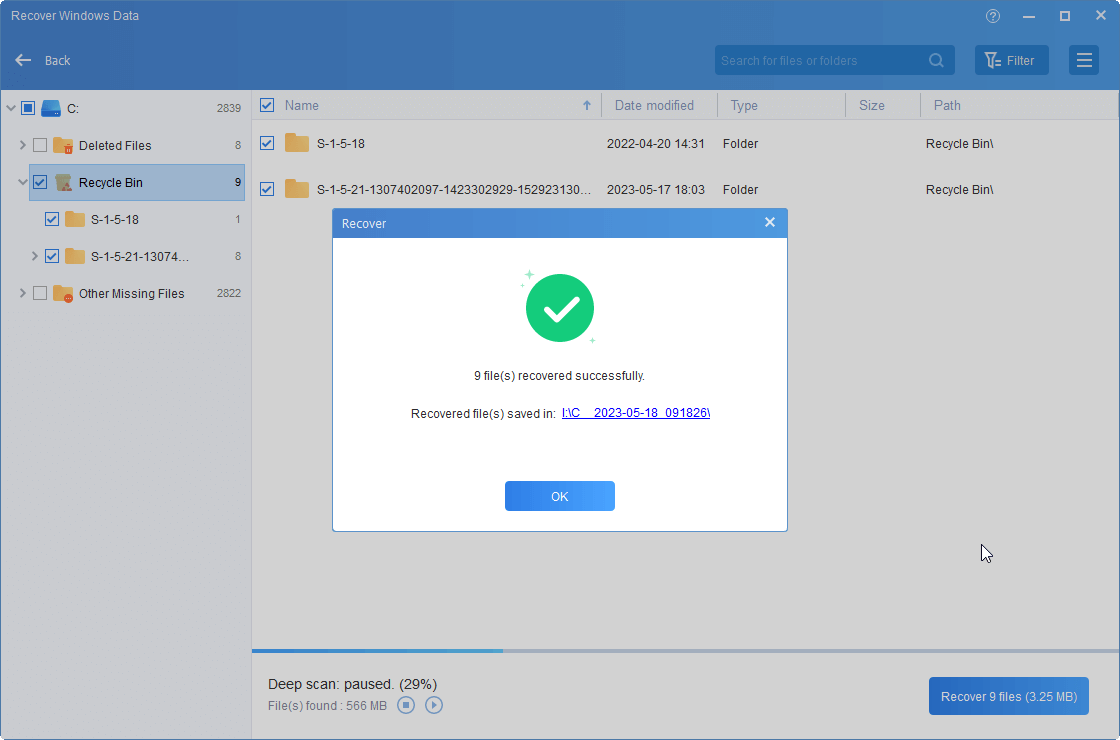
Then the recovered files will be saved in the specified location.
Conclusion
This post offers 7 methods to assist you handle the WDF_Violation problem. We've covered possible reasons why you could be experiencing this difficulty. Furthermore, all relevant lessons are displayed above to assist you in easily resolving your issue. If you experience critical data loss, do not be concerned. AOMEI Partition Assistant can also help with this issue.

