Two Ways to Create Windows 10 Live USB Easily and Safely
This article provides 2 practical ways to create a Windows 10 live USB, using Windows built-in tool and third-party software.
By AOMEI / Updated on May 12, 2023
Why create Windows 10 live USB?
Many users usually use the same computer regularly, so they will be very familiar with this computer. However, other computers are also used for some reasons. Even if the operating system installed in other computers is exactly the same as the operating system used by the user before, the different desktop layout, interface appearance, and other setting methods will make the user feel unfamiliar and cause inconvenience to use.
Imagine that, if you are out of town or on a business trip, it will be troublesome to carry your computer. But after creating Windows 10 live USB, you can use your own computer in any computer, which greatly improves work efficiency. Therefore, it is necessary to create Windows 10 live USB.
How to create Windows 10 live USB?
The following will show you two Windows 10 bootable USB tools to install Windows 10 on USB.
One is Windows To Go, a built-in tool for Windows, and the other Windows 10 live USB creator is use Windows To Go Creator function of AOMEI Partition Assistant professional.
Things you need to prepare:
1. You need to prepare a USB larger than 13 GB (Recommend you to use USB 3.0 drive because of its faster read and write speed). All data on this USB will be erased, please make a backup in advance.
2. If you plan to create a brand-new system, you need to download Windows 10 ISO file.
│Method 1. Create Windows 10 live USB via Windows To Go
Windows 10 Education Edition and Enterprise Edition users can use Windows To Go to create a Windows live USB, but they must use a USB certified by Microsoft.
Step 1. Search for “Windows To Go” in the search box in the bottom left corner of the desktop.
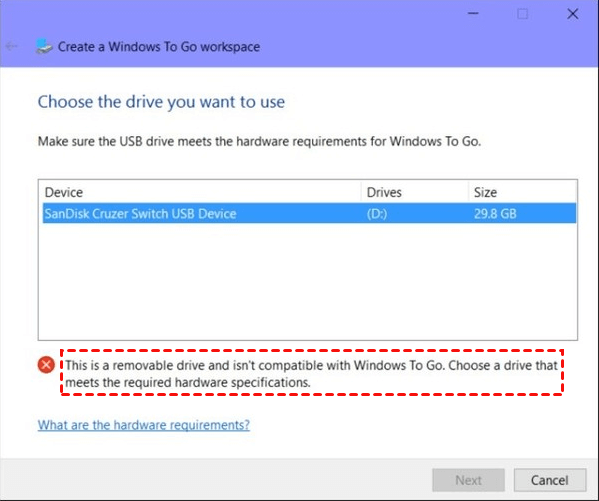
Step 2. In the Create a Windows To Go workspace window, choose the certified USB drive to which you want to transfer Windows 10 and click “Next”. If it is an uncertified USB, then you cannot proceed to the next step.
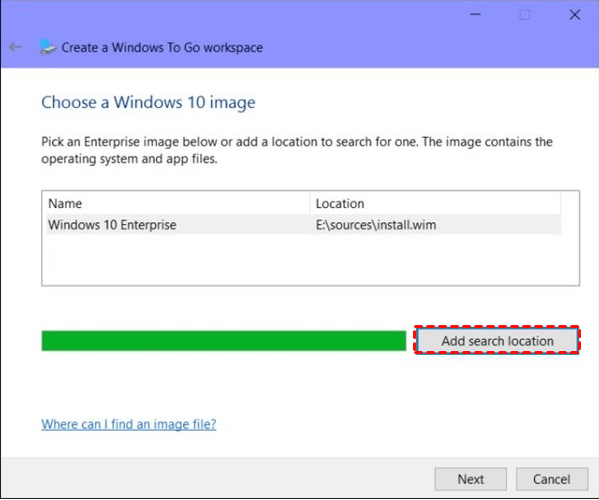
Step 3. Click “Add search location” to search for the Windows 10 installation ISO file and choose the mounted ISO file.
Step 4. Choose whether to use BitLocker in the USB drive and then click “Next”.

Step 5. Wait patiently for the whole process to complete. Then click “Yes” or “No” to make this computer boot Windows 10 from the new created bootable USB drive.
│Method 2. Use third-party utility to install Windows 10 on USB
As you have shown, Windows To Go has some limitations. It only supports Windows 8/8.1 Enterprise Edition and Windows 10 Education Edition and Enterprise Edition. Except for these versions, Windows To Go is not supported. And also need to use certified USB by Microsoft , which is usually expensive.
Fortunately, AOMEI Partition Assistant Professional can help you solve this problem. It can help you create any version of Windows, and no special USB is required.
More importantly, it also has many advanced functions, such as: move redundant programs from the system drive to another drive, clone the system drive to an external hard drive, allocate free space from one partition to another.
PS.: If you are using Windows Server, please upgrade to AOMEI Partition Assistant Server.
Step 1. Install and launch AOMEI Partition Assistant Professional. Click “Tools” and “Windows To Go Creator” on the top side, as the following picture shows.

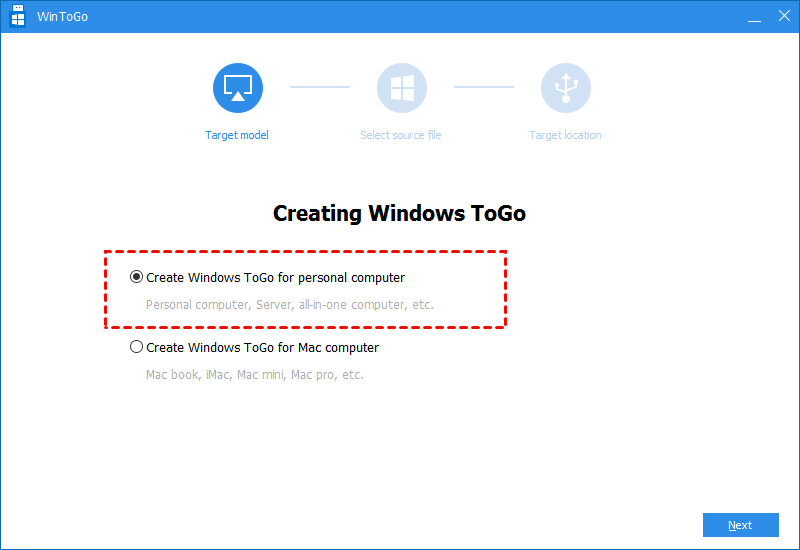
Step 2. Choose “Create Windows To Go” for personal computer and click “Next”.
Step 3. Choose “Create Windows To Go with system disc/ISO”. If Windows 10 ISO file isn’t detected automatically, click the folder icon to select manually. Then, click “Next”.
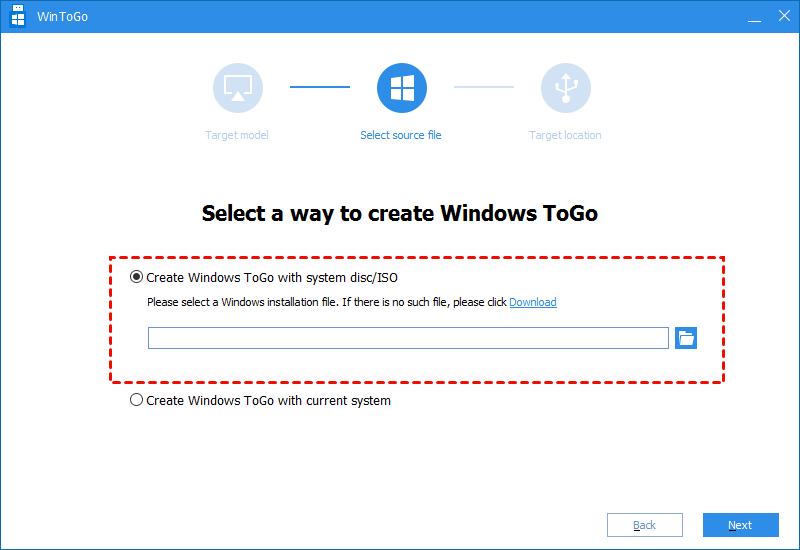
Note: If you want to use the current system to create a Windows 10 live USB, please select Create Windows To Go with current system.
Step 4. Select a USB drive as target and click Proceed.
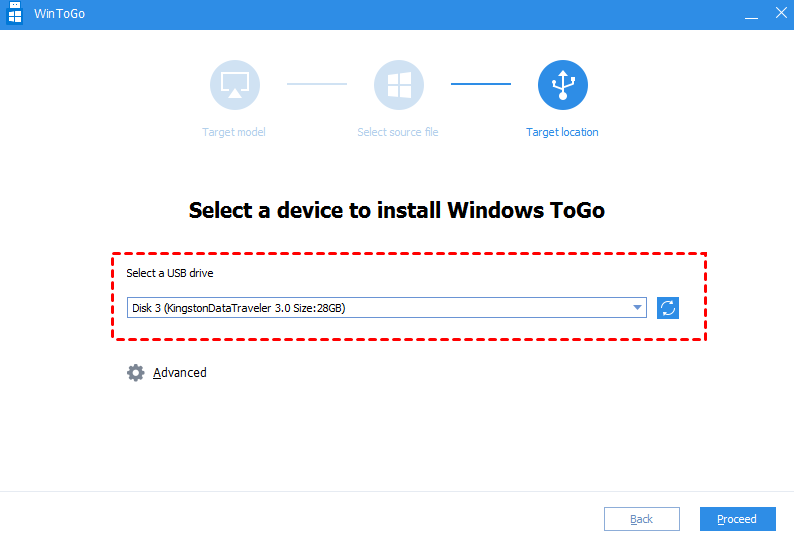
Step 5. You’ll be prompted by the message that all data on this USB drive will be erased. Click Yes to continue.
After that, you have successfully created a portable Windows 10 USB.
How to run Windows 10 from USB?
To run Windows 10 in USB on other computers, you must change the boot mode after plugging in the USB. Here are the detailed steps:
Step 1. After inserting the USB, start the computer. When the computer is loading, follow the prompts on the screen to start the shortcut and enter the BIOS.
Step 2. In the BIOS settings, select the “Boot” option, and then select “Change boot order”.

Step 3. In the boot sequence, select your USB drive, then save and exit the BIOS. Boot, your computer exits from USB.

