How to Reformat a USB Drive in Windows 10/11
Your complete guide to reformatting a USB drive on Windows. Follow our clear instructions for any "windows reformat usb drive" task. Solve common format errors and learn how to use both built-in tools and advanced software.
By Lucas / Updated on September 24, 2025
USB flash drives are essential tools for storing and transferring files, but there are times when you need to start fresh by wiping them clean. Reformatting is the key to this process, but it can seem daunting if you've never done it before. This guide will walk you through everything you need to know, from why you should reformat to the specific steps for getting it done.
Whether you're dealing with a corrupted drive, changing its use, or just want to securely erase its contents, learning how to reformat a USB drive in Windows 10 or 11 is a valuable skill. We'll explore several methods, including built-in Windows tools and a more powerful third-party solution.
Why Do You Need to Reformat a USB Drive?
Before diving into the "how," it's helpful to understand the "why." Reformatting a USB drive is more than just deleting files; it's a process that erases the drive's contents and sets up a new file system.
Changing the File System: Windows typically uses file systems like NTFS, FAT32, and exFAT. You might need to switch between them for compatibility. For instance, formatting to FAT32 is often necessary for use with older devices or certain gaming consoles, while exFAT is great for large files and cross-compatibility between Windows and macOS.
Fixing Errors or Corruption: If your USB drive becomes unreadable, slow, or shows errors, reformatting can often resolve these issues by wiping out the corrupted data structures and creating a clean slate.
Removing Viruses or Malware: If you suspect a flash drive is infected, reformatting is one of the most effective ways to remove malicious software completely.
Preparing for a New Use: If you want to use a drive as a bootable installer for an operating system like Windows, it must be formatted in a specific way. Reformatting prepares it for this new role.
Securely Erasing Data: Simply deleting files doesn't permanently remove them. Reformatting is a much more secure way to ensure your private data is gone before you sell, donate, or dispose of a drive.
3 Easy Ways: Windows Reformat USB Drive
Now, let's get into the practical steps. We'll cover three effective methods for reformatting a USB drive in Windows 10 and 11, starting with the simplest built-in tools and moving to a more advanced, flexible option.
Method 1: Reformat USB Drive in Windows with File Explorer
This is the most direct and common method for reformatting a working USB drive. It's quick, easy, and accessible to all users.
Step 1. Plug your USB flash drive into an available USB port on your computer. You can do this by pressing the Windows key + E or by clicking the folder icon on your taskbar.
Step 2. In the left-hand navigation pane, click on "This PC." You should see your USB drive listed under "Devices and drives."
Step 3. Right-click on the USB drive icon and select Format... from the context menu.
Step 4. Choose between NTFS, FAT32, or exFAT, depending on your needs. For general use and compatibility, exFAT is a great modern choice.
Step 5. You can give your USB drive a new name here.
Format options: Check the Quick Format box. This is much faster and sufficient for most situations. Unchecking it performs a full format, which takes longer but also checks the drive for bad sectors.
Click the Start button. A warning will pop up to remind you that all data will be erased. Click OK to proceed. The process will only take a few moments.

Method 2: Reformatting USB Drive in Windows 10 via Disk Management
If File Explorer can't format the drive (for example, if it's not showing up properly), Disk Management is the next logical step. This built-in utility gives you more control over your drives.
Step 1. Right-click the Start button and select Disk Management from the list. Alternatively, press Windows key + R, type diskmgmt.msc, and press Enter.
Step 2. In the lower pane of the Disk Management window, you'll see a list of all your disks. Identify your USB drive by its size and drive letter. It will likely be labeled as "Removable."
Step 3. Right-click on the main partition of your USB drive (the block with the blue bar) and select Format....
Step 4. Similar to the File Explorer method, you can set the Volume label, File system, and Allocation unit size. Ensure "Perform a quick format" is checked.
Step 5. Click OK. You'll see the same warning about data loss. Click OK again to begin reformatting the USB drive in Windows 10.
Method 3: A Powerful Alternative for Reformatting Your USB Drive
Sometimes, the built-in Windows tools fail, especially with drives that are RAW, write-protected, or have other complex errors. In these cases, a dedicated disk management tool is your best bet.
For this, we highly recommend AOMEI Partition Assistant Standard. It's a robust yet free partition manager that streamlines the process and offers capabilities far beyond what Windows provides. It easily handles situations where a typical windows reformat usb drive command fails and provides a user-friendly interface that makes complex tasks simple.
The Best Windows Disk Partition Manager and PC Optimizer
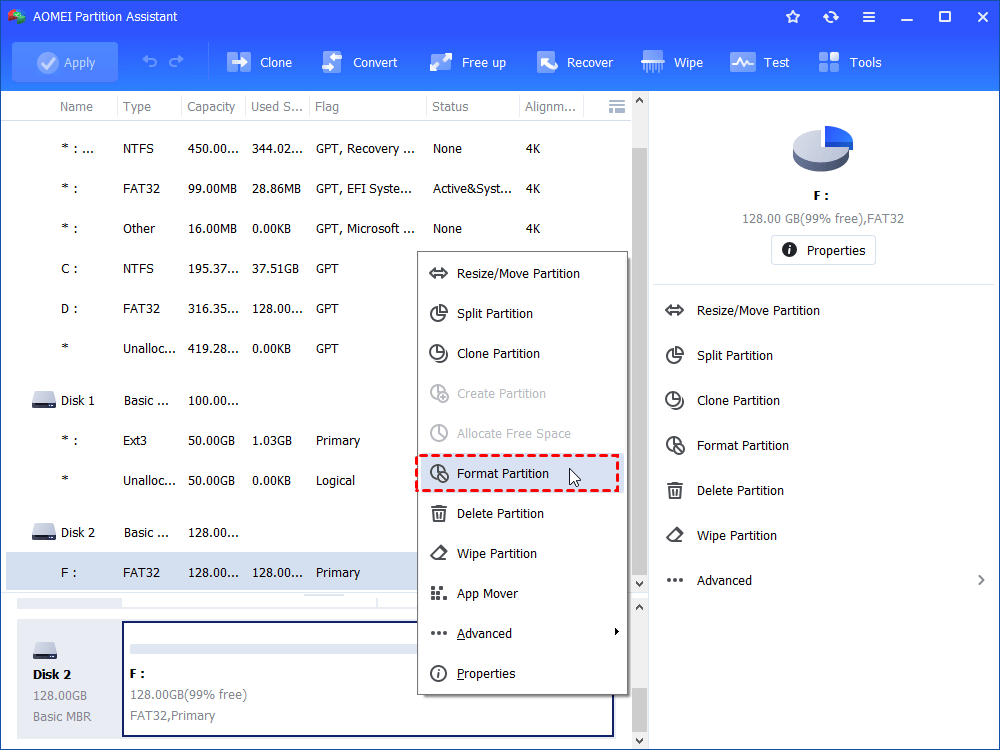
Step 1. Download this powerful software, install and run it. In the main interface, right-click the target drive and select “Format Partition”.
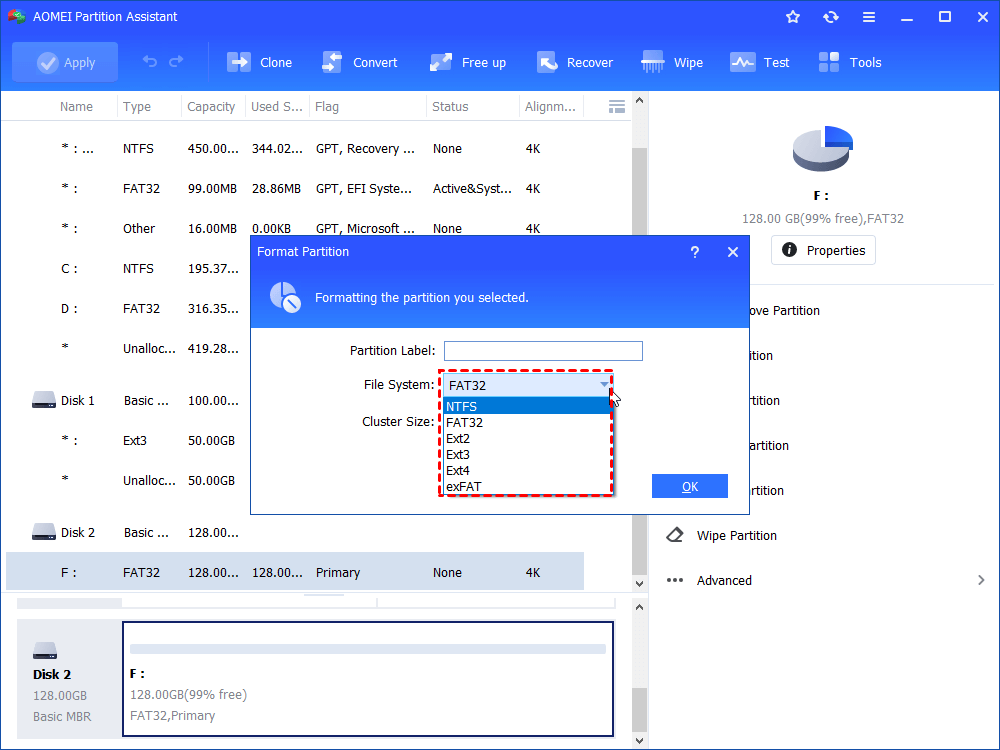
Step 2. In this small window, specify the file system of the drive based on your own demand and click “OK”.
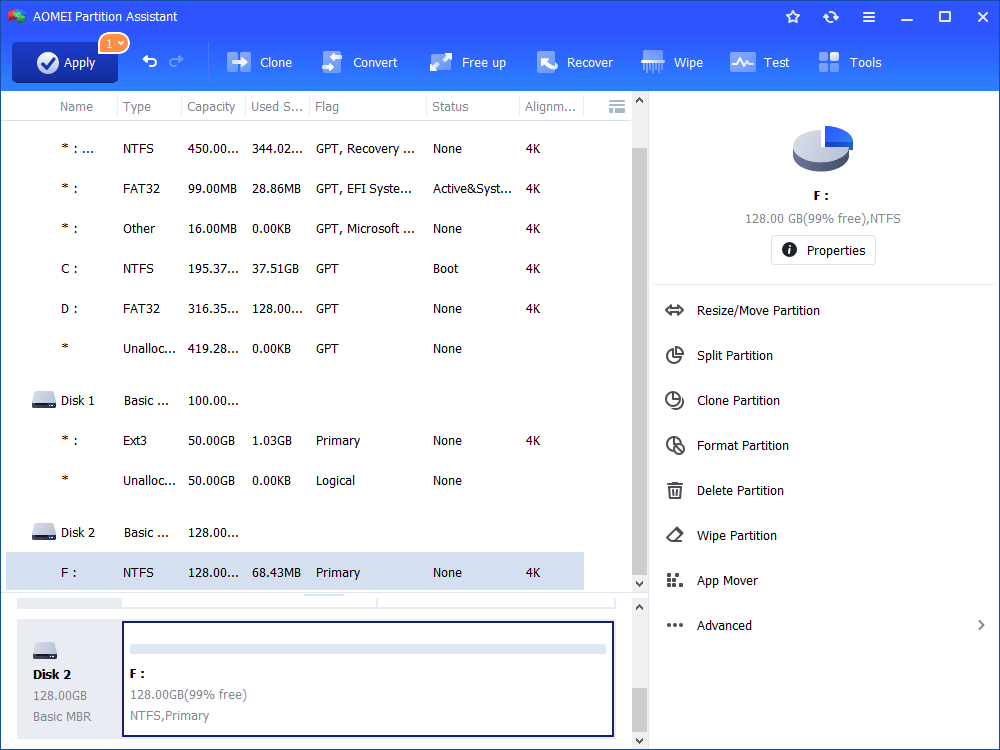
Step 3. Preview the operation. Then, click “Apply” and “Proceed” to perform it.
Tip: This tool can also format BitLocker drive without password.
Besides formatting, AOMEI Partition Assistant Standard also includes other handy functions like resizing/moving partitions, cloning disks, merging partitions, and converting between NTFS and FAT32 without losing data—features that are invaluable for advanced drive management.
To Sum Up
Reformatting a USB drive is a fundamental skill for any Windows user. We've covered three reliable methods to get the job done. For quick and straightforward jobs, File Explorer is your go-to tool. When you encounter minor errors or need slightly more control, Disk Management is the next best option.
For stubborn drives, advanced features, or simply a more user-friendly experience, a professional tool like AOMEI Partition Assistant Standard is the superior choice for any reformat USB drive Windows task. No matter which method you choose, always remember to back up your data first. With these steps, you can confidently manage, repair, and repurpose your USB drives for any task at hand.

