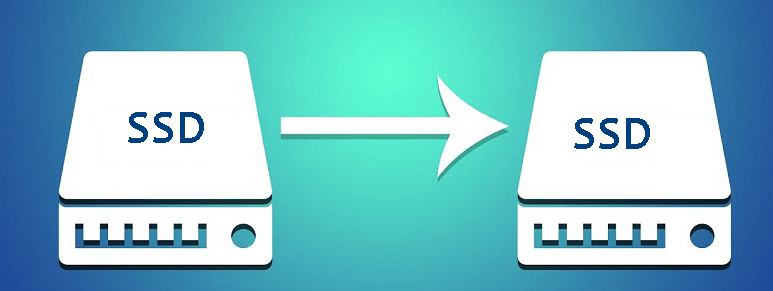
[Ultimate Guide] How to Change Laptop SSD And Boot It Successfully
If your laptop SSD performance is not good enough, please refer to this step-by-step guide to learn about how to change laptop SSD, including SATA SSD, and M.2 SSD.
By AOMEI / Updated on August 1, 2024
Can I change SSD in laptop?
“My laptop has a built-in SSD, but it is years old. Recently I noticed that the space is almost full, so I am going to replace the old SSD with a new one, can I change SSD in laptop? If it is possible, can anyone give me a detailed guide? Thanks in advance!”
No matter it is HDD or SSD, insufficient disk space has always plagued each of us. Fortunately, when you receive a low disk space warning, you can replace the old disk with a larger disk to gain more space. The purpose of this tutorial is to show you how to change laptop SSD step by step.
Tips of buying a right SSD
Before figuring out how to change laptop SSD, you need to choose the right SSD for your laptop. Well-known SSD brands include HP, Samsung, Crucial, WD, SanDisk, Toshiba, Seagate, Kingston, and Maxtor. How to buy an SSD mainly depends on the following factors:
✎ Factor 1. Confirm the supported SSD type
SSD is divided into SATA SSD and PCIe SSD, and their connection methods are different. Before buying an SSD, you need to confirm which ports your motherboard supports. If it is a new computer, it is recommended to directly choose NVMe M.2 SSD with PCIe 3.0 protocol. If the M.2 port is not supported, SATA SSD can be selected. Its compatibility is better than NVMe M.2 SSD, but the read and write speed is not as good as NVMe M.2.

✎ Factor 2. Purpose of using SSD
Currently, the mainstream SSD on the market are 256GB, 512GB, 1T, 2T, and 4T. Generally speaking, the larger the SSD capacity of the same brand and the same model, the higher the price. If you buy an SSD as a game disk, it is recommended to choose at least 1T or more. If it is only used as a system disk or for daily office use, 512G is enough.
How to change laptop SSD step by step
Next, we will show you the detailed steps to change laptop SSD. Since the installation methods of SATA SSD and M.2 SSD are different, the tools that need to be prepared are also different. For SATA SSD, you need to prepare cross screwdriver, anti-static gloves, SATA connection cable, hard drive bracket from 2.5 to 3.5 inches. For M.2 SSD, please prepare cross screwdriver, anti-static gloves.
▶ Part 1. How to install SATA SSD on the laptop
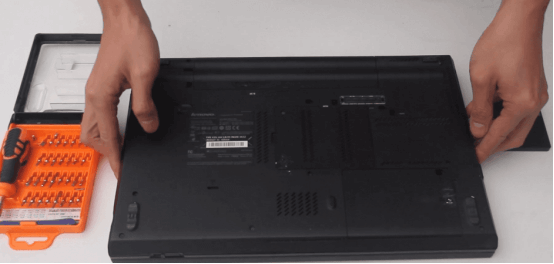
Step 1. Turn over the notebook and use a Phillips screwdriver to remove the back cover from the hard drive area.
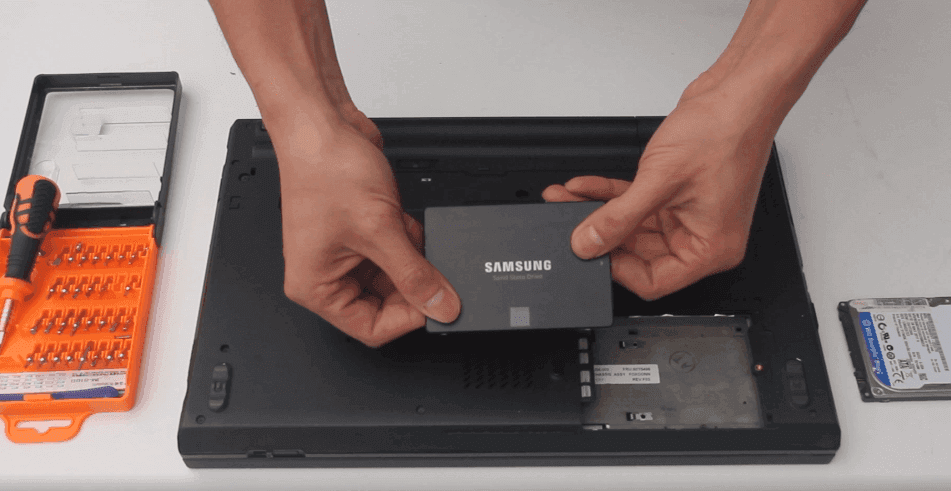
Step 2. Insert the new SATA SSD into the slot, please note that the location of the SSD disk interface should be consistent with the location of the disk interface in the slot.
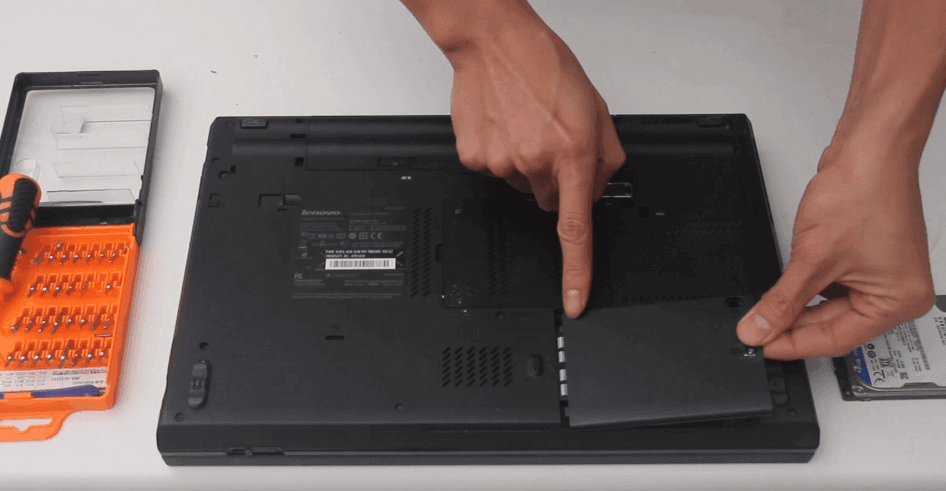
Step 3. Replace the hard drive back cover of the laptop.
▶ Part 2. How to install M.2 SSD in laptop
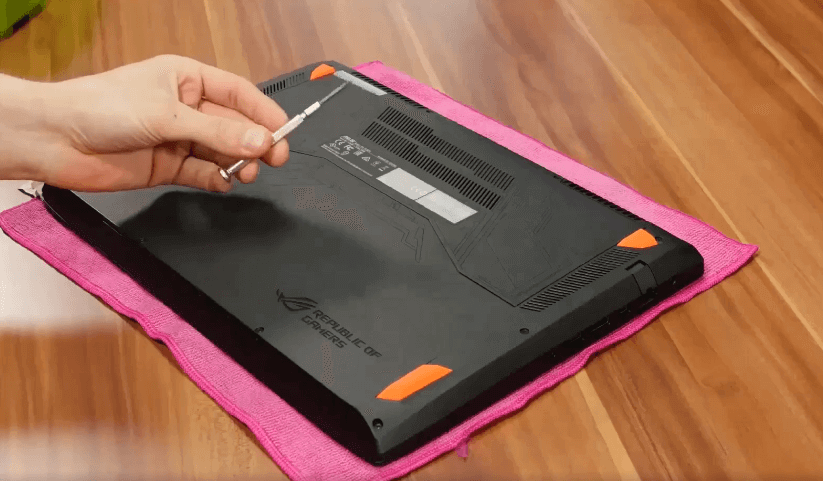
Step 1. Use a screwdriver to remove the laptop back cover.
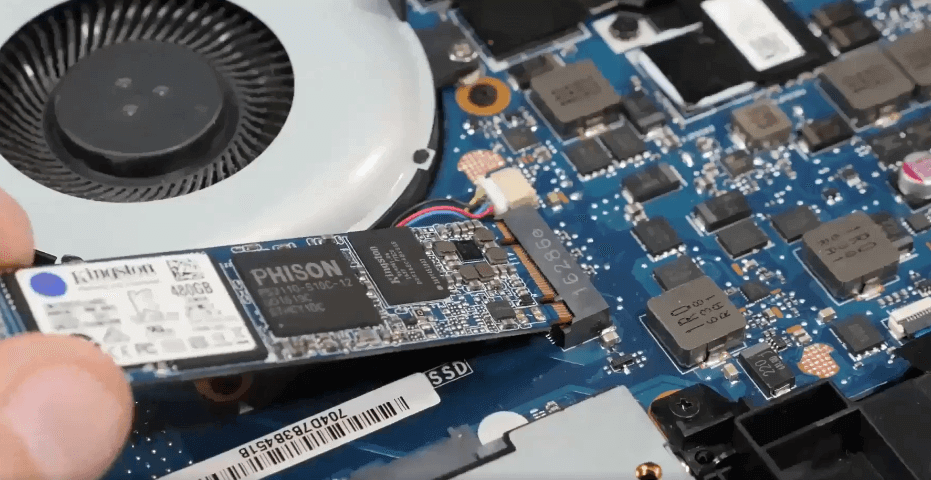
Step 2. Find the position of the M.2 SSD slot, insert the M.2 SSD into the corresponding interface, and make sure the connection is firm.
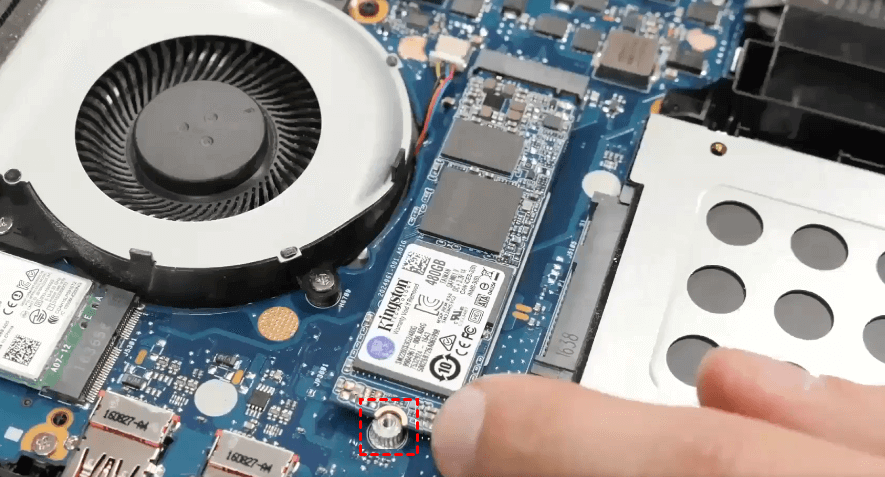
Step 3. Fix the screws, and install the rear cover.
How to install SSD in laptop without reinstalling Windows
After changing laptop SSD, you need to reinstall Windows and personal data, which will take a lot of time and effort. In order to avoid such troubles, we can migrate all data on the source disk to the new SSD, including Windows OS.
To do it, you need a reliable cloning software, and AOMEI Partition Assistant Professional is your answer. This powerful tool is compatible with Windows 11, 10, 8, 7, Vista and XP. It can transfer all data from HDD/SSD to SSD without reinstalling Windows, and the target SSD can be booted from the laptop successfully.
- ★Tip:
- Confirm there is no connection issue between SSD and laptop. Then, You need to initialize the SSD if it is new. And set the partition style(MBR or GPT) to be the same as the source disk.
Step 1. Download and install AOMEI Partition Assistant Professional. Click "Clone" in the main interface, and select "Clone Disk".

Step 2. Choose the HDD disk as the source disk and click "Next".

Step 3. Select the SSD drive as the destination disk, and then click "Next".

Step 4. Then, you can check the source and destination disk in the next window or change to "Sector to Sector clone", and click the "Confirm" button to continue if there is no problem.

Here, you can also click the "Settings" button to adjust the partition size on the destination disk or tick "4k alignment" to improve the reading and writing speed of the SSD.

Step 5. After returning to the main interface, check the pending operation and click "Apply" and "Proceed" to commit the operation.

After cloning, install the SSD into the laptop. Then restart the laptop to enter the BIOS settings, and set SSD as the boot drive.

Conclusion
This is the full guide on how to change laptop SSD. No matter which type of SSD, detailed steps are provided here. In addition, AOMEI Partition Assistant also supports only migrating Windows OS to SSD without reinstalling.
Last but not least, if you are running Windows Server, you can switch to AOMEI Partition Assistant Server, which is designed for Windows Server 2025/2022/2019/2016/2012 users.

