How To Recover Deleted Or Moved Excel Files | Data Recovery Guide
How to recover deleted or moved Excel files? Easy methods are here to help you effectively restore deleted or moved Excel files with ease.
By Irene / Updated on August 7, 2025
Can you recover deleted or moved Excel files?
Microsoft Excel is widely used in many fields for managing and analyzing data. But sometimes, Excel files get lost due to accidental deletion, drive corruption, virus attacks, software problems, or hardware failure.
When this happens, all your work can disappear in seconds. This not only wastes time but can also cause delays at work. No one wants to redo everything from scratch.
That’s why it’s important to know how to recover permanently deleted or unsaved Excel files on a Windows computer. In this guide, we’ll show you simple and effective methods to get your files back.
-
You accidentally dragged and dropped the file into the wrong folder
-
You moved the file to an external drive that was later disconnected or corrupted
-
You renamed the file or saved another file with the same name, replacing the original
-
You moved the file into a cloud folder, but syncing failed or was interrupted
-
Your antivirus or system cleaner mistakenly removed or quarantined the file
-
You moved the file to a folder you no longer have permission to access
The good news is that Microsoft Excel has a built-in AutoSave feature that can help recover unsaved files. You can also use tools like PartitionAssistant Recovery to bring back deleted or lost Excel files easily. Below, we’ll share the steps to recover your files quickly.
How to recover deleted Excel files?
Fix 1. Recover permanently deleted Excel files with a reliable tool
If you can’t find your Excel files using the usual methods, they might be permanently deleted. In that case, using reliable data recovery software can save you time and trouble. A good option to try is PartitionAssistant Recovery. It’s helpful for people who have emptied the Recycle Bin or don’t have a backup. This tool is designed to bring back deleted Excel files and works well in many situations.
Here’s why it’s worth trying:
🔶 Fast and efficient: It quickly scans your PC for lost Excel files. You can preview the files, filter the results, and choose where to save them.
🔶 Works with many devices: It supports all kinds of storage devices like hard drives, USB drives, and memory cards. It also supports different Windows systems, from 7 to Windows 11.
If you’re wondering where the recovered Excel files will show up, just download the tool and follow the steps. It will guide you through everything and help you get your files back with ease.
Losing Excel files can be frustrating, especially when they’re important. But with the right tool, you have a good chance of getting them back.
Step 1. Install and launch PartitionAssistant Recovery. Choose the exact partition or disk where your data lost and click Scan.

Step 2. Then, the recovery tool start to scan and search. lt will execute the “Quickly Scan" first for finding your deleted data fast, and then execute the “Deep Scan" for searching other lost data.

Step 3. Once the scan is completed, all deleted files, Recycle Bin and other missing files will be displayed. Please select the file you would like to recover and then click "Recover".

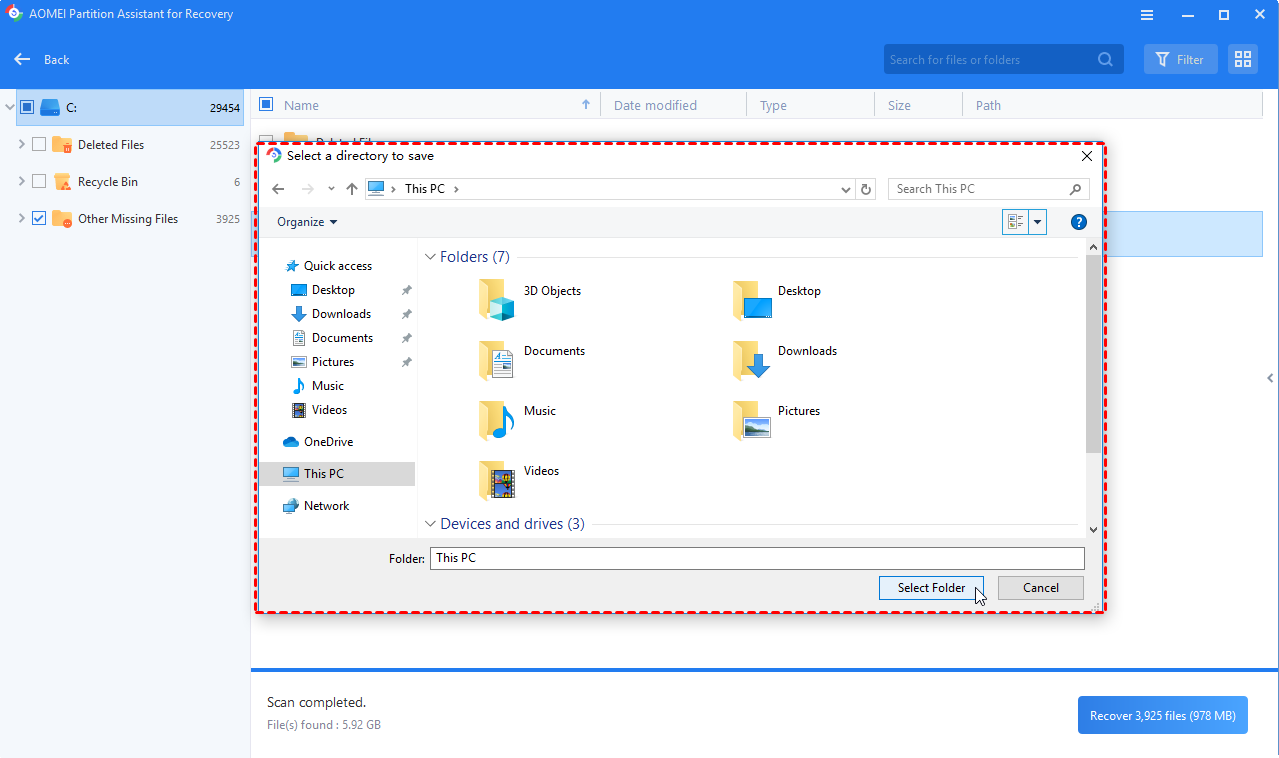
Step 4. Then, select a folder path to save your recovered files.
Step 5. Wait patiently for this process of recovering to end.
Fix 2. See Excel recovered files using AutoRecover
AutoRecover is an inbuilt feature released by Microsoft Office, which can auto-save your Excel documents at intervals. It makes a great difference when your Excel program shuts down suddenly due to a power failure or system crash.
Here are the steps to get the Excel recovery file location using AutoRecover feature.
Step 1. Launch Excel 2010 (or later), extend the "File" tab of the ribbon, and click "Options" from the list.
For Excel 2002, click the "Office" button and choose "Excel Options".
Step 2. Go to the "Save" section on the left panel and you can see the path next to "AutoRecover file location". That's where recovered Excel files are saved.

Fix 3. Find the deleted/lost/damaged Excel files from File History
File History, a useful tool to backup files in the Documents, Pictures, Video, Music, Desktop folders, and OneDrive offline data kept on the computer, is included in the Windows 8 running system. You can use it, for instance, to restore directories containing mistakenly deleted files. Where does Excel save recovered files? If you have backups using Windows tools, at this stage you can provide the Excel recovery file location depending on requirements. Consider File History for an example. Using this approach, activating File History or System Restore Point becomes necessary.
Step 1. Open “Control Panel” by entering it in the search bar and click the “System and Security” option.

Step 2. Under the File History tab, please select the “Restore your files with File History” option.
Step 3. Click the “Restore personal files” button.
Step 4. Click “Restore” to save your needed Excel files in the original location.
To save them in the designated saved path, also right-click "Restore > "Restore to". With File History enabled, you can restore past versions of Excel files should you wish to access the Excel documents during the editing process.
Conclusion
How to recover deleted or moved Excel files? Losing or accidentally deleting an Excel file can be stressful, especially when it contains important work. The good news is, there are several ways to get your files back, whether they were unsaved, deleted, or moved. Built-in features like AutoRecover and File History can help in many cases. And if those don’t work, a professional recovery tool like PartitionAssistant Recovery can make the process easier and more effective. Try these methods step by step, and you’ll have a good chance of recovering your lost Excel files.

