No Data to Recover Detected? Fix it Now!
No data to recover detected? I will provide you with seven practical solutions to resolve this issue on this page. And you will get a full guide on how to perform a hard drive data recovery using professional file recovery tool.
By Hedy / Updated on March 12, 2025
Why is my hard drive no longer detected?
External hard drives have become an essential tool for storing and transferring large files. However, some users reported that they had a working external hard drive that suddenly stopped showing any data when connected to their computer.
If you're experiencing issues with your drive not being detected, there are a few possible reasons to consider.
Poor connection: Make sure your external hard drive is receiving sufficient power and that the USB ports and cables are connected properly.
Hidden devices: Windows may automatically hide certain files, folders, or drives, making them inaccessible via File Explorer.
Missing drive letters: Both desktop and laptop computers require assigned drive letters to recognize and access external hard drives.
Outdated/corrupted device drivers: Device drivers facilitate communication between your hard drives and PCs. If they are outdated or corrupted, it can disrupt this communication.
Corrupted file systems: Damaged sectors or errors on your external hard drives can lead to corruption, making it impossible to open files.
Incompatible file systems with Windows OS: If the file system of your external hard drive doesn't work with your Windows PC, it won't be detected.
Viruses or malware attacks: Viruses can delete files or format your entire drive, causing it to become undetectable.
How to recover data from undetected hard disks & external hard drives?
Even if you have identified the reason behind the absence of detected recoverable data, you may still be curious about the methods for retrieving data from undetected hard disks. To explore the available approaches, please continue scrolling down.
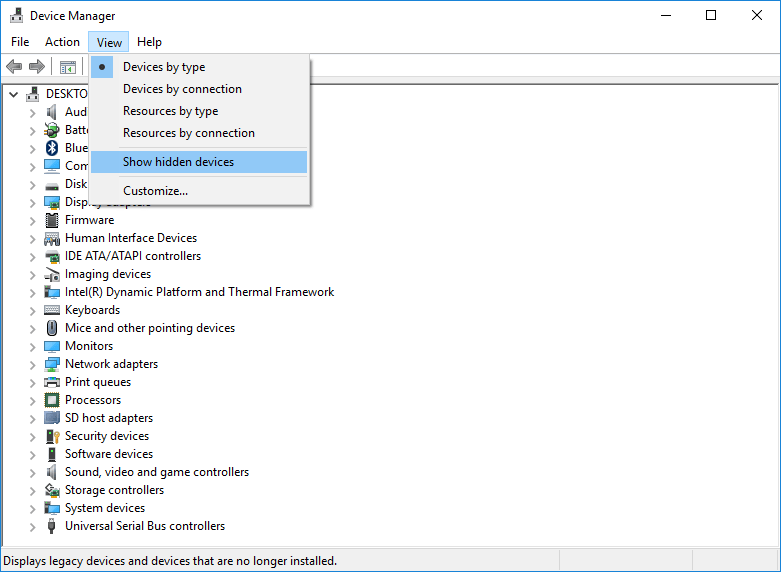
Solution 1. Show hidden devices via Device Manager
On certain occasions, your Windows operating system might have successfully detected the external hard drive that you have connected. However, if it doesn’t show up, you can utilize the Device Manager to reveal hidden devices.
To proceed with this method, it is important to ensure a stable connection between your external hard drive and your computer.
Step 1. Begin by connecting your external hard drive to your computer. Then, access the Device Manager by typing its name in the search box.
Step 2. Once you are within the main interface of Device Manager, click on "View" and select "Show hidden devices".
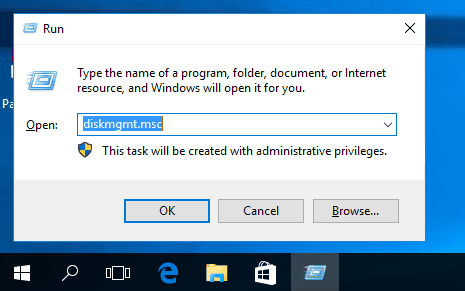
Solution 2. Assign a drive letter to make the drive recognized by Windows OS
As previously mentioned, the Windows operating system may hinder your access to unlettered drives due to the significance of drive letters as volume identifiers.
In such cases, resorting to Disk Management becomes crucial for recovering hidden partitions on computers running Windows 7, 8, 10, or 11. This system utility is specifically designed to facilitate advanced storage tasks and can assist you in resolving the issue of undetected data for recovery.
If you find yourself in a situation where no data to recover detected, please refer to the following steps to see how to recover files from external hard drive not detected effectively:
Step 1. Connect the external hard drive to your PC. Press the key combination "Win + R" to open the Run box. Type "diskmgmt.msc" in the provided field and either press "OK" or hit "Enter" to launch the Disk Management utility.
Step 2. Right-click on the connected external hard drive and select the "Change Drive Letter and Paths" option.
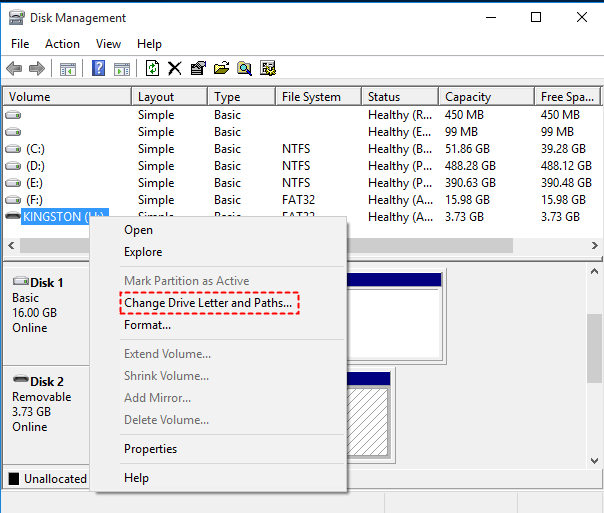
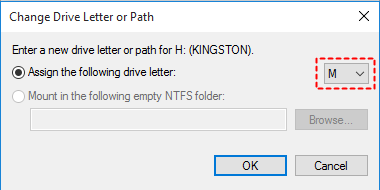
Step 3. Within the ensuing window, click on "Add" to assign a new drive letter to the unlettered external hard drive.
Step 4. Opt for the "Assign the following drive letter" option. It is advisable to choose a new drive letter that is distinct from all existing drive letters to prevent conflicts.
Solution 3. Enable the USB Root Hub
If you have never activated the USB Root Hub on your Windows computer, it is likely that the connected external hard drive will not be recognized. In order to recover files from an external hard drive that is not being detected, please follow the instructions below:
Step 1. Begin by connecting the external hard drive to your computer. Then, access the Device Manager by entering its name in the search bar.
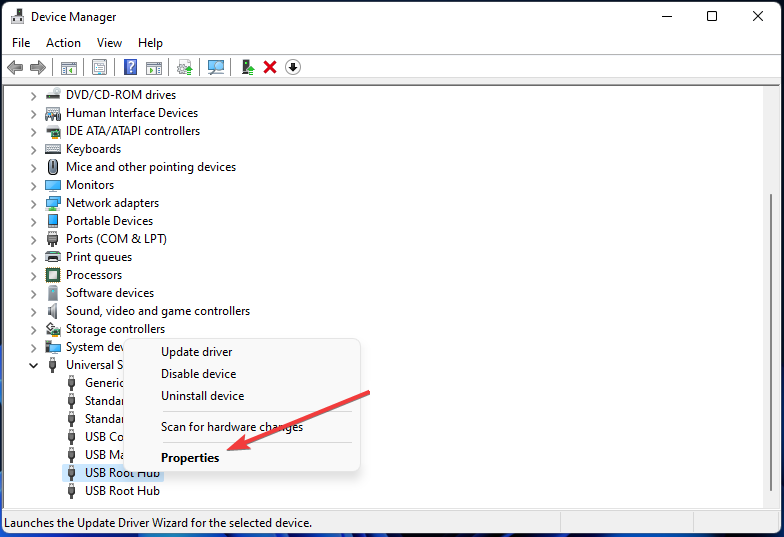
Step 2. Expand the category labeled "Universal Serial Bus Controllers" and locate the USB Root Hub that corresponds to your desired device. Right-click on the USB Root Hub and select the "Properties" option.
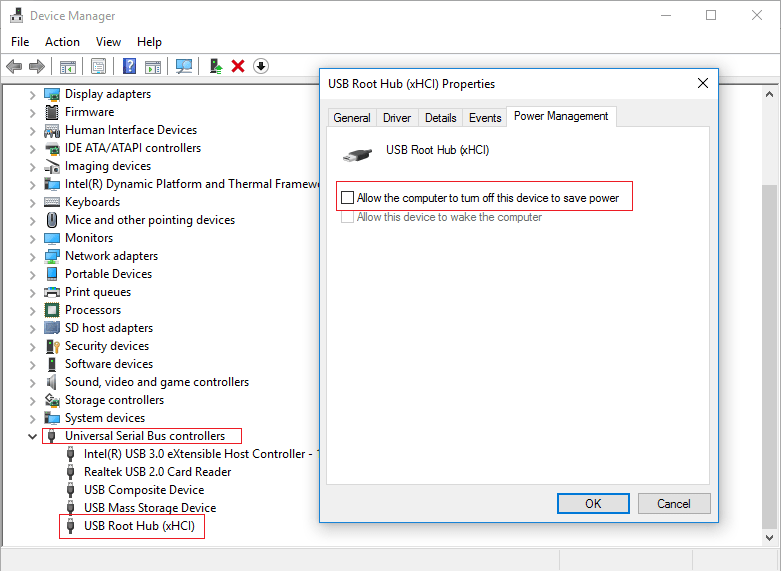
Step 3. In the Properties window, navigate to the "Power Management" tab. Uncheck the box that says "Allow the computer to turn off this device to save power" and then click "OK" to save the changes.
Solution 4. Update device driver via Device Manager
As previously mentioned, an outdated device driver can be a factor contributing to the issue of no data being detected for recovery. To address this concern, please follow the steps below to complete hard drive data recovery:
Step 1. Begin by connecting the external hard drive to your computer. Then, access the Device Manager by entering its name in the search bar.
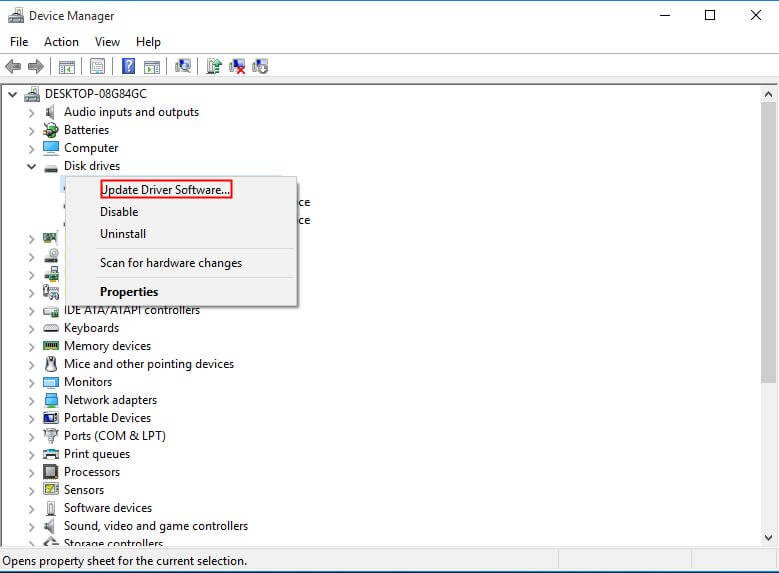
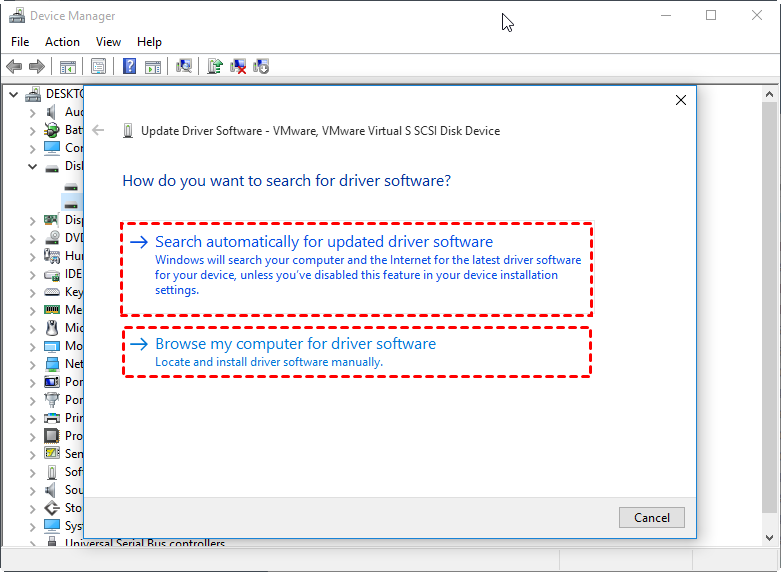
Step 2. Locate the category labeled "Disk drives" and right-click on your connected external hard drive. From the context menu, choose the "Update driver" option.
Step 3. In the subsequent window, select the "Search automatically for drivers" option.
Solution 5. Format the inaccessible external hard drive
In certain situations, if the file system of the connected external hard drive is not supported by your Windows PC, it is understandable that your computer may fail to detect it. In such cases, AOMEI Partition Assistant Standard can prove to be a valuable solution, allowing you to format and modify the file systems of your desired partition.
To address no data to recover detected, please follow the steps outlined below:
Step 1. Begin by downloading and installing the free demo version of AOMEI Partition Assistant Standard on your Windows PC. Then, connect the external hard drive to your computer.
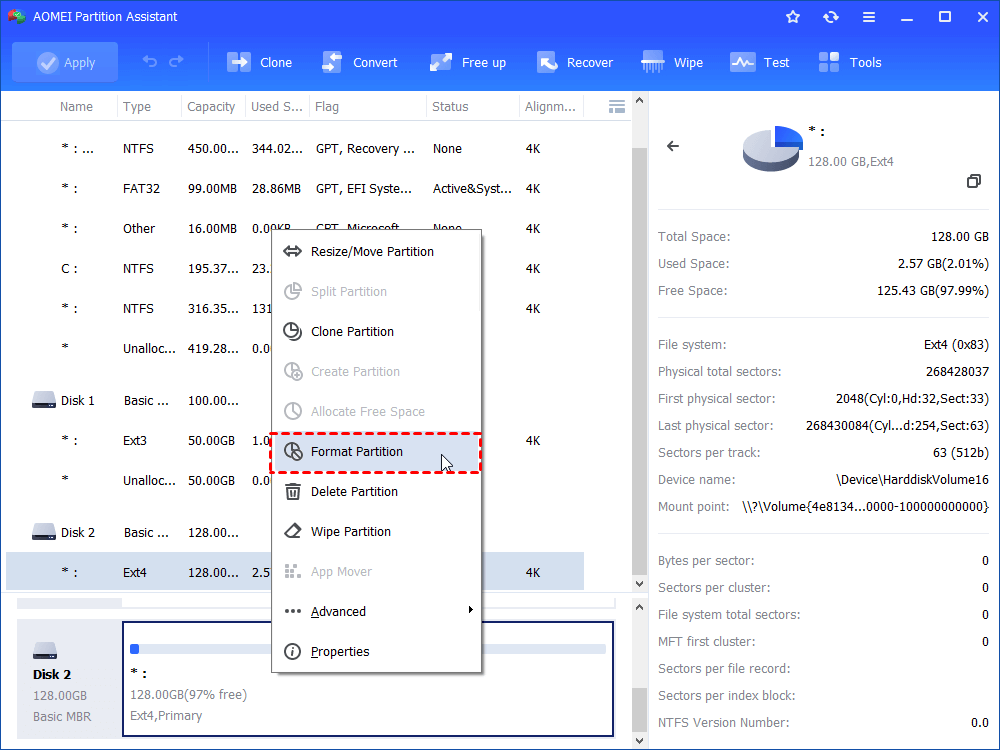
Step 2. Once you have launched the software and can view all the partitions, right-click on the connected external hard drive. From the context menu, select the "Format Partition" option.
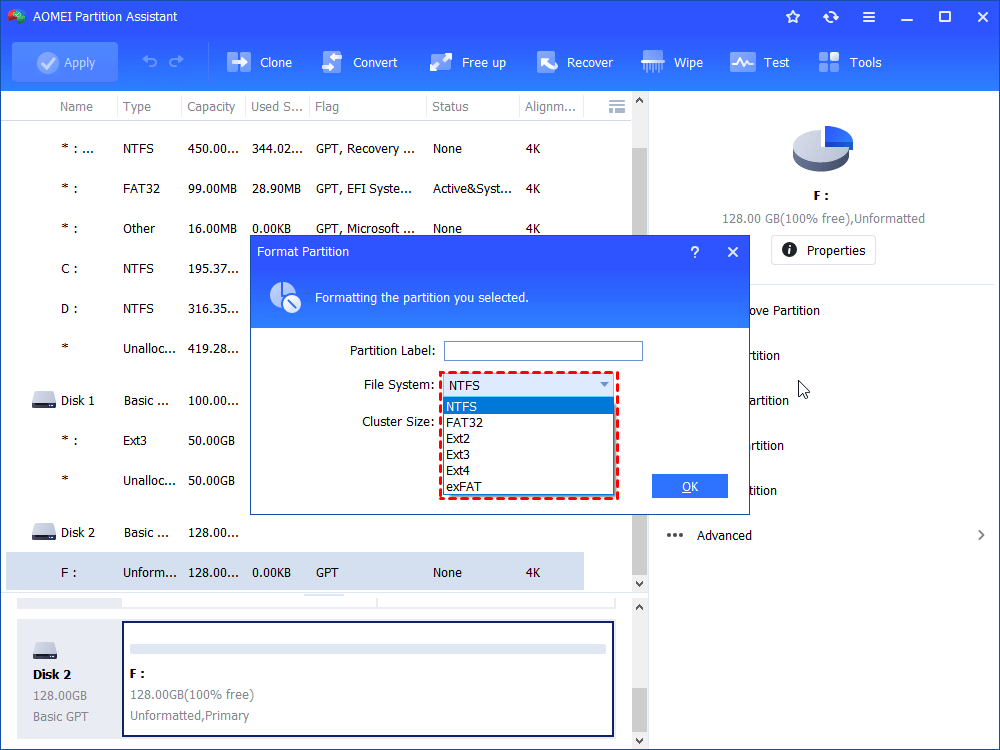
Step 3. A window will appear where you can choose the desired file system for formatting. Select the appropriate file system and click the "OK" > "Apply" to wait for the process to complete.
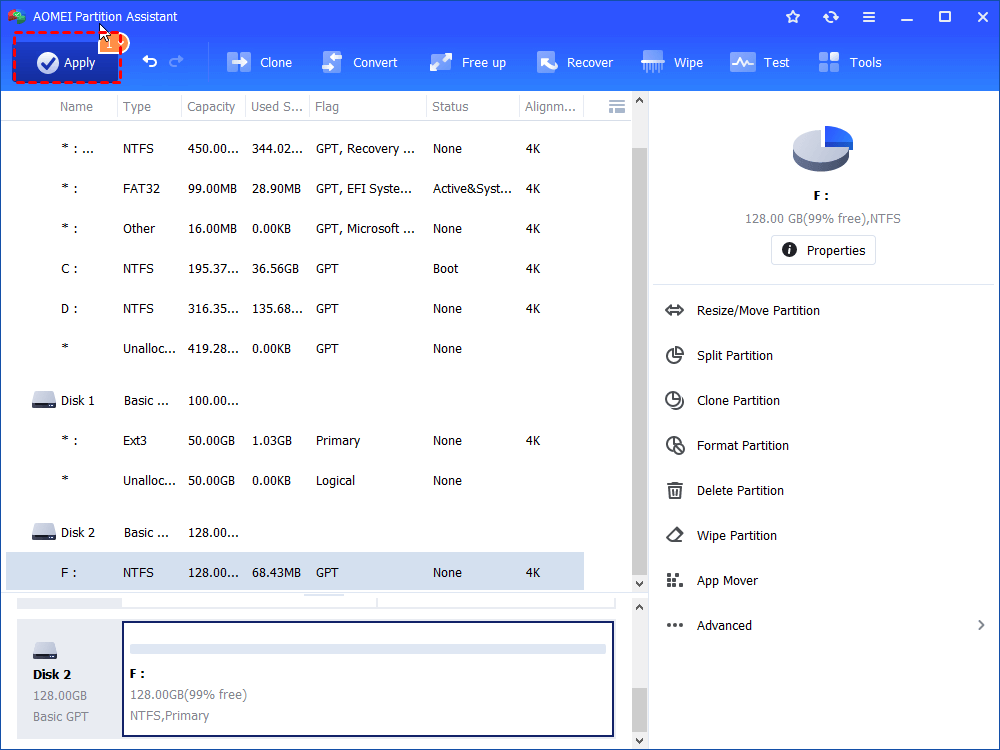
It is important to note that after making any changes, such as formatting or altering the file system, you must remember to click the "Apply" button and patiently wait for the process to complete.
Solution 6. Run CHKDSK to fix corrupted file systems of undetected drives
When the file system of your drives or disks becomes corrupted, it can result in the absence of detected data for recovery. In such cases, one effective method for data recovery from undetected hard disks is by utilizing the CHKDSK utility.
CHKDSK is specifically designed to examine a volume's file system and file system metadata for logical and physical errors. It can also fix corrupt files in the process.
To correct volume errors using CHKDSK, you can employ specific parameters such as /f, /r, /x, or /b. The following steps outline how to utilize CHKDSK to resolve the no data to recover detected effectively:
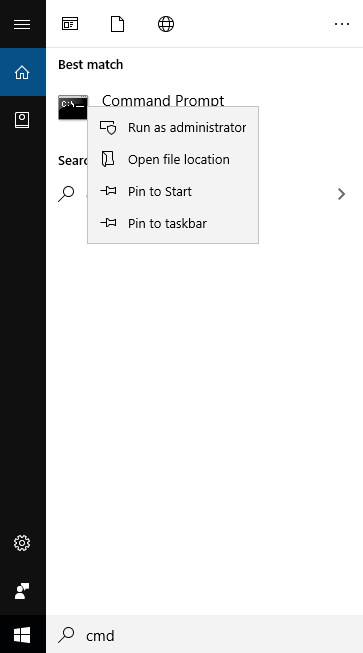
Step 1. Begin by typing "cmd" in the search bar and then click on "Run as administrator" to open the command prompt window.
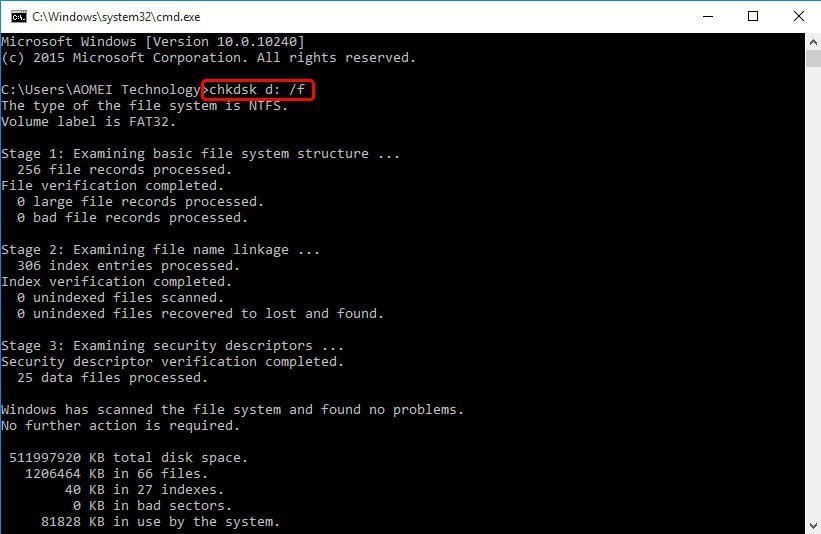
Step 2. Type "chkdsk" in the command prompt window.
Step 3. Depending on your specific requirements, you can use either "chkdsk d: /f" or "chkdsk d: /r" where "d:" represents the drive letter of the affected disk.
Solution 7. Full scan viruses & threats on the undetected drives
If no data is being detected for recovery, it is possible that your PC has been infected with viruses or malware. These malicious entities can cause files to be automatically deleted from your drives. To address this issue, it is recommended that you perform a full scan to eliminate any harmful threats from your computer.
Please follow the steps below to perform a full scan:
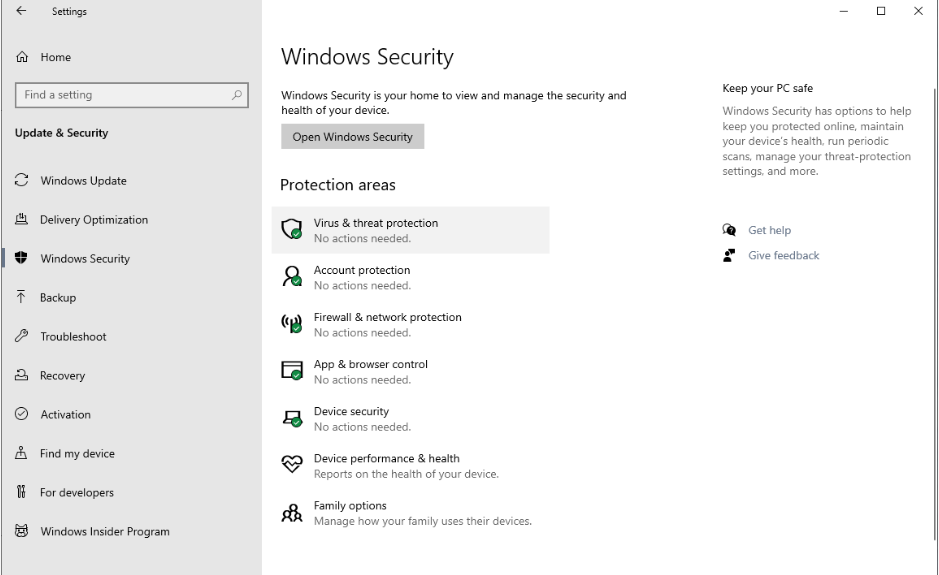
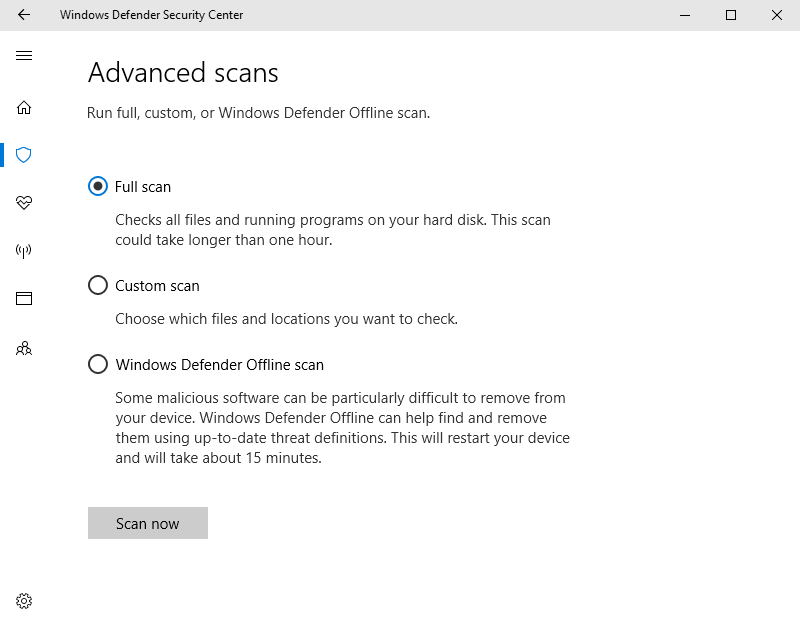
Step 1. Press the "Win + I" buttons to open Windows Settings. Then, navigate to "Update & Security" > "Windows Security".
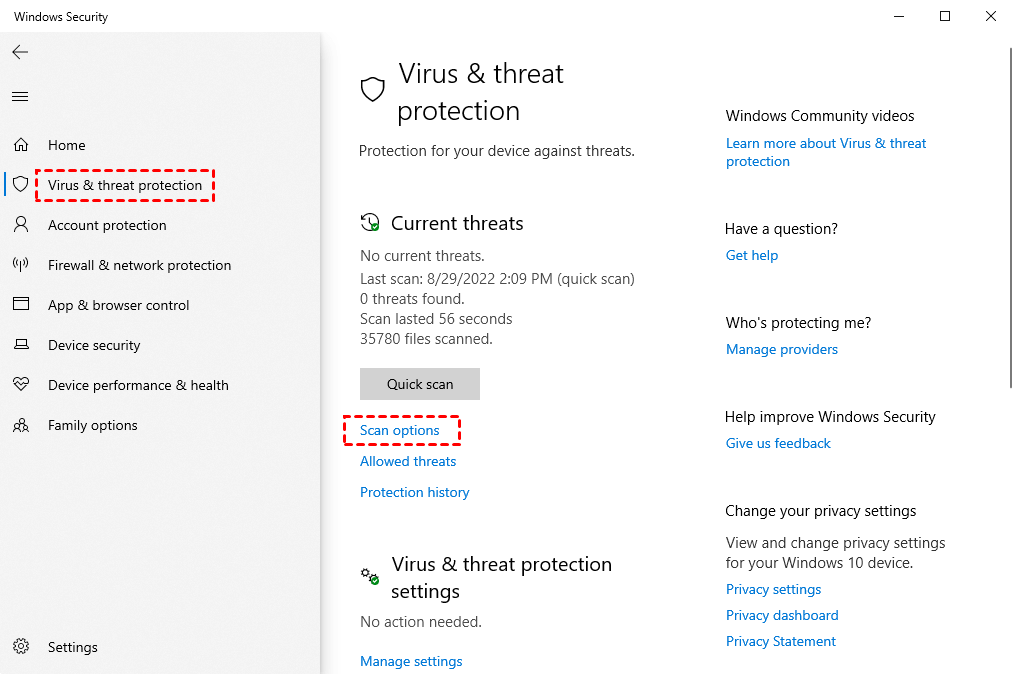
Step 2. Click on the "Scan options" button under the "Virus & threat protection" section.
Step 3. Choose the "Full scan" option and click "Scan now" to commence the scanning process. Kindly be patient while the scan is in progress.
Bonus reading: How to perform hard drive data recovery with ease?
In cases where data loss has occurred and users are in need of recovering files from external hard drives on Windows 10 computers, especially for those who have not taken precautions such as creating backups, utilizing reliable data recovery software like PartitionAssistant Recovery proves to be an effective solution.
PartitionAssistant Recovery offers powerful features designed to recover a wide range of file types, including deleted and lost MS Office files, folders, compressed files, photos, videos, audio, and more from various storage devices such as HDDs, USB drives, and SD cards.
Highlighted features of PartitionAssistant Recovery include:
Powerful features: PartitionAssistant Recovery is equipped to recover a wide variety of file types from different storage devices, providing a comprehensive solution for data recovery.
Easy-to-find: During the Quick Scan and Deep Scan processes, you can conveniently search for your desired folders using parameters such as Path, Filename, Date, and more.
Retention of original attributes: AOMEI software ensures that the recovered files retain their original Path, Filename, and Format, allowing for easy identification and organization.
Excellent compatibility: It supports multiple file systems including NTFS, FAT32, exFAT, and ReFS, ensuring compatibility with various storage devices.
To recover data using PartitionAssistant Recovery, follow these steps:
Step 1. Install and launch PartitionAssistant Recovery. Choose the exact partition or disk where your data lost and click Scan.

Step 2. Then, the recovery tool start to scan and search. lt will execute the “Quickly Scan" first for finding your deleted data fast, and then execute the “Deep Scan" for searching other lost data.

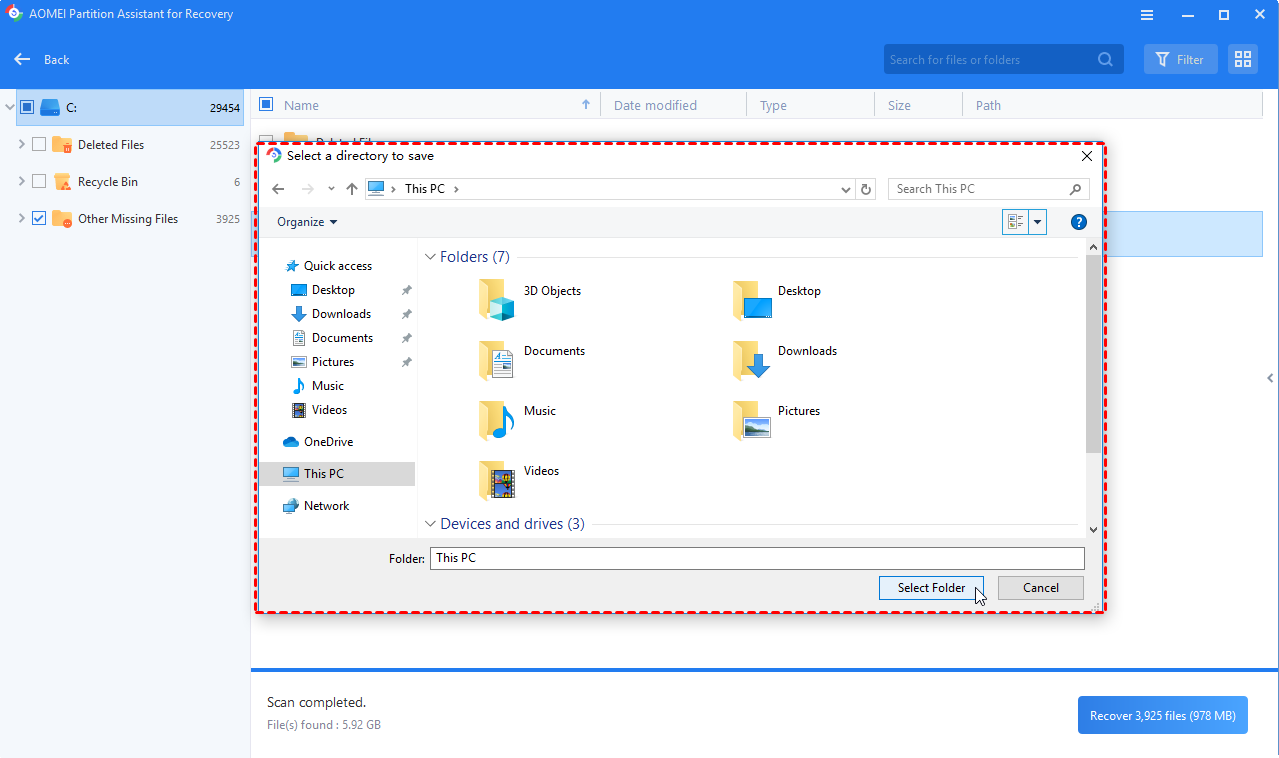
Step 3. Once the scan is completed, all deleted files, recycle bins and other missing files will be displayed. Please select the file you would like to recover and then click "Recover".

Step 4. Then, select a folder path to save your recovered files.
Step 5. Wait patiently for this process of recovering ends.
Conclusion
No data to recover detected? This article has covered the most possible factors and corresponding fixes. In case files are still missing from your external hard drive even after running the scan, two primary actions can be taken: restoring files from existing backups or utilizing the PartitionAssistant Recovery tool for recovery.

