2 Ways: Convert to Dynamic Disk Without Data Loss
To convert basic disk to dynamic disk, you can use Disk Management and AOMEI Partition Assistant Standard . Both of them can help convert to dynamic disk without losing data.
By PublicCherry / Updated on May 12, 2023
About dynamic disk
Dynamic disks started to introduce from Windows 2000 onwards, it can offer greater flexibility for Windows Servers and optimize disk I/O performance. On a dynamic disk, you can create volumes that span multiple disks like spanned or striped volumes and create fault-tolerant volumes such as mirrored and RAID-5 volumes. It is more flexible than the basic disk. So some users want to convert basic disk to dynamic disk.
2 Methods to convert to dynamic disk without losing data
To convert a basic disk to dynamic disk, you can make use of Disk Management and AOMEI Partition Assistant Professional.
1. Convert to dynamic disk via Disk Management
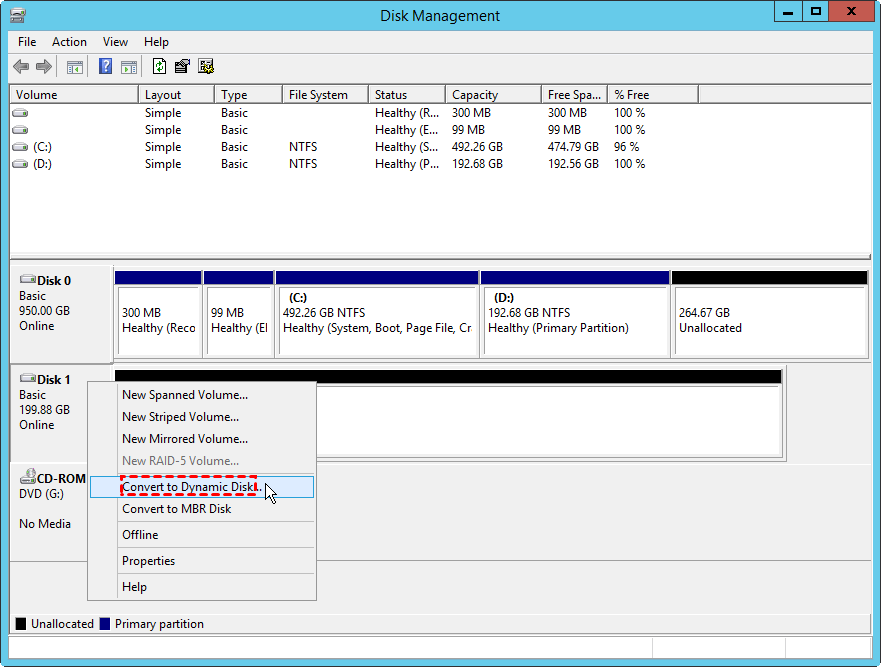
First of all, press Win+R at the same time to open “Run” dialogue. Type in “diskmgmt.msc” and hit on "Enter" to launch Disk Management. Right-click on the target basic disk and choose “Convert to Dynamic Disk”.
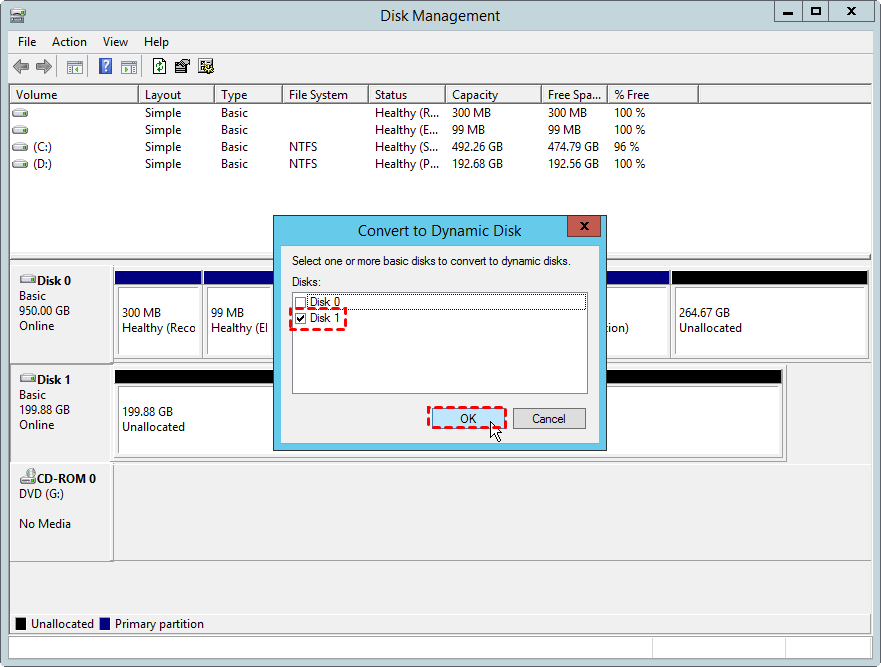
In the pop-out window, select the target disk and click on “OK” to confirm this operation and wait for the process to be done. This basic to dynamic disk conversion won’t require you to delete all partitions on the target disk, but it is necessary to remove all volumes when you plan to convert a dynamic disk back to a basic disk someday.
2. Convert to dynamic disk via professional dynamic disk manager
Apart from using Disk Management, you can also turn to AOMEI Partition Assistant Server. It has a professional dynamic disk manager, which can help convert a basic disk to a dynamic disk without losing data in all editions of Windows Server and Windows 10, 8, 7.
Step 1. Open AOMEI Partition Assistant Server. Click the target disk and select the “Dynamic Disk Manager” on the right pane.
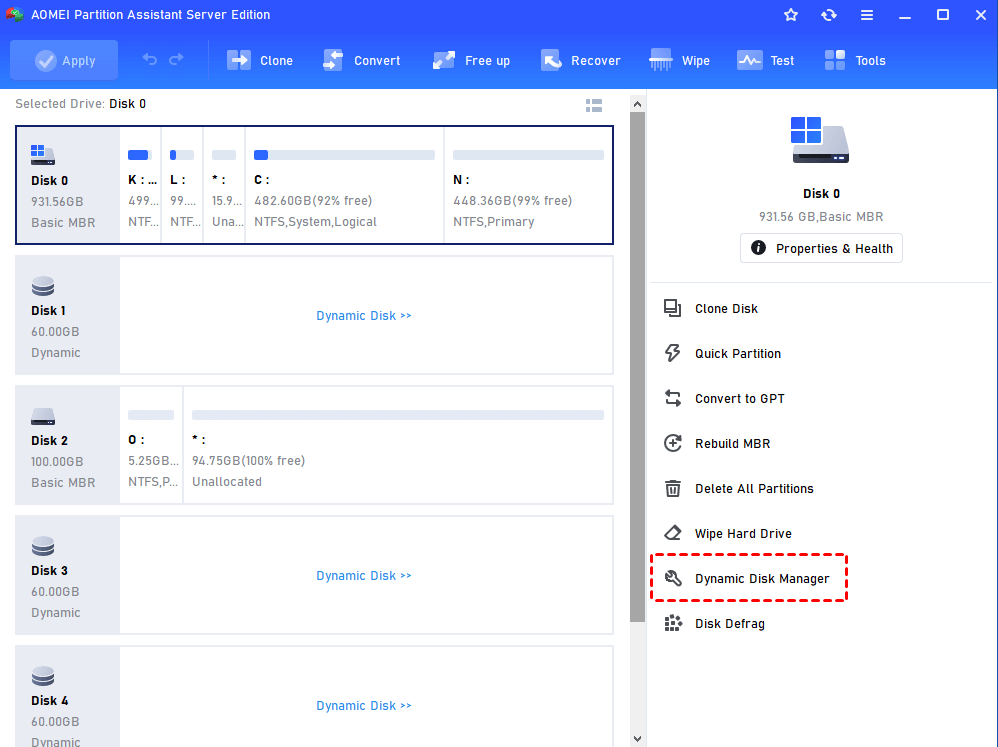
Step 2. In the main interface of AOMEI Dynamic Disk Manager. Select the basic disk and right click, choose “Convert to Dynamic Disk”.

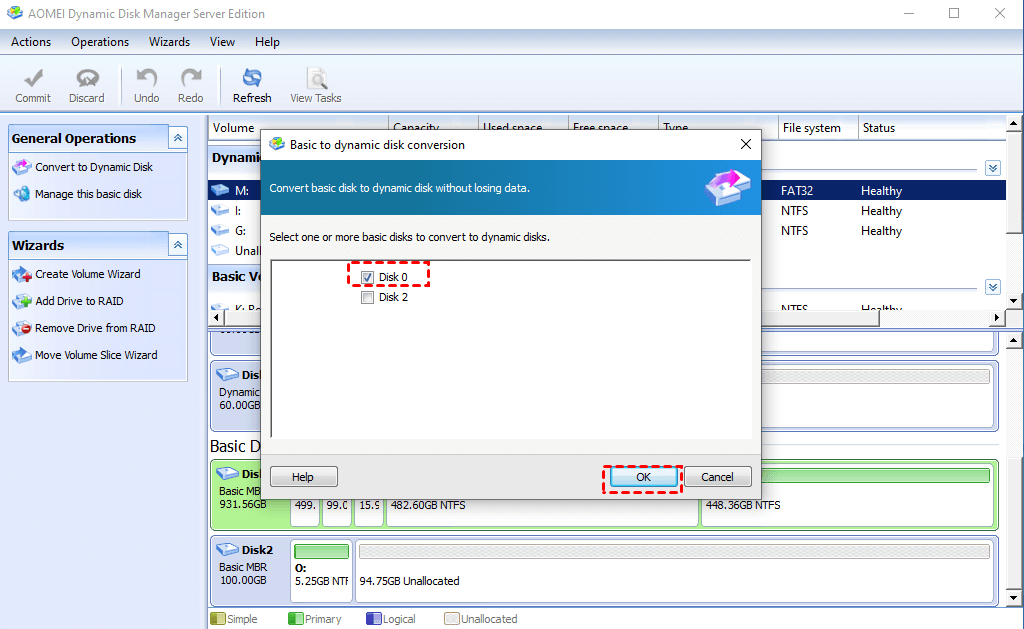
Step 3. Then, in the new pop-up window, tick the basic disk you want to convert and then click “OK:
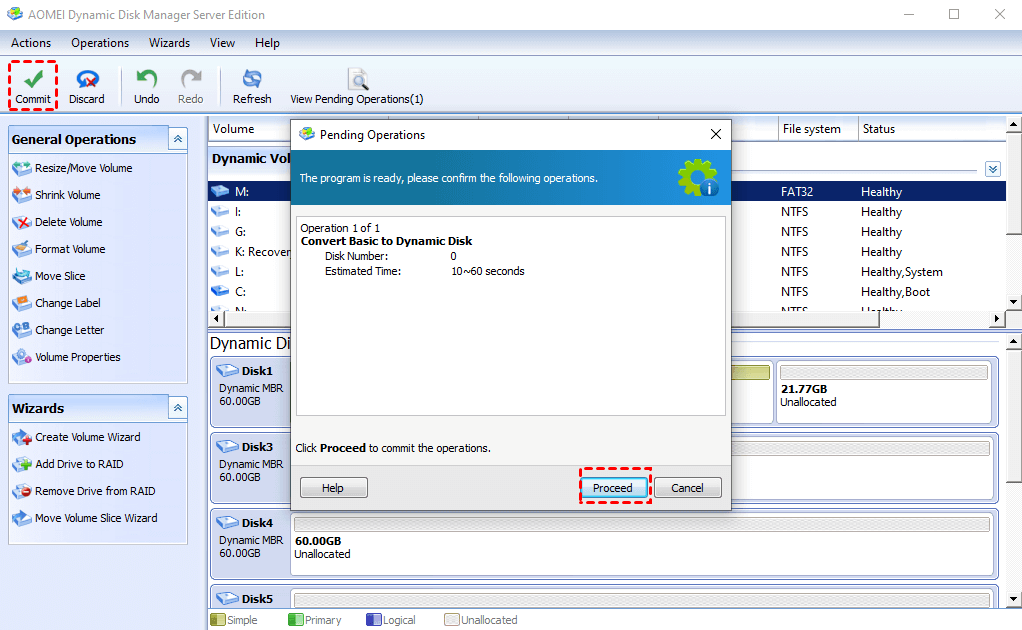
Step 4. Before applying the changes, you can choose “View Pending Operations” firstly and then click “Commit”.
After rebooting, the basic disk has been changed into dynamic disk successfully. Most importantly, it is also able to convert dynamic disk to basic disk without deleting partitions, a quite big advantage over Disk Management.