How to Extend Volume with Disk Management in Windows?
Disk Management is the tool often used to extend volume by Windows 10/8/7 users. But What should you do when that option turns greyed out? Find the solution here.
By AOMEI / Updated on May 12, 2023
Windows Disk Management
Disk Management is a built-in utility in Windows system which has appeared since Windows XP as a replacement for the fdisk command. It is used to manage hard disks installed on the computer as well as their associated partitions. You can initialize disks, create volumes, etc through Disk Management, and since Windows 7, "Extend Volume" and "Shrink Volume" have been added to this tool.
Use Disk Management to extend volume
As time goes by, there may be less and less free space on your hard disk because of the increment of data storage, especially for C drive. While the low capacity of C drive can lead to slower running speed or even system crash. So what should you do to solve such kind of problem? Apart from cleaning your computer, actually extending volume or said partition is also an ideal method. But how to extend volume Disk Management?
Please pay attention that you can only extend a volume with the free or unallocated space adjacent to it in Disk Management and the unallocated space must locate behind that volume! For example,
▪ Open Disk Management.
▪ See there’s unallocated space between C and D drive.
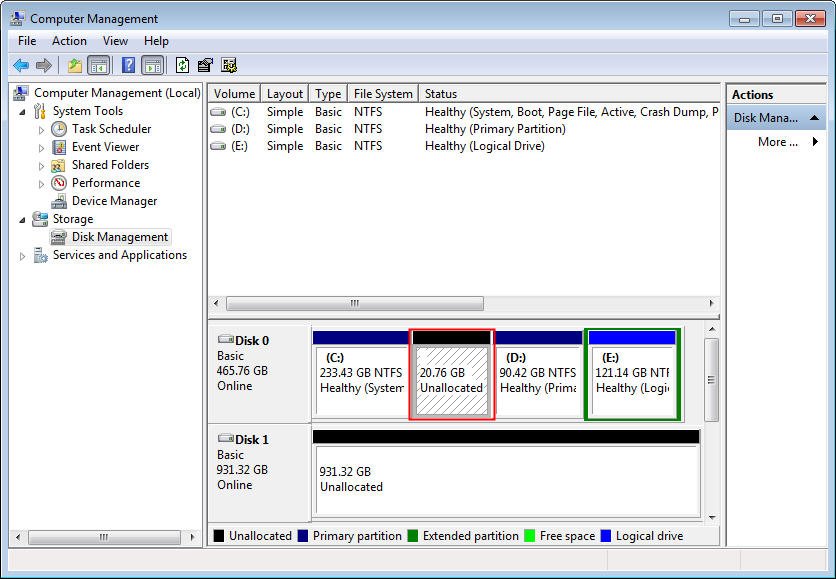
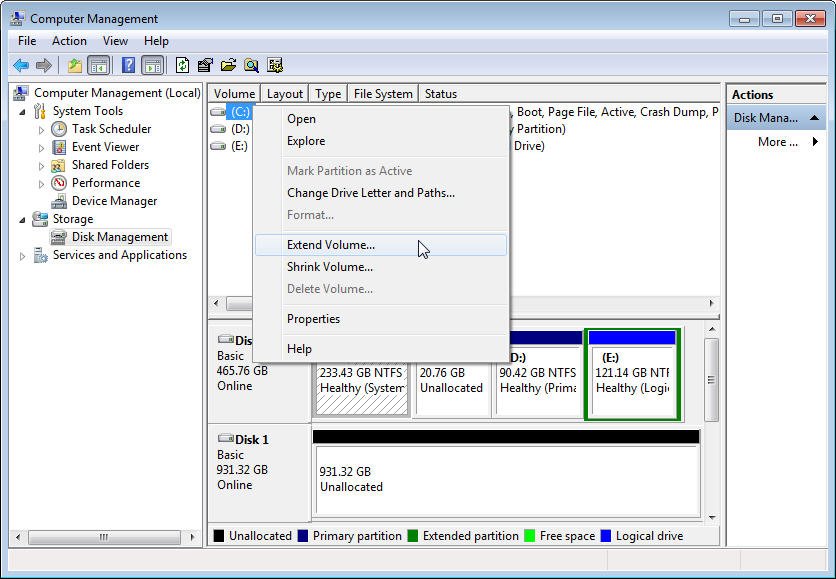
▪ Right-click C drive. Select Extend Volume then just follow the wizard to execute.
But when you right-click D drive in the same case, you will find this option is greyed out.
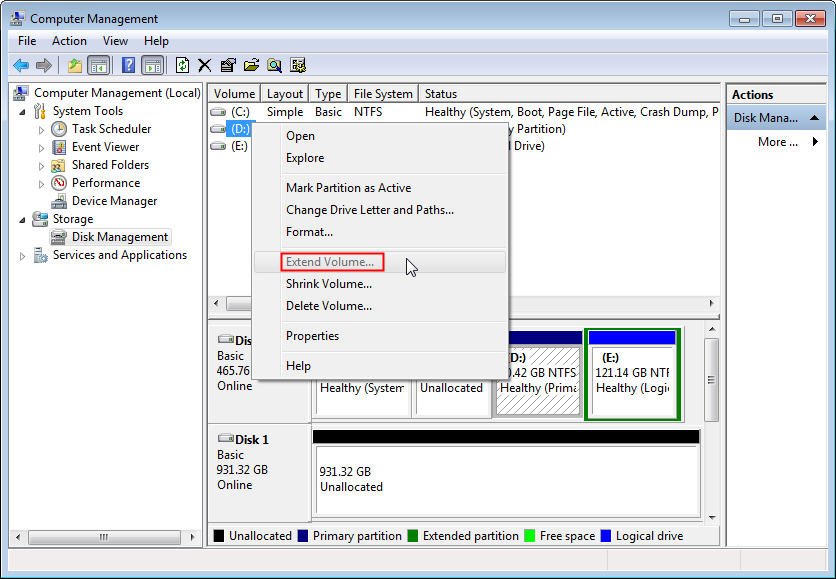
Great limitations exist in Disk Management! What if there’s no unallocated space? Some people consider shrinking another volume. The result is that "Shrink Volume" only makes the unallocated space locate behind the volume you shrink. Besides, you are not able to shrink a volume beyond the point where any unmovable files are located. So a third-party freeware is recommended.
Extend volume with AOMEI Partition Assistant
AOMEI Partition Assistant Standard is a free disk management software that comes with a lot of powerful functions that enable you to control hard disks and partitions easily. It supports Windows 7/8/10/XP/Vista. With AOMEI, you don’t have to worry anymore when you meet the problems mentioned above. The following steps will show you how to extend a volume easily.
Step 1. Install and launch AOMEI Partition Assistant. You may get some free space via “Resize Partition” first if there’s no unallocated space.
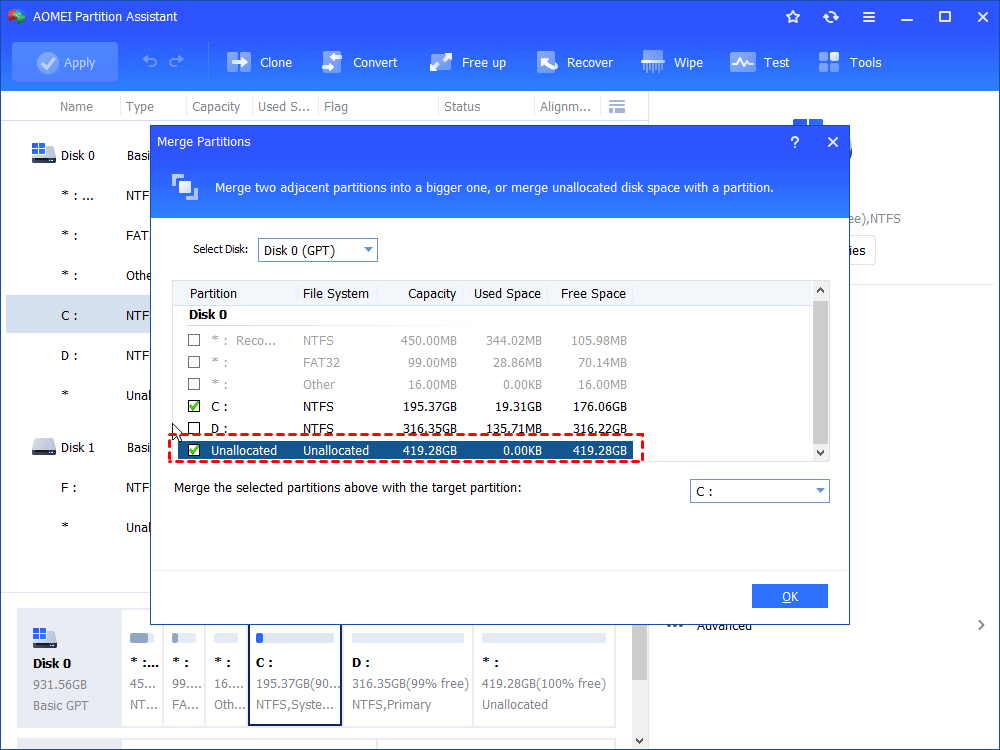
Step 2. In the main interface, click the target volume. In the right navigation, select “Advanced” and then press the “Merge Partitions” button.
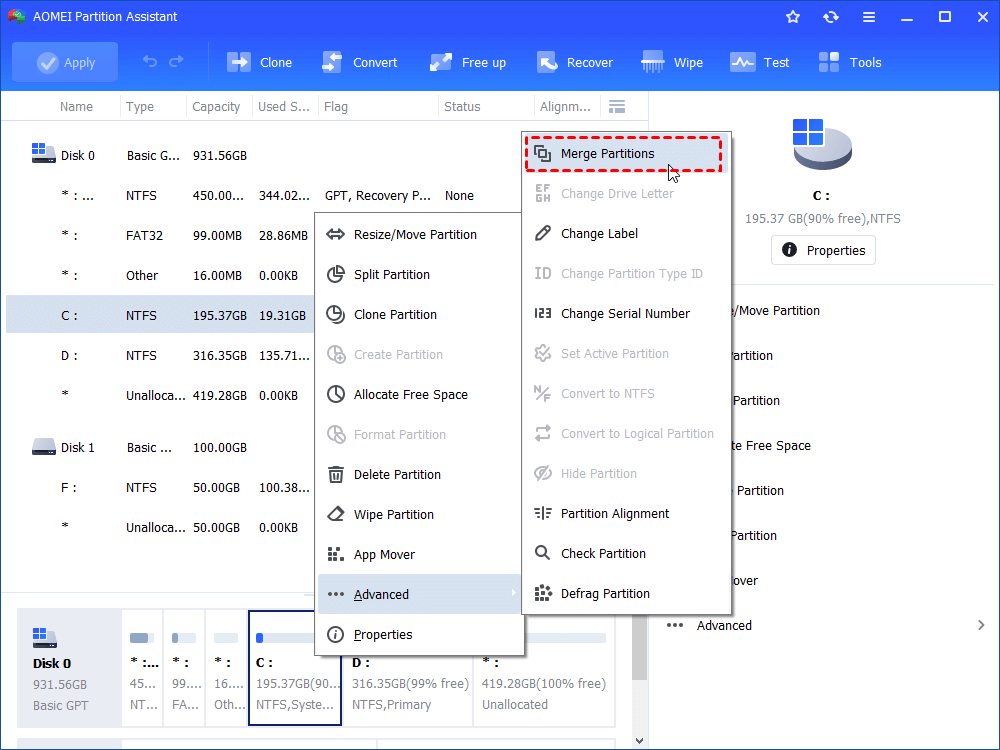
Step 3. Tick unallocated space and click OK.
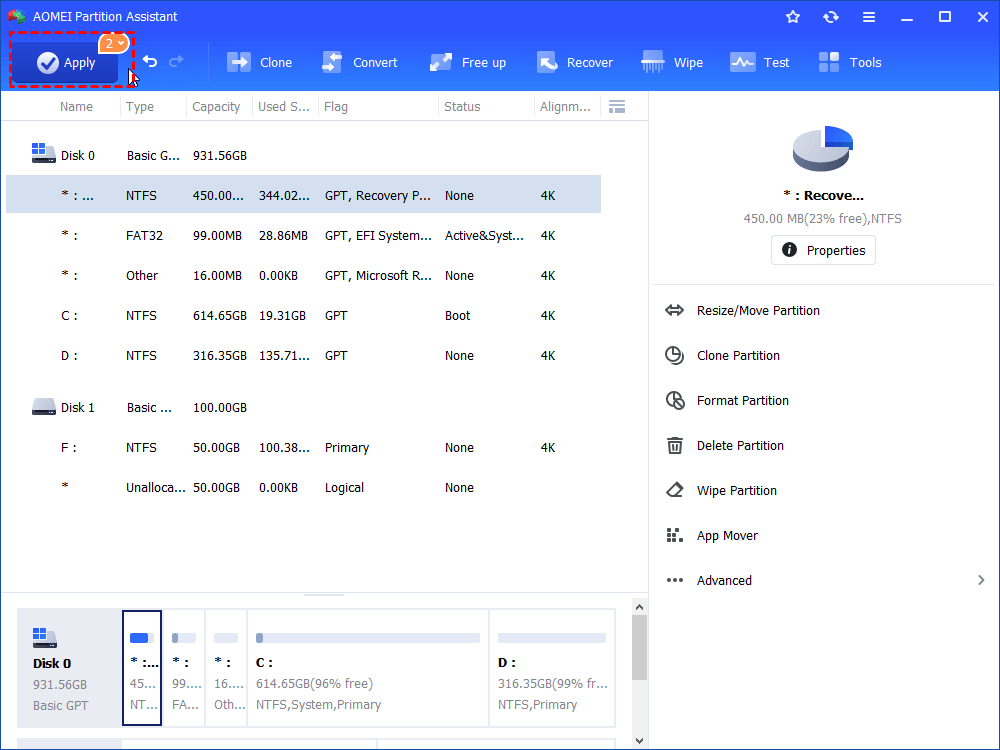
Step 4: Click Apply to operate.
Compared with employing Disk Management to extend volume, hiring AOMEI Partition Assistant Standard can directly extend any volume with multiple unallocated space at one time with AOMEI Partition Assistant Standard as long as they are on the same disk. What’s more, there won’t be any data loss during the process.

