Shrink Volume with Disk Management in Windows 11, 10, 8, 7
Some people may face the problem of shrinking volume with Disk Management. This article will tell you details of why and how to shrink volume.
By AOMEI / Updated on May 12, 2023
What does it mean to shrink volume?
Shrinking volume is actually shrinks the existing volume on the disk. Shrinking volumes is generally based on these two reasons:
☞ After shrinking volume, users can create new volumes to store their important data or information, respectively. Users can also use the newly created volume to keep backup system files and use multiple operating systems.
☞ The user can extend the size of the adjacent volume by shrinking the volume.
For example, if you buy a new PC, but its system disk has only one partition (simple volume). At this time, you can obtain free space by shrinking the volume, and then create a new volume to store other data. Avoid other data and operating system on one partition. Or, you have two adjacent volumes of C and D on one of your disks, the allocable space of partition C is full, but D has a lot of left, then you can extend the space of C by shrinking D.
How to use Disk Management to shrink volume
Disk Management (DM) is a Windows built-in program that can help you solve problems such as formatting partitions, deleting partitions, and changing drive letters. If you want to shrink the volume, please refer to the following steps:
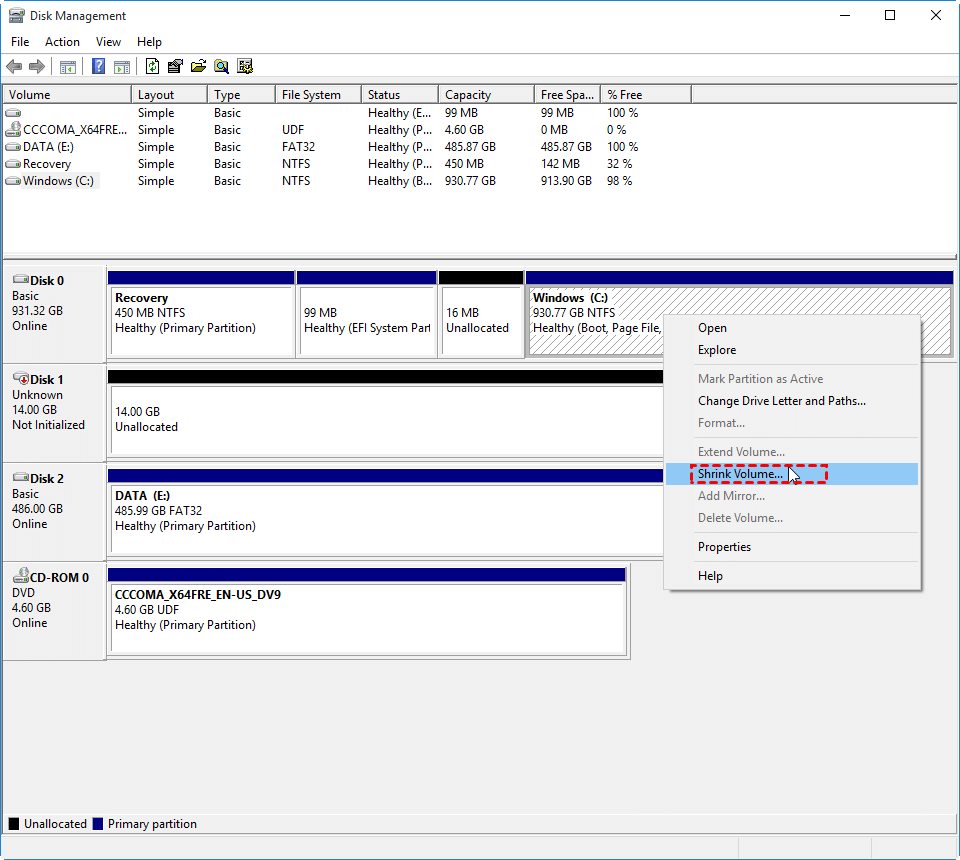
Step 1. Press "Windows+R", Enter "diskmgmt.msc". On the main page of Disk Management, right-click the volume you want to shrink, and then select "Shrink Volume".
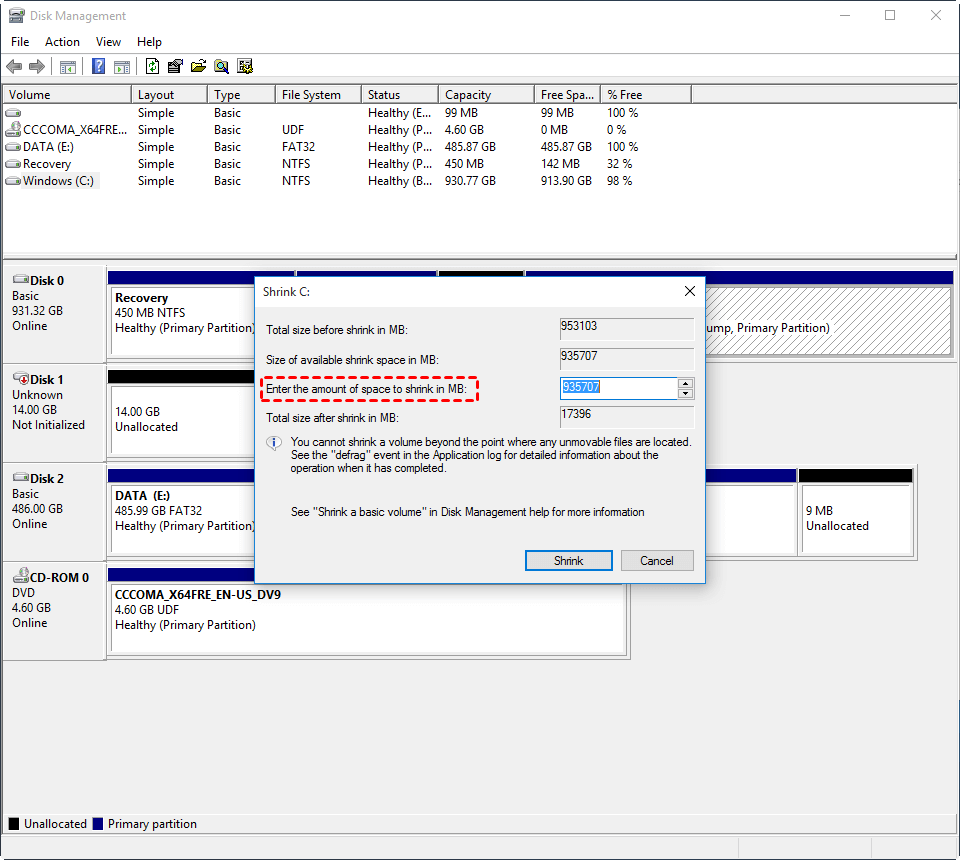
Step 2. Enter the size you want to shrink, and then click "Shrink".
Please note that you can't shrink volume with Disk Management in Windows 10 in these situations:
1. If there are unmovable files at the very end of the partition which you want to shrink, the option is still greyed out.
2. If there is some virtual memory on the partition, the shrink volume may still be greyed out.
3. If the disk file system isn’t NTFS and RAW, you can’t shrink volume, because Disk Management only supports shrinking volume in NTFS and RAW format, but you can convert it to NTFS.
4. The disk fragment is also the reason that causes you unable to shrink volume.
Disk Management alternatives to shrink volume in Windows
Next, I will teach you three other different methods to shrink volume, some of which can make up for the shortcomings of Disk Management.
│Method 1. Shrink volume via Command Prompt
In addition to DM, using “cmd” to shrink volume is also a method, the specific steps are as follows:
Step 1. Press “WIN+R”, type “cmd” and press Enter.
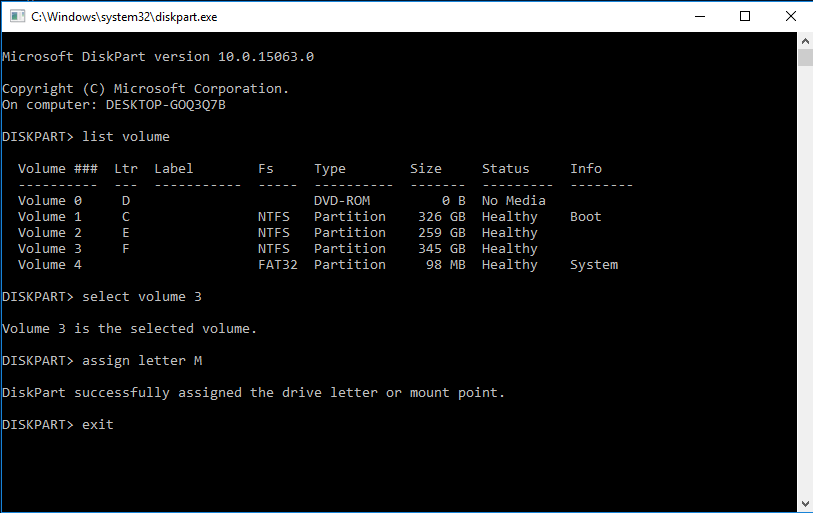
Step 2. To shrink volume in Windows 10, type the following commands in sequence and hit ENTER.
● diskpart
● list volume
● select volume 4 (volume number of the partition to shrink)
● shrink desired = 10240 (the amount of space you want to shrink the partition too)
Note: But when using cmd to shrink volume, if any bad clusters are detected, the volume cannot be shrunk.
│Method 2. Shrink volume by PowerShell
First of all, click "Start" and search PowerShell.
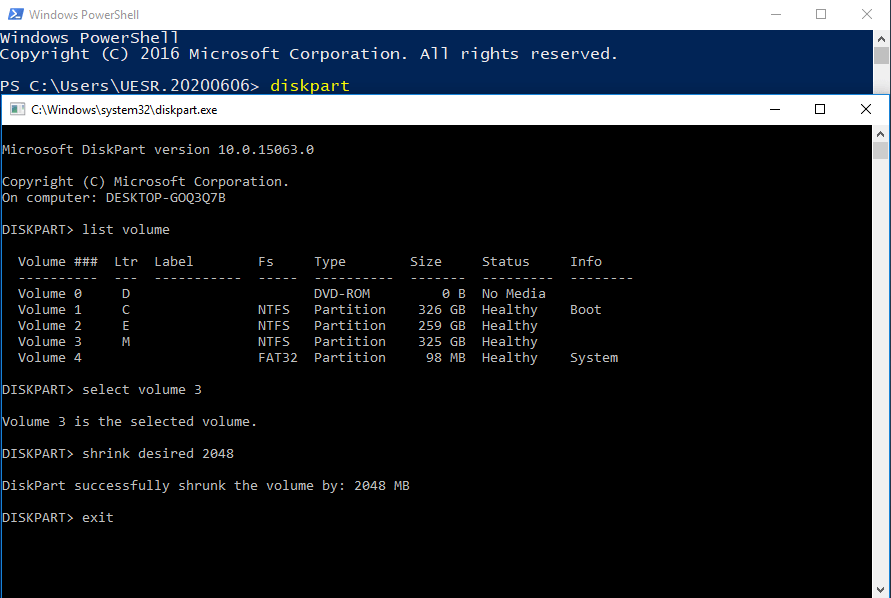
Step 1. Open PowerShell, and then enter the following commands one by one and hit ENTER:
● diskpart
● list volume
● select volume 3
● shrink desired = 2048
● exit
Step 2. Hit enter and wait for completion.
Note: You may fail to shrink volume if there are unmovable files on the disk. You can only shrink volume to the unmovable file point.
│Method 3. Shrink volume with AOMEI Partition Assistant
Note: Although the above methods can help you shrink volume, they all have limitations. When there is virtual memory, you cannot shrink volume. If there are files that can not be moved at this time, the volume cannot shrink. When your file system is not NTFS, you cannot shrink volume either. Fortunately, there is another better way for you to choose.
AOMEI Partition Assistant Standard (support Windows XP/Vista/7/8/8.1/10/11)is a completely free and powerful third-party software that can manage your disk more flexibly. Using AOMEI Partition Assistant Standard can avoid all the problems what has mentioned above, you can shrink volume in any situation. If the Shrink Volume grayed out in Disk Management, you can try it. It supports resizing partition in Windows 10, including extend volume and shrink volume.
If you need advanced features such as allocate free space from one partition to another, convert NTFS to FAT32, convert primary partition to logical, clone computer system and so on, you need to upgrade to AOMEI Partition Assistant Professional.
To shrink volume, you can follow the steps below:
Step 1. Download the freeware, install and launch it. You will see the basic situation of your disk.
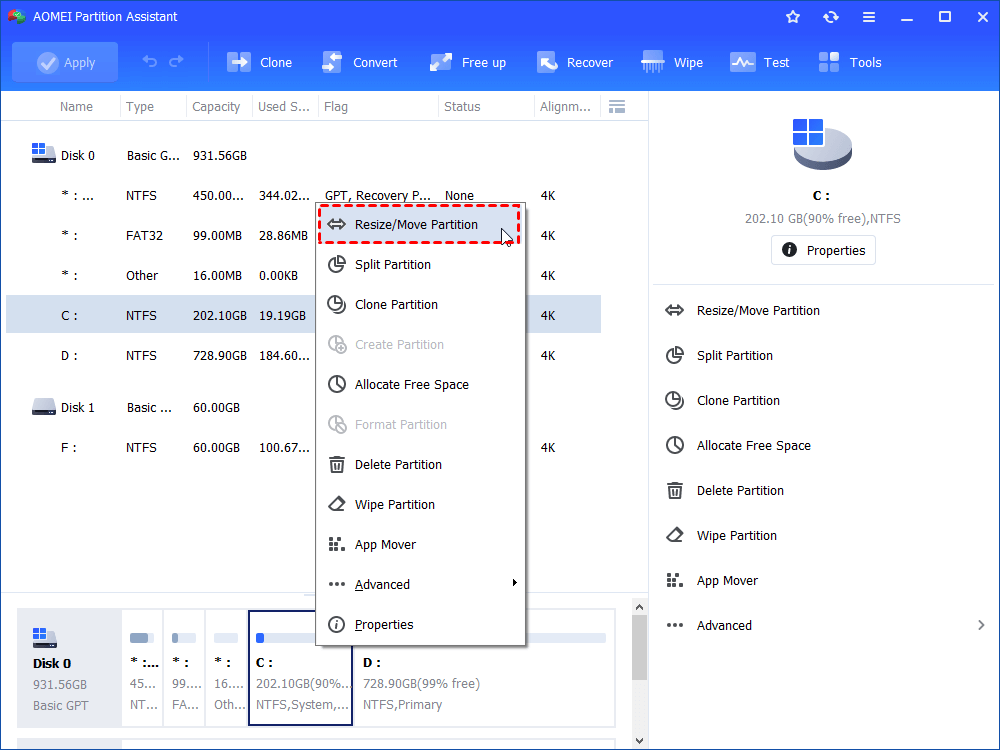
Step 2. Right-click the drive you want to shrink the volume. Then choose “Resize/Move Partition”.
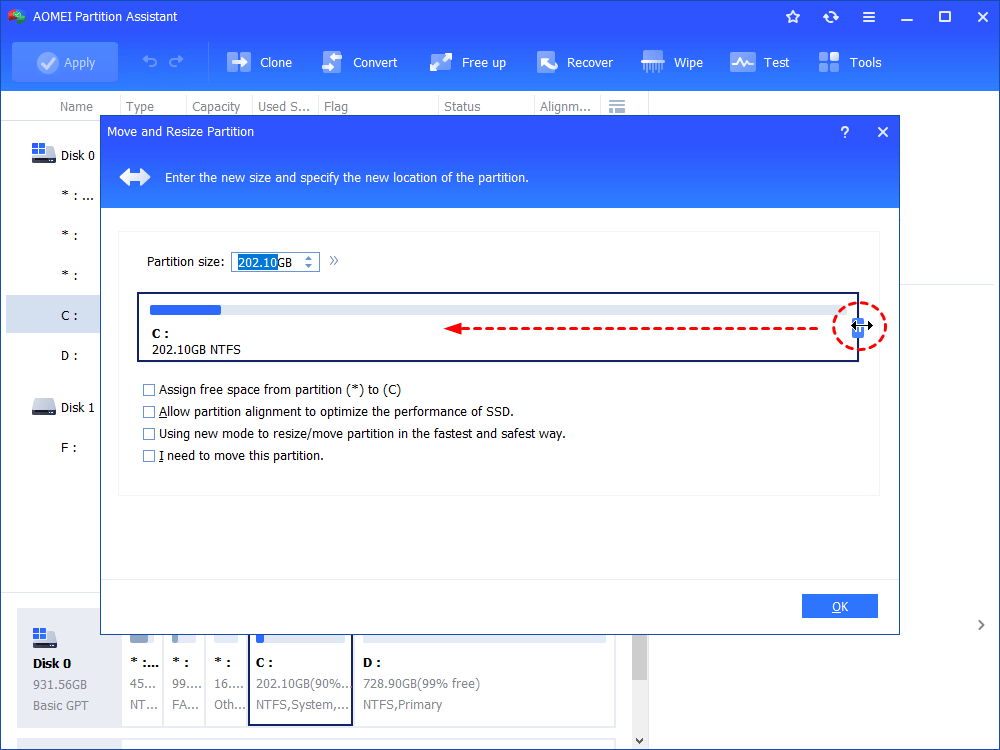
Step 3. Drag the border (left side). You can move the partition.
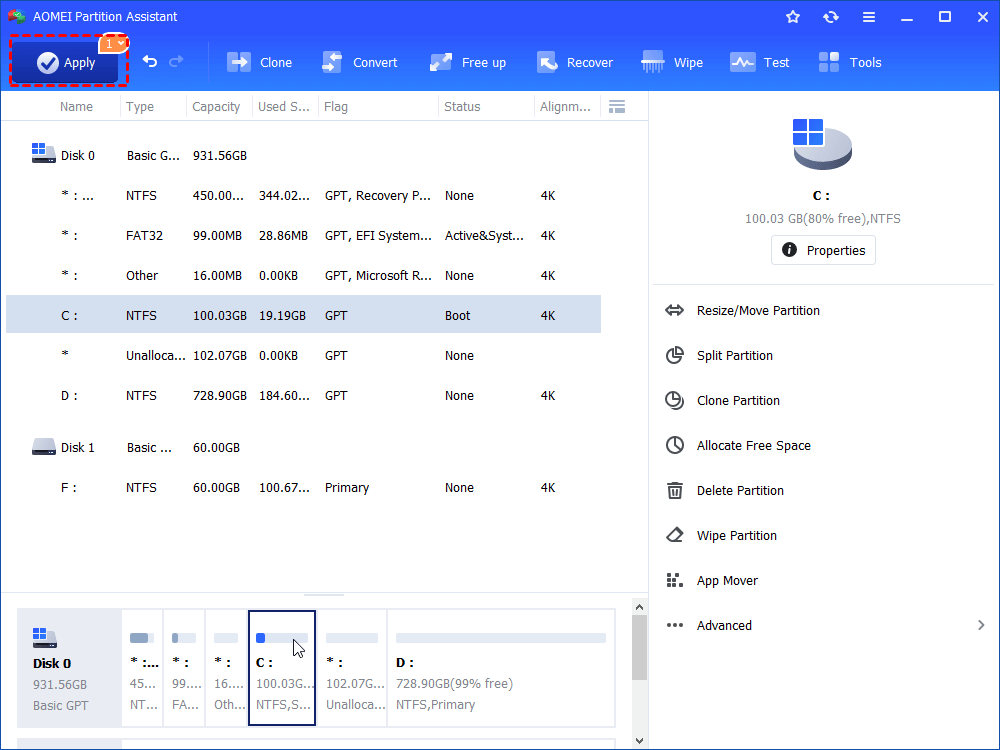
Step 4. Click Apply to submit the whole operation.
Things you might do after shrinking volume
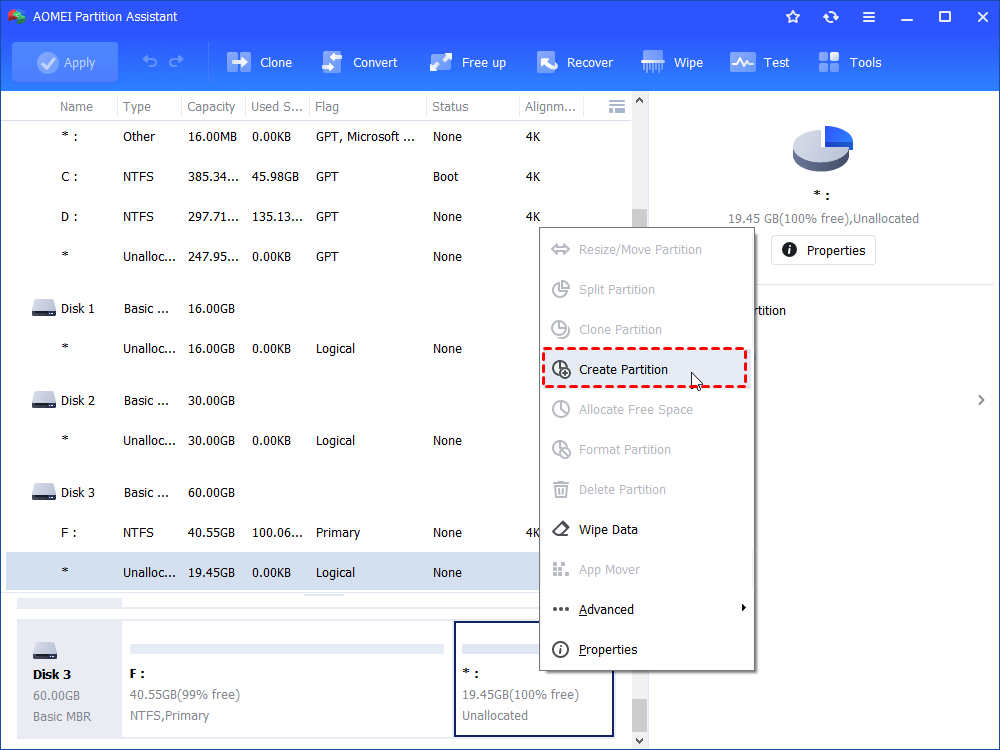
After shrinking the volume successfully with the free partition manager, you can use the unallocated space to create a new partition or extend another partition that needs more disk space. Creating a new partition can be easily completed with AOMEI Partition Assistant Standard, as shown below:
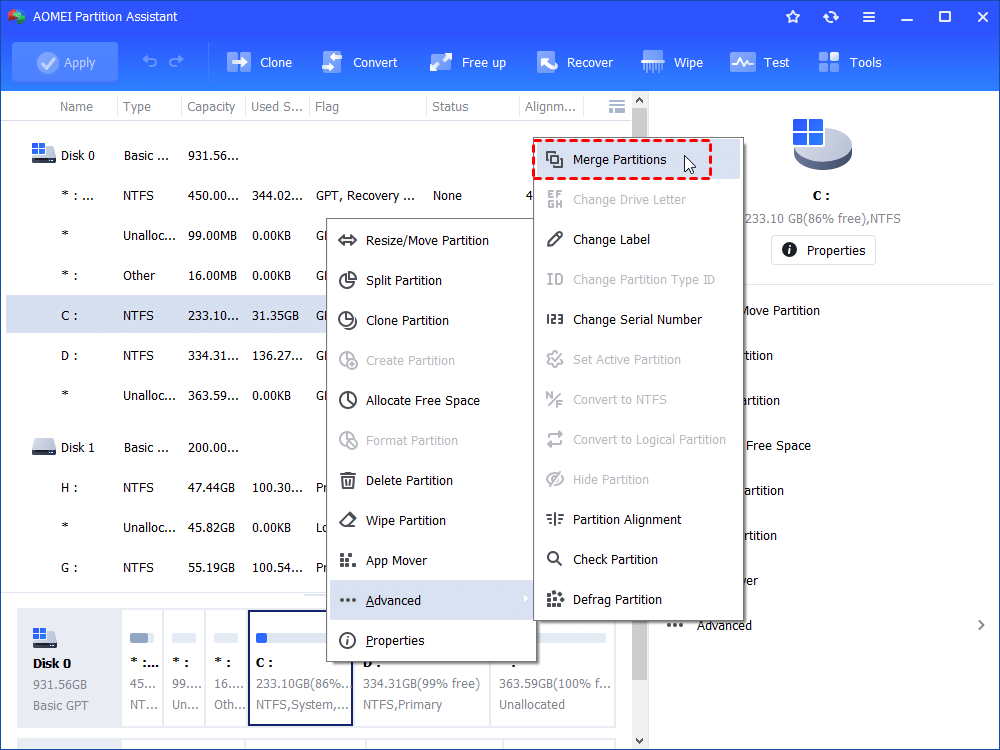
The "Merge Partitions" function of the AOMEI Partition Assistant Standard can add non-adjacent unallocated space to another partition. You can operate as shown in the figure below.
Step 1. Right-click the partition you wish to extend and select “Merge Partitions”.
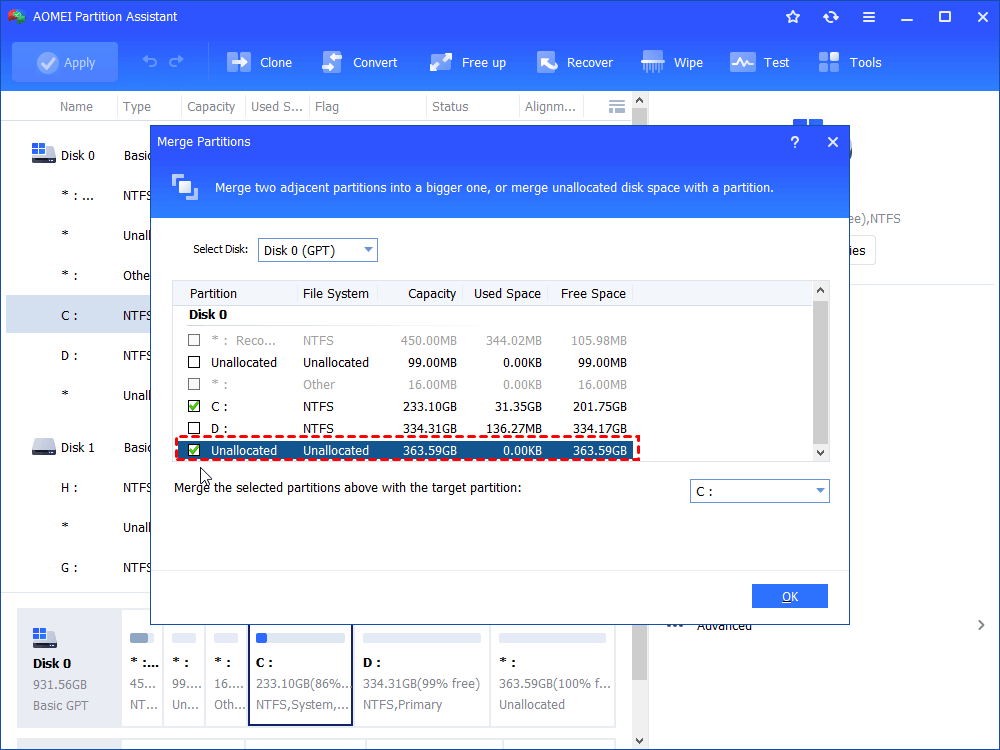
Step 2. Tick the unallocated space and click on “OK”.
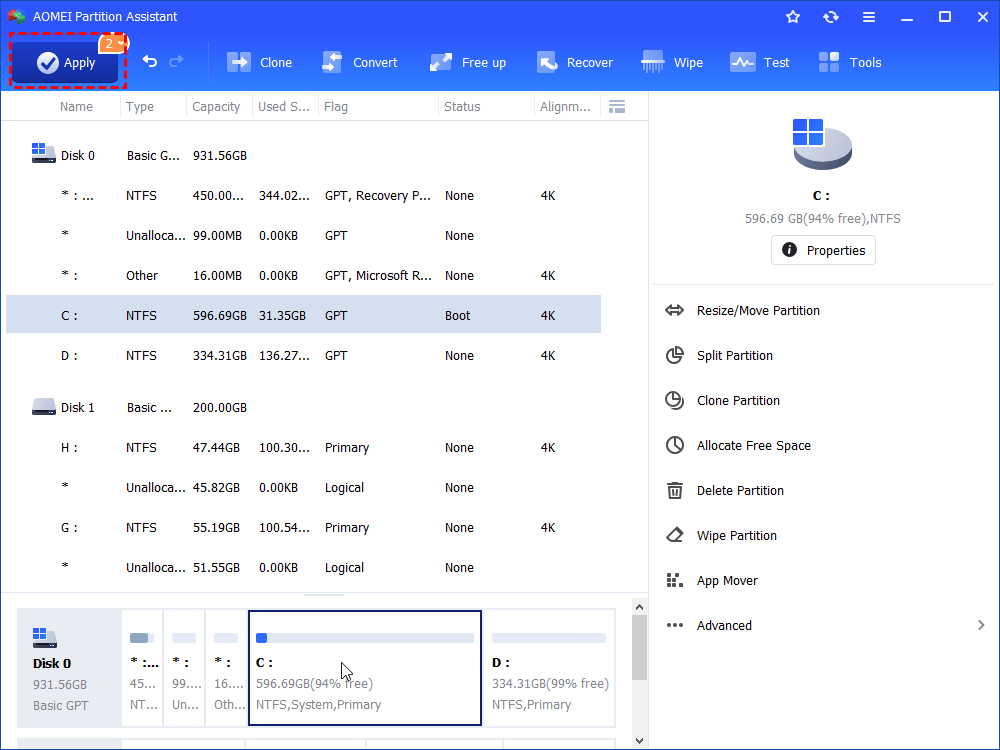
Step 3. Click “Apply”.
Conclusion
In addition to showing you how to shrink volume with Disk Management, I also introduced other three methods, you can choose one of them.

