

How to Get Rid of Junk Files on Windows 10 PCs?
Over time, a large amount of junk files can accumulate on your PC, potentially causing performance issues. This post provides a comprehensive guide on how to get rid of junk files on Windows 10 PCs, helping you optimize system performance and free up storage space with ease.
By Gia / Updated on July 11, 2025
Overview of Junk Files
Before diving into the methods to get rid of junk files, it's essential to understand what junk files are. These files include various system junk files, registry junk files, and other redundant data that serve no purpose. Here are several common types of junk files:
✔ Temporary Files: Created by the system and applications for short-term use.
✔ Cache Files: Stored data to speed up processes but can become outdated.
✔ Recycle Bin Files: Deleted files that are still taking up space.
✔ Old Windows Update Files: Leftover files from previous updates.
✔ Log Files: Records of system and application activities.
✔ Thumbnails: Cached images of your files for quicker previews.
While these files may seem harmless, they can consume valuable storage space, slow down your computer, and even affect its performance. Is it safe to delete junk files? Sure! Regularly cleaning up these files is essential to maintaining an efficient and well-functioning device.
How to Get Rid of Junk Files on Windows 10 PCs?
How can you remove these files and free up storage space effectively? This section offers several common methods to get rid of junk files on your Windows PC. Select the one that best suits your needs.
Method 1. Use Windows Disk Cleanup
Windows Disk Cleanup is a built-in tool designed to help you free up space on your computer by removing unnecessary files. It scans your system for temporary files, system files, and other common junk files.
Here’s how to use it to get rid of junk files on Windows PCs:
Step 1. Right-click on a drive in File Explorer, and click Properties > General > Disk Cleanup.
Step 2. Select the drive you want to clean.

Step 3. Choose the file types you want to delete and click OK.
Step 4. Finally, click Delete Files to confirm and start the cleanup process.
Method 2. Enable Storage Sense
In addition to Disk Cleanup, you can enable Storage Sense to automatically free up space. This tool can delete temporary files, Recycle Bin files, and other unnecessary files.
Follow these steps to get rid of junk files by enabling Storage Sense:
Step 1. Click Start and select Settings.
Step 2. Go to the System section and select Storage on the left side.
Step 3. Turn on Storage Sense to free up space. And you can customize how often it runs and what it deletes.
If you'd like to clean up files immediately, choose "Configure Storage Sense or run it now".
Method 3. Manually Clearing Browser Cache Files
Browser cache files can speed up processes but may accumulate and take up significant storage space on your device. Here we take Chrome as an example, showing you how to manually clear browser cache files:
Step 1: Open your web browser and click menu.
Step 2: Select Clear Browsing Data from the left-hand side.
Step 3: On the Delete browsing data dialog, review each information field and check the checkboxes to the left of the information you wish to remove. Then click Delete Data.
Step 4: Close and re-open Chrome to save your changes.
An All-in-One Tool to Get Rid of Junk Files
While Windows 10 includes several cleanup tools to get rid of junk files, they don’t work for all situations. For those looking for a more comprehensive solution, we’d like to recommend PartitionAssistant Cleanup. This robust tool offers advanced features for cleaning most junk files, including system junk files, registry junk files, unnecessary large files, and more.
- Seamless Compatibility: Fully supports Windows 11, 10, 8.1, 8, 7 and Servers.
- User-Friendly Design: An intuitive interface with drag-and-drop functionality ensures effortless navigation and operation.
- Maximize Disk Performance: Unlock your disk's full potential and manage partitions with precision and efficiency.
Free Up Disk Space To Keep Your PC Running Smoothly and Efficiently
Let’s use PartitionAssistant Cleanup to get rid of junk files:
➤ Remove Junk Files:
Step 1. Install and launch PartitionAssistant Cleanup. Click the "Clean Junk Files" tab.

Step 2. Click the "Scan Now" button to start the process of scanning junk files.

Step 3. After the scan process is finished. All system junk files (including recycle bin files, temporary files, log files, invalid shortcuts, and so on) and registry junk files (including DLL registry, system registry, and program registry) will be displayed.

You can also click the button behind to view the junk files details.

Step 4. And, you can click the button behind to locate the file.

By default, the program will select some junk files to clean up, for example, temporary files, log files, and so on. You can also manually check to select more or uncheck to deselect fewer listed junk files. Or, click "Select All" to select all junk files to clean up if you need to clean up all.
Step 5. After selecting junk files that are not needed anymore, you can click the "Clean Now"button to start the cleanup.

The process of the cleanup might take time, and the selected files will be cleaned up. After the process is finished, you will get a cleanup completed window displaying how many files you have cleaned and not yet cleaned.

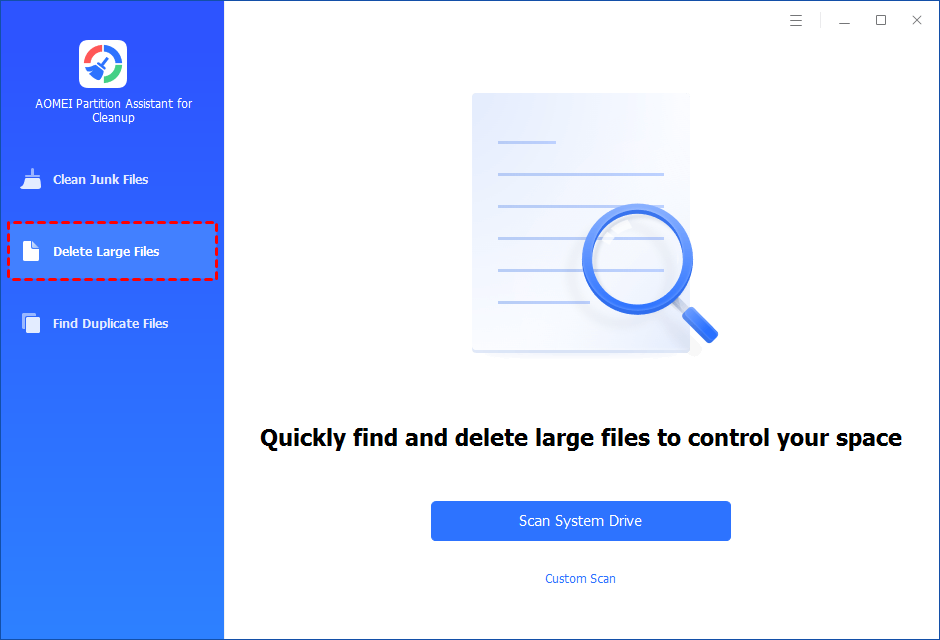
➤ Delete Useless Large Files:
Step 1. Install and launch PartitionAssistant Cleanup. Click the "Delete Large Files" tab.
Step 2. You can either click "Scan System Drive" to start the scan of your system C: drive. Or, click "Custom Scan" to manually select paths to be scanned. (Here, we take the "Custom Scan" as an example.)
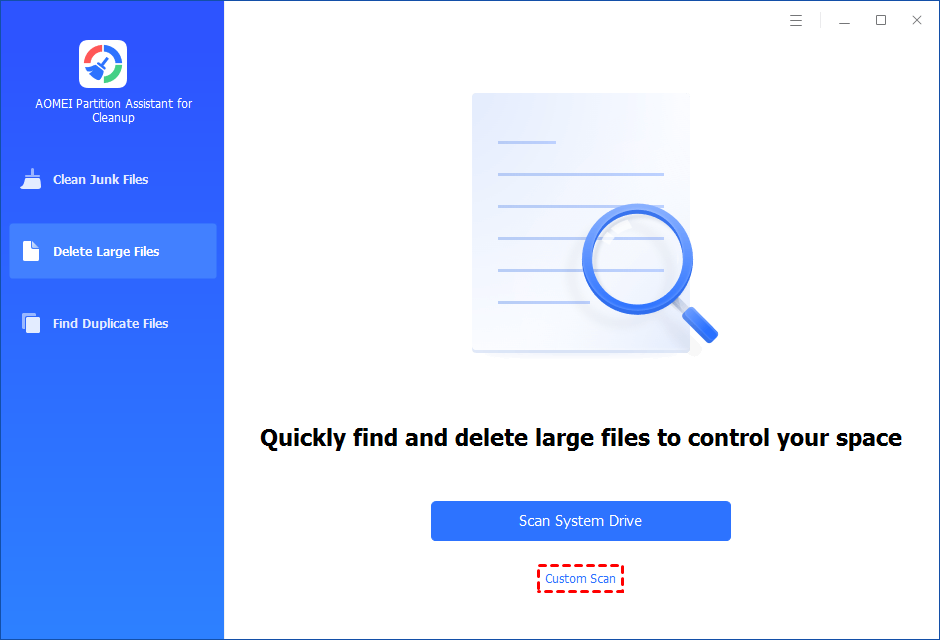
Step 3. After clicking "Custom Scan", all local and external drives on your PC and the common Desktop, Documents, and Downloads paths will be displayed. You can manually select paths to be scanned. Once necessary paths are added, you can click the "Scan Now" button to start the scan process.

The scan process might take time. After the scan is complete, all large files found will be listed.
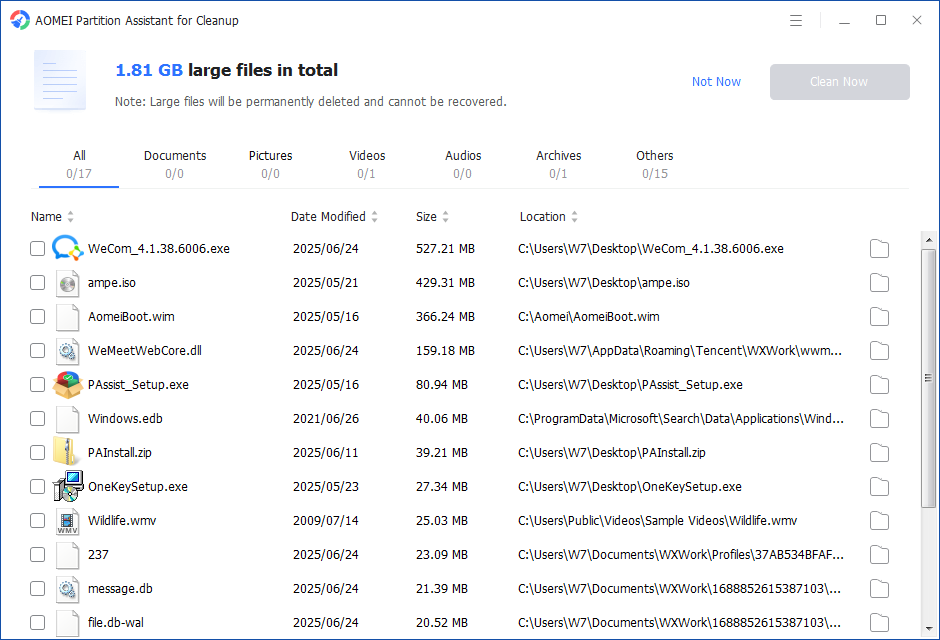
You can also check the large files and click the button behind to locate them.
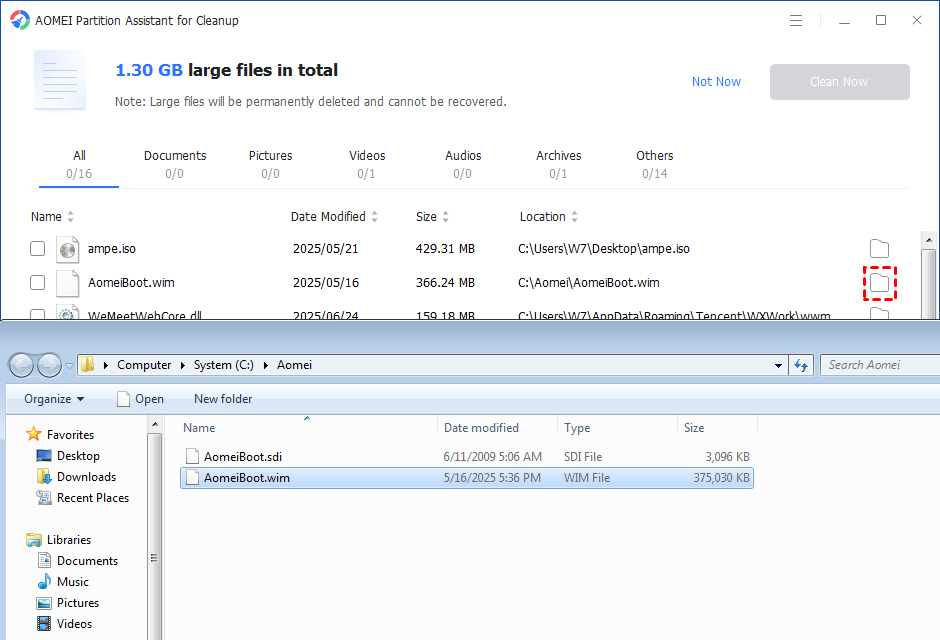
Step 4. Tick the files you want to delete, and then click the "Clean Now" button to start the deletion.
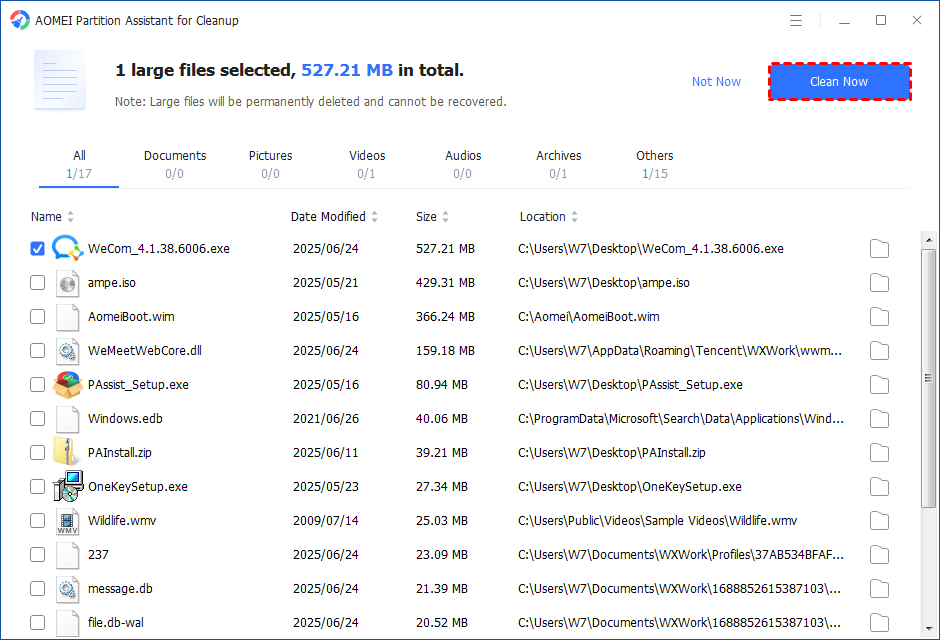
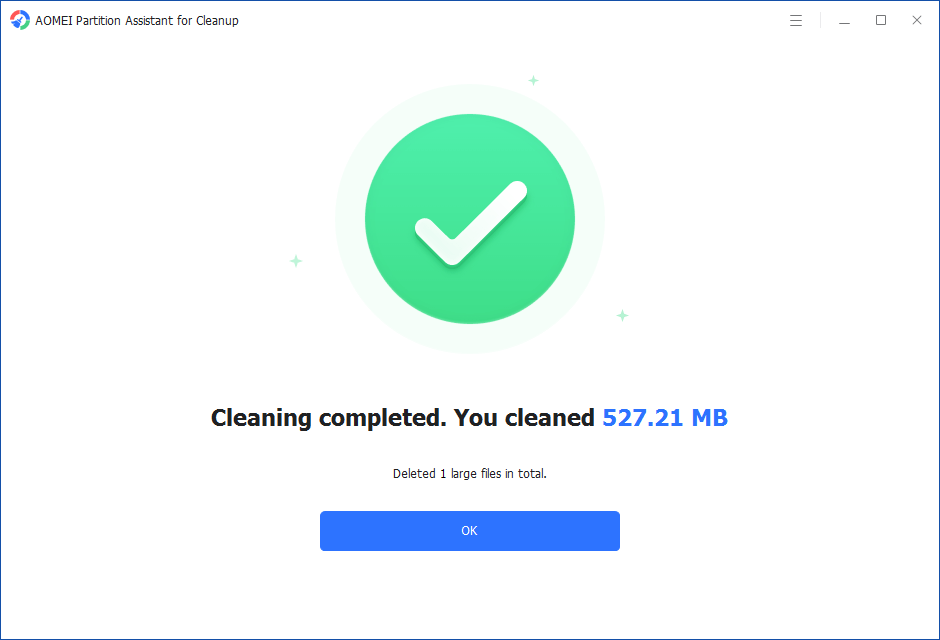
Step 5. The deletion might take time. After the process is finished, the selected files will be deleted, and you will get a cleaning completed window displaying how much data you deleted in total.
➤ Delete Duplicate Files:
Step 1. Install and launch PartitionAssistant Cleanup. Click the "Find Duplicate Files" tab.
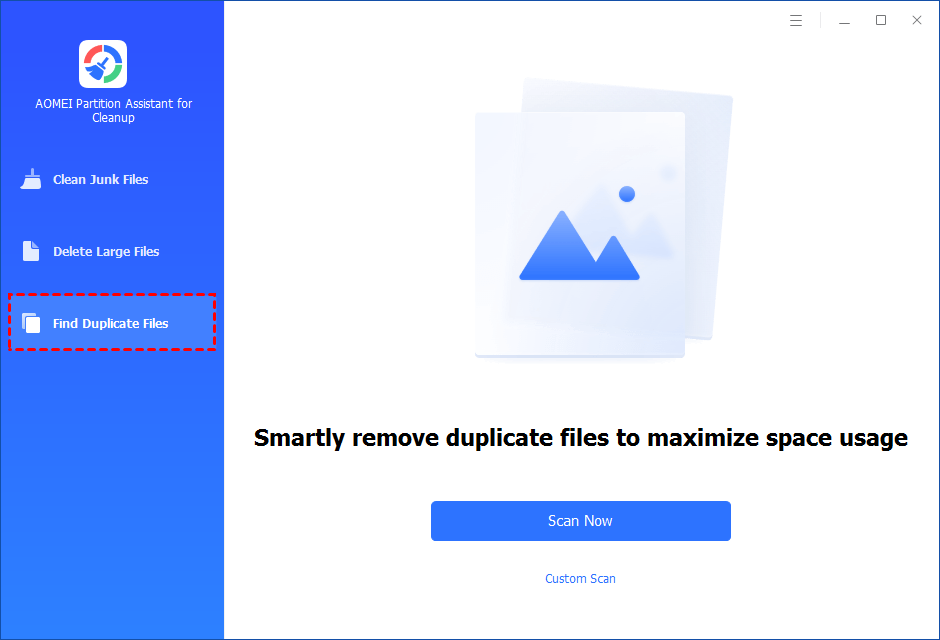
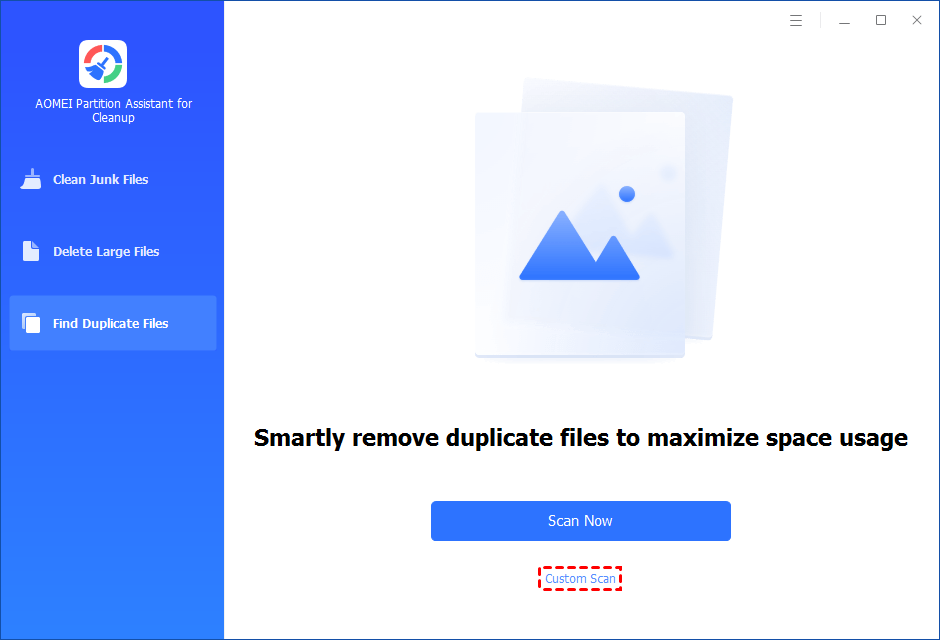
Step 2. You can either click "Scan Now" to start the scan of your system C: drive. Or, click "Custom Scan" to manually select paths to be scanned. (Here, we take the "Custom Scan" as an example.)
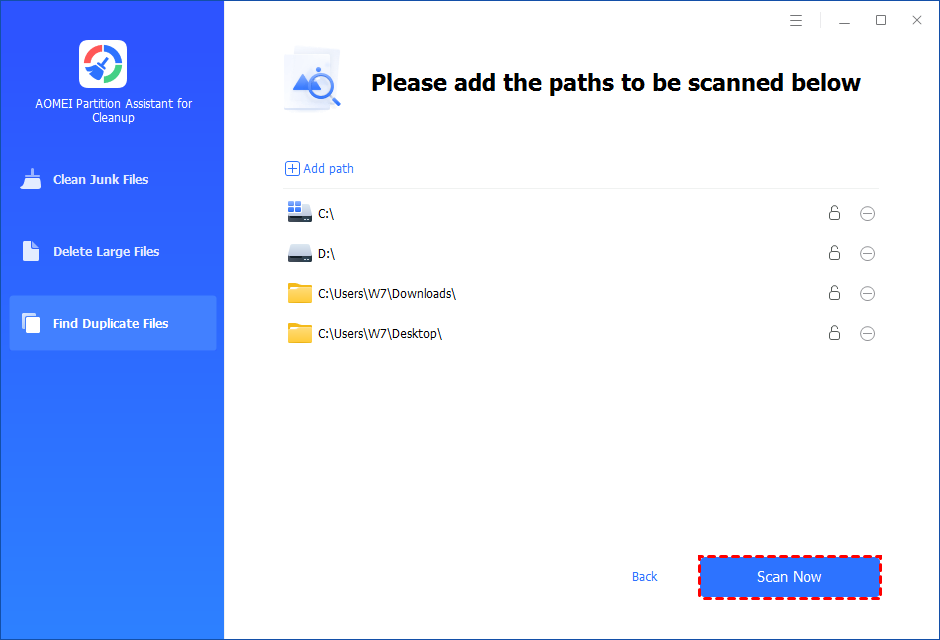
Step 3. After clicking "Custom Scan", all local and external drives on your PC will be displayed. You can also click the "Add Path" button, and then a browse folder window will pop up. So you can add more paths on this PC, like Desktop, Downloads, and other folder paths.
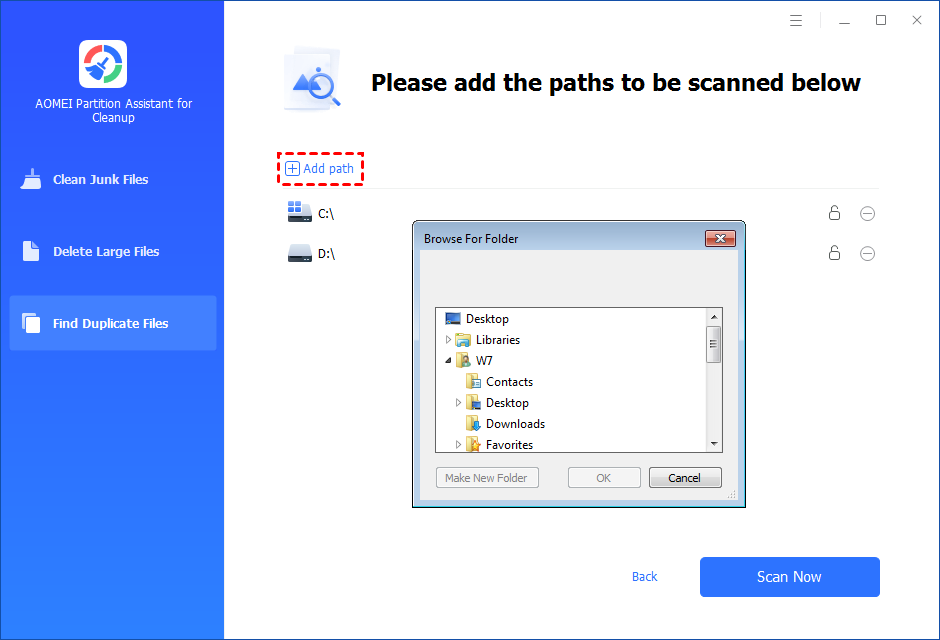
Step 4. Once necessary paths are added, you can click the "Scan Now" button to start the scan process.
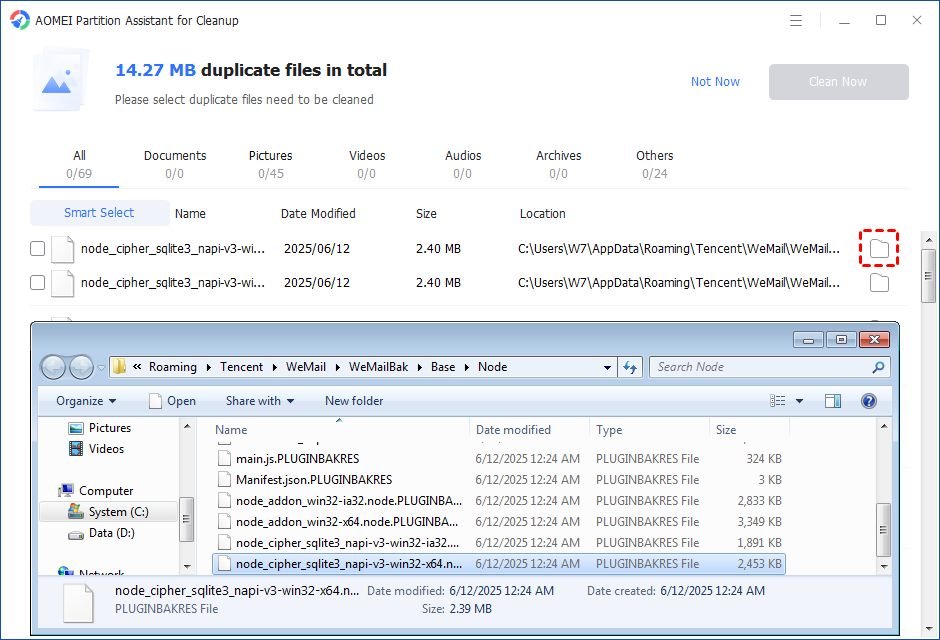
The scan process might take time. After the scan is complete, all duplicate files will be listed. You can click the button behind to locate them.
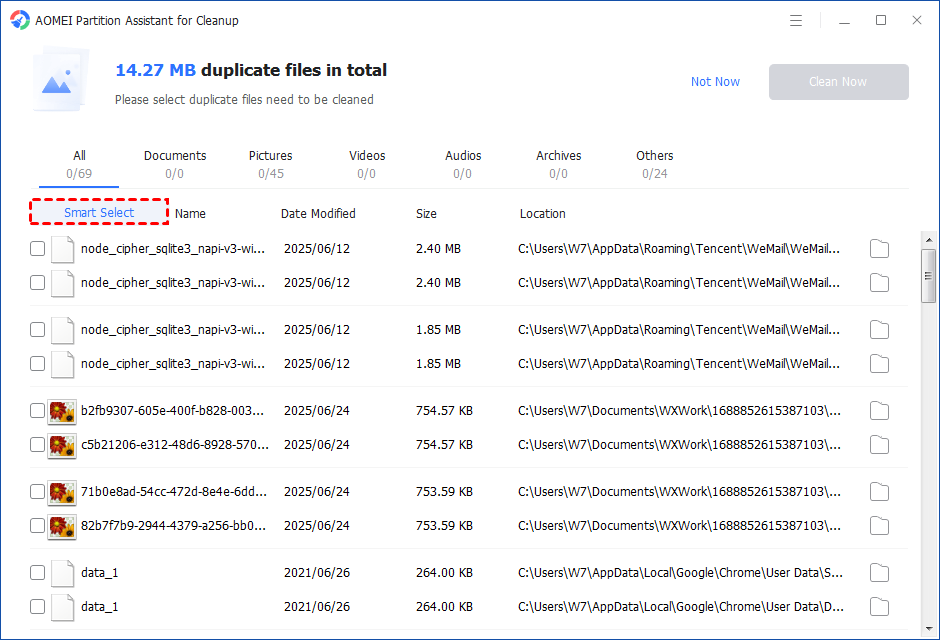
You can either manually select duplicate files, or click the "Smart Select" button to automatically select unnecessary duplicate files to delete.
Tips: If the "Smart Select" is ticked, only the oldest duplicate file will be unticked. It means that all duplicate files except the oldest one will be ticked to delete. (The oldest file means the file that was created first. This file will not be deleted. All other duplicate files are considered copies of the oldest file. )
If you manually select all copies of duplicate files, you will get a pop-up warning window to keep at least one copy of the duplicate files. If you indeed want to delete all copies of duplicate files, you can click "OK" so all copies of duplicate files will be selected to delete.

After unnecessary duplicate files are selected, please click the "Clean Now" button to start the deletion.

Step 5. The deletion might take time. After the process is finished, the selected files will be deleted, and you will get a cleaning completed window displaying how much data you deleted in total.

Conclusion
Learning how to get rid of junk files is essential for keeping your system at optimal performance. By following the methods outlined in this guide, you can effectively remove unnecessary files and free up valuable storage space.
For a more comprehensive solution, consider using PartitionAssistant Cleanup, a powerful tool that offers advanced features for cleaning junk files.

