How to Shrink Volume on Server 2012 without Data Loss
This article discusses how to shrink volume on Server 2012 or Server 2012 R2 without losing data via Disk Management and a third-party partition manager.
By AOMEI / Updated on December 4, 2024
-
Easier to shrink partition on Server 2012 with a partition manager
-
Shrink volume to create a new volume or extend an existing volume
Is there a need to shrink volume on Server 2012?
You may wonder why someone would want to shrink volume on Windows Server 2012 or other operating systems.
One reason would be creating more volumes: if your entire large hard disk has been used for System Reserved and C drive, it is easy to slow down your computer or cause data loss when OS crashes, so it is better to shrink the C drive to get some unallocated space, and create more than one volume to separate system files and installed programs from personal files.
Another reason is to extend existing volumes: if one of your volumes is too small and requires more capacity, while the other volume happens to have some unused free space, then you might want to shrink the large volume for extending the smaller one.
Shrink volume with Windows Server 2012 Disk Management tool
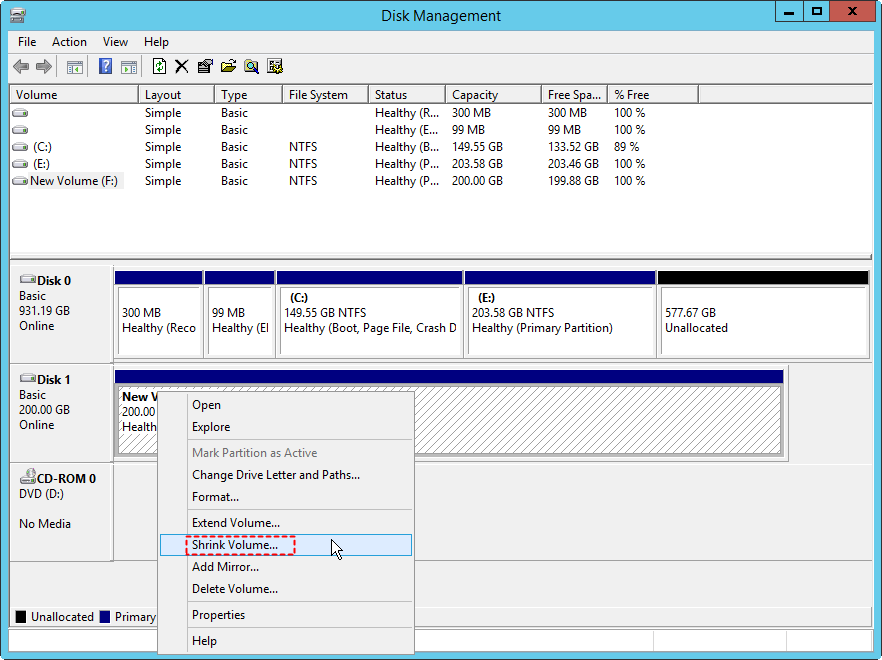
To shrink volume on Windows Server 2012, you can make use of Windows Server 2012 Disk Management tool, which contains “Shrink Volume” feature. Open Disk Management console by pressing Win+R, and inputting “Diskmgmt.msc” in the Run dialogue, right click the volume you want to shrink and then select "Shrink Volume" option in the drop-down menu as is shown in the picture.
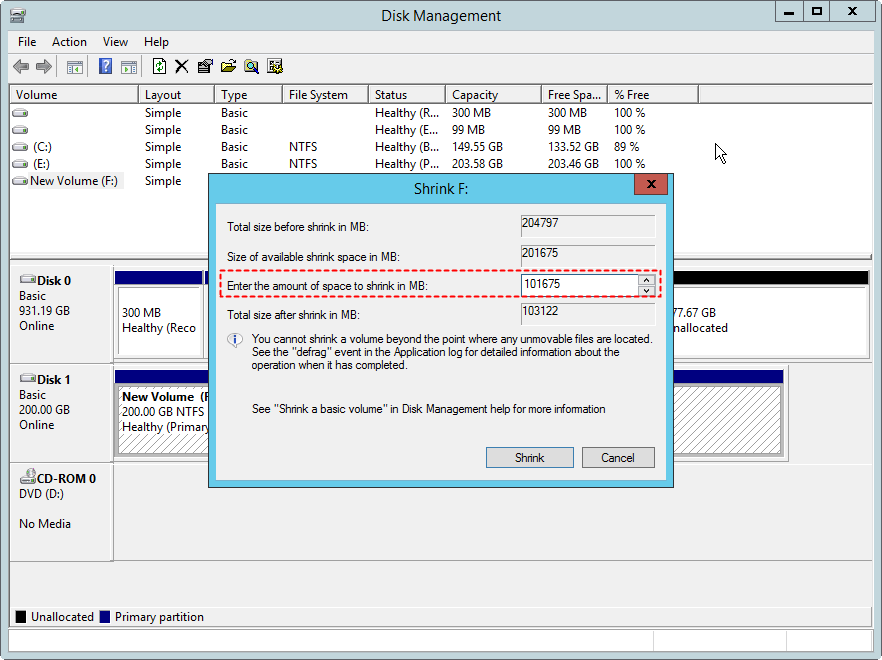
In the pop-up dialog box, enter the amount that you want to shrink. After that, you will see an unallocated space right next to the volume.
- ★Tips:
- The size of the available shrink space can be restricted by the amount of space currently allocated to the hard drive, that is to say, you can shrink a volume only up to half of the free space.
- You cannot shrink a volume beyond the point where an unmovable file is located. If there are some system files on the partition, you may find the available shrink space is too low, sometimes, even 0MB in size.
How to shrink partition on Server 2012 with ease
When you shrink volume with Disk Management, some certain files such as the paging file or the shadow copy storage area cannot be automatically relocated so that you cannot decrease the allocated space beyond the point where the unmovable files are located. To break this restriction, you can resort to AOMEI Partition Assistant Server. It works well on Windows Server 2025, 2022, 2019, 2016, 2012 (R2) and Windows 11/10/8/7.
Better than Server 2012 Disk Management, it allows you to shrink volume to minimum size even if there are unmovable files. Besides, using Disk Management to shrink a volume, the unallocated space can only be generated at its right side. But with the AOMEI Partition Assistant Server, you can create unallocated space by shrinking a volume at both the right and left side.
Next, we will take shrinking partition F as an example to show you how to shrink volume on Server 2012. Before proceeding, you can free download its Demo Version.
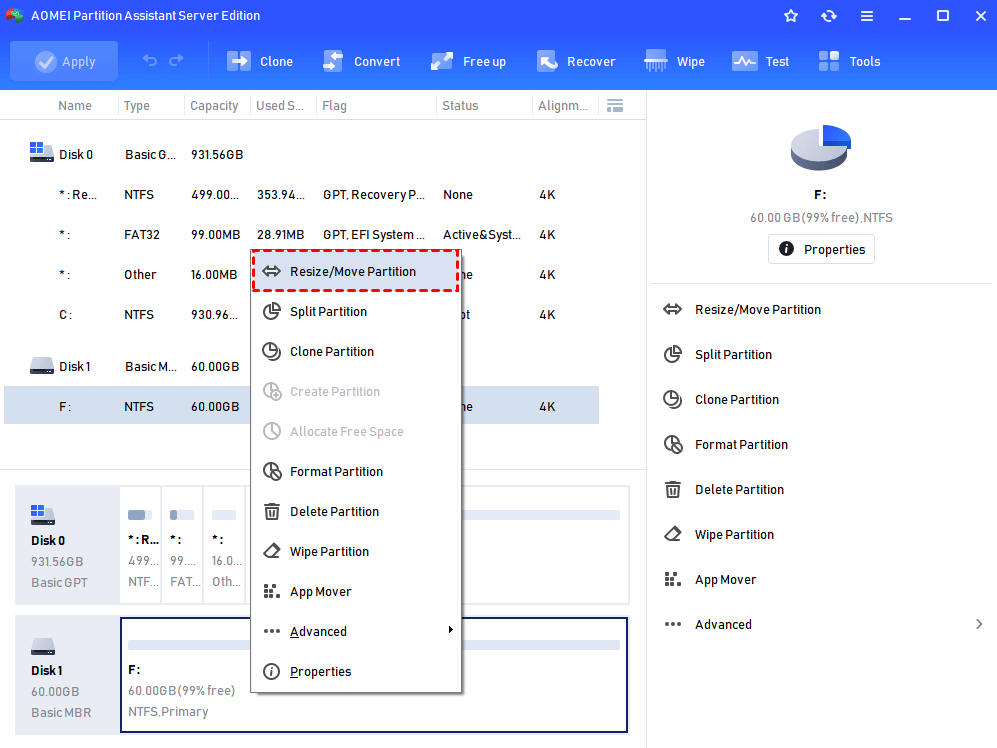
Step 1. Launch AOMEI Partition Assistant Server Edition, right click partition F and choose ”Resize/Move Partition”.
Step 2. A new window comes out with a slider bar. Drag this slider bar leftwards to make unallocated space. Also, you can input accurate figures in the blanks below. Then click “OK” to go on.

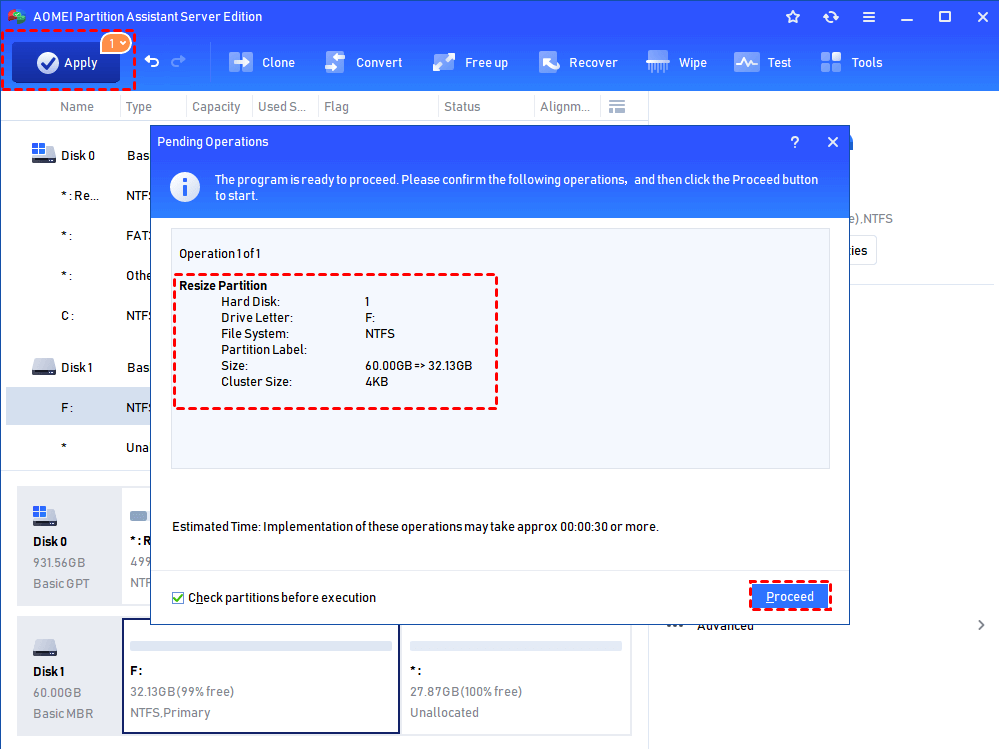
Step 3. Now you can see the F drive has been decreased. And there is an unallocated space right behind the E drive. Finally, click “Apply” and "Proceed" to commit the operation.
Shrink volume to create a new volume or extend an existing volume
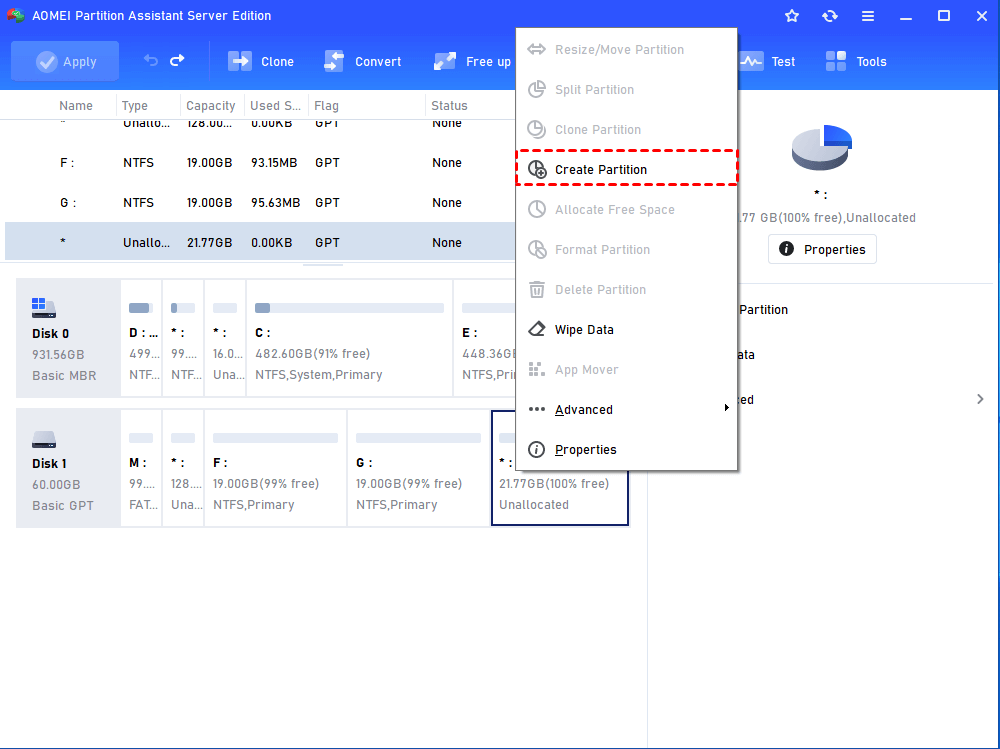
From above, you have learnt how to shrink partition on Server 2012. Now with the generated unallocated space, you can create new a partition or extend another partition.partitions. In either case, AOMEI Partition Assistant can be quite helpful. To create a new partition from unallocated space, just right-click the unallocated space, choose “Create Partition”, and then follow the guidance.
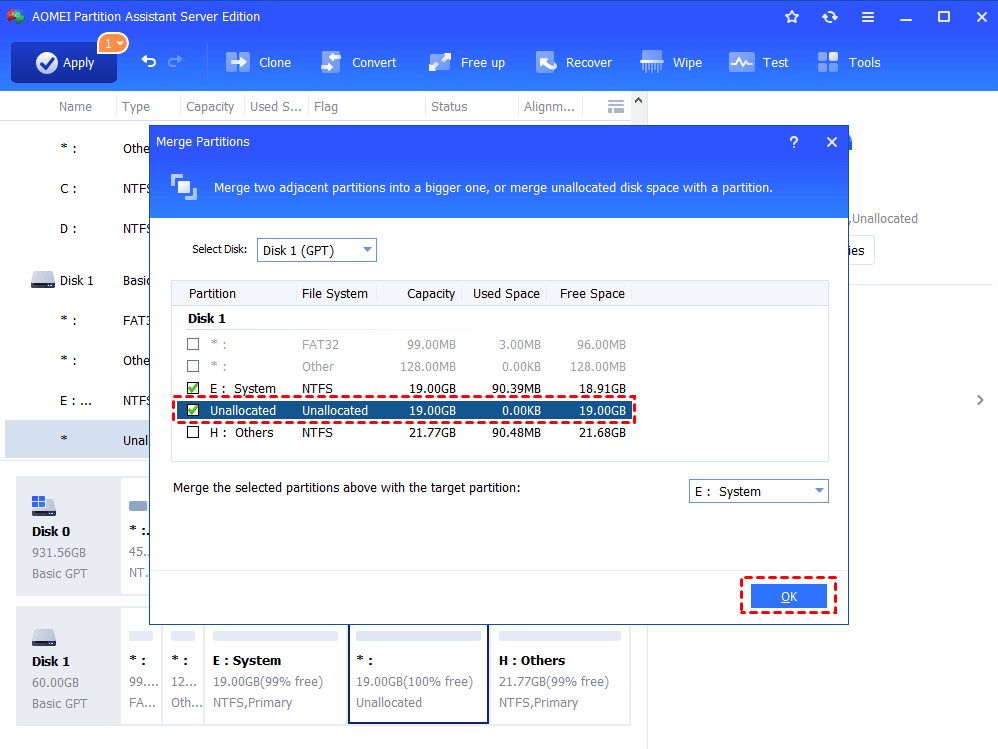
To add the unallocated space into another drive for expanding it, you can try “Merge Partitions” function. Right-click the partition you need to extend and select “Merge Partitions”, tick the unallocated space in the next window and click “OK”, and finally click on “Apply” to commit the pending operation.
Summary
Now, you should know how to shrink volume on Server 2012, and the same steps can also apply to shrink drive on other Server operating systems and Windows 11/10/8/7. Also, we have demonstrated how to create a new volume and extend another volume after shrinking volume successfully.
In addition to the “Shrink Volume” function, this software has other advanced features to make disk partition management as easy as a pie, such as split partition, quick partition, move partition, clone partition, migrate OS to SSD/HDD, allocate free space, convert disk between MBR and GPT without deleting partitions, etc. To install this brilliant software on an unlimited PC or Server in one company, try the Unlimited Edition instead.

