What Is The Recommended Disk Size for Windows Server 2019?
What is the recommended disk size for Windows Server 2019? If your Server 2019 doesn’t reach the ideal disk size how to fix it? Find the answer and methods in this post.
By Lucas / Updated on December 24, 2024
What is the minimum and recommended disk size for Windows Server 2019?
On October 2, 2018, Microsoft released Windows Server 2019 on a global scale. Although Server 2022 has been released as its better successor, Server 2019 now still possesses many users, and many people want to install it to help them.
Windows Server 2019 space requirements are higher than the Windows PC system. If you plan to set a Windows Server 2019, the Windows Server 2019 recommended specs are:
• 4 processor cores (For 1 or 2 users, 2 processor cores)
• 16 GB for RAM (For 1 or 2 users, 8 GB RAM)
• Disk volume for OS, RAID 1, 128GB (It holds additional roles and features installed based on server roles, Windows Updates, miscellaneous files, logs, etc.)
• Disk volume for Data, RAID 1, 512GB
To ensure the Windows Server 2019 can run smoothly for 2-3 years, the recommended disk plans are:
▶ For best performance--128GB SSD+ 512GB SSD
▶ For best price consideration--256GB SSD+ 1TB HDD
If you think the plans we recommend are suitable for your circumstances, then you can try to extend the Windows Server 2019 OS partition size and fix the Windows server 2019 low disk space alert by adjusting your Server disk. Since SSD is always the best plan for OS disk, we suggest you don’t split more drives on your Server OS SSD, which can offer better performance in the future. As for the data disk, you can partition it to store different files and applications to do classification.
How to fix low disk space alert in Windows Server 2019
However, if you’re a Windows Server 2019 user who’s suffering low disk space alert or a crowded C drive on your Windows Server 2019, before you find a larger SSD to replace the current disk, what can you do to release the storage pressure on your disk?
Leave this problem to AOMEI Partition Assistant Server, and save your disk from low storage crisis! AOMEI Partition Assistant Server is a disk and partition manager specially designed for Windows Server devices. It perfectly supports Windows Server 2025/2022/2019/2016/2012(R2)/2008(R2) and offers many helpful functions. For storage crisis, it gives users 3 features: “App Mover”, “Allocate free space”, and “Merge Partition”.
▶ App Mover: This feature is for users who wish to move the installed programs to another drive or another disk with enough free space to release storage space from the original disk. It avoids the work of reinstalling, so users can directly run the moved programs from the new location.
▶ Allocate free space: Normally, users can add volume to increase the C drive space in Disk Management, but "Extend Volume greyed out” often impedes the way because there is no unallocated space on the right behind the C drive. To avoid deleting the partition, this function can reallocate unused space of one drive to the target partition to use full disk space. Users can customize the size redistribution based on their situations.
▶ Merge Partition: Merge any unallocated space into any available partition. No matter if it’s adjacent or not. And if you need, you can merge two partitions into one.
Now, here are all details about these three.
1. App Mover
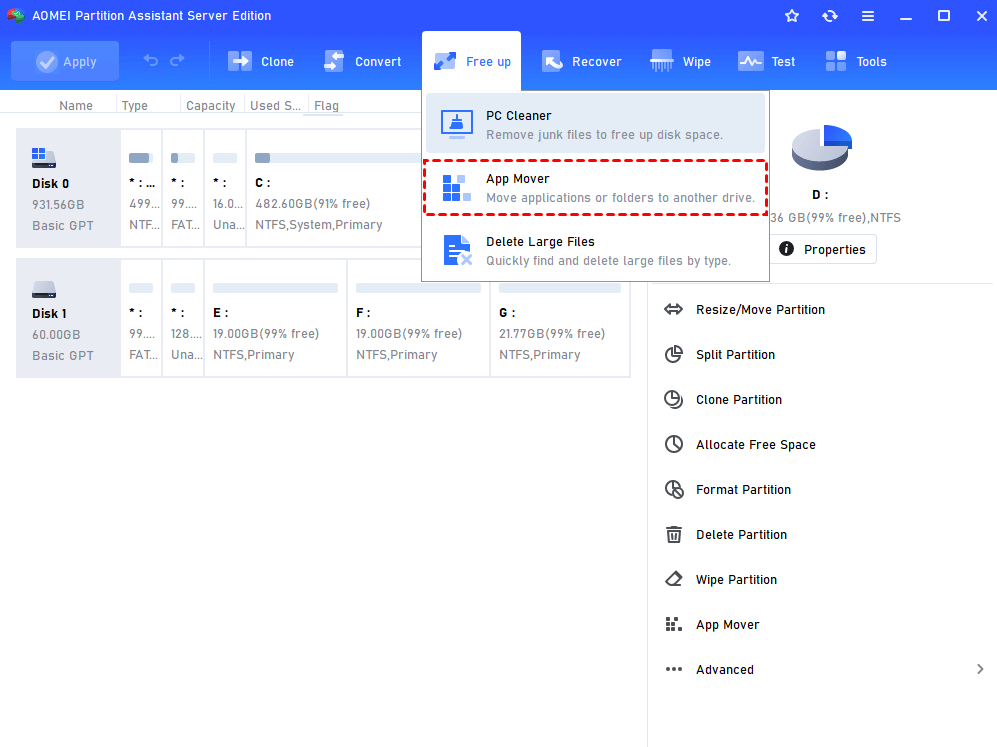
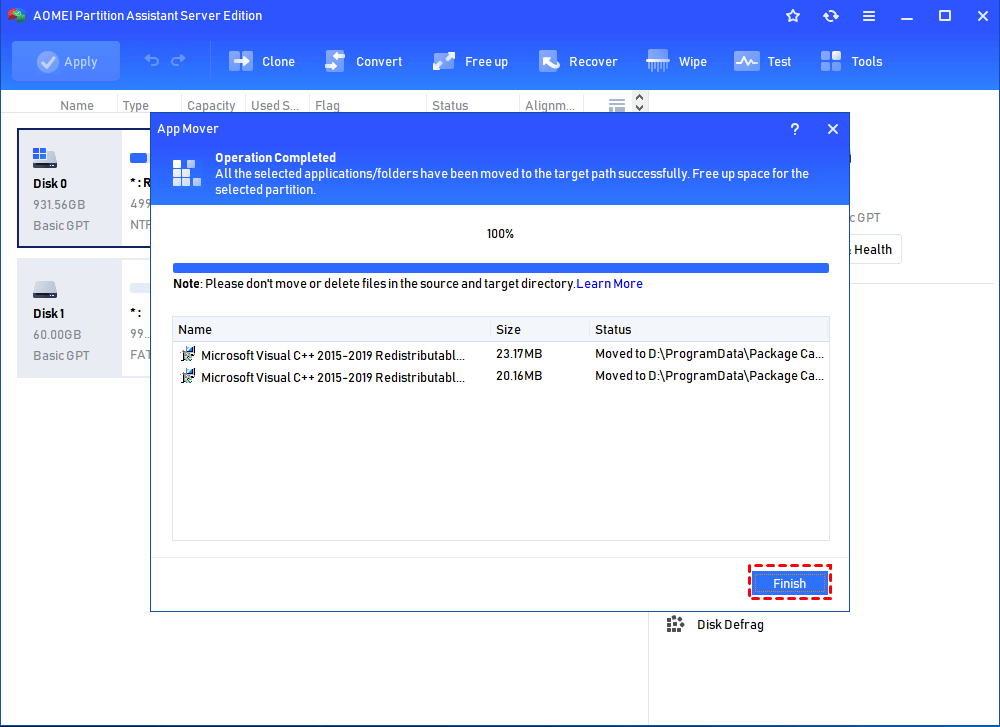
Step 1. Download and install AOMEI Partition Assistant Server. After opening, you can see many useful functions on the main interface, click “Free up” on in the top toolbar, and choose “App Mover”.
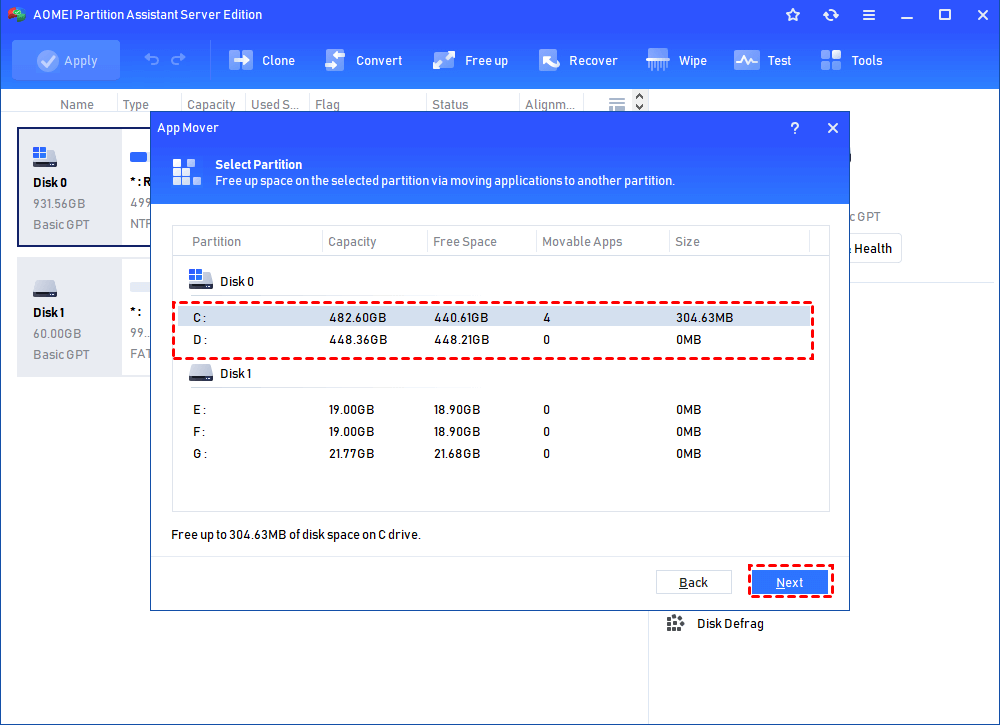
Step 2. Select the disk and drive where the apps you want to move are located and click “Next”. You can even click “Manage/Restore Apps” to restore the moved software to its original location.
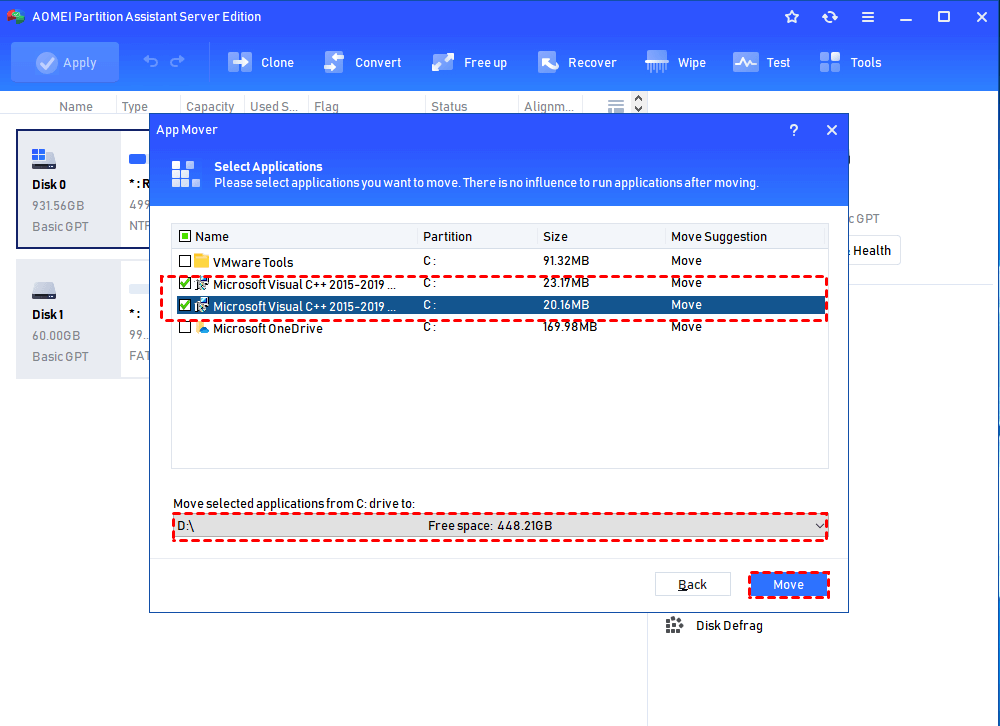
Step 3. In this window, please tick the programs you want to move, and then select the new path. Finally, click “Move”.
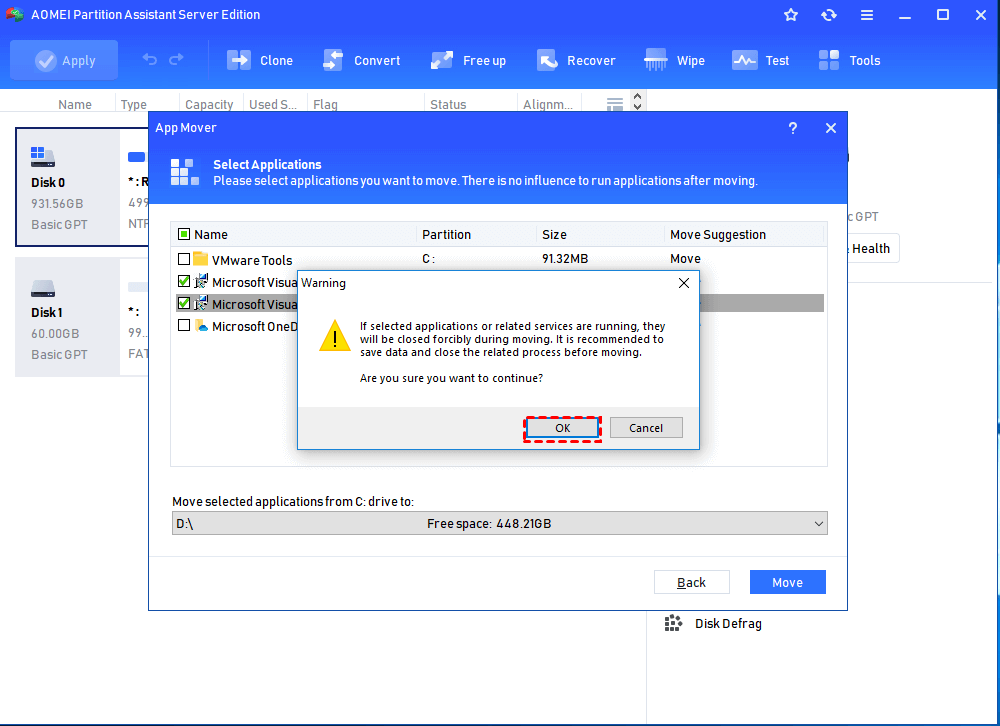
Step 4. Read the prompts carefully, and then click “OK”.
Step 5. Wait for the transfer to complete, click “Finish”. Finally, don't forget to click “Apply” in the upper left corner to submit the operation.
2. Allocate Free Space
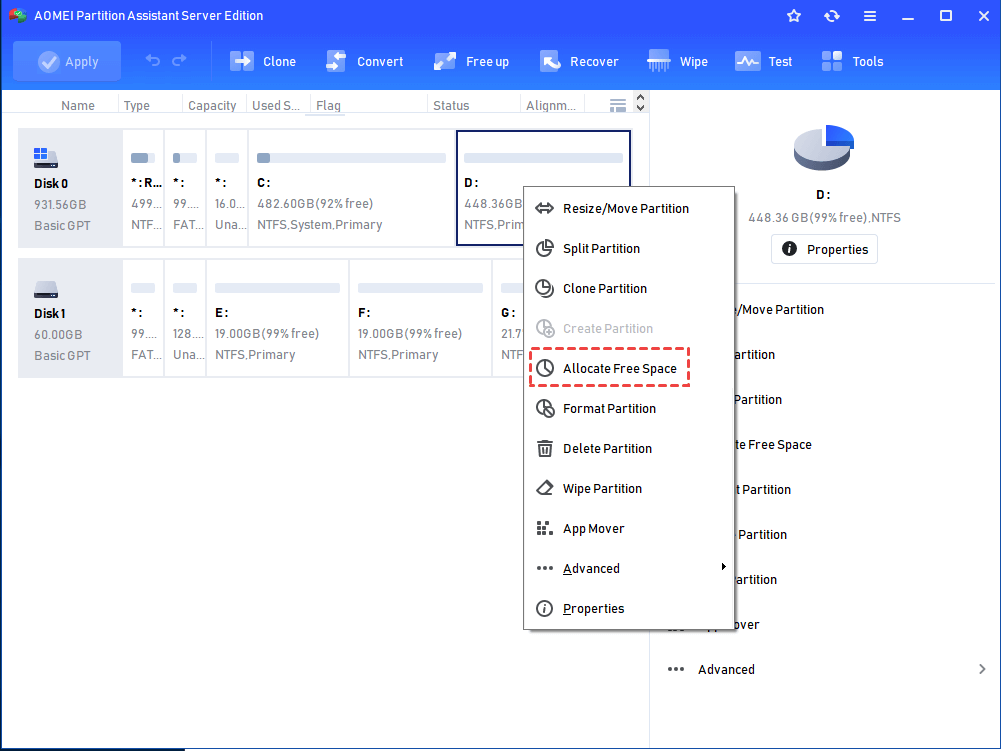
Step 1. Launch AOMEI Partition Assistant, right-click the partition from which you want to allocate free space, and select "Allocate Free Space".
Step 2. Type in the size of the free space which you want to cut from this partition and this free space will be directly added to the destination partition.
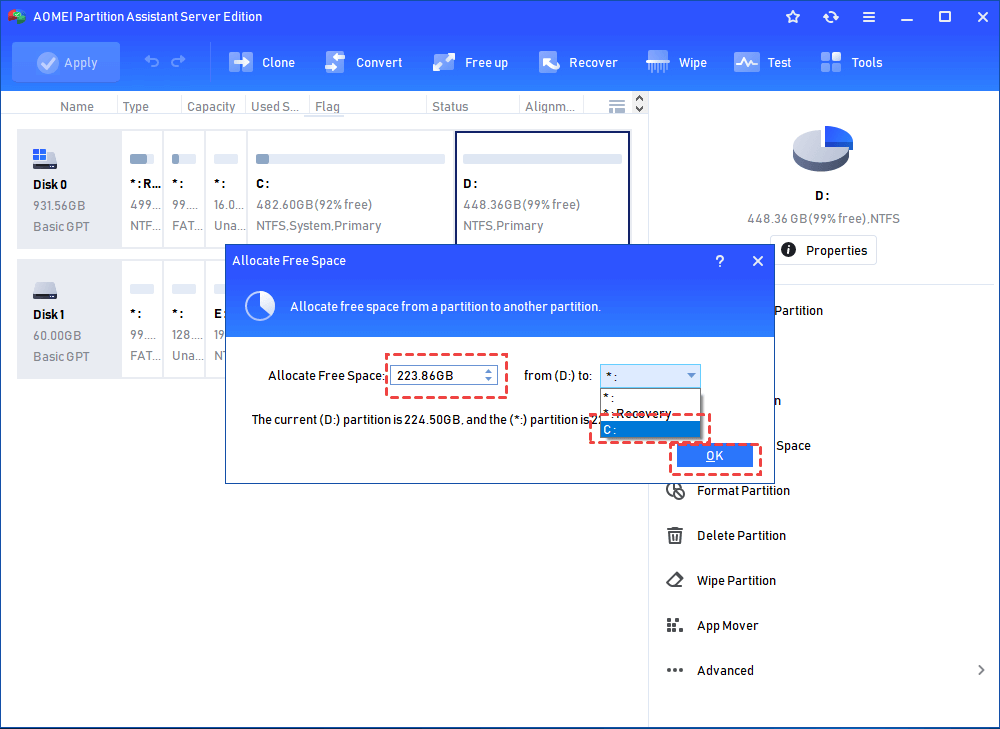
Step 3. Click "Apply" to execute this operation. In the pop-out window, you can see how much time it will cost you to finish this operation.

3. Merger Partition
Step1. Run the software, right-click partition C, choose “Advanced” and select “Merge Partition”.
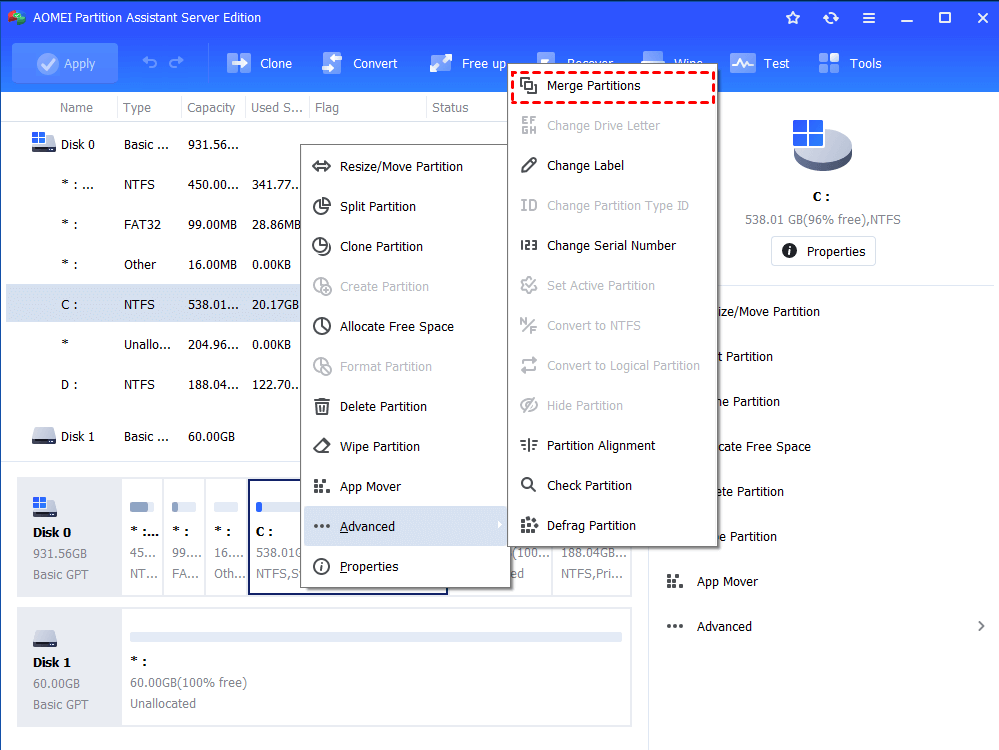
Step 2. Choose the partition that you wish to be merged, and click “OK”.
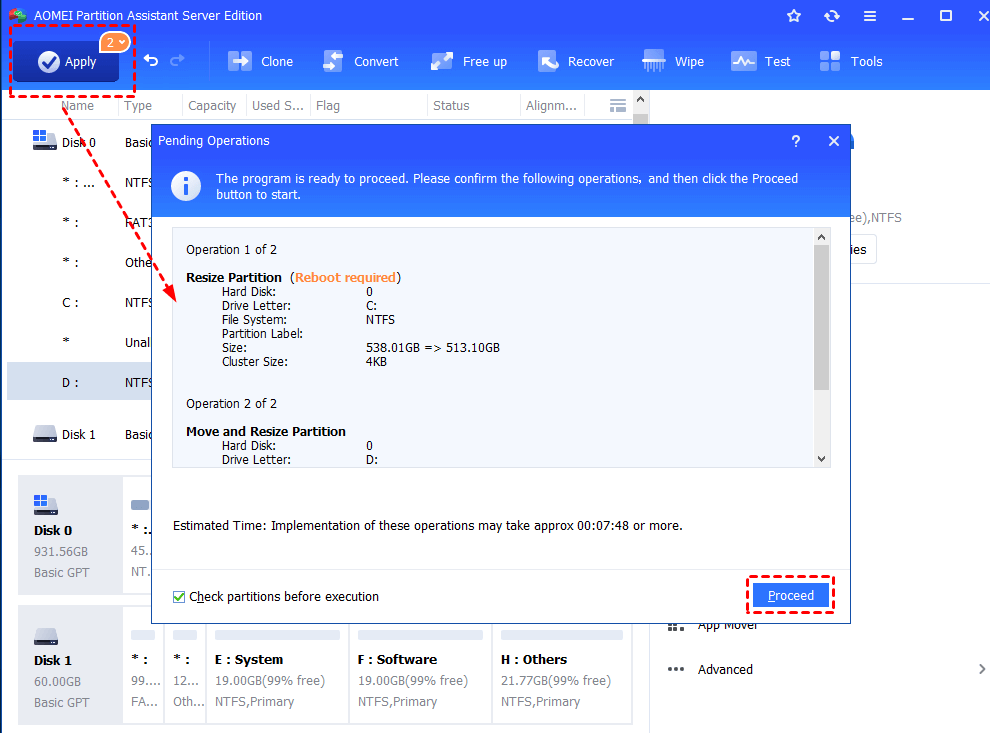
Step 3. Click “Apply” and you can preview the result. Click “Proceed” to commit the operation.
Then, you need to reboot the computer to finish the operation. Then, you can also scan your PC to find and remove large files to release more space.
Further reading: Windows Server 2025 released-- System requirements for new Server
Windows Server 2025 has been available as a preview for quite some time, and it will be available to everyone on November 1, 2024.
▶ 1.4 GHz 64-bit processor with support for x64 instruction set, SLAT, NX, and DEP.
▶ You’ll also need to have CMPXCHG16b, LAHF/SAHF, PrefetchW, and SSE4.2 instruction set with POPCNT instruction. POPCNT instruction is now also a requirement for consumer editions, as part of Microsoft’s efforts to make Windows more security.
The only new needs are SSE4.2 and POPCNT. Microsoft has made it essential for all Windows 11 24H2 editions, thus it comes as no surprise for Windows Server 2025.POPCNT began shipping in 2008, therefore processors without it are unlikely to be capable of running Server 2025.
CPU
▍Windows Server 2025 supported Intel CPUs:
- Second through Fifth Gen Xeon SP processors
- Xeon 6 SP Processors (67xxE)
- Xeon E 23xx and 24xx
- Xeon D 17xx, 18xx, 21xx, 27xx, 28xx
- Pentium G7400 and G7400T
▍Windows Server 2025 supported AMD CPUs:
- AMD EPYC 7xx2
- AMD EPYC 7xx3
- AMD EPYC 4xx4
- AMD EPYC 8xx4
- AMD EPYC 9xx4
- AMD EPYC 9xx5
▍RAM
- 512 MB for Server Core
- 2 GB (4GB recommended) if you want to run the Server with Desktop Experience
▍Other Requirements
- UEFI 2.3.1c-based system and firmware with Secure Boot.
- Trusted Platform Module (TPM) 2.0.
- Graphics device and monitor capable of Super VGA (1024 x 768) or higher resolution.
Bonus tips
The recommended disk size for Windows Server 2019 is just a suggestion. The specific situation needs to be adjusted according to the usage of your Server. For better performance and larger capacity, we advise you to change to a new larger SSD as the OS disk for your Server, especially if you're wondering about upgrading to Windows Server 2025. You don’t need to worry about anything because AOMEI Partition Assistant Server offers “Migrate OS to SSD” and “Disk Clone Wizard” functions to help you do this job.

