How to Restore SSD to Peak Performance in a Few Minutes
After using SSD for a while, you may find it is not as fast as before. You can restore SSD performance in Windows 7.
By AOMEI / Updated on November 8, 2023
SSD running slow after an excessive usage
When you used your solid state drive (SSD) for the first time, the speed was fast as what you had been told. However, after a running it a long time, you certainly will notice that the performance is low. Some people find their SSD’s write speed is as low as 1/4 of the original speed after 18 months of usage. In that case, you may wonder how you can restore SSD to peak performance.

Why SSD performance decreases?
When you delete a file from your SSD, it only delete the table of contents entry, but leave the actual data blocks on your SSD. Due to the properties of NAND flash memory, formerly written blocks in SSD have to be erased before you can store new data.
Otherwise, the performance will degrade. Modern SSDs has avoid this problem by using a few tricks including garbage collection (identifies the unneeded data blocks and delete them during idle time), over-provisioning and TRIM command (known as TRIM in the ATA command set).
However, garbage collection may not run constantly, and some operating system (OS) may not work well with TRIM command. What’s worse, Windows XP does not even support the TRIM command. If you are using Windows 10/8/7, you do not need to care about this problem.
As you know, simply wipe everything from your SSD and repartitioning will not work. Actually, even without the utility to force garbage collection, you can restore SSD to factory condition by doing a Secure Erase.
How to perform SSD Secure Erase?
Some SSDs provides a tool to help your maintain the SSD best performance, like Samsung Magician Software. However, Samsung Magician can only do Secure Erase for Samsung SSDs. If you does not have Samsung SSD or have other SSDs besides Samsung SSD, you probably want to have a software that is able to securely erase all types of SSDs.
Luckily, you can use free software AOMEI Partition Assistant Professional to perform Secure Erase SSD and restore performance. It only takes a few minutes to complete a full Secure Erase.
PS.: It's available to download the Demo version of AOMEI Partition Assistant Professional to stimulate operations at first.
As you know, secure erase will delete everything on your SSD, leaving your SSD as unallocated space. If you do not want to reinstall system, you can create a SSD backup and then restore to it after the Secure Erase. You can follow the steps below to securely erase your SSD.
Step 1. Connect your SSD to a Windows 7 computer via SATA port (since SSD Secure Erase is only workable in Windows at present). Install and run AOMEI Partition Assistant Professional.
Step 2. In the left menu of AOMEI Partition Assistant. Right click on the SSD and select "SSD Secure Erase".
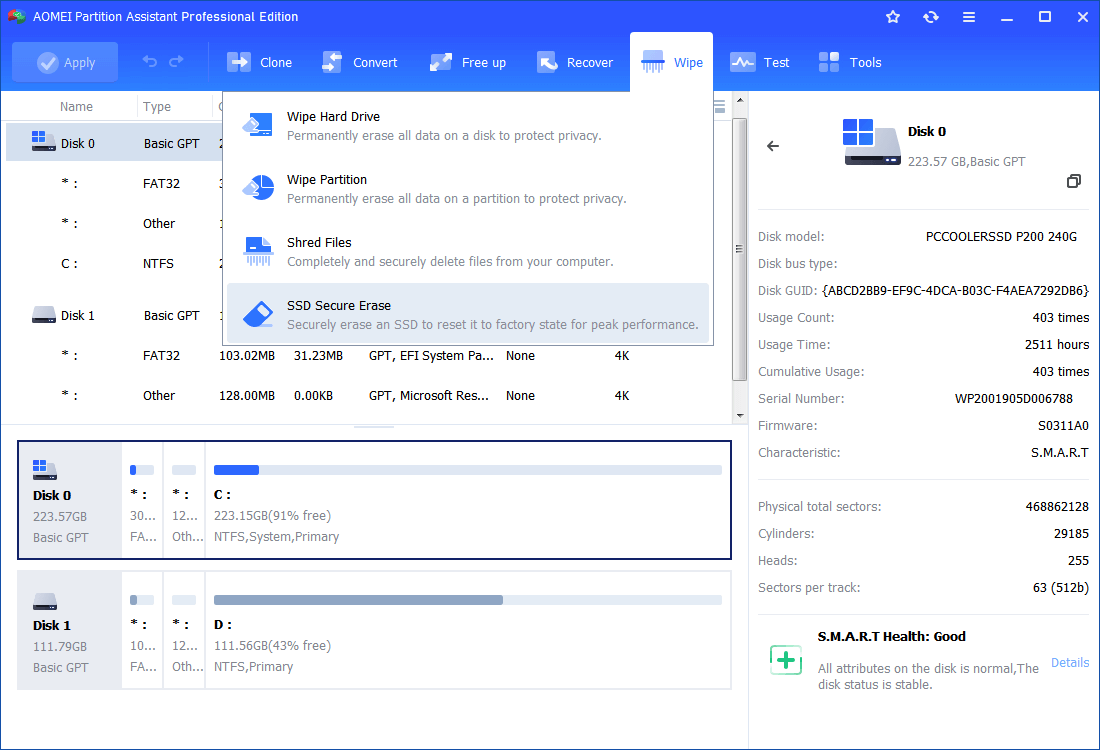
3. Select your SSD that you want to restore performance. This feature works with all brands of SSDs, but it will not work with hard disk drive (HDD).

4. Then you will see the SSD identification information. Confirm it and click Next to continue.
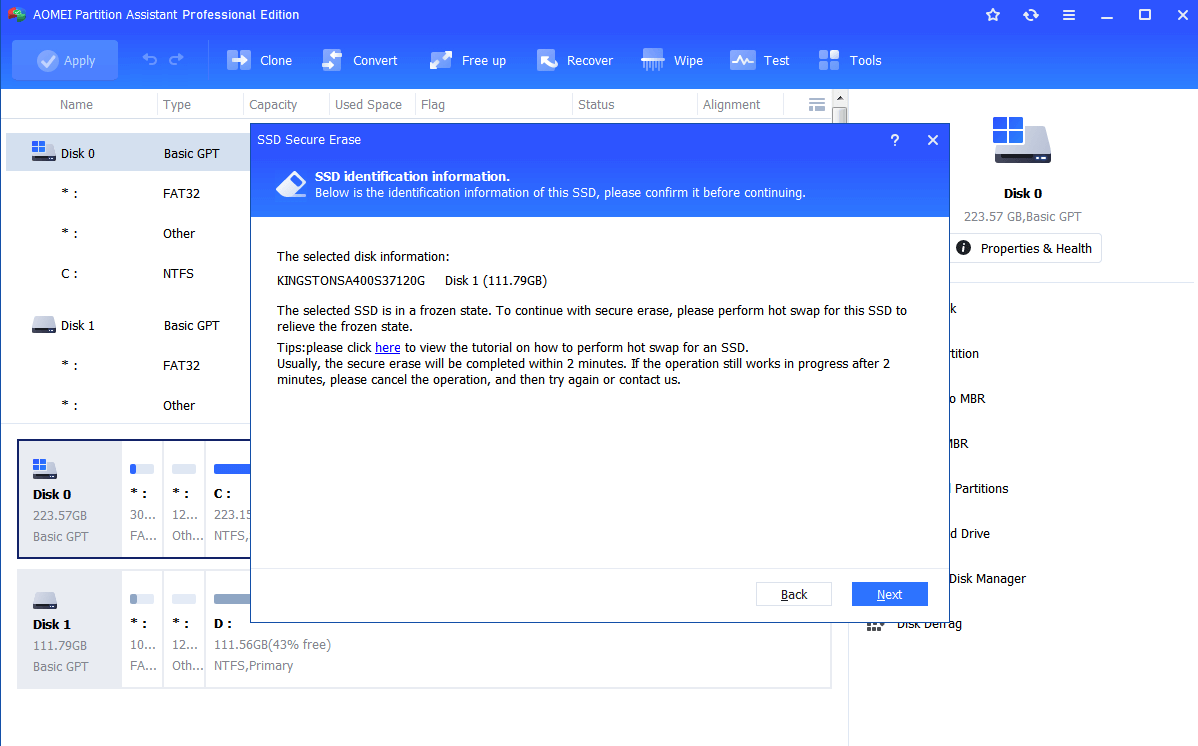
5. Because your SSD is in Frozen state, you need to do hot swap for this SSD. Just unplug off the power cable and data cable and then plug then in.
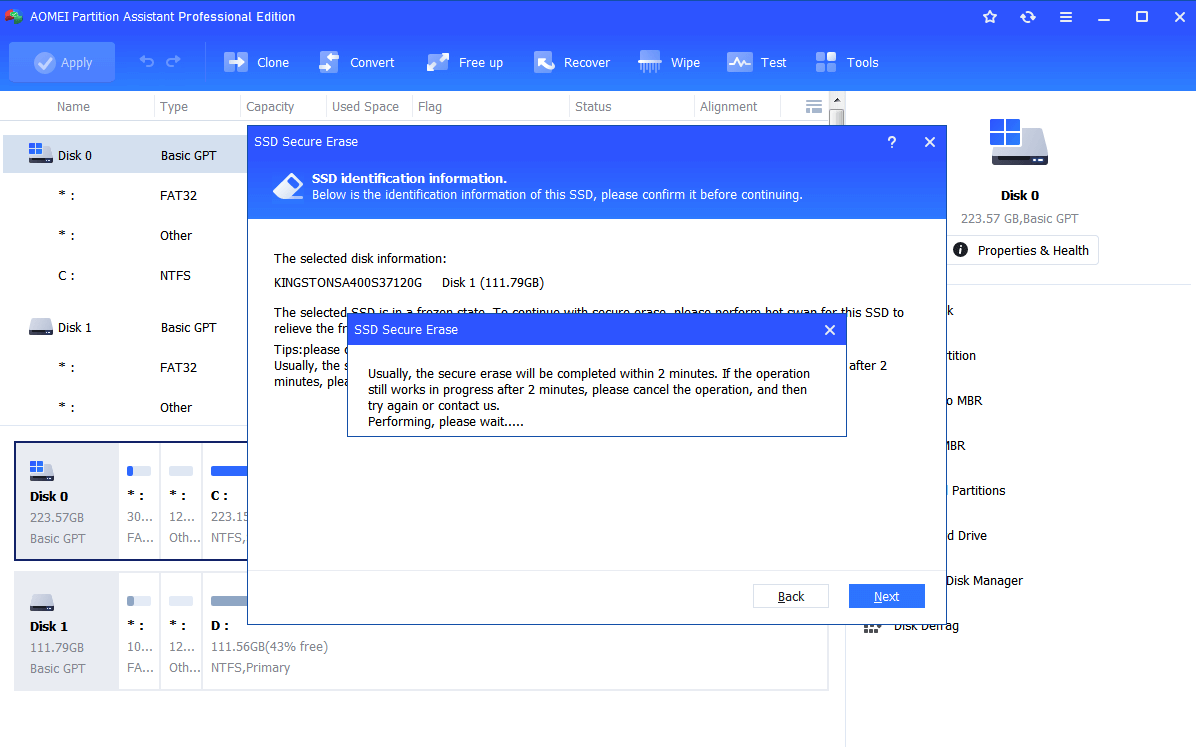
6. After hot swap, click OK to start SSD Secure Erase. In a few seconds, your SSD will be erased securely. Then you can create new partition and format SSD to restore performance.
Then you can create new partition and format SSD just using this free tool. In most of cases, your SSD will restore to its peak performance. However, there are also other issues that can cause SSD running slow, like outdated BIOS drivers, wrong SATA Port/Controller, cable issue, etc.

