How to Convert MBR to GPT During Windows Installation
Learn to convert MBR to GPT during Windows installation via Command Prompt and a handy tool to convert the disk without losing data.
By Lucas / Updated on May 12, 2023
Why do users convert MBR to GPT during Windows installation?
Converting MBR disk to GPT disk is quite normal for users who wish to use a large-capacity disk, because the MBR partition table has a limitation that only 2TB capacity can be utilized. GPT has no such limitation, you can even get an 18TB GPT disk on the market. If you only know a little about MBR and GPT partition tables, don’t worry, we’ll do a brief presentation before we start to show conversion methods. If you know them clearly, you can skip to the next part.

This is a simplified representation of the GPT and MBR disk structures. Besides the capacity we’ve mentioned, the number of available partitions is another point. Users can have 4 partitions on an MBR partition table disk, but on a GPT disk, has 128 partitions.
Some customers receive the following warning during Windows installation: "Windows cannot be installed on this drive. The partition table on the selected disc is MBR." This warning is typically displayed when the partition table of the current system disk is MBR but the system you're going to install requires EFI as the OS boot partition. And EFI only appears when the GPT disk is a system disk. So users need to convert this disk to a GPT table. However, users can only use CMD or other assistance throughout the installation; thus, we’ll show how to use it to fix this issue.
How to convert MBR to GPT during Windows installation
In this part, we’ll introduce how to convert MBR to GPT with the Windows built-in tool and third-party powerful software.
1. Convert MBR to GPT during Windows installation via CMD
You can’t open anything except for CMD to do some changes, so we’ll introduce this method first. We’ll install Windows 11 on a Windows 10 PC as an example.
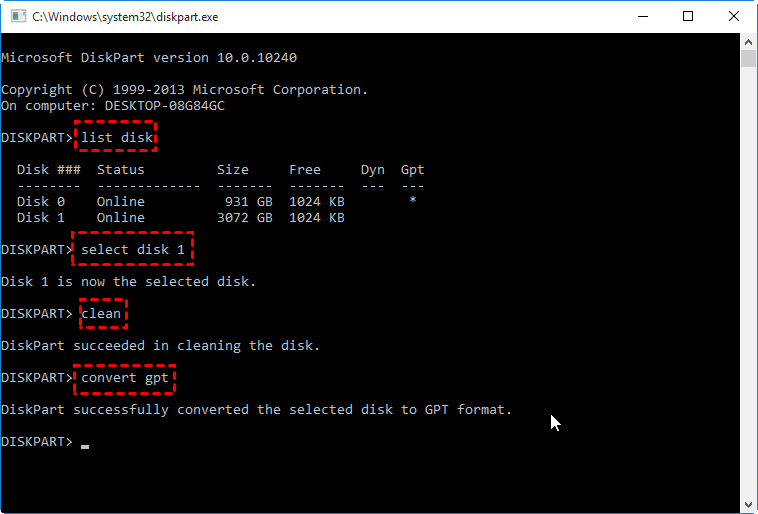
Step 1. During the installation, on the page of “Active Windows”, press “Shift” + “F10” to open CMD.
Step 2. Type “diskpart”, and hit “Enter”.
Step 3. Type “list disk”, and hit “Enter”.
Step 4. Type “select disk x” and hit “Enter” to choose the MBR disk. “X” is the number of the disk.
Step 5. Type “clean” and press “Enter”. This step will delete all data on this disk, so make sure it doesn’t have any important data, or you can do a backup before the installation.
Step 6. Type “convert GPT” and press “Enter” to execute the conversion.
Then you can continue the Windows installation.
2. Convert MBR to GPT during Windows installation without data loss
In the first method, users have to clean their disks before they do the conversion, this will cause data loss. However, AOMEI Partition Assistant Professional doesn’t have such a request. Users can convert their MBR disk to GPT disk without any data loss, and you won’t need to worry to use the wrong command line to make any mistake. Besides converting MBR to GPT, you can also use this powerful tool to migrate OS, create Windows to go USB, clone disk…
There are two sections in this method, let’s do it with AOMEI Partition Assistant Professional.
Section 1. Make a bootable media (USB or DVD)
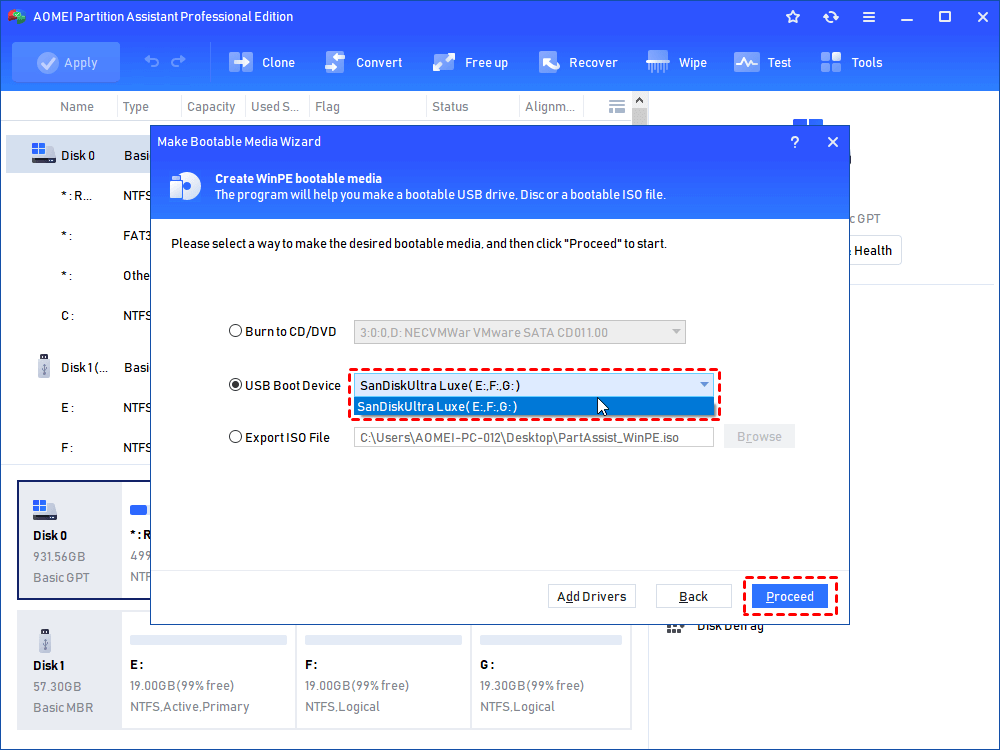
Step 1. Install and run Partition Assistant on a normal Windows 10 computer, and plug a USB in.
Note: All data on this USB will be deleted, please back up if there’re important data files on it.
Step 2. Click "Tools"> “Make Bootable Media” feature in the top menu, and click “Next” in the pop-up window.

Step 3. Choose “USB Boot Device”, and select your USB, and click “Proceed”.
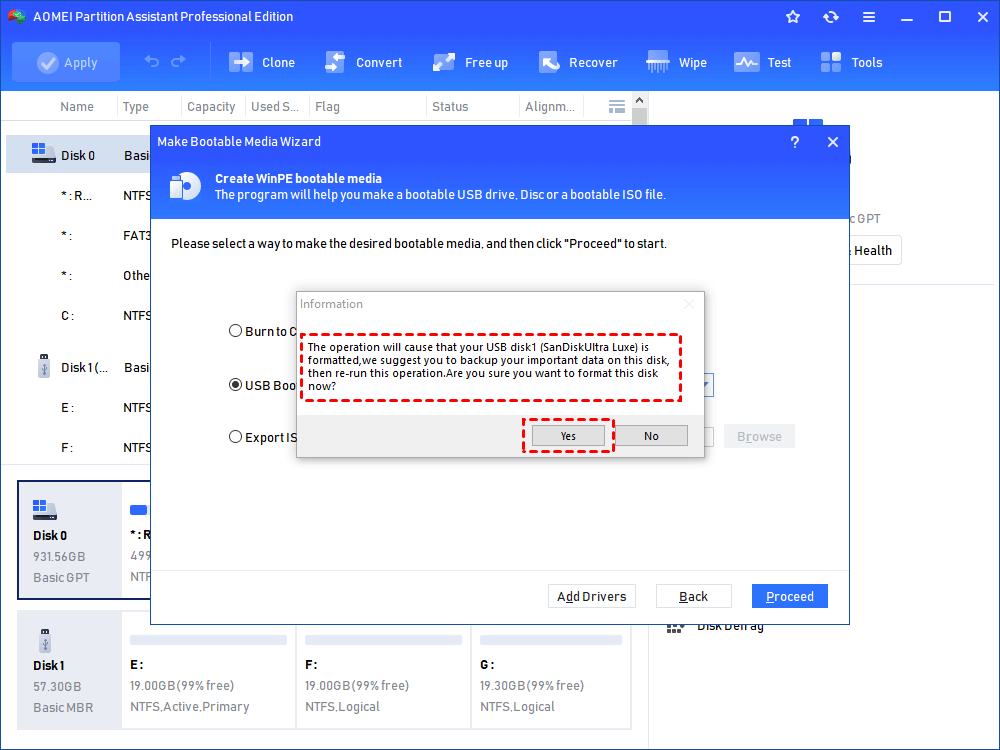
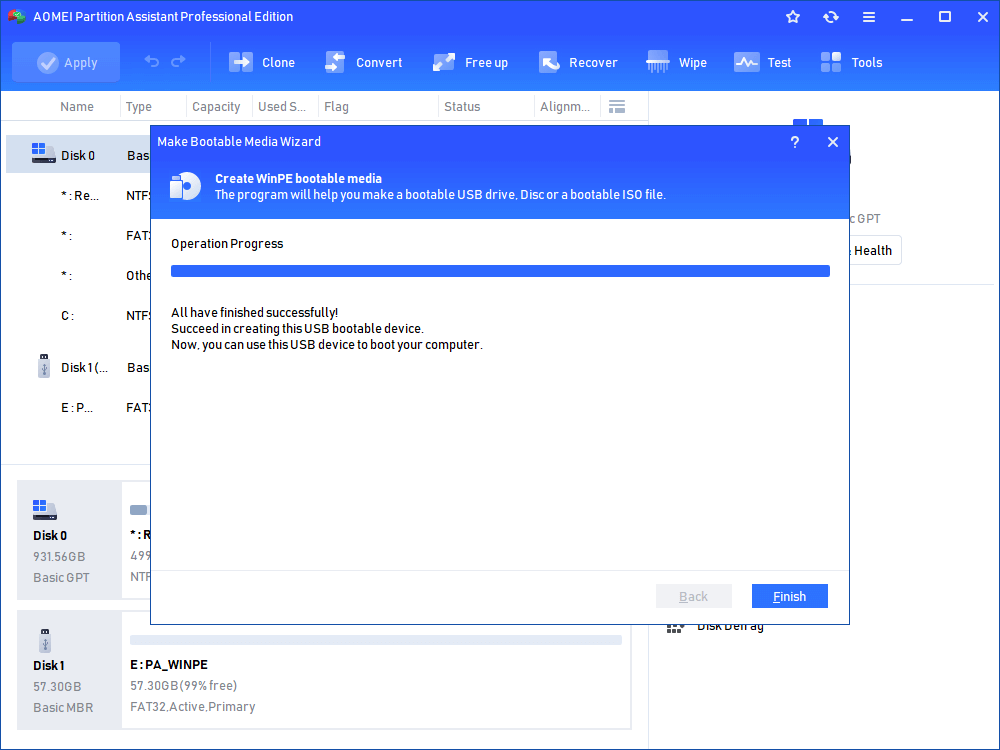
Step 4. Click “Yes” in the information window. Then, you can wait for the operation to progress, and click “Finish”.
Section 2. Convert MBR to GPT
Step 1. Plug this USB into the target computer, and enter BIOS to change the boot order to boot this PC from this USB.
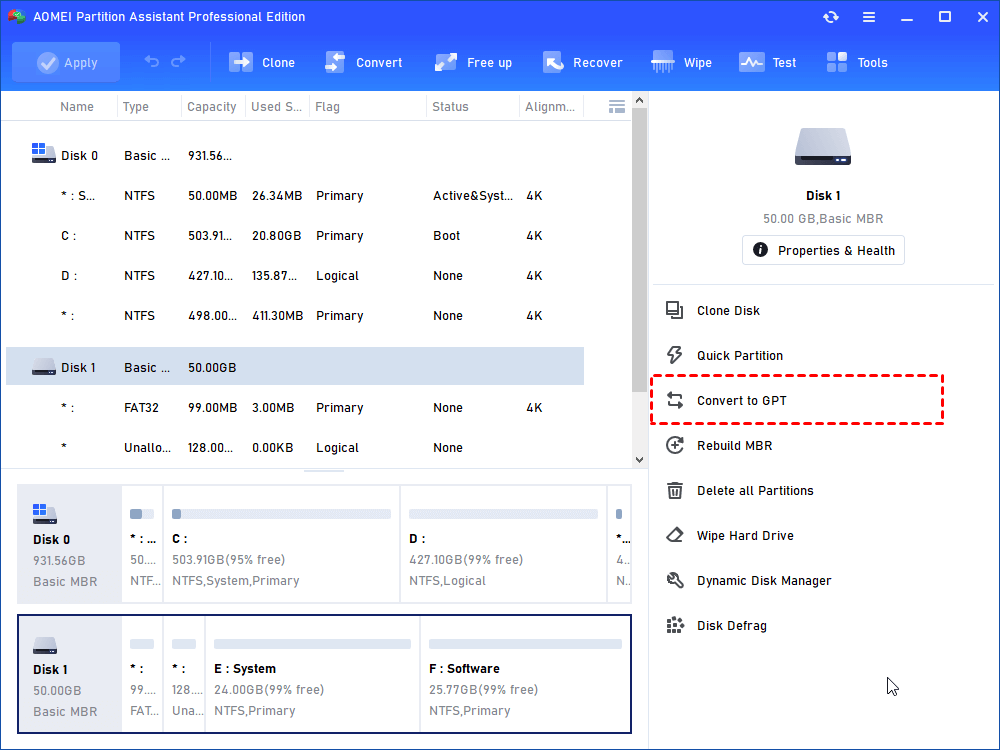
Step 2. After that, you’ll see the interface of the AOMEI Partition Assistant. Now, all your disks will show in this window, right-click the MBR disk, and select “Convert to GPT”.
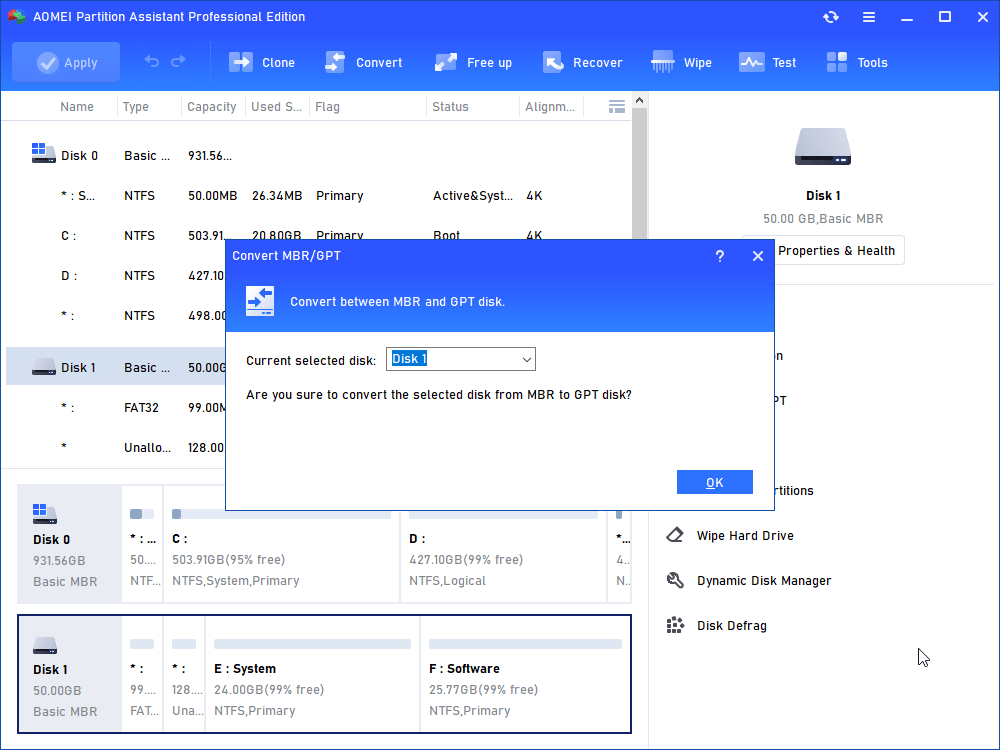
Step 3. In the pop-up windows, click “OK” to continue.
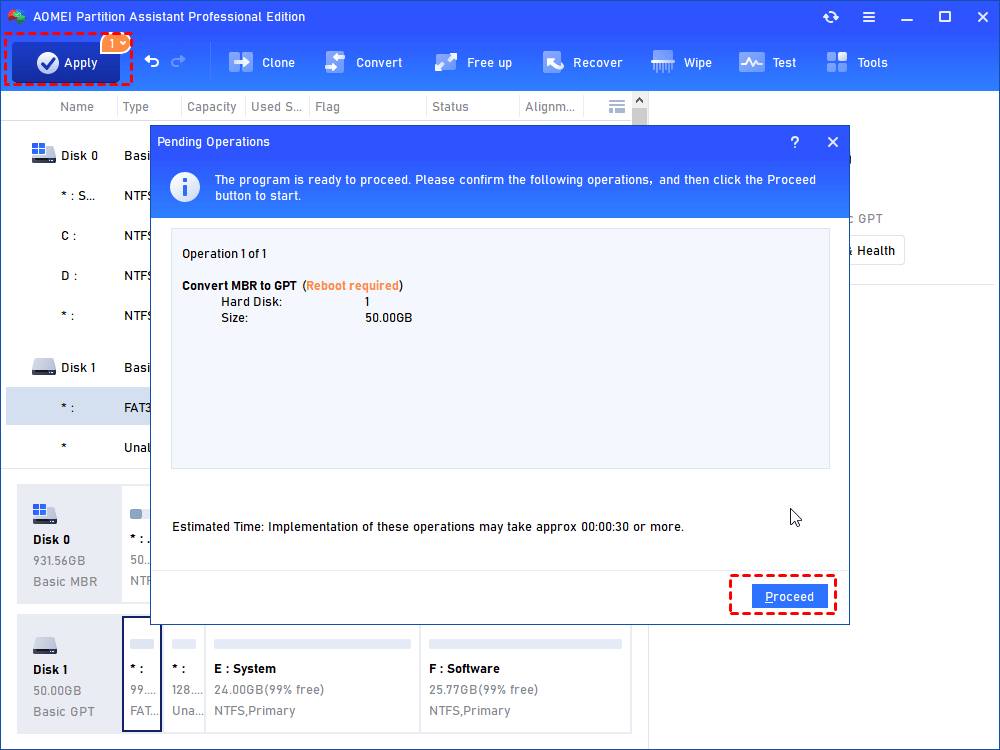
Step 4. Click “Apply” to operate and then your disk will be changed to GPT disk style.
Then you can start to install Windows OS.
Ending line
These are 2 methods for Windows users to convert MBR to GPT during Windows installation. AOMEI Partition Assistant supports all Windows editions, so you can flexibly convert MBR to GPT during Windows 11, 10, 8, and 7 installations. If you don’t want to lose data, we suggest you use the second method. AOMEI Partition Assistant also has a Server edition for users to manage their devices, you can choose a suitable edition to protect your disks and partitions.

