Two Recovery Partitions in Windows 11, How Do I Do?
In Windows 11, two recovery partitions on the primary disk will take up much space. In this post, you learn how to deal with them with secure ways.
By Lucas / Updated on May 12, 2023
Why are there two recovery partitions in Windows 11?
If you’re familiar with Windows, you might notice that sometimes there is not only one recovery partition on your primary disk. Some users might have two or multiple recovery partitions on the system disk, and some might also have an OEM recovery partition. What are they? And why are there many of them in your Windows?

Two situations might cause this problem.
▶ Case 1. One recovery partition + OEM partition

This case usually happens on a newly bought PC. The recovery partition holds the Windows RE (Windows Recovery Environment) with almost 500MB to help users to enter repair mode to manage their PC. The OEM recovery partition is for storing PC default settings, default programs, and data from manufacturers, which often takes up 7-20GB size.
▶ Case 2. Two or more recovery partitions+ OEM partition

If you find there are two or more recovery partitions on your system disk, the reason may be the system updates. When the new features are added to the new upgrade, the current recovery partition might not have sufficient space to store all data, so the system will create a new recovery partition to ensure the upgrade will go well. Then, after a few upgrades, your Windows will have two or more recovery partitions.
Can I delete recovery partitions?
Firstly, the answer is “Yes”, secondly, we don’t suggest you delete recovery partitions. As we’ve shown in the first part, if you delete them, you’ll no longer use Windows RE in the future. So, please make sure you're back up it on another drive if you decide to delete recovery partitions.
How to delete recovery partitions in Windows 11
Since recovery partitions are important in Windows, here we offer you 2 safe solutions to delete them.
Way 1. Delete recovery partition with Diskpart
There are two or multiple recovery partitions in Windows 11, you need to check which one is currently needed.
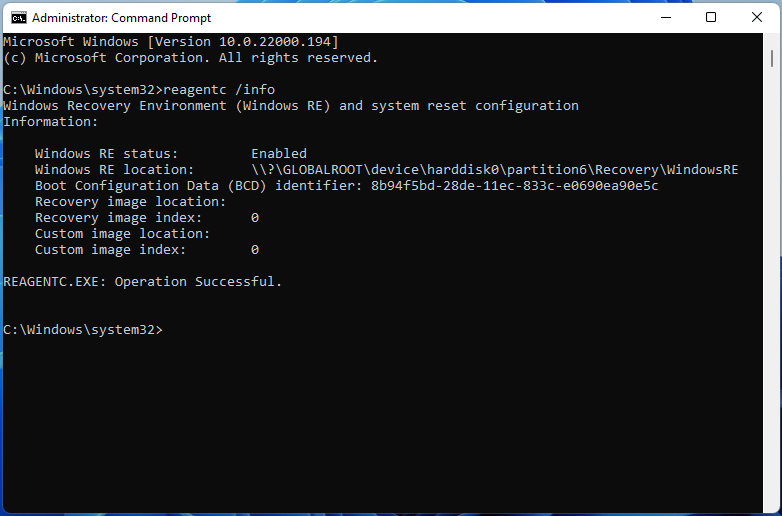
Step 1. Type cmd in the Search box, and then right-click the Command Prompt app and select Run as administrator.
Step 2. In Command Prompt window, type the reagentc /info command and hit Enter. Then it will show you which recovery partition is being used counting from left to right.
Now, we can delete the recovery partition via Diskpart.
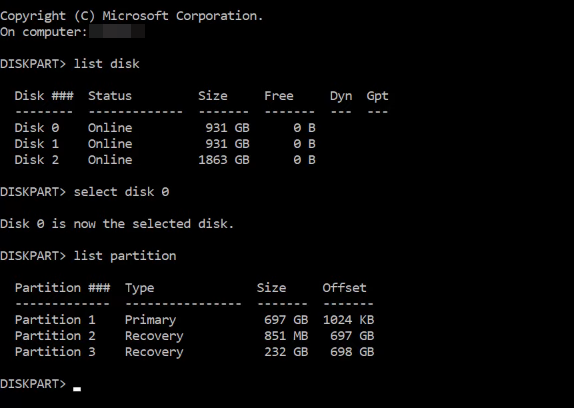
Step 1. Type diskpart in the Search box, and then right-click the Diskpart app and select Run as administrator.
Step 2. In the pop-up window, type the following commands in order and hit Enter after each one:
• list disk
• select disk n (replace n with the disk number that contains 2 recovery partitions Windows 10)
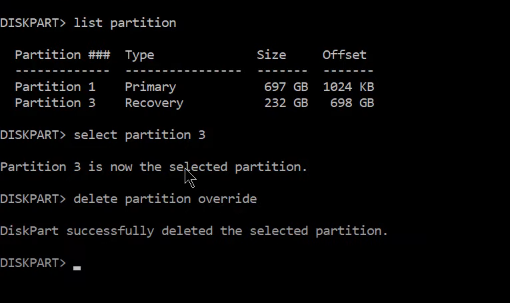
• list partition
• select partition x (replace x with the partition number of the unused recovery partition)
• delete partition override
Way 2. Delete recovery partition and extend the C drive with a third-party tool
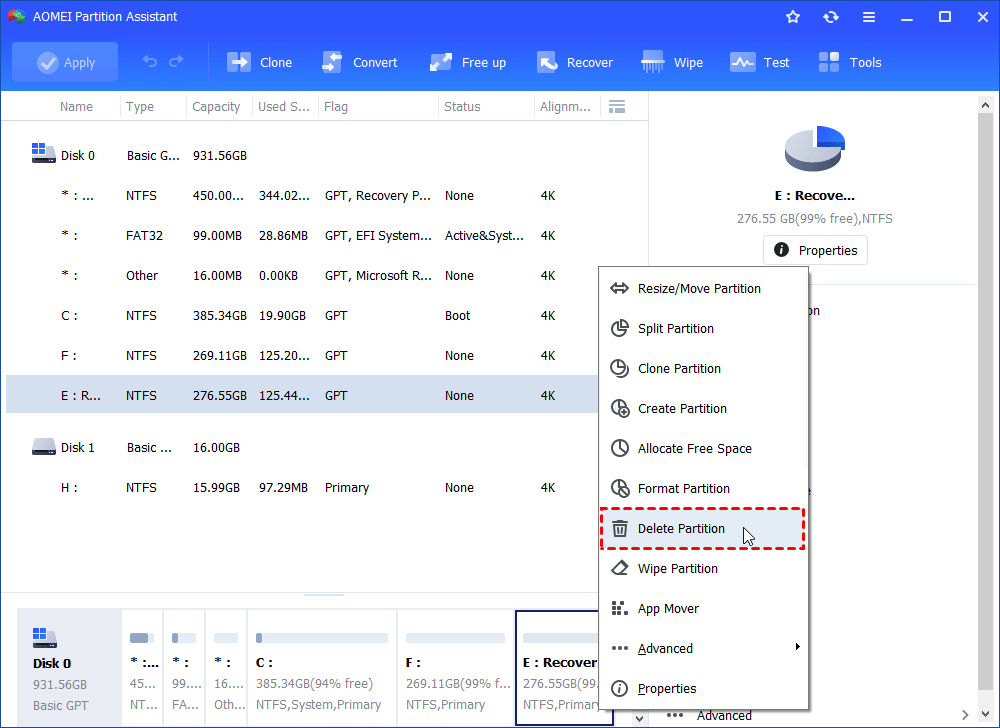
If you’re not familiar with Diskpart commands or are worried about wrong operations damaging your PC, then you can turn to AOMEI Partition Assistant Standard to delete the recovery partition in Windows 11. It’s a free disk management tool for Windows 11/10/8/8.1/7/XP users. With the “Delete Partition” function, you can easily and safely delete the recovery partition on your PC.
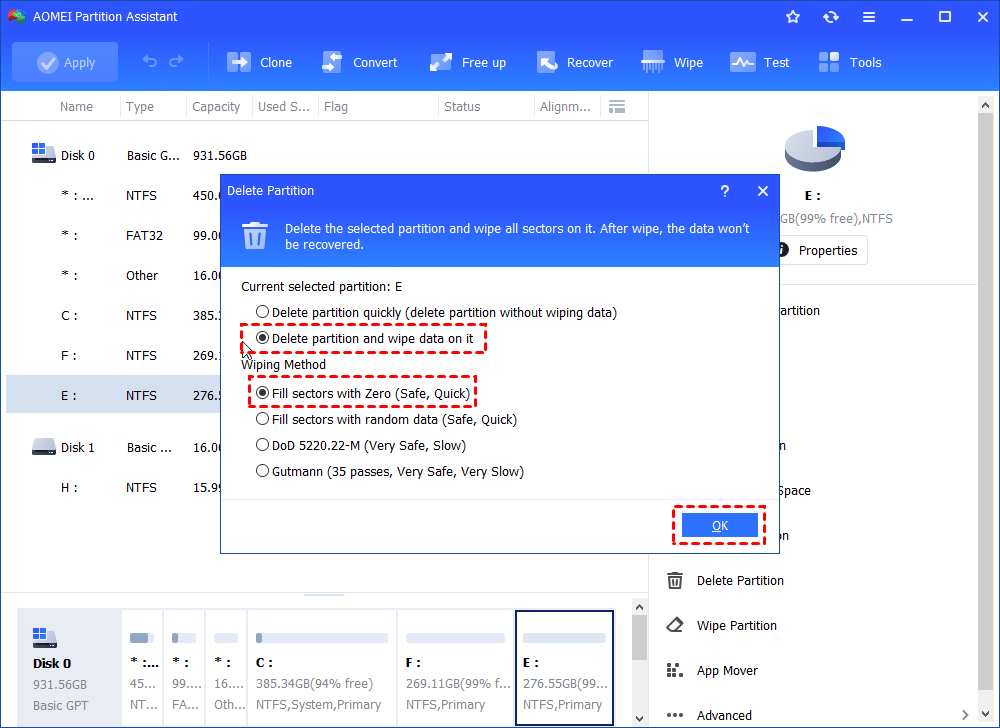
Step 1. Install and run this tool, right-click the recovery partition, and choose “Delete Partition” in the small menu.
Step 2. Select a method to delete it, and click “OK”.
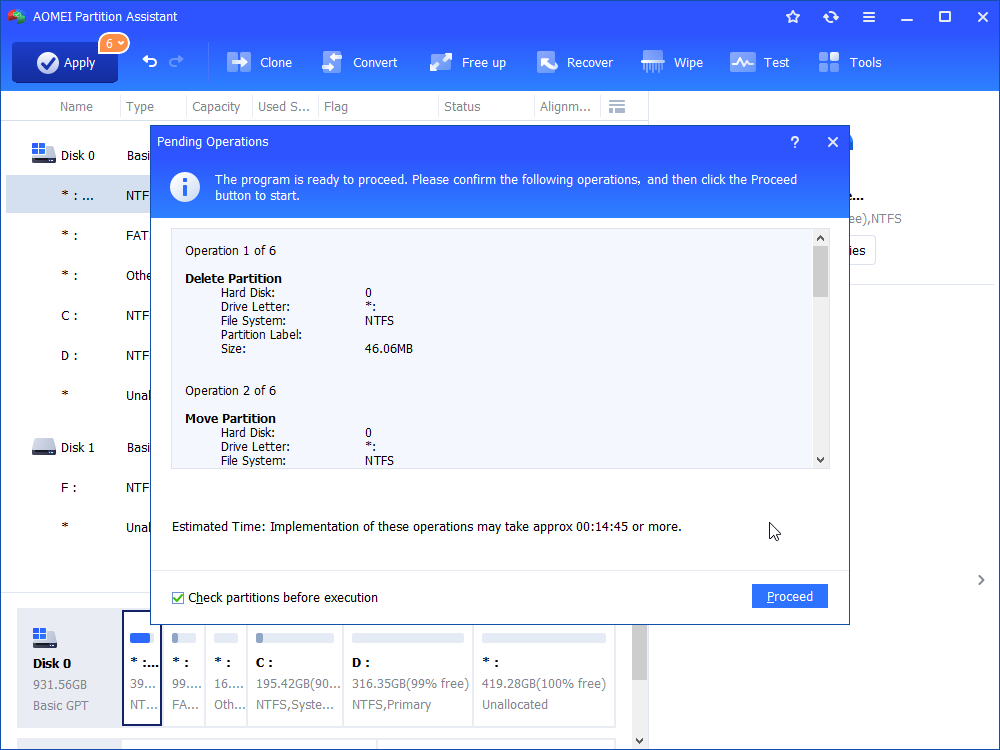
Step 3. The recovery partition will be displayed as an unallocated space. Make sure that is the partition you want to get rid of and click "Apply" to make the operation in the process.
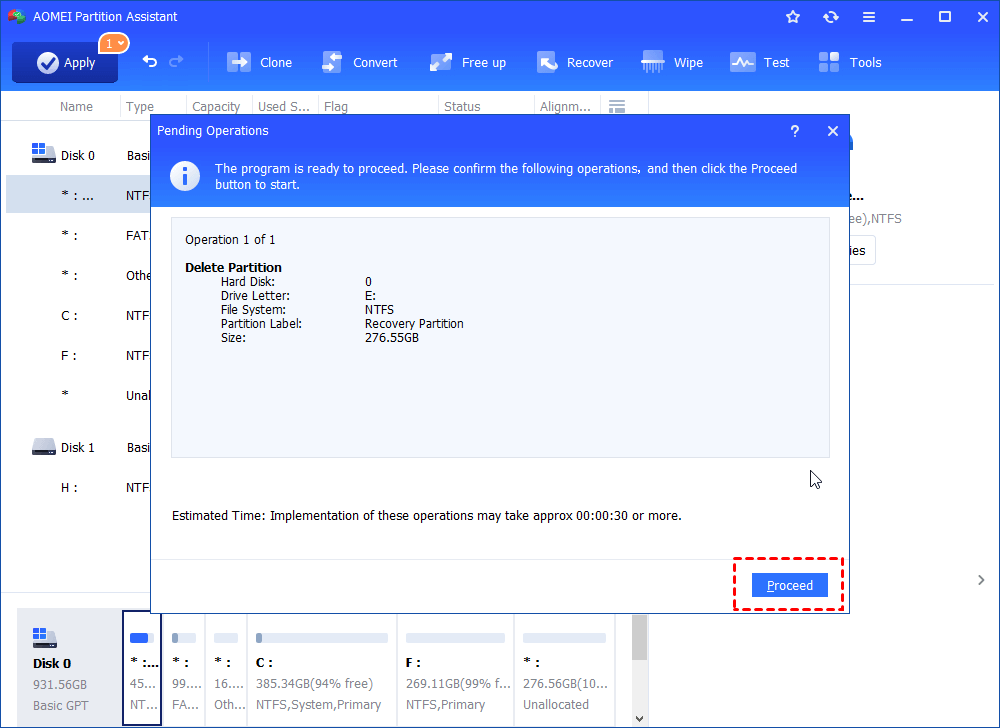
Then the deleted recovery partition will show as unallocated space on your disk.
If this space stays on the right of the C drive, you can “Extend Volume” in the Disk Management to extend your C drive. But, if it’s not at the proper location, you’re not allowed to use Disk Management, the “Extend Volume” option will be greyed out.
In this situation, you can directly use the “Merge Partition” of AOMEI Partition Assistant with only 3 steps to merge this unallocated space into the C drive, even if it’s not in the proper place.
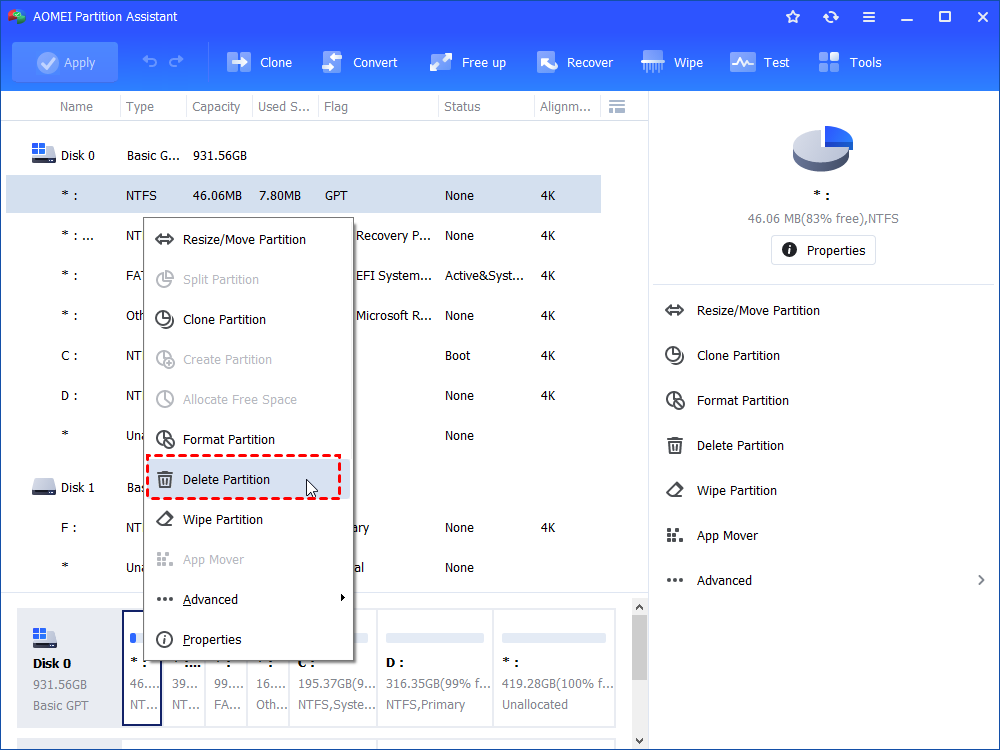
Step 1. Launch AOMEI Partition Assistant. On the main page, you can see all your drives. Right-click the C drive, and select "Advanced"> “Merge Partitions”.
Step 2. Select the unallocated space and then click “OK”.
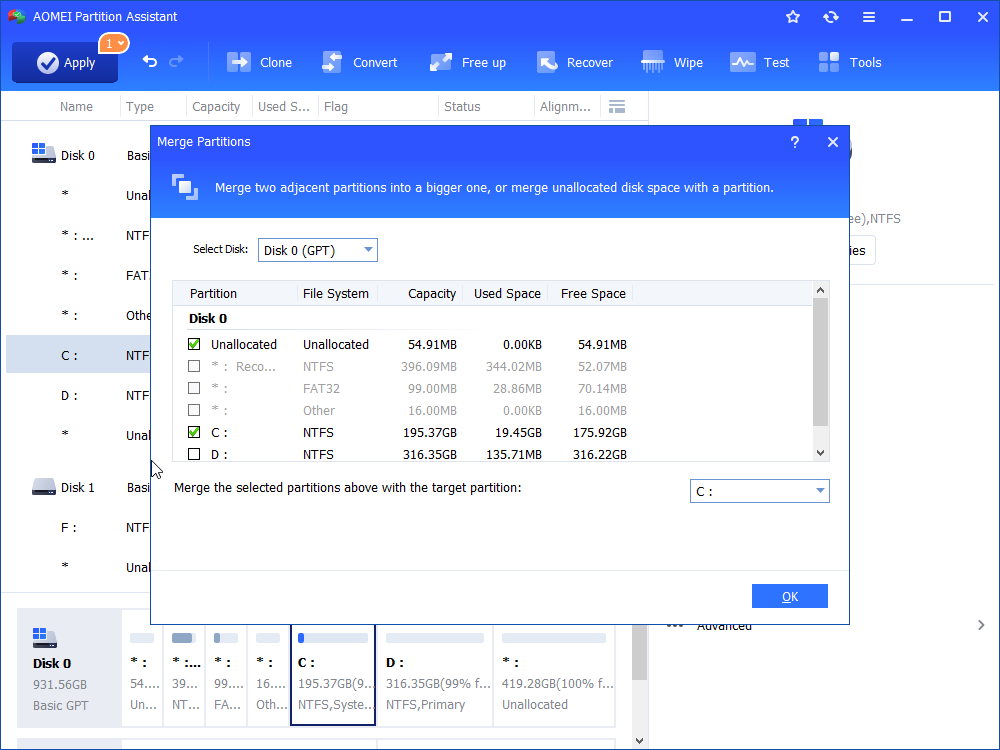
Step 3. In the pop-up window, you will realize the size of the partition has been increased. To operate, please click "Apply".
◤ Note: If you have a drive with sufficient space, you can also upgrade to the Pro Edition to allocate free space from one drive to another.
To wrap up
If there are two recovery partitions in Windows 11, you might as well try the methods we list in this post. AOMEI Partition Assistant is a reliable tool, you don’t need to worry about the safety of your data and files. And if you need it, there is the Server Edition for Server PC.

